当前位置:网站首页>The following assertion was thrown during performlayout
The following assertion was thrown during performlayout
2022-06-22 03:44:00 【One leaf floating boat】
In the use of Row and Column Layout , In use Expanded Component errors are as follows :
I/flutter (14104): ══╡ EXCEPTION CAUGHT BY RENDERING LIBRARY ╞═════════════════════════════════════════════════════════
I/flutter (14104): The following assertion was thrown during performLayout():
I/flutter (14104): RenderFlex children have non-zero flex but incoming width constraints are unbounded.
I/flutter (14104): When a row is in a parent that does not provide a finite width constraint, for example if it is in a
I/flutter (14104): horizontal scrollable, it will try to shrink-wrap its children along the horizontal axis. Setting a
I/flutter (14104): flex on a child (e.g. using Expanded) indicates that the child is to expand to fill the remaining
I/flutter (14104): space in the horizontal direction.
I/flutter (14104): These two directives are mutually exclusive. If a parent is to shrink-wrap its child, the child
I/flutter (14104): cannot simultaneously expand to fit its parent.
I/flutter (14104): Consider setting mainAxisSize to MainAxisSize.min and using FlexFit.loose fits for the flexible
I/flutter (14104): children (using Flexible rather than Expanded). This will allow the flexible children to size
I/flutter (14104): themselves to less than the infinite remaining space they would otherwise be forced to take, and
I/flutter (14104): then will cause the RenderFlex to shrink-wrap the children rather than expanding to fit the maximum
I/flutter (14104): constraints provided by the parent.
I/flutter (14104): If this message did not help you determine the problem, consider using debugDumpRenderTree():
I/flutter (14104): https://flutter.dev/debugging/#rendering-layer
I/flutter (14104): http://api.flutter.dev/flutter/rendering/debugDumpRenderTree.html
I/flutter (14104): The affected RenderFlex is:
I/flutter (14104): RenderFlex#ad712 relayoutBoundary=up14 NEEDS-LAYOUT NEEDS-PAINT NEEDS-COMPOSITING-BITS-UPDATE(creator: Row ← Column ← Row ← Padding ← Semantics ← DefaultTextStyle ← AnimatedDefaultTextStyle ← _InkFeatures-[GlobalKey#e6eab ink renderer] ← NotificationListener<LayoutChangedNotification> ← CustomPaint ← _ShapeBorderPaint ← PhysicalShape ← ⋯, parentData: offset=Offset(0.0, 0.0); flex=null; fit=null (can use size), constraints: BoxConstraints(unconstrained), size:
MISSING, direction: horizontal, mainAxisAlignment: start, mainAxisSize: max, crossAxisAlignment:
center, textDirection: ltr, verticalDirection: down)
I/flutter (14104): The creator information is set to:
I/flutter (14104): Row ← Column ← Row ← Padding ← Semantics ← DefaultTextStyle ← AnimatedDefaultTextStyle ←
I/flutter (14104): _InkFeatures-[GlobalKey#e6eab ink renderer] ← NotificationListener<LayoutChangedNotification> ←
I/flutter (14104): CustomPaint ← _ShapeBorderPaint ← PhysicalShape ← ⋯
I/flutter (14104): The nearest ancestor providing an unbounded width constraint is: RenderFlex#63b6e relayoutBoundary=up12 NEEDS-LAYOUT NEEDS-PAINT NEEDS-COMPOSITING-BITS-UPDATE:
I/flutter (14104): creator: Row ← Padding ← Semantics ← DefaultTextStyle ← AnimatedDefaultTextStyle ←
I/flutter (14104): _InkFeatures-[GlobalKey#e6eab ink renderer] ← NotificationListener<LayoutChangedNotification> ←
I/flutter (14104): CustomPaint ← _ShapeBorderPaint ← PhysicalShape ← _MaterialInterior ← Material ← ⋯
I/flutter (14104): parentData: offset=Offset(0.0, 0.0) (can use size)
I/flutter (14104): constraints: BoxConstraints(w=361.4, 0.0<=h<=Infinity)
I/flutter (14104): size: MISSING
I/flutter (14104): direction: horizontal
I/flutter (14104): mainAxisAlignment: start
I/flutter (14104): mainAxisSize: max
I/flutter (14104): crossAxisAlignment: start
I/flutter (14104): textDirection: ltr
I/flutter (14104): verticalDirection: down
I/flutter (14104): See also: https://flutter.dev/layout/
I/flutter (14104): If none of the above helps enough to fix this problem, please don't hesitate to file a bug:
I/flutter (14104): https://github.com/flutter/flutter/issues/new?template=BUG.md
I/flutter (14104):
I/flutter (14104): Widget creation tracking is currently disabled. Enabling it enables improved error messages. It can
There is not much information to find effective clues when reporting errors , Because there are still some differences between the structure creation and the errors thrown out at present ,
But one of them is as follows :
Size is too flexible , My code was Row() The module is also equipped with Row() The structure of the components ,
There is not much information to find effective clues when reporting errors , Because there are still some differences between the structure creation and the errors thrown out at present ,
But one of them is as follows :
Size is too flexible , My code was Row() The module is also equipped with Row() The structure of the components
Find the problem from the clue above , At this time, I thought , I was directly at the bottom Row() In the assembly, the support assembly is directly used Expanded, And the parent component of the upper layer or some N The size of the parent component is particularly flexible. There is no fixed size .
So the whole thing is flutter Cannot calculate the size to open the layout , At this time, I will put the above of the parent component Row Also used in Expanded Only when the components are opened can no error be reported
PS: Here's an explanation , You can use your parent component The outer layer is wrapped with a fixed width component to achieve no error , However, the overall flexible layout of the business is limited !
Here's the code that went wrong
class _SearchListState extends State<SearchList> {
  @override
  Widget build(BuildContext context) {
    return ListView.builder(
      itemCount: 1,
      itemBuilder: (BuildContext context, idx) {
        return Container(
          child: Card(
            margin: EdgeInsets.only(bottom: 10), //  Margin
            elevation: 3, //  Shadow size
            child: Padding(
              padding: EdgeInsets.fromLTRB(5, 15, 5, 15),
              child: Row(
                crossAxisAlignment: CrossAxisAlignment.start,
                children: <Widget>[
                  //  Not here Expanded Assembly brace , So there are nested Row The use of the spreader assembly will result in an error
                  cardRigthWidget(),
                ],
              ),
            ),
          ),
        );
      },
    );
  }

  Widget cardRigthWidget() {
    return Column(
      mainAxisAlignment: MainAxisAlignment.end,
      children: <Widget>[
        Row(
          children: <Widget>[
            Expanded(
              child: RichText(
                text: TextSpan(
                  text: ' title ',
                  style: TextStyle(
                      color: Theme.of(context).primaryColor), //  Set the default text style
                  children: <TextSpan>[
                    TextSpan(text: 'title_mo_blockhain'),
                  ],
                ),
              ),
            ),
          ],
        ),
      ],
    );
  }
}
The last fixed code , It's on the top floor Row Add a... Inside the component Expanded Open the assembly , such flutter Inside, you can calculate the size of the component box
class _SearchListState extends State<SearchList> {
  @override
  Widget build(BuildContext context) {
    return ListView.builder(
      itemCount: 1,
      itemBuilder: (BuildContext context, idx) {
        return Container(
          child: Card(
            margin: EdgeInsets.only(bottom: 10), //  Margin
            elevation: 3, //  Shadow size
            child: Padding(
              padding: EdgeInsets.fromLTRB(5, 15, 5, 15),
              child: Row(
                crossAxisAlignment: CrossAxisAlignment.start,
                children: <Widget>[
                  //  modified , The parent component wraps Expanded Open the assembly
                  Expanded(
                    child: cardRigthWidget(),
                  ),
                ],
              ),
            ),
          ),
        );
      },
    );
  }
  // .... Other code is the same as before
}
In this case, the error is solved in sequence , Rendering is normal
summary : image flutter It can't be like HTML Write exactly the same flex Elastic use , There are still some pits , For example, this time Row The elastic components are internally applied with other Row, The top floor must be supported for calculation , Such nested layers Row For normal use Expanded Components .
Otherwise, it will cause flutter Incorrect calculation component , Throwing the parent component directly is always elastic, and the width cannot be calculated normally .
Elastic layout (Flex)
Flexible layout allows child components to allocate the parent container space in proportion . The concept of flexible layout is widely used in other fields UI It also exists in the system , Such as H5 Layout of elastic box in ,Android in Of FlexboxLayout etc. .Flutter The elastic layout in is mainly through Flex and Expanded To achieve .
Flex
Flex Component can arrange its subcomponents horizontally or vertically , If you know the direction of the spindle , Use Row or Column It will be more convenient , because Row and Column Inherit from Flex, The parameters are basically the same , So you can use Flex Basically, all the places can be used Row or Column.Flex Its function is very powerful , It can also be with Expanded Components cooperate to achieve flexible layout . Next, let's just discuss Flex Properties related to elastic layout ( Other properties are already introduced Row and Column I introduced ).
Flex({
  ...
  required this.direction, // The direction of flexible layout , Row The default is the horizontal direction ,Column The default is vertical direction
  List<Widget> children = const <Widget>[],
})
Flex Inherited from MultiChildRenderObjectWidget, Corresponding RenderObject by RenderFlex,RenderFlex The layout algorithm is implemented in .
Expanded
Expanded Only as Flex The children of ( Otherwise, an error will be reported ), It can be scaled “ Expansion ”Flex The space occupied by the subcomponents . because Row and Column Inherit from Flex, therefore Expanded Can also be their children .
const Expanded({
  int flex = 1,
  required Widget child,
})
flex The parameter is the coefficient of elasticity , If 0 or null, be child There is no flexibility , That is, the space that will not be occupied by expansion . If it is greater than 0, be-all Expanded According to it flex The proportion of the spindle to divide all the free space . Let's look at an example :
class FlexLayoutTestRoute extends StatelessWidget {
  @override
  Widget build(BuildContext context) {
    return Column(
      children: <Widget>[
        //Flex The two child widget Press 1:2 To occupy the horizontal space
        Flex(
          direction: Axis.horizontal,
          children: <Widget>[
            Expanded(
              flex: 1,
              child: Container(
                height: 30.0,
                color: Colors.red,
              ),
            ),
            Expanded(
              flex: 2,
              child: Container(
                height: 30.0,
                color: Colors.green,
              ),
            ),
          ],
        ),
        Padding(
          padding: const EdgeInsets.only(top: 20.0),
          child: SizedBox(
            height: 100.0,
            //Flex Three of them widget, Press... In the vertical direction 2:1:1 To occupy 100 Pixel space
            child: Flex(
              direction: Axis.vertical,
              children: <Widget>[
                Expanded(
                  flex: 2,
                  child: Container(
                    height: 30.0,
                    color: Colors.red,
                  ),
                ),
                Spacer(
                  flex: 1,
                ),
                Expanded(
                  flex: 1,
                  child: Container(
                    height: 30.0,
                    color: Colors.green,
                  ),
                ),
              ],
            ),
          ),
        ),
      ],
    );
  }
}
The operation effect is as shown in the figure :

In the example Spacer The function of is to occupy a specified proportion of space , In fact, it's just Expanded A packaging class of ,Spacer The source code is as follows :
class Spacer extends StatelessWidget {
  const Spacer({Key? key, this.flex = 1})
    : assert(flex != null),
      assert(flex > 0),
      super(key: key);

  final int flex;

  @override
  Widget build(BuildContext context) {
    return Expanded(
      flex: flex,
      child: const SizedBox.shrink(),
    );
  }
}
Summary
Flexible layout is relatively simple , The only thing that needs attention is Row、Column as well as Flex The relationship between .
Expanded Components can make Row、Column、Flex And so on sub components expand and fill the available space in the direction of its main axis ( for example ,Row In the horizontal direction ,Column In the vertical direction ). If multiple subcomponents expand , Free space will be flex factor( Indicates the speed of expansion 、 The proportion ) Division .
Expanded Components must be used in Row、Column、Flex Inside , And from Expanded To the one that encapsulates it Row、Column、Flex The path of must include only StatelessWidgets or StatefulWidgets Components ( It can't be any other type of component , image RenderObjectWidget, It's a rendering object , No longer change the size , therefore Expanded Don't put in RenderObjectWidget).
RenderObjectWidget
RenderObjectWidget by RenderObjectElement Provide configuration information .
RenderObjectElement Packaged RenderObject,RenderObject Provide real rendering for applications .
RenderObjectWidget It's an abstract class .
abstract class RenderObjectWidget extends Widget {

 const RenderObjectWidget({ Key key }) : super(key: key);

 /// RenderObjectWidgets always inflate to a [RenderObjectElement] subclass.
 @override
 RenderObjectElement createElement();

 ///  Use `RenderObjectWidget` Information ,
 /// Create a `RenderObjectWidget` It means `RenderObject` example .
 /// Create time :
 ///`[RenderObjectElement.mount]` Method used in `RenderObjectElement` establish .
/// When mounting , Call the associated `widget` Create the corresponding `RenderObject`
 @protected
 RenderObject createRenderObject(BuildContext context);

 ///  Copy this [RenderObjectWidget] Describe the configuration to a given [RenderObject],
 /// this `RenderObject` The type will be the same as this `RenderObjectWidget` Of
///[createRenderObject] Back to `RenderObject` The same type .
 ///  Timing of invocation :[RenderObjectElement.update]
 @protected
 void updateRenderObject(BuildContext context, covariants RenderObject renderObject) { }

 /// this `widget` Previous associated `RenderObject` Has been removed from the tree .
 /// Here `RenderObject` Is a copy of it .
 @protected
 void didUnmountRenderObject(covariant RenderObject renderObject) { }
}
species

You can also refer to :Flutter Widgets And Expanded and Flexible_ A floating boat blog -CSDN Blog
extend :
Flutter newspaper A RenderFlex overflowed error ( Wide height overflow ) perhaps Flutter Widget Solution not shown (Expanded、Flexible)
We were using the Flutter Write ui When , I often meet people who have finished writing Widget It doesn't show ,
For example, the following code :
The code is simple , In fact, there is a row control inside Text And a ListView.
import 'package:flutter/material.dart';

void main() => runApp(MyApp());

class MyApp extends StatelessWidget {
  // This widget is the root of your application.
  @override
  Widget build(BuildContext context) {
    return MaterialApp(
      title: 'Flutter Demo',
      theme: ThemeData(
        primarySwatch: Colors.blue,
      ),
      home: MyHomePage(title: 'Flutter Demo Home Page'),
    );
  }
}

class MyHomePage extends StatelessWidget {
  MyHomePage({Key key, this.title}) : super(key: key);

  final String title;

  @override
  Widget build(BuildContext context) {
    return Scaffold(
      appBar: AppBar(
        title: Text("Flutter"),
      ),
      body: Column(
        children: <Widget>[
          _titleWidget(),
          _listView(),
        ],
      ),
    );
  }
}

_titleWidget() {
  return Container(
    color: Colors.grey,
    alignment: Alignment.center,
    child: Text(" title "),
    height: 50,
  );
}

_listView() {
  var datas = List.generate(100, (index) {
    return "item ${index + 1}";
  });

  return ListView.builder(
    itemBuilder: (BuildContext context, int index) {
      return Container(
        child: Text("${datas[index]}"),
        height: 40,
        alignment: Alignment.center,
        decoration: BoxDecoration(
            border: Border(bottom: BorderSide(color: Colors.grey))),
      );
    },
    itemCount: datas.length,
  );
}
The effect diagram after operation is as follows :
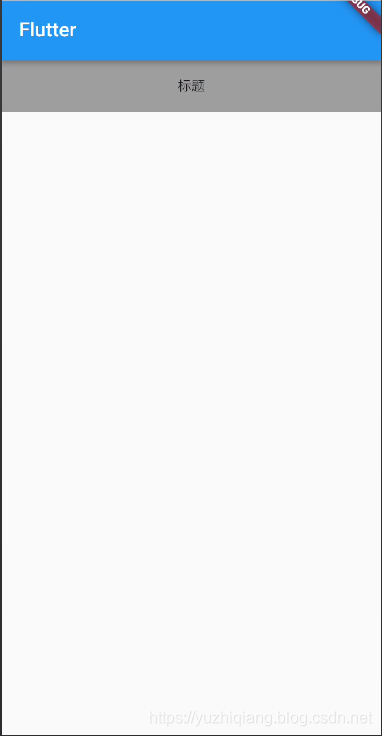
Find out ListView It doesn't show , Then the console gives the following error prompt
I/flutter (22718): ══╡ EXCEPTION CAUGHT BY RENDERING LIBRARY ╞═════════════════════════════════════════════════════════
I/flutter (22718): The following assertion was thrown during performResize():
I/flutter (22718): Vertical viewport was given unbounded height.
I/flutter (22718): Viewports expand in the scrolling direction to fill their container.In this case, a vertical
I/flutter (22718): viewport was given an unlimited amount of vertical space in which to expand. This situation
I/flutter (22718): typically happens when a scrollable widget is nested inside another scrollable widget.
I/flutter (22718): If this widget is always nested in a scrollable widget there is no need to use a viewport because
I/flutter (22718): there will always be enough vertical space for the children. In this case, consider using a Column
I/flutter (22718): instead. Otherwise, consider using the "shrinkWrap" property (or a ShrinkWrappingViewport) to size
I/flutter (22718): the height of the viewport to the sum of the heights of its children.
Usually it is because we are Row Or is it Column There is no definite width or height Widget The width and height are also not determined Widget As a result of , for example ListView、Wrap、GridView etc. ,Flutter I don't know what width and height to render widget, So it won't show .
The solution is as follows :
1. Given width or height
It is generally determined according to the rolling direction , In this case ListView It scrolls vertically , So just set the height .
Such as :
_listView() {
  var datas = List.generate(100, (index) {
    return "item ${index + 1}";
  });

  return Container(
    height: 300,
    child: ListView.builder(
      itemBuilder: (BuildContext context, int index) {
        return Container(
          child: Text("${datas[index]}"),
          height: 40,
          alignment: Alignment.center,
          decoration: BoxDecoration(
              border: Border(bottom: BorderSide(color: Colors.grey))),
        );
      },
      itemCount: datas.length,
    ),
  );
}
Here we give ListView It's covered with Container, And specify its height as 300, The operation effect is as follows :
You can see , here ListView It has been shown , however , Usually , We hope ListView Take up all the remaining heights , Because the screen height of each device must be different , therefore , It is certainly not appropriate to write down the height .
2. Use ListView The total height of the child control ListView Height
I understand Flutter List control ListView Then we know ,shrinkWrap Property can control whether or not it is based on a child widget To set the total length of ListView The length of .
Since we can't put ListView The height of writing die , Let's use the sub widget To set the total length of ListView The height of is OK ? Let's try .
The code is as follows :
_listView() {
  var datas = List.generate(100, (index) {
    return "item ${index + 1}";
  });

  return ListView.builder(
     shrinkWrap: true,// Use the total length of child controls to set ListView The length of ( The length here is the height )
    itemBuilder: (BuildContext context, int index) {
      return Container(
        child: Text("${datas[index]}"),
        height: 40,
        alignment: Alignment.center,
        decoration: BoxDecoration(
            border: Border(bottom: BorderSide(color: Colors.grey))),
      );
    },
    itemCount: datas.length,
  );
}
We will shrinkWrap Set to true, Let's see how it works .

After running, it is found that there is a yellow area at the bottom , Then the console reports the following error :
══╡ EXCEPTION CAUGHT BY RENDERING LIBRARY ╞═════════════════════════════════════════════════════════
The following message was thrown during layout:
A RenderFlex overflowed by 3410 pixels on the bottom.
The overflowing RenderFlex has an orientation of Axis.vertical.
The edge of the RenderFlex that is overflowing has been marked in the rendering with a yellow and
black striped pattern. This is usually caused by the contents being too big for the RenderFlex.
Consider applying a flex factor (e.g. using an Expanded widget) to force the children of the
RenderFlex to fit within the available space instead of being sized to their natural size.
This is considered an error condition because it indicates that there is content that cannot be
seen. If the content is legitimately bigger than the available space, consider clipping it with a
ClipRect widget before putting it in the flex, or using a scrollable container rather than a Flex,
like a ListView.
Tell us the bottom is overflowing , The reason is that the screen doesn't have so much height to display ListView, obviously ,shrinkWrap Set to true It's not easy to use .
If in Android To handle this layout in native , It's simple , We use LinearLayout Layout ,Title Given height ,ListView The weight of 1, namely ListView The height can occupy the remaining height .
that Flutter Is there a similar layout in ? The answer is yes , He is Expanded Control
Expanded It's an expansion Row、Column、 perhaps Flex One of the child controls Widget, Used to fill the available space . This seems to meet our needs , Let's look at it in detail .
Flutter Expanded
Source code is as follows :
class Expanded extends Flexible {
  /// Creates a widget that expands a child of a [Row], [Column], or [Flex]
  /// expand to fill the available space in the main axis.
  const Expanded({
    Key key,
    int flex = 1,
    @required Widget child,
  }) : super(key: key, flex: flex, fit: FlexFit.tight, child: child);
}
You can see ,Expanded Inherited from Flexible , Let's look at it directly Flexible Okay .
Flutter Flexible
Flexible Source code is as follows :
  const Flexible({
    Key key,
    this.flex = 1,
    this.fit = FlexFit.loose,
    @required Widget child,
  }) : super(key: key, child: child);
You can see , Its construction method is very simple ,Flexible Than Expanded Only one more fit attribute .
- flex: Used to control the space ratio occupied by itself on the spindle , The default value is 1, If the value is 0, It means that the child control decides its size by itself , I don't usually use it like this .
- fit: Used to control how child controls are placed in free space , There are two values , Anyway, I don't understand the difference between the two values , So I won't introduce , Please also ask the guidance leader to give some advice , Be deeply grateful .
actually Flutter Medium Flexible and Expanded Medium flex Just follow Android The original LinearLayout Medium weight( The weight ) The concept is almost complete .
Let's change the above code :
_listView1() {
  var datas = List.generate(100, (index) {
    return "item ${index + 1}";
  });

  return Expanded(
    child: ListView.builder(
      itemBuilder: (BuildContext context, int index) {
        return Container(
          child: Text("${datas[index]}"),
          height: 40,
          alignment: Alignment.center,
          decoration: BoxDecoration(
              border: Border(bottom: BorderSide(color: Colors.grey))),
        );
      },
      itemCount: datas.length,
    ),
  );
}
The operation effect is as follows :

Basically, I have met my requirements .
Now let's write another ListView, And let him flex The value is 2.
_listView2() {
  var datas = List.generate(100, (index) {
    return "item ${index + 1}";
  });

  return Flexible(
    flex: 2,
    child: ListView.builder(
      itemBuilder: (BuildContext context, int index) {
        return Container(
          child: Text("${datas[index]}"),
          height: 40,
          alignment: Alignment.center,
          decoration: BoxDecoration(
              border: Border(bottom: BorderSide(color: Colors.grey))),
        );
      },
      itemCount: datas.length,
    ),
  );
}
Here's the whole code :
Under normal circumstances ListView1 The height of is one third of the remaining space of the spindle ,ListView2 The height is two-thirds of the remaining space of the spindle , For viewing purposes , I put a red divider between the two lists .
import 'package:flutter/material.dart';

void main() => runApp(MyApp());

class MyApp extends StatelessWidget {
  // This widget is the root of your application.
  @override
  Widget build(BuildContext context) {
    return MaterialApp(
      title: 'Flutter Demo',
      theme: ThemeData(
        primarySwatch: Colors.blue,
      ),
      home: MyHomePage(title: 'Flutter Demo Home Page'),
    );
  }
}

class MyHomePage extends StatelessWidget {
  MyHomePage({Key key, this.title}) : super(key: key);

  final String title;

  @override
  Widget build(BuildContext context) {
    return Scaffold(
      appBar: AppBar(
        title: Text("Flutter"),
      ),
      body: Column(
        children: <Widget>[
          _titleWidget(),
          _listView1(),
          Container(
            decoration: BoxDecoration(
              border: Border(
                bottom: BorderSide(
                  color: Colors.red,
                ),
              ),
            ),
          ), // Red divider
          _listView2(),
        ],
      ),
    );
  }
}

_titleWidget() {
  return Container(
    color: Colors.grey,
    alignment: Alignment.center,
    child: Text(" title "),
    height: 50,
  );
}

_listView1() {
  var datas = List.generate(100, (index) {
    return "item ${index + 1}";
  });

  return Expanded(
    child: ListView.builder(
      itemBuilder: (BuildContext context, int index) {
        return Container(
          child: Text("${datas[index]}"),
          height: 40,
          alignment: Alignment.center,
          decoration: BoxDecoration(
              border: Border(bottom: BorderSide(color: Colors.grey))),
        );
      },
      itemCount: datas.length,
    ),
  );
}

_listView2() {
  var datas = List.generate(100, (index) {
    return "item ${index + 1}";
  });

  return Flexible(
    flex: 2,
    child: ListView.builder(
      itemBuilder: (BuildContext context, int index) {
        return Container(
          child: Text("${datas[index]}"),
          height: 40,
          alignment: Alignment.center,
          decoration: BoxDecoration(
              border: Border(bottom: BorderSide(color: Colors.grey))),
        );
      },
      itemCount: datas.length,
    ),
  );
}
Running effect :
You can see , As we expected .
actually , We can simply Flutter Medium Expanded and Flexible Control as Android Native LinearLayout, Their effects are very similar .
边栏推荐
- Use yolov5 to train your own data set; Installation and use of yolov5; Interpretation of yolov5 source code
- 力扣:用两个栈实现一个队列
- Pan micro e-cology V9 information disclosure vulnerability
- Wechat applet ChAT expression
- 3000 yuan projector comparison and evaluation, dangbei D3x beats Jimi new Z6 x
- Magic method "six"__ enter__ And__ exit__
- Research on std:: move and std:: forward right value reference
- Flutter-状态管理
- Flutter-渲染原理&三棵树详解
- Cloud native architecture (02) - what is cloud native
猜你喜欢


随机推荐
Flutter 性能优化
The future has come: cloud primary Era
[qnx hypervisor 2.2 user manual]5.5 starting and using guest
Research on std:: move and std:: forward right value reference
在请求目标中找到无效字符。有效字符在RFC 7230和RFC 3986中定义
Application method and operation of Beifu cx9020 (wince 7) controller
ORA-32700: error occurred in DIAG Group Service
Beifu TwinCAT 3 cylinder action program compilation
倍福CX9020(WINCE 7)控制器使用方法和操作
[网鼎杯 2018]Fakebook1 参考
其实很多人都在学电子
std::make_shared特点
动态规划-使用最小花费爬楼梯为例
[netding Cup 2018] fakebook1 reference
八大排序之直接插入排序
LOCAL=NO
剑指 Offer 68 - I. 二叉搜索树的最近公共祖先
3de 保存到收藏夹
倍福嵌入式控制器PLC各型号介绍
Docker install redis