当前位置:网站首页>【Node实现数据加密】
【Node实现数据加密】
2022-07-30 19:21:00 【꒰ঌsnail໒꒱】
一、Node实现数据加密
1、加密的分类
(1)对称加密:也称为单密钥加密。同一个密钥进行加密和解密。
(2)非对称加密:有两把钥匙(公钥和私钥)
(3)摘要算法:把任意长度的输入,根据算法生成一串固定长度的伪随机数(没有密钥,加密过程是不可逆的)
2、MD5(摘要算法)在Node的使用方法
(1)安装crypto模块
npm install crypto
(2)使用crypto.createHash(‘md5’)32字节/(‘sha256’)64字节创建加密对象
(3)使用加密对象的update(明文)进行加密,然后调用digest(‘hex’)返回定长的十六进制字符串
3、示例
- 对用户的注册密码进行加密后存入数据库
(1)首先安装模块
npm install mysql2
npm install sequelize
(2)其次创建数据库连接的配置对象seqconfig.js文件。
//1、导入sequelize模块,引入框架
const Sequelize = require('sequelize')

//2、配置数据库连接对象
const mysqlDemo = new Sequelize('xy','root','123456',{

    host:'localhost',
    port:3306,
    dialect:'mysql',//数据库方言,类型
    pool:{
    //数据库连接池
        max:10,
        min:3,
        idle:100000
    }
})
//3、导出数据库连接的配置对象
 module.exports = mysqlDemo
(3)model的admin.js的模块,使用sequelize建立模型(类),该模型实现与数据表的orm映射.
const Sequelize = require('sequelize')
const orm =require('../seqconfig')

const AdminModel =orm.define('admin',{

    Id:{

        type:Sequelize.INTEGER,
        primaryKey:true,//主键
        autoIncrement:true,//自增
        field:'id'
    },
    userName:{

        type:Sequelize.STRING,
        allowNull:false,
        field:'username'
    },
    userPwd:{

        type:Sequelize.STRING,
        field:'userpwd'
    }
},{

    freezeTableName:true,
    timestamps:false
})
module.exports = AdminModel;
(4)使用第三步创建的模型进行crud操作
const express = require('express')
const crypto = require('crypto')
const AdminModel = require('../config/model/admin')
const router = express.Router()

//http://localhost:3000/md5/register
router.post('/register',(req, res) => {

    let name =req.body.username
    let pwd = req.body.userpwd
    //对密码进行加密
    //生成加密对象
  let hash = crypto.createHash('md5')
  //使用加密对象进行加密并生成十六进制字符串
  let newPwd = hash.update(pwd).digest('hex')
  //将用户名和加密的密码保存到数据库中
    AdminModel.create({

        userName:name,
        userPwd:newPwd
    }).then((result)=>{

        res.json({

            code:1001,
            msg:'保存成功'
        })
    }).catch((err)=>{

        console.log(err)
        res.json({

            code:1002,
            msg:'保存失败'
        })
    })
})

//http://localhost:3000/md5/login
router.post('/login',(req, res) => {

    let name = req.body.username
    let pwd =req.body.userpwd
    //对密码进行加密
    //生成加密对象
    let hash = crypto.createHash('md5')
    //使用加密对象进行加密并生成十六进制字符串
    let newPwd = hash.update(pwd).digest('hex')
    AdminModel.findOne({

        where:{

            userNmae:name
        }
    }).then((admin)=>{

        if(admin.userPwd === newPwd){

            res.json({

                code:1001,
                msg:'验证成功'
            })
        }else{

            res.json({

                code:1002,
                msg:'密码错误,验证失败'
            })
        }
    })
})

module.exports =router;
(5)别忘了最后要配置app.js文件
var md5Router = require('./routes/md5')
app.use('/md5',md5Router)
验证:
第四步的部分代码:将用户的注册密码进行加密后存入数据库
//http://localhost:3000/md5/register
router.post('/register',(req, res) => {

    let name =req.body.username
    let pwd = req.body.userpwd
    //对密码进行加密
    //生成加密对象
  let hash = crypto.createHash('md5')
  //使用加密对象进行加密并生成十六进制字符串
  let newPwd = hash.update(pwd).digest('hex')
  //将用户名和加密的密码保存到数据库中
    AdminModel.create({

        userName:name,
        userPwd:newPwd
    }).then((result)=>{

        res.json({

            code:1001,
            msg:'保存成功'
        })
    }).catch((err)=>{

        console.log(err)
        res.json({

            code:1002,
            msg:'保存失败'
        })
    })
})
可以看到在postman测试成功: 我们再来看看数据库,可以看到用户的密码加密信息保存到了数据库中:
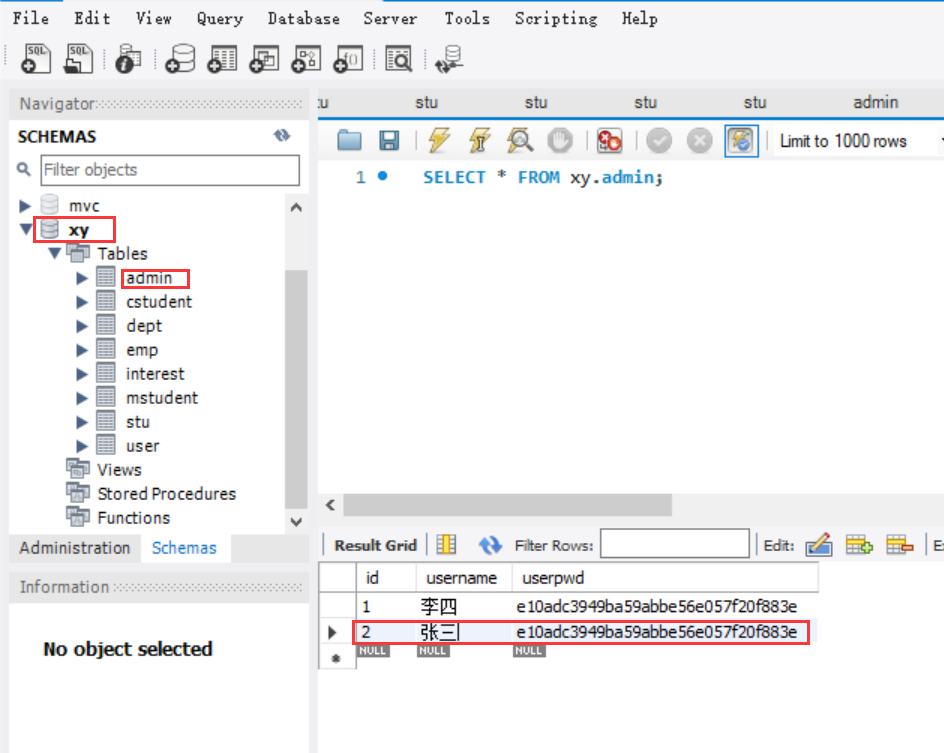
第四步骤的部分代码,验证用户是否可以登录:
//http://localhost:3000/md5/login
router.post('/login',(req, res) => {

    let name = req.body.username
    let pwd =req.body.userpwd
    //对密码进行加密
    //生成加密对象
    let hash = crypto.createHash('md5')
    //使用加密对象进行加密并生成十六进制字符串
    let newPwd = hash.update(pwd).digest('hex')
    AdminModel.findOne({

        where:{

            userName:name
        }
    }).then((admin)=>{

        if(admin.userPwd === newPwd){

            res.json({

                code:1001,
                msg:'验证成功'
            })
        }else{

            res.json({

                code:1002,
                msg:'密码错误,验证失败'
            })
        }
    })
})
可以看到在postman测试成功:

(6)前后端分离,所以我们要写一个前端页面,进行前后端交互。
<!DOCTYPE html>
<html lang="en">
<head>
<meta charset="UTF-8">
<meta http-equiv="X-UA-Compatible" content="IE=edge">
<meta name="viewport" content="width=device-width, initial-scale=1.0">
<title>Document</title>
</head>
<style> div{
width: 500px; margin: 100px auto; } </style>
<body>
<div>
<!-- <form action="" method="post"> -->
<label>
用户名:<input type="text" id="userName" name="username">
</label>
<br><br>
<label>
密 码:<input type="password" id="userPwd" name="userpwd">
</label>
<br><br>
<button type="button" id="btn_reset">重置</button>
<button type="button" id="btn_submit">提交</button>
<!-- </form> -->
<br><br>
<span id="msg"></span>
</div>
<script src="../js/jquery-3.4.1.js"></script>
<script> $(function(){
//jQuery入口函数 //1、给登录按钮绑定click事件 $('#btn_submit').click(function(){
//2、获取用户输入的密码和用户名 let name=$('#userName').val() let pwd = $('#userPwd').val() //3.调用ajax函数向服务器发送异步的请求 $.post('http://localhost:3000/md5/login',{
username:name,userpwd:pwd},function(result){
$('#msg').html(result.msg) },'json') }) }) </script>
</body>
</html>
输入用户张三和密码123456后,显示验证成功,也就表明了登录成功: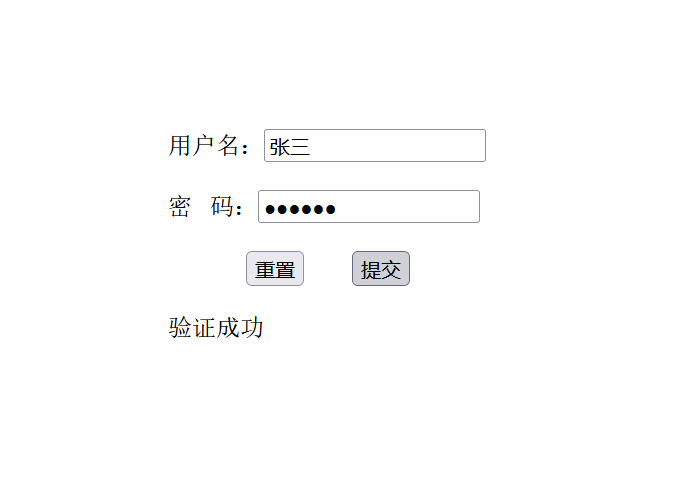
边栏推荐
- Witness the magical awakening of the mini world in HUAWEI CLOUD
- WEBSOCKETPP使用简介+demo
- Scala学习:类和对象
- LeetCode 0952. Calculate Maximum Component Size by Common Factor: Mapping / Union Search
- 牛客网——华为题库(100~108)
- 7.29模拟赛总结
- MindSpore:【模型训练】【mindinsight】timeline的时间和实际用时相差很远
- 浅聊对比学习(Contrastive Learning)第一弹
- NC | Tao Liang Group of West Lake University - TMPRSS2 "assists" virus infection and mediates the host invasion of Clostridium sothrix hemorrhagic toxin...
- Scrapy framework is introduced
猜你喜欢
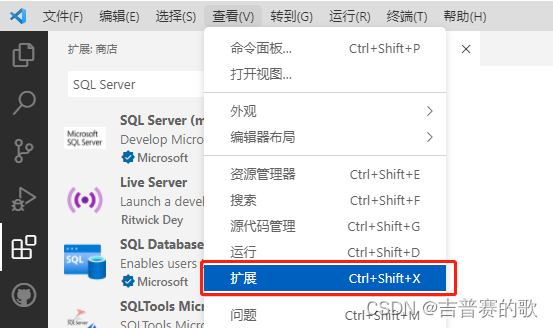
VS Code 连接SQL Server
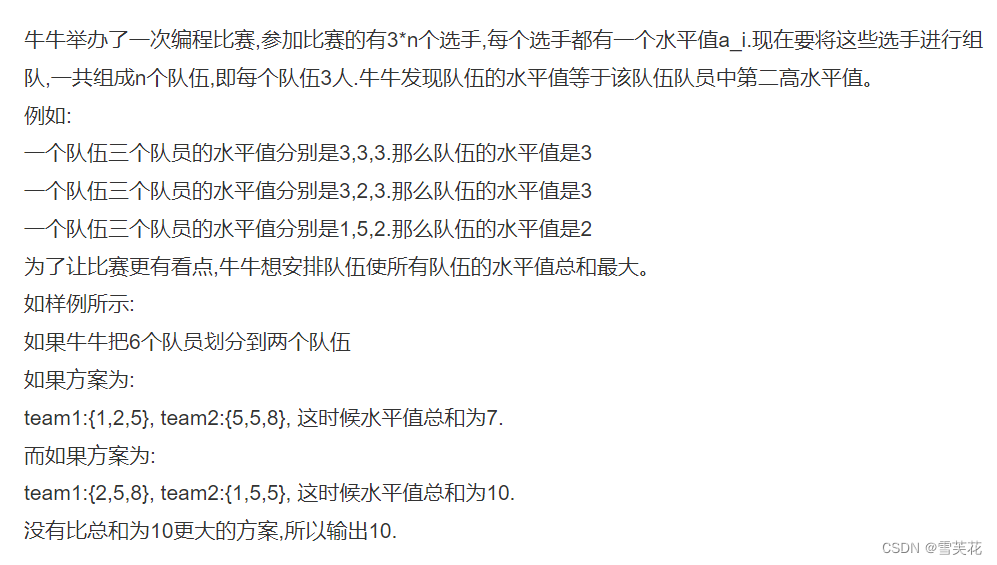
牛客刷题系列之进阶版(组队竞赛,排序子序列,倒置字符串, 删除公共字符,修理牧场)

C# wpf borderless window add shadow effect

【Pointing to Offer】Pointing to Offer 18. Delete the node of the linked list

Swiper rotates pictures and plays background music

MongoDB打破了原则引入SQL?

Google's AlphaFold claims to have predicted almost every protein structure on Earth

kotlin by lazy

技术很牛逼,还需要“向上管理”吗?

深入浅出边缘云 | 3. 资源配置
随机推荐
第十七届“振兴杯”全国青年 职业技能大赛——计算机程序设计员(云计算平台与运维)参赛回顾与总结
【PHPWord】Quick Start of PHPWord in PHPOffice Suite
OneFlow source code analysis: Op, Kernel and interpreter
[TypeScript]编译配置
SwiftUI iOS Boutique Open Source Project Complete Baked Food Recipe App based on SQLite (tutorial including source code)
ImportError: attempted relative import with no known parent package
又一家公司面试的内容
ResNet18-实现图像分类
AWS console
来了!东方甄选为龙江农产品直播带货
不同的路径依赖
MindSpore:【模型训练】【mindinsight】timeline的时间和实际用时相差很远
跨域问题的解决方法
Swiper轮播图片并播放背景音乐
【Swords Offer】Swords Offer 17. Print n digits from 1 to the largest
nlohmann json 使用指南【visual studio 2022】
Google's AlphaFold claims to have predicted almost every protein structure on Earth
MongoDB打破了原则引入SQL?
The problem of writing go run in crontab does not execute
开心的聚餐