当前位置:网站首页>Unreal Engine graphics and text notes: use VAT (vertex animation texture) to make Houdini end on Houdini special effect (ue4/ue5)
Unreal Engine graphics and text notes: use VAT (vertex animation texture) to make Houdini end on Houdini special effect (ue4/ue5)
2022-06-25 10:21:00 【Old Wang who developed games】
disclaimer : Houdini The small white , Sell now , Pure notes . If there is any misleading, we will not bear any responsibility . This paper refers to Houdini Official 《Lightning Strike FX》 course
List of articles
Effect demonstration (UE4/5)
What is? VAT?
VAT(Vertex Aniamtion Texture) Vertex animation texture , Its principle is not complicated .VAT It's not for CPU Process the animation , Instead, each vertex displacement data is recorded in the texture , Then input this texture into the world position parameter of the vertex shader , Thus, the GPU Restore the animation of each frame .VAT Not in itself Houdini Invented ,Houdini Based on VAT, A set of Houdini Medium VAT Texture baking method , And help us write support Unreal/Unity Wait for the engine Shader.Houdini Baked VAT The texture is as follows :

VAT Texture data format is also very simple and intuitive : The horizontal axis is that each point corresponds to a vertex on the aggregate ; The vertical axis is the time axis . Each point on the plane corresponds to the coordinate displacement of a vertex at a certain time .
Case study : Crushing effect
0. Overview

1. Geometry node

2. Internal node
2.1 Box node
This is the geometry to be broken , It can be replaced by any mesh model

2.2 RBD Material Fracture node
Scatter Points The larger the value, the more fragmented the mesh will be 


2.2 Divide node


2.3 UVTexture node
2.4 Assemble node

2.5 RBD Configure node

adjustment Bound Box Location and size of , The green selected part of the screen is the fragment finally participating in the simulation


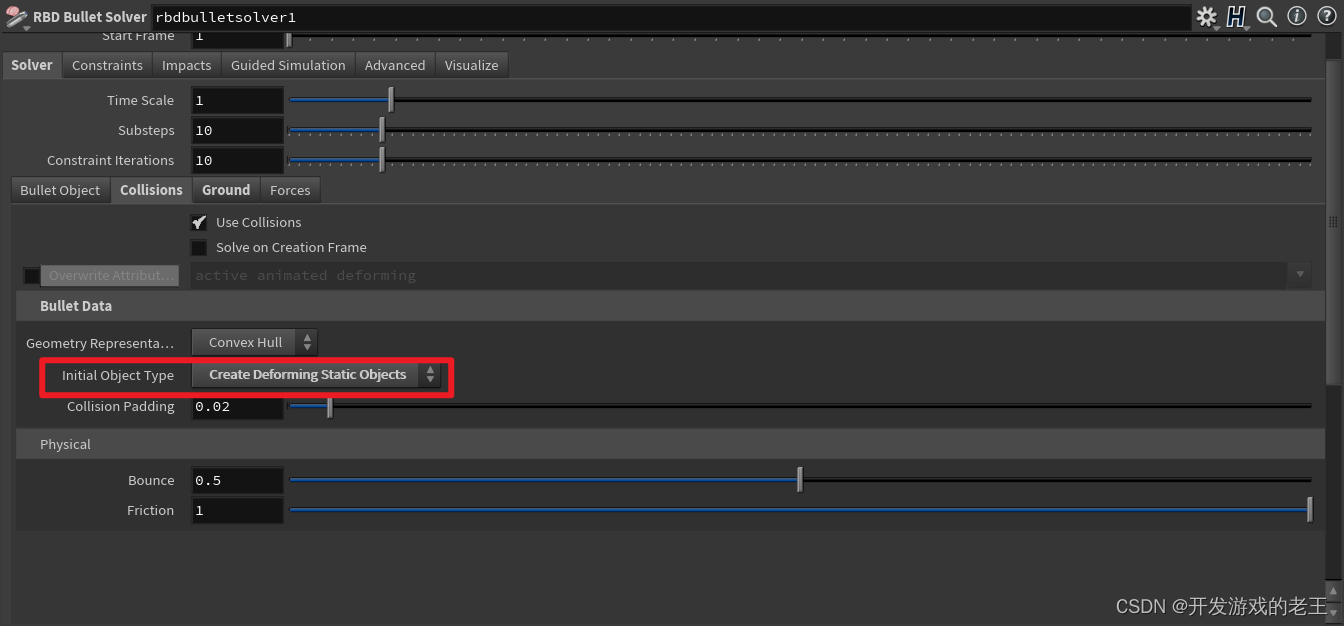
2.6 RBD Bulletsolver node
After adding RBD Bulletsolver node It can simulate the crushing

Add ground

Set the position of the ground as required


Create Deforming Static Objects
This step corresponds to using a collision body to collide with the current mesh body
stay Transfer Attribute Add orient and pivot

2.6 Add collider

Place Collider Sphere Through one transform Nodes connecting to RBD BulletSolver Of Collision Geometry entrance

3. Collision animation


4. export VAT


Out Pattern


- "geo" In the folder is fbx Model
- "tex" In the folder are textures


边栏推荐
- Shuttle JSON, list, map inter transfer
- Comparison and evaluation of digicert and globalsign single domain ov SSL certificates
- How do wechat sell small commodity programs do? How to open wechat apps to sell things?
- 链表 删除链表中的节点
- Jetpack compose layout (II) - material components and layout
- i++ 和 ++i的真正区别
- 我希望按照我的思路尽可能将canvas基础讲明白
- ShardingSphere-Proxy 5.0 分库分表(一)
- 独步武林,架构选型手册(包含 PDF)
- CyCa 2022 children's physical etiquette primary teacher class Shenzhen headquarters station successfully concluded
猜你喜欢

Pytorch_ Geometric (pyg) uses dataloader to report an error runtimeerror: sizes of tenants must match except in dimension 0

【历史上的今天】6 月 24 日:网易成立;首届消费电子展召开;世界上第一次网络直播
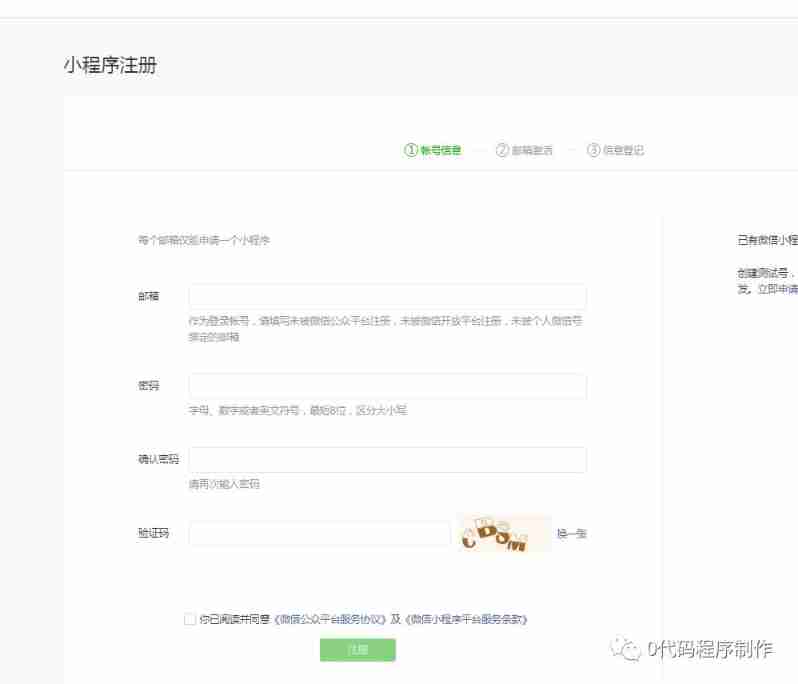
How to apply for a widget on wechat how to get a widget on wechat

Tiktok brand goes to sea: both exposure and transformation are required. What are the skills of information flow advertising?

ShardingSphere-Proxy 5.0 分库分表(一)

Jetpack compose layout (III) - custom layout

Redis (II) distributed locks and redis cluster construction

How to make small programs on wechat? How to make small programs on wechat

How to build a wechat applet? How to open an applet?
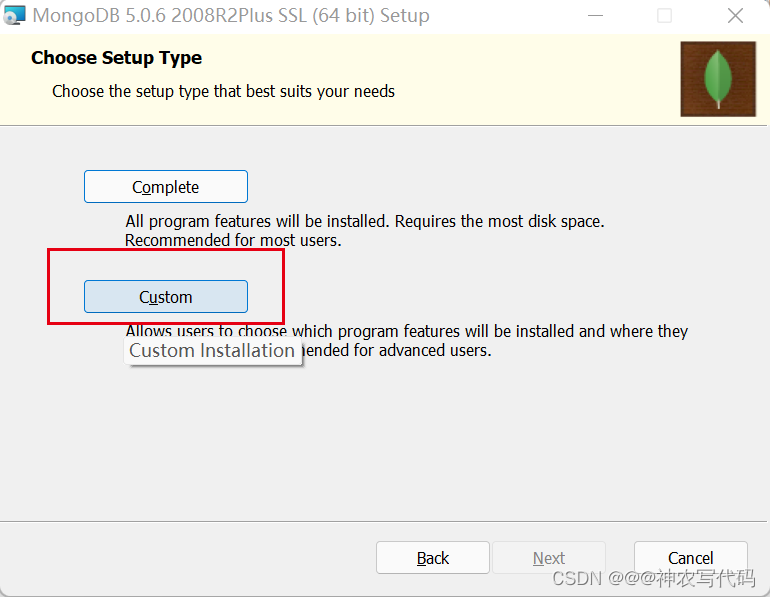
MongoDB的原理、基本使用、集群和分片集群
随机推荐
Etcd tutorial - Chapter 4 etcd cluster security configuration
Kotlin advanced - class
How much does a small program cost? How much does a small program cost? It's clear at a glance
MongoDB的原理、基本使用、集群和分片集群
js工具函数,自己封装一个节流函数
SQL to object thinking vs SQL of object thinking
NetCore性能排查
Flask博客实战 - 实现个人中心及权限管理
JS【中高级】部分的知识点我帮你们总结好了
Requirements and precautions for applying for multi domain SSL certificate
依赖属性、依赖附加属性以及类型转换
ShardingSphere-Proxy 5.0 分库分表(一)
Minio基本使用与原理
Bug- solve the display length limitation of log distinguished character encoding (edittext+lengthfilter)
Bitmap is converted into drawable and displayed on the screen
Can two Mitsubishi PLC adopt bcnettcp protocol to realize wireless communication of network interface?
Repo sync will automatically switch the correspondence between the local branch and the remote branch - how to customize this behavior
Shuttle JSON, list, map inter transfer
Mengyou Technology: tiktok live broadcast with goods elements hot topics retention skills shaping image highlight selling points
tokenizers>=0.11.1,!= 0.11.3,<0.13 is required for a normal functioning of this module,