当前位置:网站首页>Vs code + GCC environment compilation for STM32 development
Vs code + GCC environment compilation for STM32 development
2022-06-21 12:04:00 【Summer foam and light rain】
Write it at the front :
The purpose of this article is to summarize backup 、 For future reference , Because it's a personal summary , If there is any wrong , Welcome to correct ; in addition , Most of the content comes from the Internet 、 Books 、 And all kinds of manuals , In case of infringement, please inform , Immediately delete the post and apologize .
Catalog
One 、 Program installation
1、VSCode:https://code.visualstudio.com/Download
Good use of the popular text editor , With powerful plug-ins , Make your development efficiency greatly improved .
2、Java:https://www.java.com/zh-CN/download/
STM32CubeMX The installation of requires JAVA Running environment (jre).
3、STM32CubeMX:https://my.st.com/content/my_st_com/en/products/development-tools/software-development-tools/stm32-software-development-tools/stm32-configurators-and-code-generators/stm32cubemx.html
Support the latest HAL Library and LL library , Engineering code configuration and generation tool , Support generation IAR、Keil、STM32CubeIDE、Makefile Wait for the project , Here we use the Makefile engineering .
4、MinGW-w64:https://sourceforge.net/projects/mingw-w64/files/mingw-w64/mingw-w64-release/
A powerful and practical C/C++ compiler . After installation, you need to add system environment variables , You can use cmd command :gcc -v test .
5、arm-none-eabi-gcc:https://launchpad.net/gcc-arm-embedded/+download
GUN Of arm General cross compilation chain tool , Basically common arm All processors support . alike , After installation, you need to add system environment variables , You can use cmd command :arm-none-eabi-gcc -v test .
Two 、CubeMX Project generation
at present STM32 Now the main library is HAL library , And of course there is LL The library is used to manipulate the underlying registers ; about HAL library , The official has specially launched graphical software CubeMX To simplify the HAL Under the library STM32 Initialization code ; We only need to configure the corresponding peripheral functions and clock tree , Click generate code ,CubeMX The corresponding project file will be generated , It also supports a variety of IDE Tools , It's really necessary to travel at home . cough , Partial topic !
First , Select your target chip , Start project configuration , Here is a simple one LED Control heel DEBUG To configure .
The serial port configuration is as shown in the figure below , As usual , Asynchronous communication ,Baud rate:115200、8Bit、1Stop Bit

Then configure LED IO Pin , Directly click the corresponding pin to configure , As shown in the figure below :

How to use this software is not discussed here , There is also a little attention :
If you want to use STLink Wait for the online debugger , Then you need to select the debugging method you need in the following figure :

For the clock tree , Like us, we usually use HSE High speed external crystal , Then you need to be in RCC There open the corresponding configuration :

Then configure the corresponding peripheral clock in the clock configuration :

Last , Because we want to be in VSCode On the development , Just choose to generate Makefile That's all right. . One thing to note is that , This step is not necessary , It's quite possible not to use CubeMX, Write it yourself Makefile It's OK, too . Then output the generated project file .

3、 ... and 、VSCode The deployment environment
1、 Plug in installation
| plug-in unit | function |
|---|---|
| Chinese (Simplified) Language Pack for Visual Studio Code | chinese ( Simplified Chinese character ) Language pack |
| Comment Translate | VSCode Annotation translation |
| C/C++ | C / C ++ Language support for , Grammar IntelliSense 、 Highlight and debug functions , Of course, system installation is required arm-none-eabi-gcc compiler |
| Cortex Debug | Provide jlink、stlink And other debugging interface functions |
| ARM | arm Assembly language support |
| vscode-icons | File Icon , You can quickly view file types |
2、 To configure VS Code
First , Take from STM32CubeMX The created project is imported into VS Code Inside , obtain :

By default , The project does not include .vscode The folder of , It will be created automatically by operating the following three methods :
Open the command window to edit the configuration (Ctrl+Shitf+P > Edit Configurations(JSON))

Or click... In the window bar terminal -> Configure tasks -> Create... Using templates task.json -> Other

Or modify... In the workspace settings.json file ( window File–Preferences–Settings–Features–Terminal Of Terminal > Integrated > Automation Shell: Windows Column )

The three created effects are as follows :

Let's start with the first two files :
- c_cpp_properties.json
Mainly add include route , Compiler path , Macro definition, etc ; After setting up , Indexes 、 Compiling is like keil As convenient as . then , Its configuration is modified as follows :
{

    "configurations": [
        {

            "name": "STM32",		//  Create a file called "STM32" Configuration of
            "includePath": [		//  Declare the of this workspace  C/C++ What header file directories does the project contain
                "${workspaceFolder}/**",
                "${workspaceFolder}/Drivers/CMSIS/Device/ST/STM32L1xx/Include",
                "${workspaceFolder}/Drivers/CMSIS/Include",
                "${workspaceFolder}/Drivers/STM32L1xx_HAL_Driver/Inc",
                "${workspaceFolder}/Drivers/STM32L1xx_HAL_Driver/Inc/Legacy",
                "${workspaceFolder}/Core/Inc"
            ],
            "defines": [			//  Global preprocessing macro definitions
                "STM32L151xB",
                "USE_HAL_DRIVER"
            ],
            "compilerPath": "gcc.exe",		//  If you add an environment variable , It can be expressed like this ; Otherwise you have to add an absolute path , Such as :C:\\Program Files\\mingw64\\bin\\gcc.exe
            "cStandard": "c11",				//  The use of  C standard
            "cppStandard": "c++17",			//  The use of  C++ standard
            "intelliSenseMode": "gcc-x64"	//  Language style
        }
    ],
    "version": 4
}
Be careful : This json Comments are not allowed , therefore , If it is like copying to your file , Remember to delete the notes .
- tasks.json
Under this document tasks Each object in the array represents a task .
{

    // See https://go.microsoft.com/fwlink/?LinkId=733558
    // for the documentation about the tasks.json format
    "version": "2.0.0",
    "tasks": [
        {

          "label": "Build",			//  Tag name
          "type": "shell",			//  terminal (shell) Type of task
          "command": "make",		// * Executed command
          "args": [					//  Arguments to the command
            "-j6"					//  It means that six threads compile at the same time
          ],
          "problemMatcher": ["$gcc"],	//  Indicates that if a compilation error occurs , The question panel will show  gcc Type of mistake
          "group": {

            "kind": "build",
            "isDefault": true
          }
        }
      ]
}
Be careful : above "command" The options are filled with “make”; actually , In our download of MinGW-w64 In the compiler , Execution is mingw32-make.exe; however , Here you can see mingw32-make.exe The filename is too long , And it's hard to remember , So we can copy it and rename it make.exe In this way, with Linux Under the make The orders are consistent ; If you don't copy it as mentioned above make.exe, that , stay "command" Fill in the options as “mingw32-make”, Similarly, when compiling , The command you type is mingw32-make.
- settings.json
I'll leave this for you in combination with an example .
Four 、 Engineering compilation
After you configure the above operations , The best thing is to save all the files first , Then close it VS Code, Reopen the project .
There are two ways to compile :
1、 Click... In the window bar terminal -> Run build task ( Shortcut key Ctrl+Shitf+B)

2、 Click... In the window bar terminal -> New terminal , choice cmd

If not , Click on it , Then click “ Choose default Shell”, Then click the trash can next to it , Open it again .
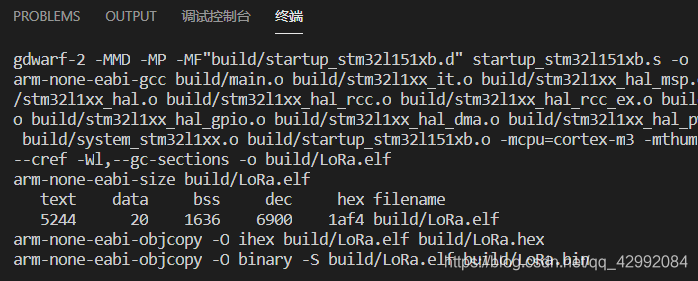
type make, Finally press enter . When the compilation is completed, the compiled file size will be displayed as shown in the following figure :
5、 ... and 、 Compile cleanup
Compile file cleanup , Just type... In the terminal console make clean That's all right. , however , however , If you are using cmd Of shell, You'll find that :

The compiled file is not cleared . Why is that ? You can get the answer here :https://github.com/STAT545-UBC/Discussion/issues/55
According to the description, it can be summarized as :
resolvent 1: Use Windows Version of rm yes del, So you can simply use rm Replace with del. But be careful , Doing so means that you will not be able to use Git Bash shell, Because it doesn't support del Command procedure ;
Solution 2: Suppose you have installed Git Bash( If not, install Git Chant , all 0202 了 , No one else doesn't have to Git Well , I really don't want to use Git, Then find a support rm Terminal command desk , for example :msys2), Then you can switch the terminal command console to Bash above
The first one is simple , stay makefile In the rm Replace with del, As shown in the figure below :

the second , Click again as above “ Choose default Shell”, And then choose Git bash

then , Use this operation to modify the terminal Sell, Different projects are important for selecting different terminals , Sometimes you need to switch frequently , inconvenient ; Then you have a workspace settings.json The role of file configuration .
stay settings.json In file , We only need to configure the following operations :
{

	/*  Terminal in Windows The use of shell The path of  */
    "terminal.integrated.shell.windows": "C:\\Program Files\\Git\\bin\\bash.exe",	//  If you add an environment variable, you can remove the path
    "terminal.external.windowsExec": "C:\\Program Files\\Git\\bin\\bash.exe"		//  Same as above
}
In this way , Then it will only have an effect in the project workspace .
You see , The colors are different :

6、 ... and 、 other
Next , download & Setup of debugging environment :STM32 Development of VS Code + GDB Download debugging
边栏推荐
- 【无标题】
- 第k小__
- HMS Core机器学习服务身份证识别功能,实现信息高效录入
- DDoS attack and defense: from principle to practice
- Centos7 升级MySQL5.6.40至企业版5.6.49
- 6-Zabbix监控自动发现第三方中间件内存及CPU使用情况
- One's deceased father grind politics English average cent furnace! What is your current level?
- Factory mode implementation
- Knowledge points: several special wiring methods for PCB
- 2022年138套数学分析高等代数考研真题参考解答勘误
猜你喜欢
![[Harbin Institute of technology] information sharing for the first and second examinations of postgraduate entrance examination](/img/06/df5a64441814c9ecfa2f039318496e.jpg)
[Harbin Institute of technology] information sharing for the first and second examinations of postgraduate entrance examination

旅行不能治愈心灵

How does Huawei build a project centered project management system from 0 to 1?

typora免费版,无需破解,安装直接使用

【无标题】

Citus 11 for Postgres is completely open source and can be queried from any node (citus official blog)

【云原生 | Devops篇】Jenkins安装与实战(二)
![[deep learning] use deep learning to monitor your girlfriend's wechat chat?](/img/03/ecf50eacc91c0633b0d9689cdad2c2.png)
[deep learning] use deep learning to monitor your girlfriend's wechat chat?

2022 special operation certificate examination question bank and online simulation examination for safety management personnel of hazardous chemical business units

南京大学 静态软件分析(static program analyzes)-- introduction 学习笔记
随机推荐
STL基本容器测试
ACM. HJ36 字符串加密 ●●
图文并茂--微信小程序,获取用户地理位置信息,并调用腾讯地图API来获取用户具体位置
R & S oscilloscope software, introduction to upper computer software ns-scope of rod and Schwartz oscilloscope
Apache ShardingSphere 5.1.2 发布|全新驱动 API + 云原生部署,打造高性能数据网关
Interesting research on mouse pointer interaction
It is the German oscilloscope software and the keysight oscilloscope upper computer software ns-scope
STM32cubeMX之 uart问题汇总
Adapter power supply automatic test equipment | introduction to charger ATE test system nsat-8000
Introduction to the upper computer software ns-scope of Tektronix oscilloscope
[comprehensive pen test] sword finger offer II 114 Alien dictionary
Devsecops: new to Jianghu
Knowledge points: several special wiring methods for PCB
Est le logiciel d'oscilloscope allemand, le logiciel d'ordinateur hôte d'oscilloscope keysight NS scope
使用赞美提高绩效
Clear the switch configuration, configure the image port and Wireshark packet capturing (take Huawei s5720 as an example)
Never ending database injection attack and defense
是德示波器软件,Keysight示波器上位机软件NS-Scope
是德示波器軟件,Keysight示波器上比特機軟件NS-Scope
2-zabbix使用自动发现自动添加主机