当前位置:网站首页>How to set the picture background to transparent
How to set the picture background to transparent
2022-06-21 19:38:00 【liitdar】
This paper mainly introduces the use of Windows System native “ drawing 3D” The specific method for the application to set the image background to be transparent .
1 Required applications
Windows10 The operating system comes with “ drawing 3D” Applications , As shown in the figure below :

2 Methods to introduce
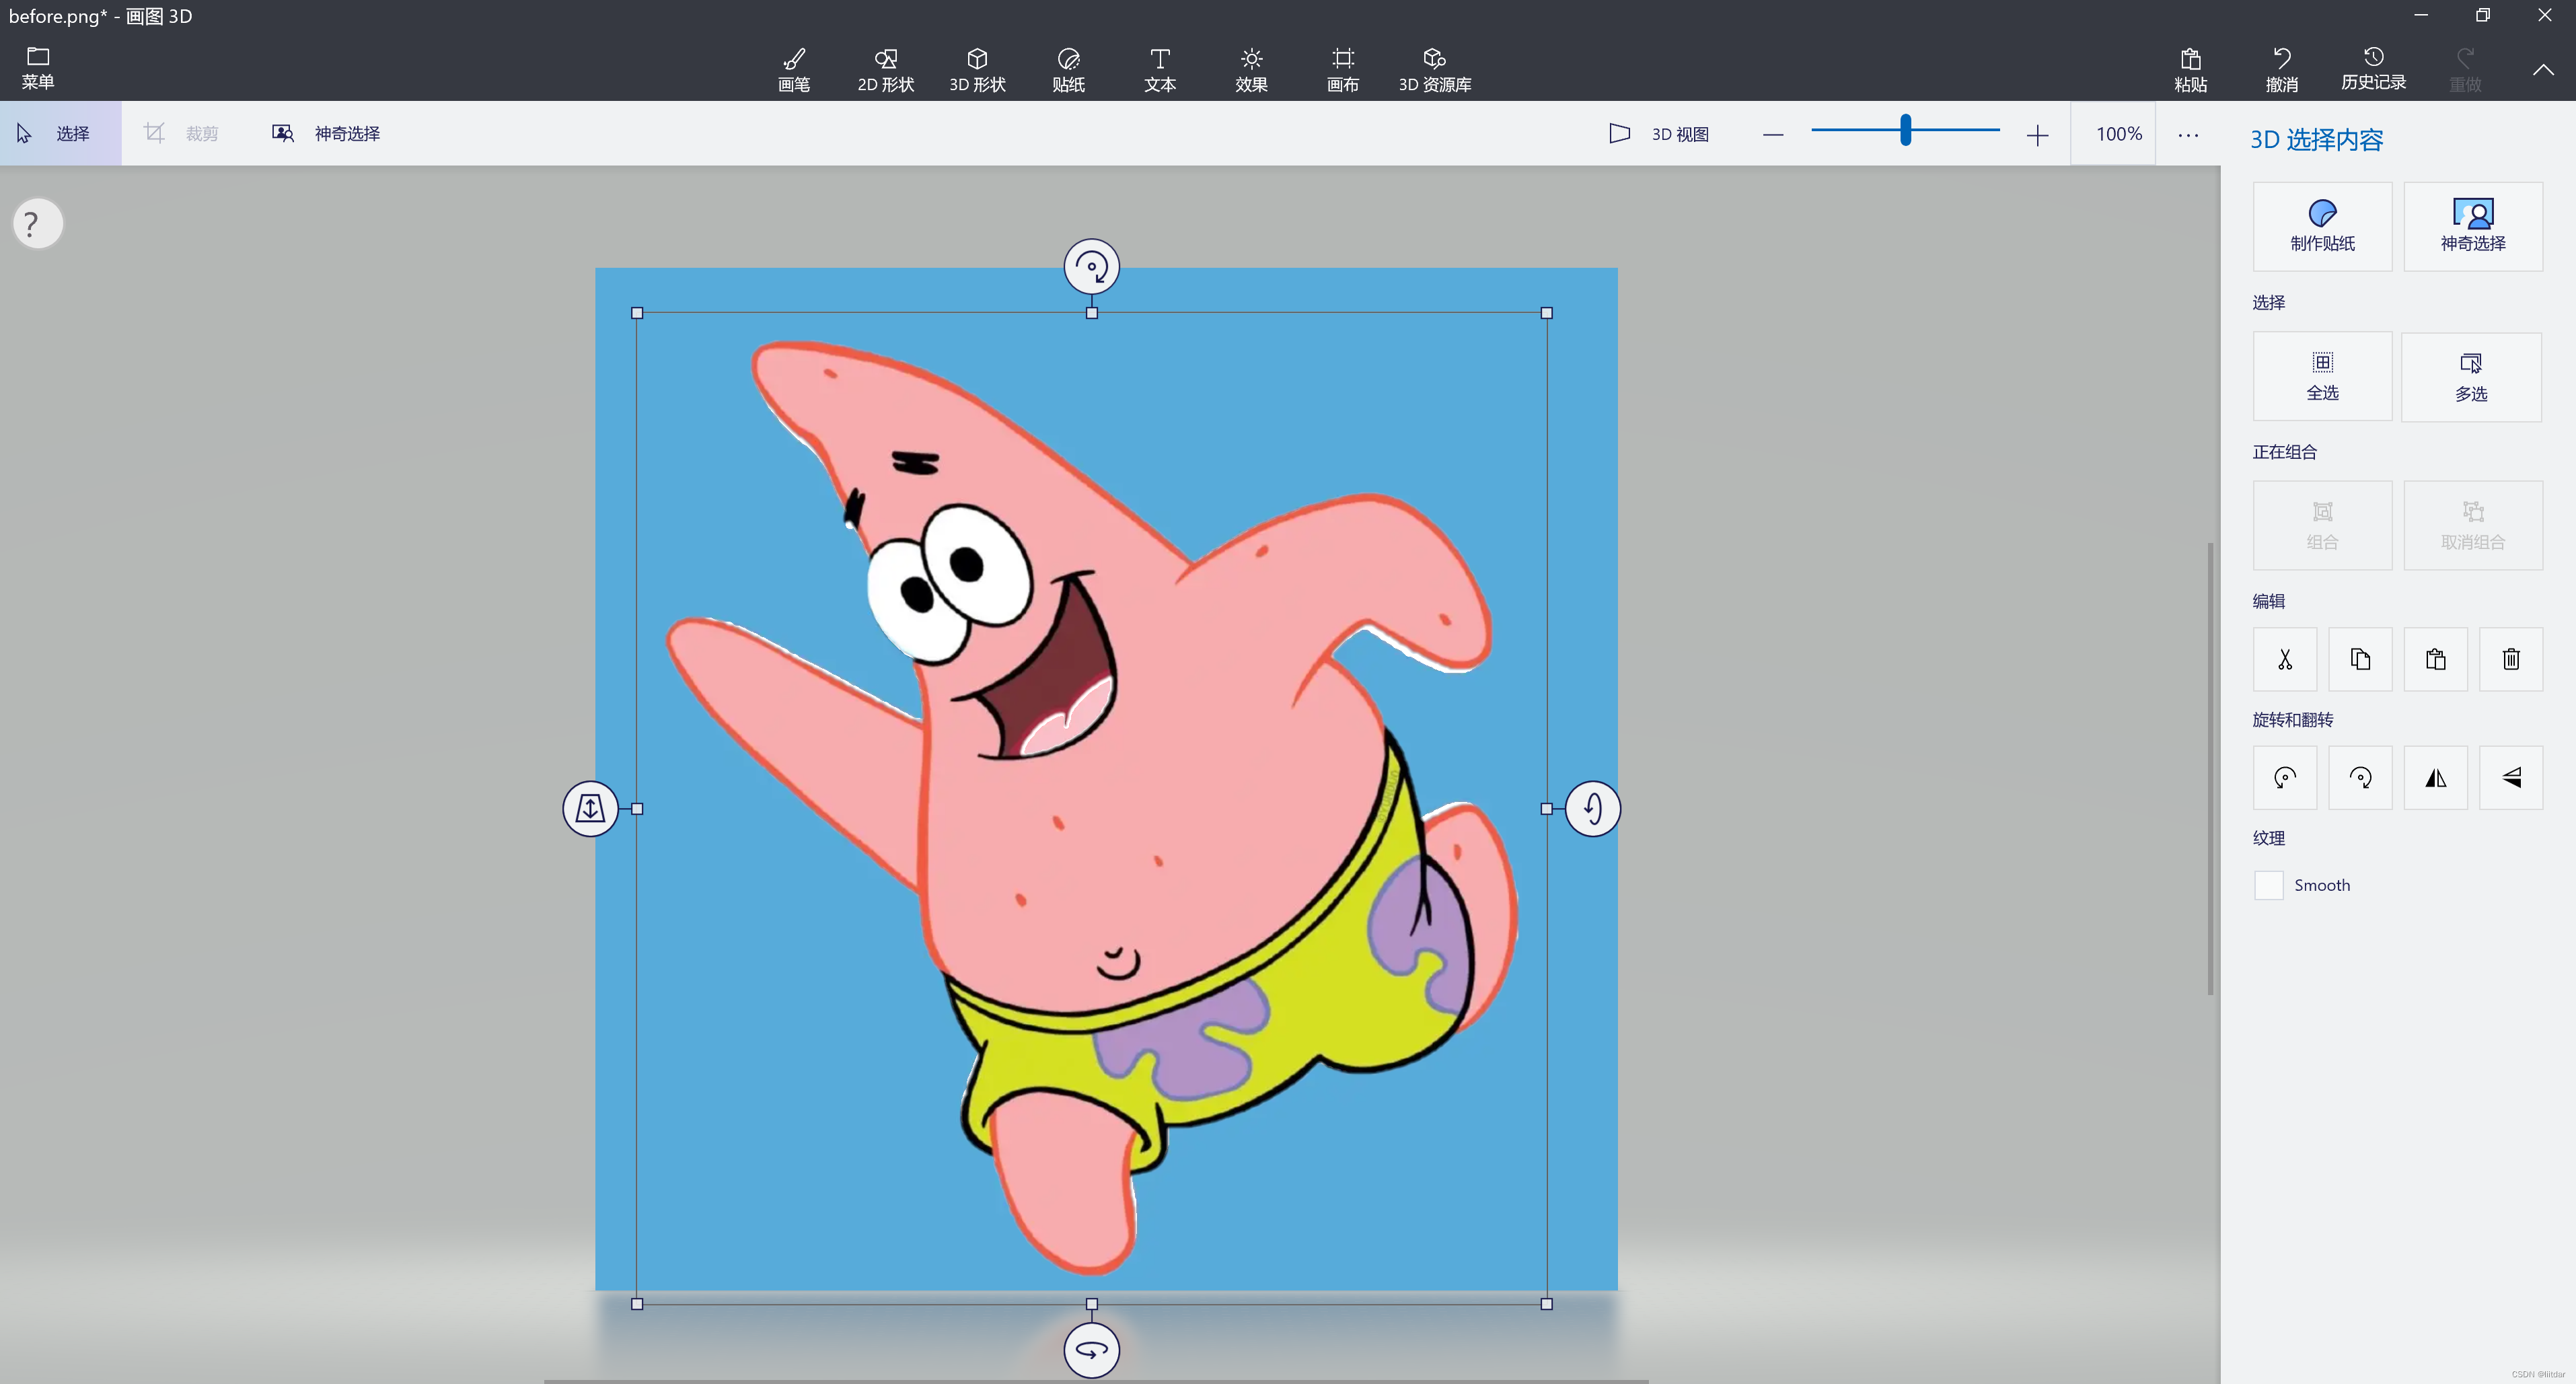
There is a blue background png Format picture , As shown in the figure below :

The following describes how to set the background of this picture to transparent .
1. Use “ drawing 3D” The application opens the picture ;
2. stay “ drawing 3D” In the interface , Click on “ Magical choice ” Button ( This operation will select the whole picture by default );
3. Click... On the right side of the interface “ next step ”;
4. Select... On the right side of the interface “ Delete ” Icon , Then check it “ Auto fill background ” Options , As shown in the figure below :

5. Click on the image above “ Completed ” Button , At this point, a view with the picture content separated from the background will be generated , As shown in the figure below :
6. Click on the image above “ canvas ” Button , Then close the “ Show the canvas ” switch , When this is done , You will get a picture without canvas , As shown in the figure below :

7. adopt “ menu ”->“ Save as ”->“ Images ” function , Get the picture to be saved , As shown in the figure below :

8. ( Optional ) At this time, it can be based on actual needs , Click on the image above “ Adjust the angle and frame ” To resize the picture . for example , If you need a square picture , You can set the frame scale to “1:1”, As shown in the figure below :

After completing the settings in the above figure , Click on “ determine ” Button , Back to the first 7 In the image to be saved interface of step .
9. Check... On the right side of the interface “ transparency ” Options , As shown in the figure below :

Click... At the bottom right of the above interface “ preservation ” Button , You can get the picture with transparent background , As shown in the figure below :

In the diagram above ,“before.png” Is the original picture with a blue background ,“after.png” Is the corresponding background transparent picture .
thus , The picture with transparent background is finished .
Last , To compare the difference between the background transparent picture and the original picture ( In other words, verify whether the modified image is indeed transparent to the background ), have access to “ Screenshots and sketches ” The application opens the two pictures separately . Use “ Screenshots and sketches ” The contents of the two opened pictures are shown in the following figure :

It can be seen from the above figure , The image generated in this example is indeed transparent in the background .
3 Special instructions
In some cases , We want the main content in the picture ( As in the example in this article “ Patrick Star ”) Try to occupy more space in the picture , That is to make the main content in the picture more “ Big ” some , that , There is a way to meet this need .
Return to Chapter 2 of this article 6 Step , Finish closing “ Show the canvas ” After the operation , Cancel “ drawing 3D” The application maximizes the effect , And then by adjusting “ drawing 3D” Application interface size , To adjust the proportion of main content in the final generated background transparent picture , As shown in the figure below :

It can be seen from the above figure , Main content of picture “ Patrick Star ” The proportion of the whole picture has been significantly increased .
For the following operations, refer to the relevant steps in Chapter 2 , Finally, the generated background is transparent “after2.png” And generated in Chapter 2 “after.png” Contrast figure , As shown in the figure below :

As you can see in the picture above ,“after2.png” The main content of is obviously larger than “after.png” The corresponding content in .
Last , Remind everyone , We can also adjust the original image ( namely “before.png”) The proportion of main content in , To indirectly adjust the proportion of main content in the final generated background transparent picture , You can use these methods flexibly according to the actual situation .
边栏推荐
- Selection skills of national production reinforced Ethernet switch
- Technology sharing | mysql:caching_ sha2_ Password quick Q & A
- 【区间和专题の前缀和】前缀和 + 哈希表 运用题
- 如何使用DevExpress WPF在WinUI中创建第一个MVVM应用?
- 基于ASP.NET开发的企信通源码 短信管理平台源码
- Delete the specified screen
- CPDA|数据分析师需要具备哪些基本功?
- How does the easycvr intelligent edge gateway hardware set power on self start?
- 第298场周赛
- Ogg-21.3 error reporting ogg-00768 failed to map database character to ulibcharaset
猜你喜欢

W10添加系统环境变量Path

This humble doctor's thesis is very popular: looking back, I feel sorry for countless mountains

The main data products of China's two Fengyun meteorological "new stars" will be open and shared with global users

系统集成项目管理工程师(软考中级)怎么备考?

jvm造轮子

Huawei launches new products again? These models have excellent functions
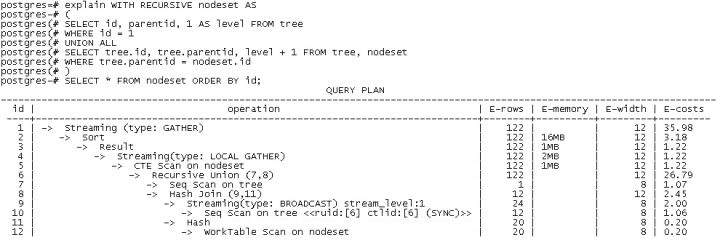
SQL operation: with expression and its application

6月22日直播 | 华南理工詹志辉: 面向昂贵优化的进化计算
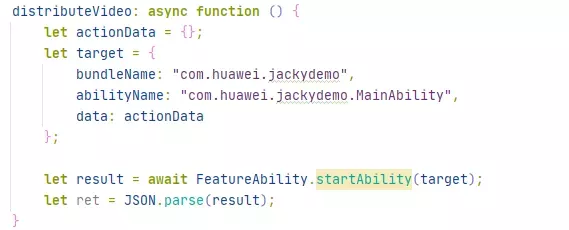
鸿蒙版“抖音”,这体验感赞

How many correct answers can you get to Huawei Hongmeng certification test questions?
随机推荐
API interface for discharge summary identification - medical bill OCR identification / discharge diagnosis record / electronic medical record / claim settlement service
R language uses neuralnet package to build neural network regression model (feedforward neural network regression model), visualize the scatter diagram between the actual target value and the predicte
R语言glm函数构建二分类logistic回归模型(family参数为binomial)、使用coef函数获取模型系数并解析系数意义
Dynamic programming [1] (knapsack problem)
Literature analysis CiteSpace 6.1.2 download and installation tutorial
Excel文件加密的两种方式
Shang Silicon Valley Shang Silicon Valley | what is Clickhouse table engine memory and merge
GetEmptyBlcoksPre Info
2022年6月25日PMP考试通关宝典-4
医疗费用清单秒速录入,OCR识别助力效率倍增
11 brève introduction et installation de la Bibliothèque d'analyse de soup beautiful
Linux MySQL command
Yolov5 trains its own data set to report error records
11 introduction and installation of beautiful soup parsing library
Does the school of Finance and business belong to a securities company? Is it safe to open an account?
【面试高频题】难度 1.5/5,经典「前缀和 + 二分」运用题
R语言dist函数计算dataframe数据中两两样本之间的距离并返回样本间距离矩阵,将距离矩阵输入给hclust函数进行层次聚类分析,method参数指定两个组合数据点间的距离计算方式
The GLM function of R language is used to build a binary logistic regression model (the family parameter is binomial), and the coef function is used to obtain the model coefficients and analyze the me
MFC interface library bcgcontrolbar v33.0 - Desktop alert window, grid control upgrade
使用uniapp框架搭建浙里办微应用(单点登录、埋点、适老化、RPC网关)