当前位置:网站首页>【 Gazebo introductory tutorial] speak the second model library into robot modeling and visualization (editor) model
【 Gazebo introductory tutorial] speak the second model library into robot modeling and visualization (editor) model
2022-08-04 17:03:00 【Born as Zhaoxu】
【Gazebo入门教程】第二讲 Model library import and visual robot modeling(模型编辑器)

文章目录
一、Model library import
- 1.1 下载模型文件
The model files here can be found and downloaded by yourself,Here is a link for your reference,This file contains many commonly used models,You can download it as a compressed package when using it,Ubuntu下解压缩、Instructions for moving files link blog:Ubuntu常见指令 ,下载链接如下:
https://github.com/osrf/gazebo_models
- 1.2 创建models文件夹
\qquad 指令如下:此处需要注意,gazeboFolders are hidden files,需要Ctrl + H解除隐藏
	cd /usr/share/gazebo-11
	mkdir -p models
\qquad 此处的gazeboThe folder path is always /usr/share/gazebo-11等
- 1.3 Copy the model file
- 将压缩包移动到models文件夹下:
sudo mv /home/zhaoxu/Downloads/gazebo_models_master.zip /usr/share/gazebo-11/models
- 解压压缩包:Move to the specified directory,Use the following unzip command
sudo unzip gazebo_models_master.zip
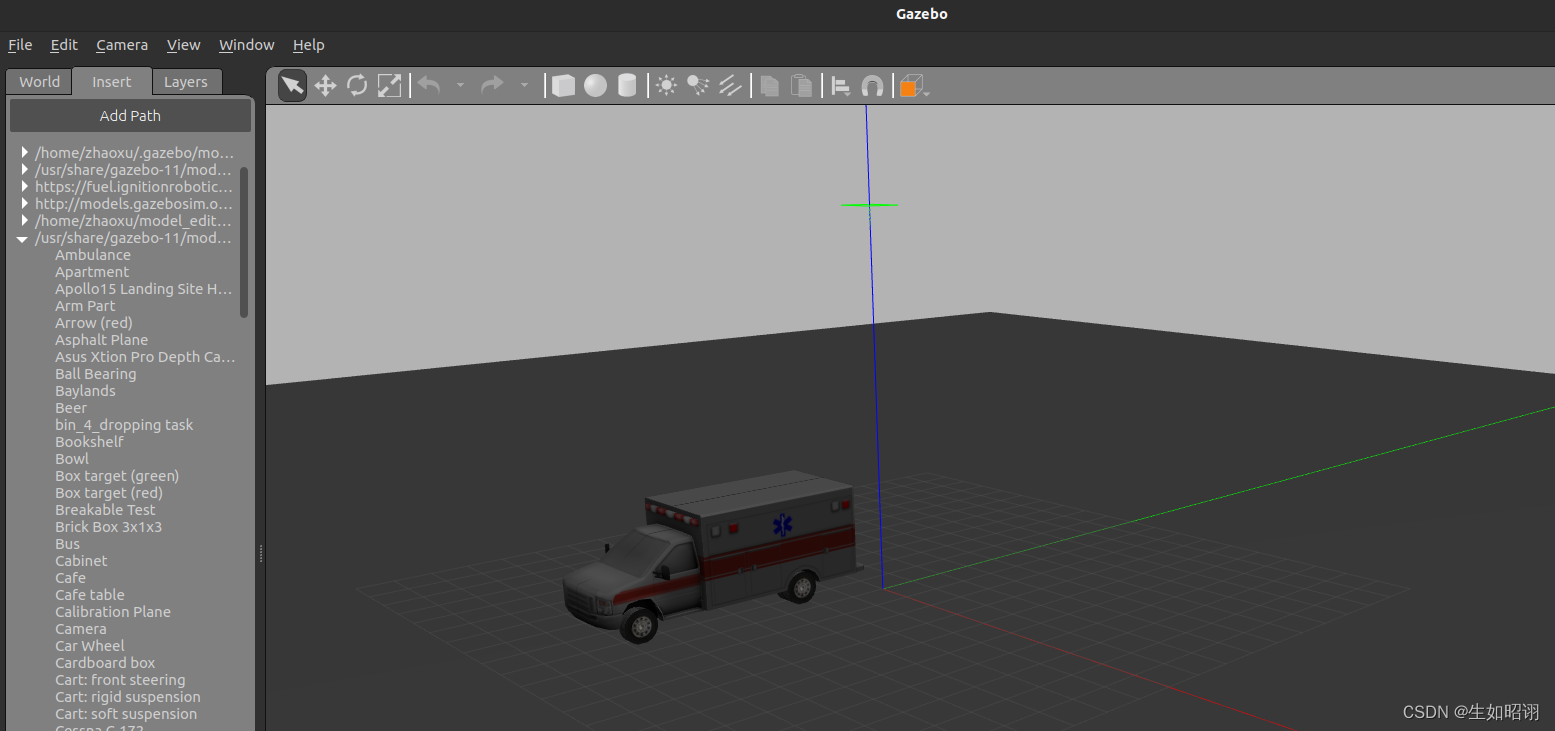
- 1.4 测试
\qquad 打开gazebo,在INSERTSelect Model Import from the panel(The corresponding path needs to be added),效果如下:
二、模型编辑器(Take wheeled vehicle construction as an example)
1. 用户界面介绍
- Enter the model editor:
- Click on the top menu barEdit,选择Model Editor
- 使用热键Ctrl + M
\qquad 注意:After entering the model editor, the main interface simulation will be paused,The bottom toolbar is hidden,The rest is very similar to the main interface,具体如下
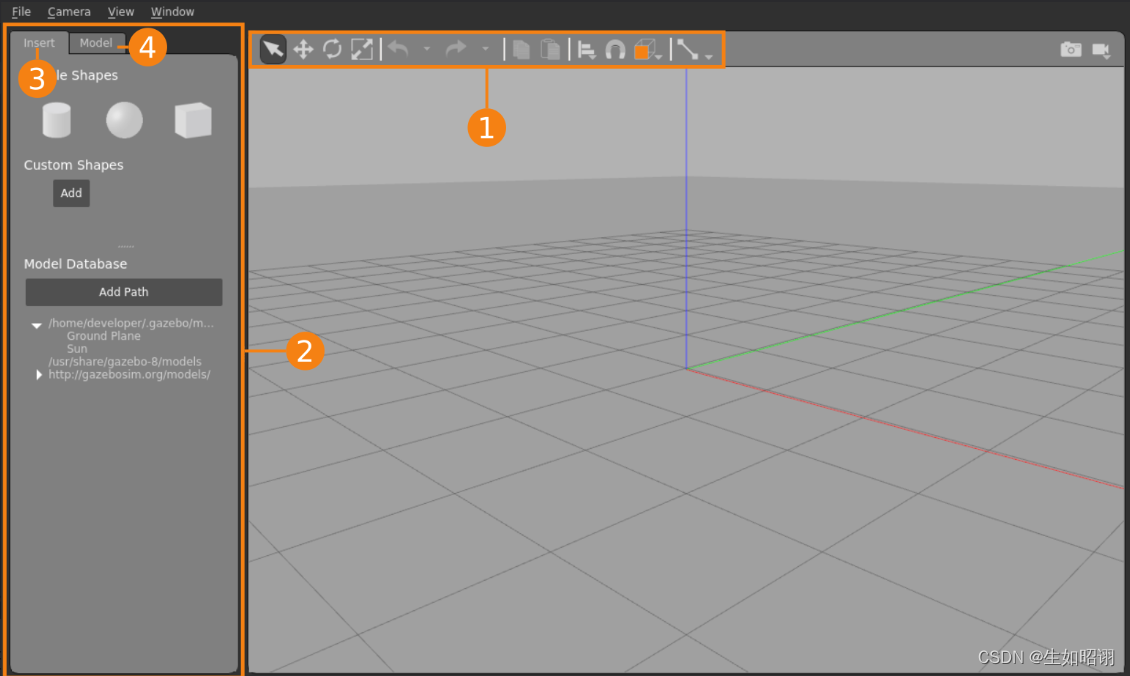
① 工具栏:Tools for editing models
\qquad Tools contains tools for interacting with scene objects,从左到右分别是:
平移、缩放、旋转、撤销与重做、复制和粘贴、对齐、捕捉、View adjustment and joint creation
② 调色板:左面板
\qquad The left panel specifically containsINSERT选项卡和MODEL选项卡,具体介绍如下
\qquad (1)INSERT选项卡
- 基本功能:Insert new parts(链接和模型)Added to model editor,具体部分如下;
- 简单形状:Basic geometric shapes,Form links in the model;
- 自定义形状:Import custom meshes from model links,支持COLLADA(.dae),3D Systems(.stl),Wavefront(.obj)和W3C SVG(.svg)文件
- 模型数据库:模型列表,Can be inserted in the same way as simple shapes;
\qquad (2)MODEL选项卡
- 基本功能:Set the model name and basic parameters,Display links in the model、关节、Model constraints and plugins
\qquad 注意:Modify the parameters to useLink Inspector,打开方式如下,The specific internal interface is explained in the example:
- Double-click an item in the model list;
- Right-click an item in the list,选择Open Link Inspector;
- 双击场景中的项目;
- Right-click an item in the scene,选择Open Link Inspector;
③ Visual modeling pitfalls:需要通过SDF文件完成
- Nested models and links within them cannot be edited;
- Cannot add and edit similar“平面、折线”Equivalent geometry;
- Heightmaps are not supported、CAD等功能;
2. Example analysis of wheeled vehicles
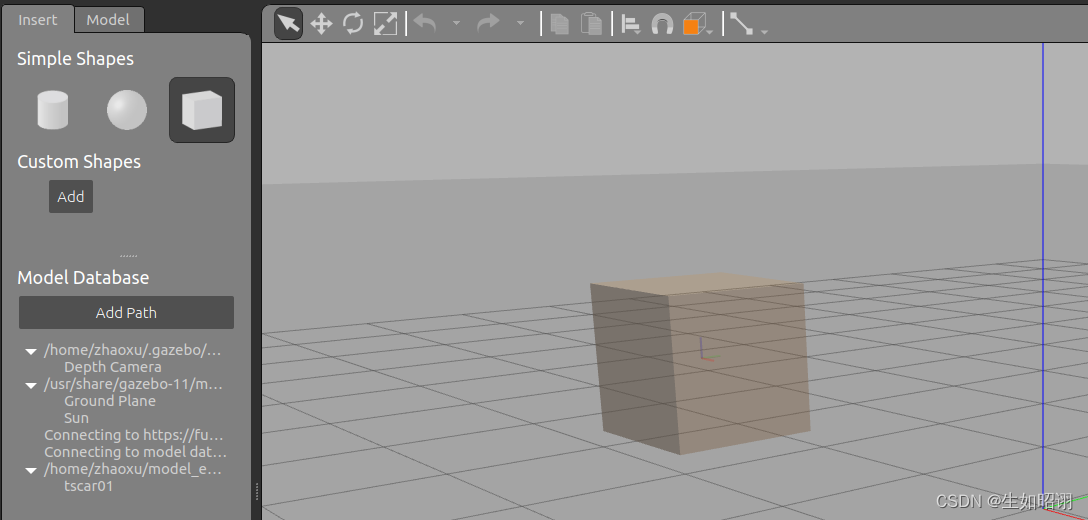
(1)底盘
\qquad ① Create the chassis(INSERT)
\qquad 左侧面板的INSERT选项卡,单击box图标,Drag to move to the target location in the scene,单击释放:
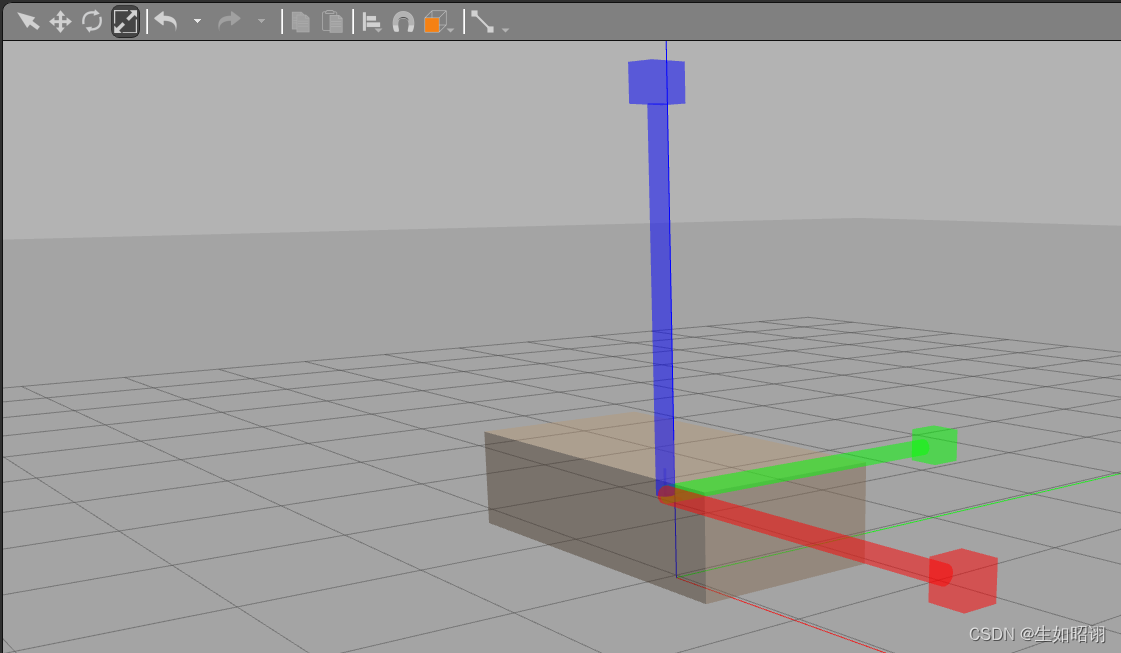
\qquad ② Adjust the chassis size(Toolbar scaling)
\qquad 首先选中缩放工具,Then select the chassis in the main interface,出现RGB标记,红色标记代表X轴,绿色代表Y,蓝色代表Z,Click and drag the corresponding marker to zoom the chassis,目标2m长(Ground grid units1m),The height is half the original height;
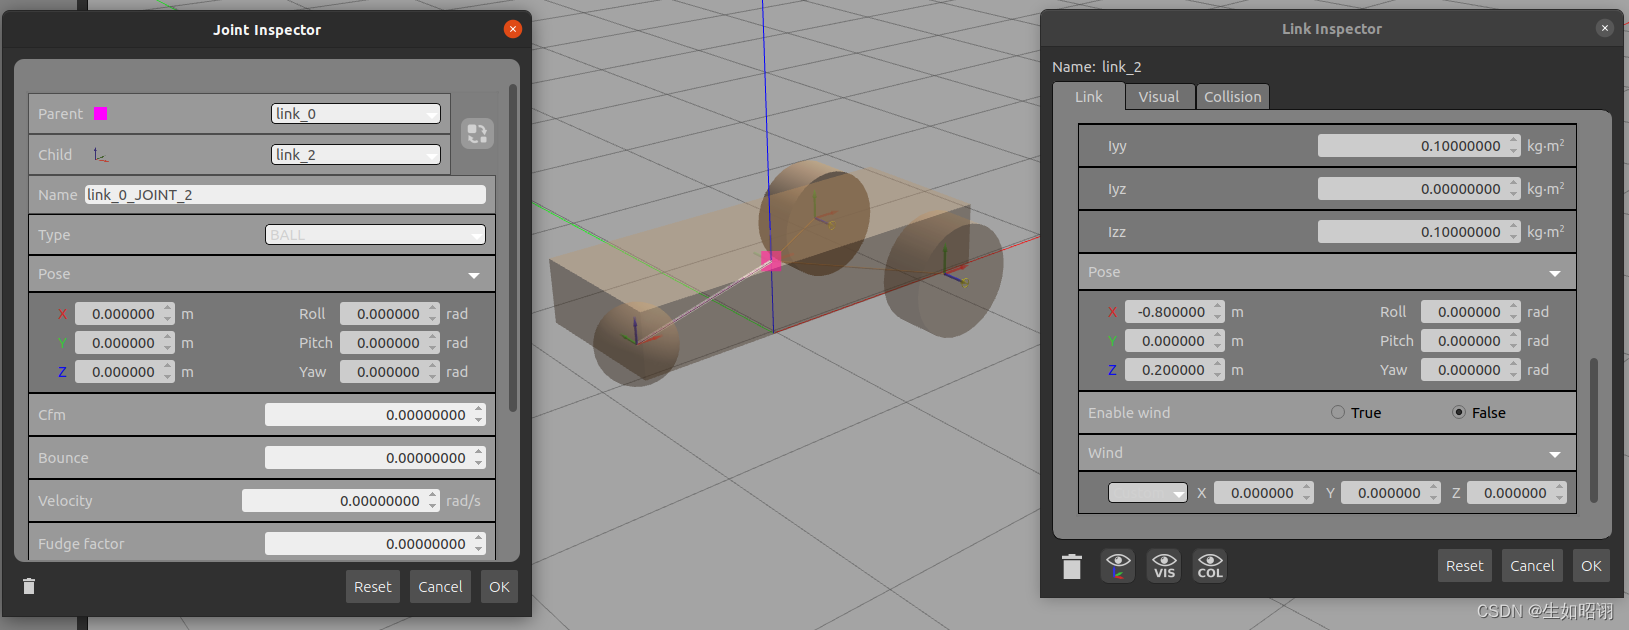
\qquad ③ Modify the chassis position(Link Inspector)
\qquad Open the joint inspector for the chassis,其中LinkResponsible for setting properties such as mass inertia density,VisualResponsible for setting shape dimensions,CollisionResponsible for setting collision boundaries,此处需要修改Link选项卡中的Pose参数,修改Z = 0.4m,然后选择OK保存更改并退出

(2)前轮
\qquad ① Insert and modify wheels(INSERT&Link Inspector)
\qquad 首先从INSERTInsert a cylinder in the tab(Leftmost simple shape),紧接着使用Link Inspector进行修改,将Pose中的Roll角调整为1.5707rad即90°,然后打开Visual栏,Expand the viewable,将Geometry中的Radius和Length分别调整为0.3m和0.25m,同样打开Collision栏,重复Visual中的操作,保存并关闭
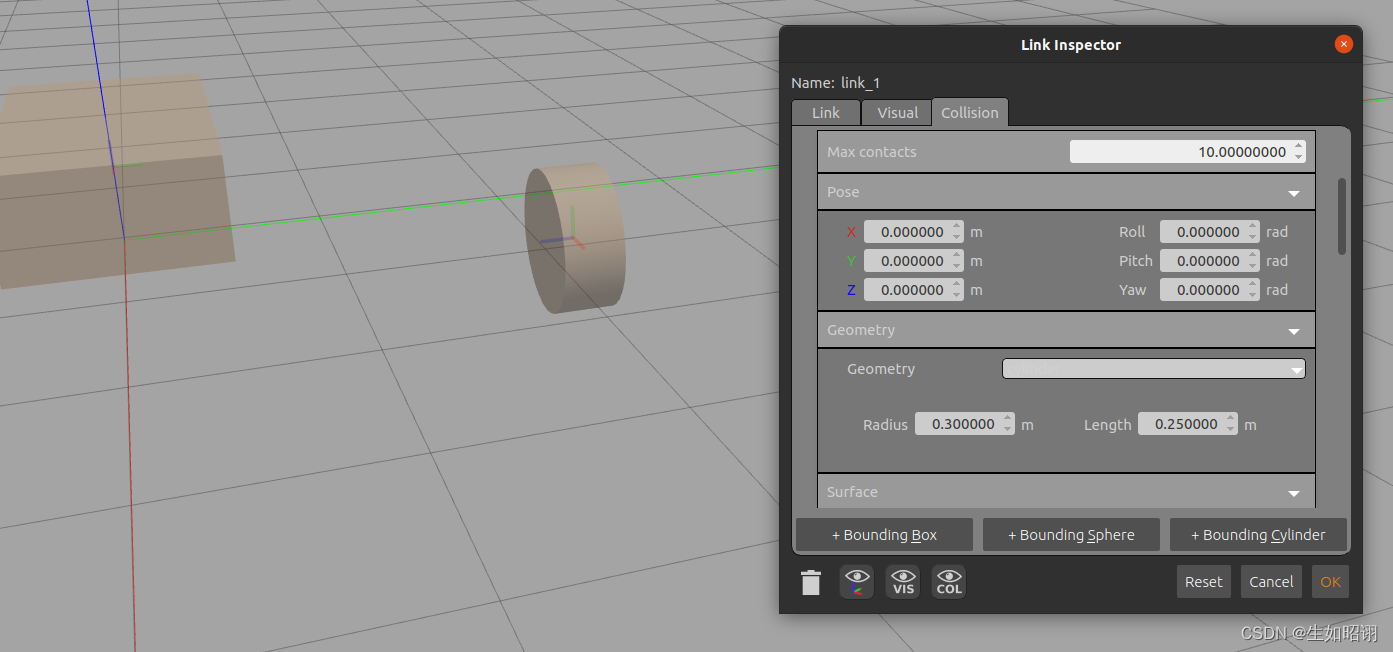
注意:The first step is to rotate the cylinder,The second step is to adjust the visual size,The third step is to adjust the collision simulation size
\qquad (如果visual和collision有差别,There will be a situation where the cylinder is set inside the cylinder, that is, through the mold)
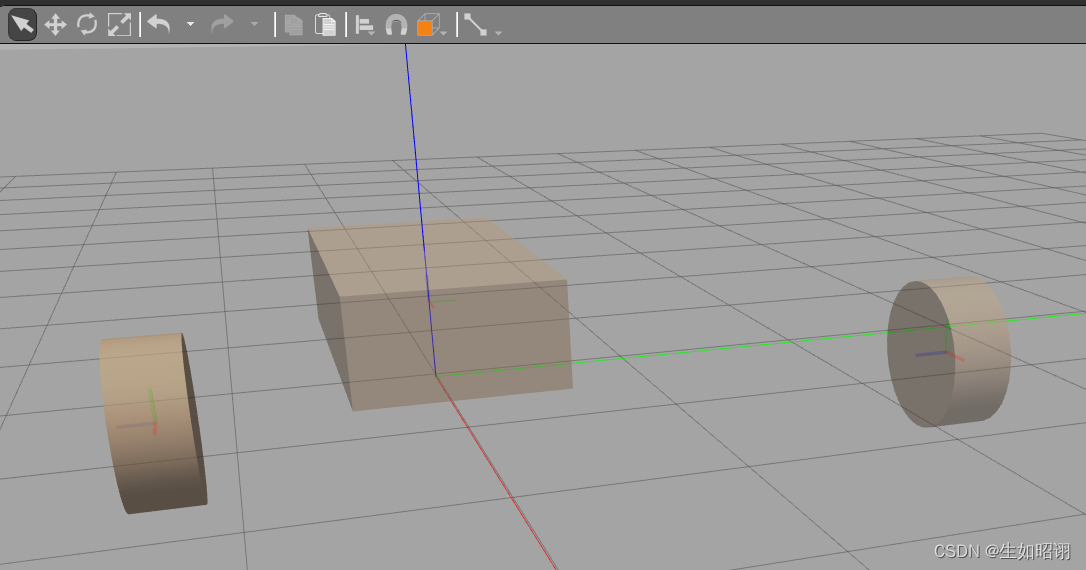
\qquad ② Duplicate the wheel and build the joint connections(Create Joint)
\qquad 首先,After selecting the wheel,Check the copy icon in the toolbar,Then click the paste icon to insert a copy wheel in the scene:
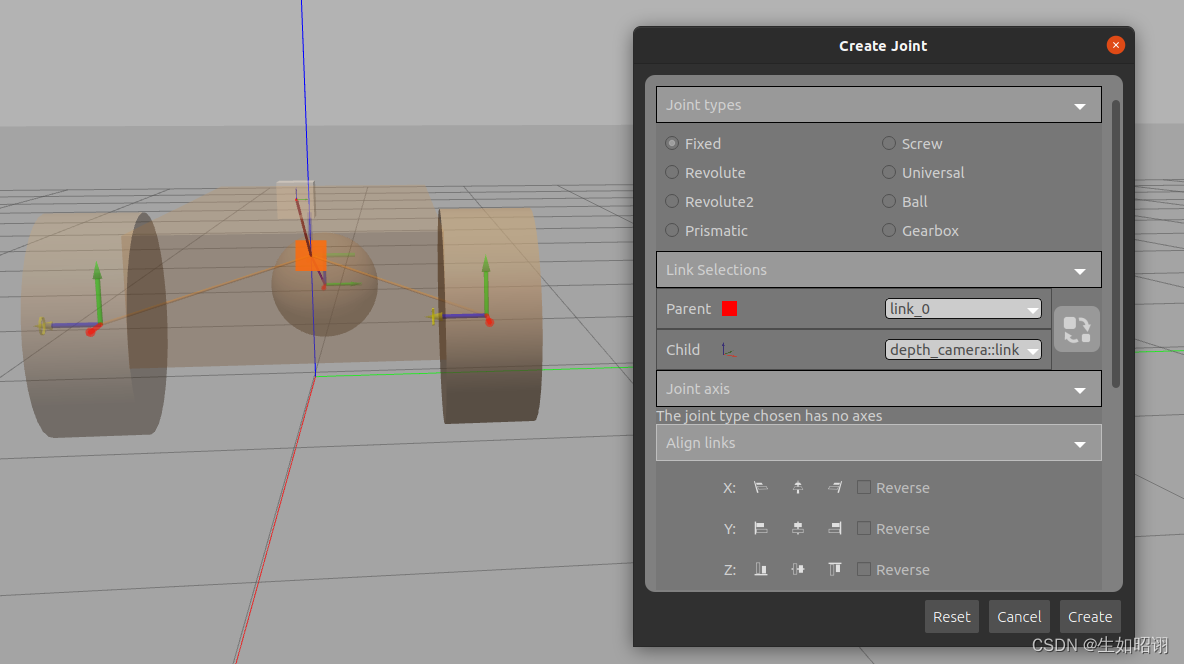
\qquad Add joints between the wheels and the chassis,单击工具栏上的Joint图标,进入Create Joint框:单击底盘将其设置为父代,单击轮子设置为子代,Joint Types选择为Revolute(旋转关节)
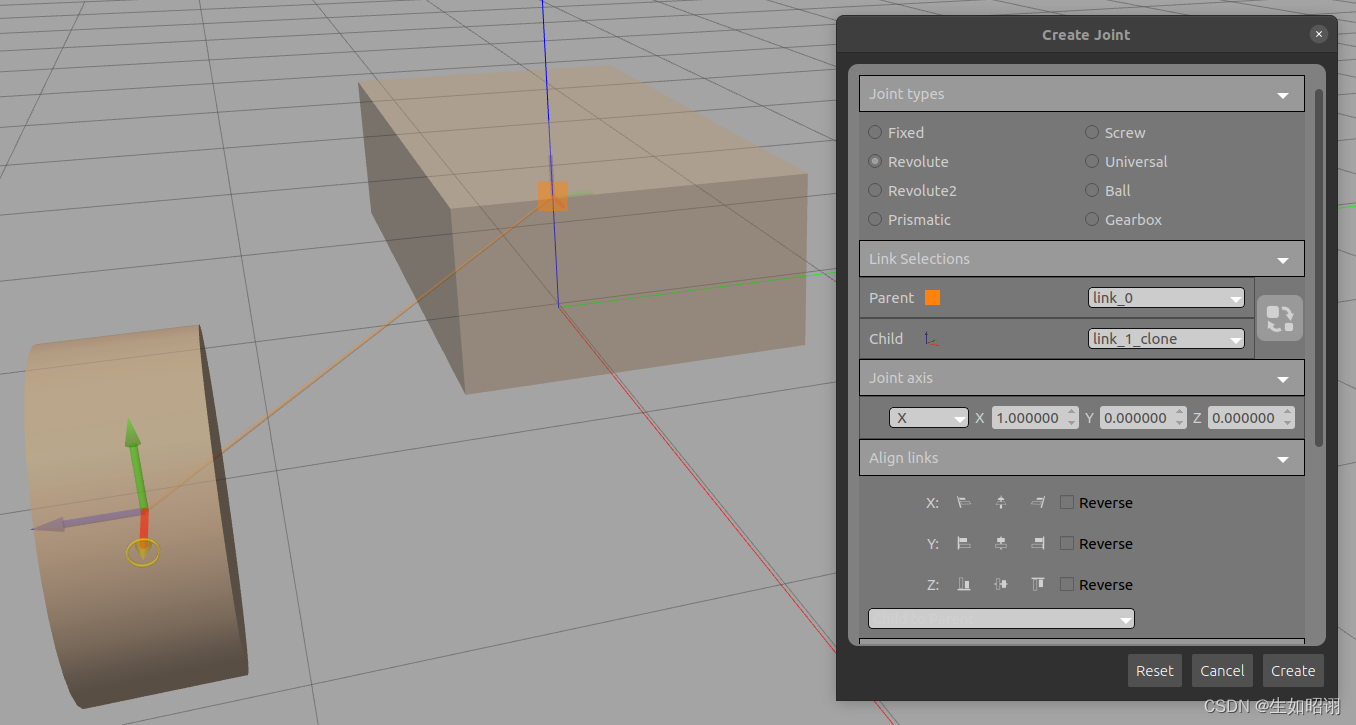
\qquad 配置旋转轴:将Joint axis修改为Z(0,0,1);Align the wheels with the chassis:使用Joint Creation中的Align links,单击X Align Max(xthe third column),单击Y Align Max(Ythe third column),and select the rightReverse,Set the wheel to the minimum value(The opposite direction of the maximum value)与底盘的最大值对齐,Repeat with the other wheel when you're done(此时Y Align MaxThe first one should be selected)
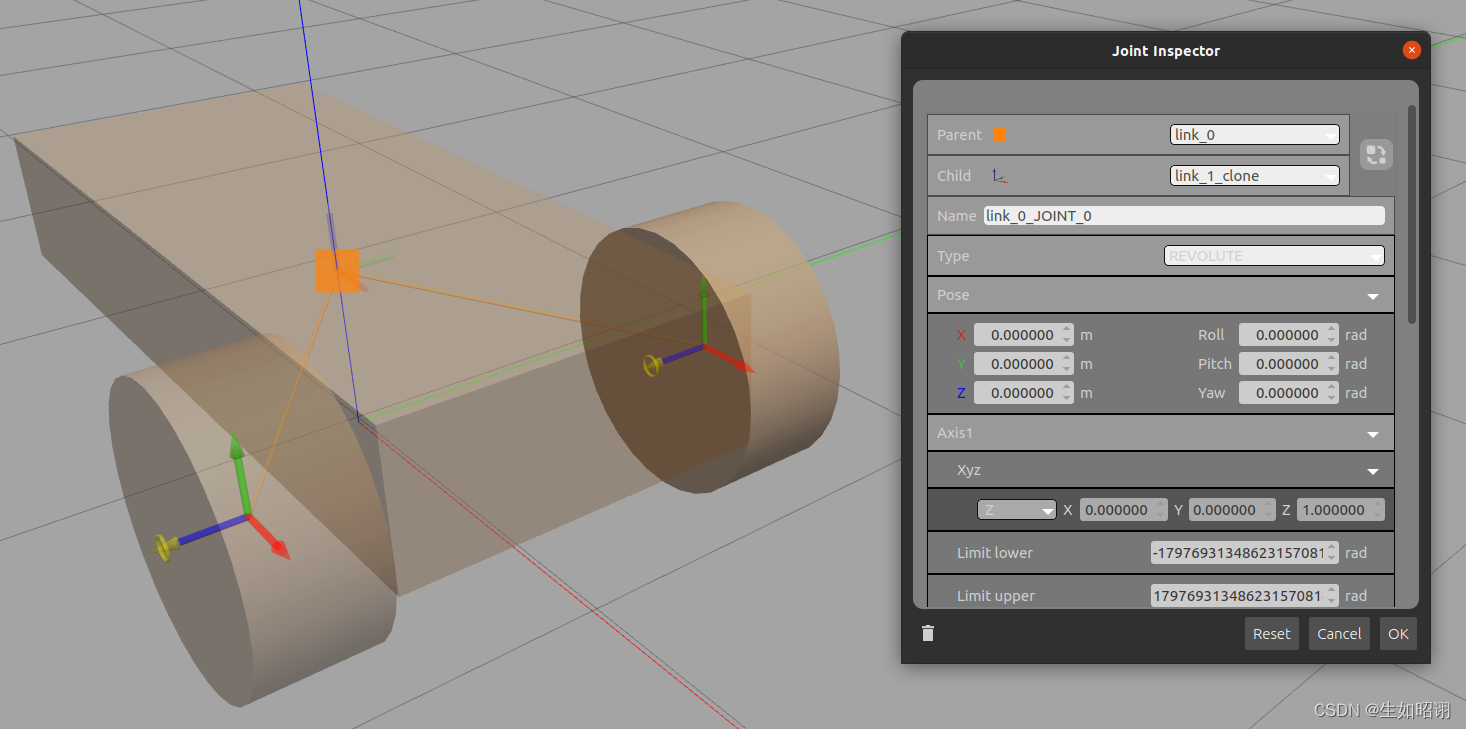
注意:Normalize for location,The chassis position can be set to (2.0,0.787,0.332),After setting up the joints set the height of the two front wheels to0.3m
(3)万向轮
\qquad First insert a sphere,Set the sphere radius to 0.2m,Next create the joints,注意:Joint types需为Ball,xAxis minimum alignment,y轴居中对齐,Finally place the ballsZ调整为0.2m即可(可从modelSelect the ball in the column)
(4)传感器
\qquad 在INSERT中Model DatabaseFind an existing library,Add a depth camera(Depth Camera),The pan is placed at approximatelyy轴中间、above the trolley,Next, create the fixed joint,令Joint types为Fixed即可,图示如下:
(5)插件(增强模型)
\qquad 在左侧栏中MODEL选项卡,在Model Plugins下单击Add按钮,进入Model Plugin Inspector界面,Add the plugin as shown below and save it:
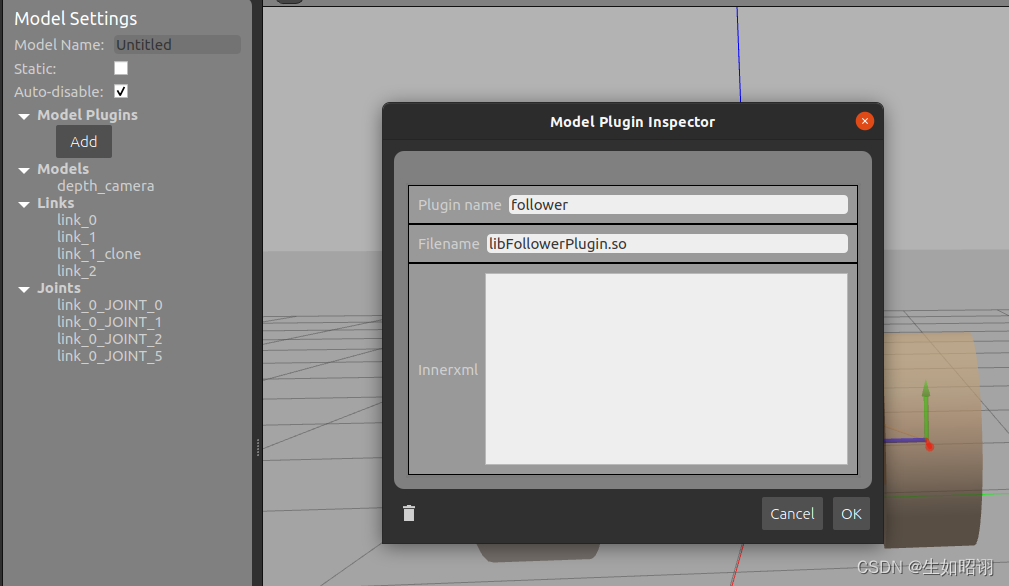
注意:FilenameCorresponds to the actual filename of the plug-in library stored on the local computer.It exists as a dynamically linked shared library,Hence the naming convention and extension.so(在Linux上),且由于Innerxml字段留空,在使用follower插件的情况下,它会对其附加的模型类型做出许多假设,并尝试自动找到关节和传感器
(6)保存模型
\qquad File菜单中选择Save As来保存模型,保存后再次进入 File菜单中选择Exit Model EditorExit the model editor to return to the simulation interface,You can start playback by inserting other objects to watch the car move,Editing the model requires right-clicking the cart and selectingEdit Model

总结
- 内容分析:This blog mainly introduces the GazeboHow to import an existing model library,And according to a detailed example of a wheeled trolley pairGazeboThe model editor in ,Create joint links graphically,And complete the robot connection by setting joints and so on,Finally, add corresponding sensors and plug-ins to realize the motion and other functions of the robot,The next blog will describe how to use itSDF文件在GazeboBuild the robot model and complete the simulation,敬请期待.

- 注意:本文参考了GazeboThe official website and Gu Yue are in the middleGazebo有关教程,The main purpose is to facilitate self-inquiry knowledge,Consolidate the learning experience,无任何商业用途
边栏推荐
猜你喜欢
开一个羽毛球馆大概需要多少钱?大约15万左右可以搞定!
美容院管理系统有哪些促销方式?

麒麟信安石勇博士荣获openEuler社区年度开源贡献之星

leetcode 48. Rotate Image 旋转图像(Medium)
Mobile Hisense IP102H_905L3-B_wire brush firmware package
Clearance sword refers to Offer——The sword refers to Offer II 010. and the sub-array of k
浙江移动咪咕MGV2000-K4_ZJ_S905l2_7661_线刷固件包

LeetCode 每日一题——1403. 非递增顺序的最小子序列
湖北移动中兴B860AV2.1_S905L_线刷固件包

ping不通百度
随机推荐
Cesium快速上手0-Cesium安装与基本介绍
"Distributed cloud best practices" BBS, on August 11, shenzhen
SRM Supplier Collaborative Management System Function Introduction
并发编程原理学习-reentrantlock源码分析
Mobile BesTV_R3300-L_S905L_8189_wire brush firmware package
JSP的Web监听器(Listener)
【Gazebo入门教程】第二讲 模型库导入与可视化机器人建模(模型编辑器)
【小程序】实现发动态功能
Hubei Mobile HG680-LV_S905L3B_wire brush firmware package
shell脚本详解-------循环语句wuile循环和until循环
跨域传递数据(iframe)
从-99打造Sentinel高可用集群限流中间件
域名哪家便宜?怎么买便宜域名?
nyist 301 递推求值(矩阵快速幂)
SAP 电商云 Spartacus UI SSR 里 engine 和 engine instance 的区别
华为云数据治理生产线DataArts,让“数据‘慧’说话”
机器学习(十六):主成成分分析(PCA)
win11如何退出安全模式
SRM供应商协同管理系统功能介绍
跨链桥已成行业最大安全隐患 为什么和怎么办