Overview of application function modules
The enterprise portal application consists of five pages , And different pages have different functional modules , As shown in the figure below :
Application display
The main function of enterprise portal application is enterprise dynamic 、 Display of enterprise information , The application details are as follows :

Application data source design
Data model creation
Before you create an application , We need to know , When there are dynamic data function modules in the application , You need to create a corresponding data model for management . Take the enterprise portal application as an example , The data model and fields we need to create are as follows :

Data entry
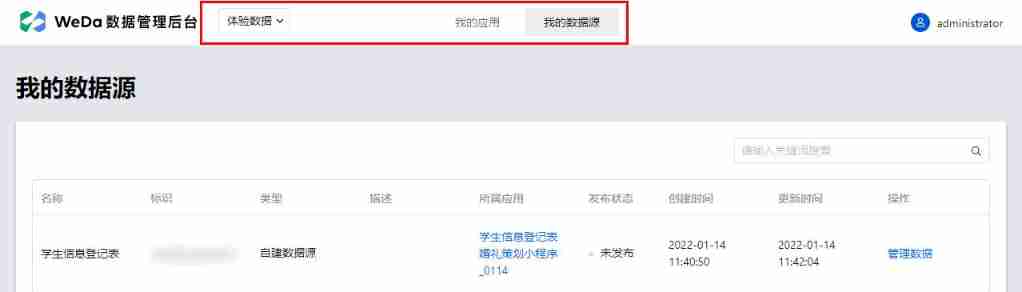
After the data model is created , Need to go to Data management background Enter experience data , Steps are as follows :
- stay Data model Click on the page Data management background Get into .

- Get into Data management background > My data source page , The replacement data is Experience data .
- Take the enterprise dynamic table as an example , single click Management data Enter the corresponding management background .

- single click newly build , Enter the data creation page .

- Click... After entering experience data on the data creation page Submit that will do .

? In the process of actually building an application, you need to view the real state of the page through real-time preview , And because the data called by real-time preview is experience data , Therefore, it is recommended to enter the experience data before developing the application , It is convenient for application development and debugging .
Prerequisite
- Complete the of enterprise portal application Data model design .
- complete Create a custom application .
step 1: New page
Create a new page , Name it Enterprise portal home page .
step 2: Create a home page banner Figure module
Select... In the edit area on the right side of the page Ordinary containers Components , Then place... In the ordinary container assembly Wheel planting Components , This can then be done by adding picture Component to realize the rotation of pictures , If there are picture configuration requirements , You can select the picture component and replace the picture in the configuration area on the right .
? Common containers can be used for unified management and style adjustment of components , Therefore, in the process of practical application development, it is recommended to place components into ordinary containers according to modules , Easy to manage, but also improve development efficiency .
step 3: Create application scenario navigation
By looking at the page design, you can find , Application scenario navigation consists of four navigation Tab constitute , And the arrangement is horizontal , So in order to achieve this function , We need to use model variables 、 Grid layout components and component cycle functions .
Create a single navigation Tab
- Create a normal container , And add... Into the container Grid layout Components , Configure the column scale attribute of the grid component to "12".

- In the grid container Column slot Drag into a normal container , And put picture and text components in ordinary containers .

? Notice here , When placing picture and text components , The picture component in the outline tree needs to be above the text component , Otherwise, the position will be reversed .
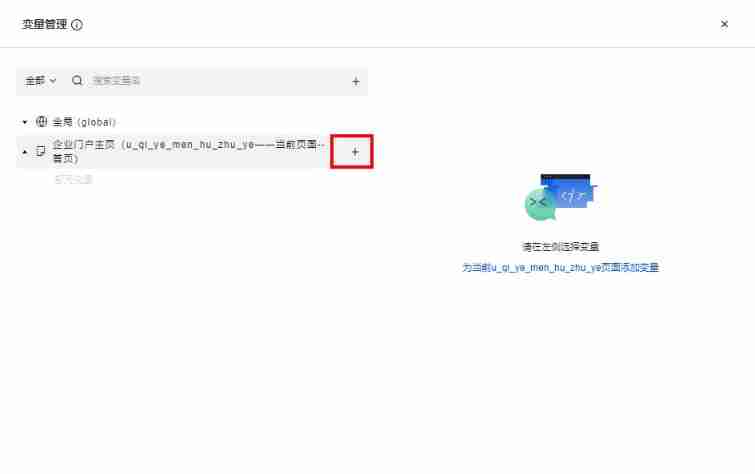
Create model variables
- Click on the Variable , Enter the variable editing page .

- On the current page , single click Create button Create model variables .
- Enter the variable ID , And select the variable type as Model variables , Data source selection Application scenario table , Variable initialization method selection Query list - built-in (WedaGetRecords). Design according to the design drawing , Only four navigations are shown here Tab, Therefore, the method parameters are adjusted according to the conditions .

Component binding loop
- Select the normal container component , And on the right attribute > General configuration > Circular display Middle click Bind loop button .

- Select the newly created model variable in the pop-up window , single click determine .

- After returning to the editor page , Select the picture component under the container , Click... On the right Data binding button .

- Select the loop variable in the pop-up window Tab, And select the corresponding data model field to complete data binding .

- Bind the data of the text component in the above way , After completion, the page style is as follows :

Style adjustment
After the cycle and data configuration are completed , The style of this module is not shown as in the application design drawing , Therefore, we need to adjust the style of the component to make it meet the expectations , First, adjust the width and height of the picture component .
- Click the style in the edit area on the right Tab, Adjust the width and height of the picture component to 100.

- You can see that the size of the picture becomes normal , Then we adjust the picture 、 The centered state of the text component , Click normal container component , The style in the configuration area Tab in , Select the layout mode as elastic layout , The spindle direction is set to vertical , The spindle alignment is set to horizontal center , The secondary axis alignment is set to the midpoint alignment .
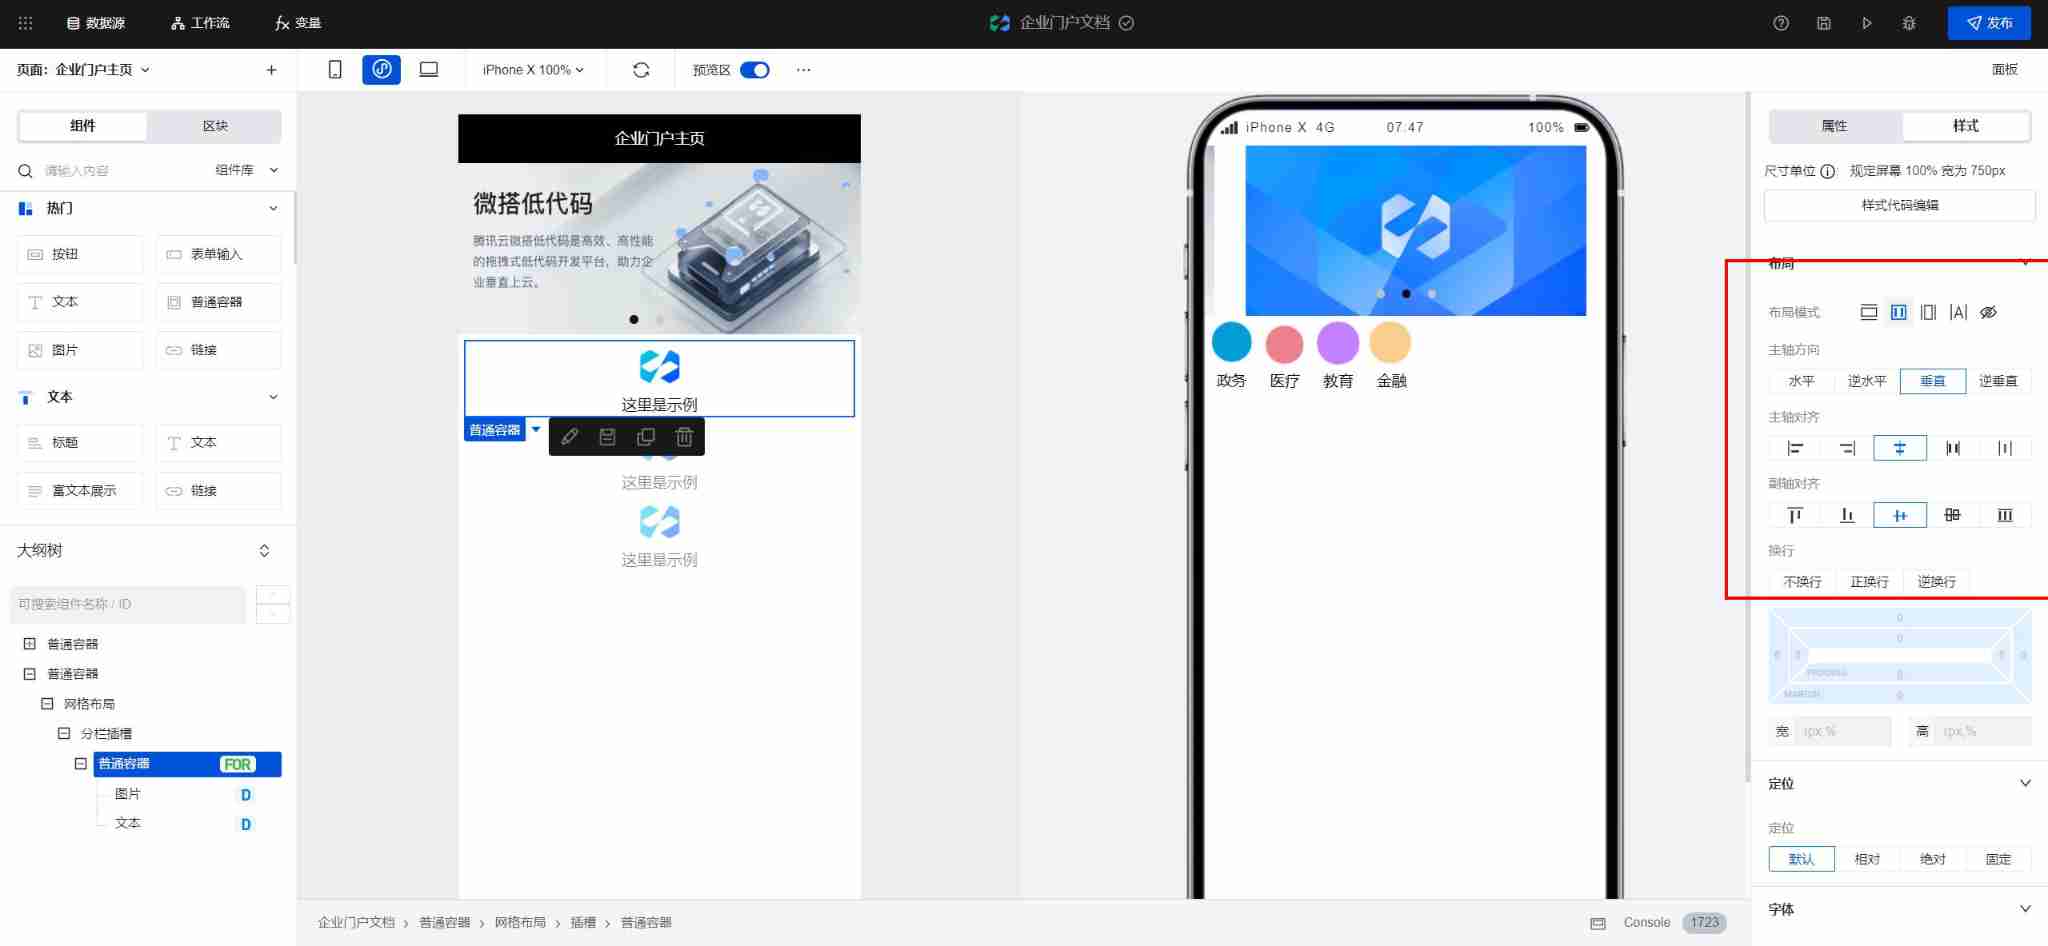
About elastic layout :
If the elastic layout is set, the components in the container will change according to the currently set spindle direction 、 Spindle alignment 、 Align the secondary axis to adjust the layout . - Then adjust the width of ordinary container components , The width is set to 200, You can see that the components have been arranged according to the style in the design drawing .

step 4: Enterprise dynamic navigation
Create module title
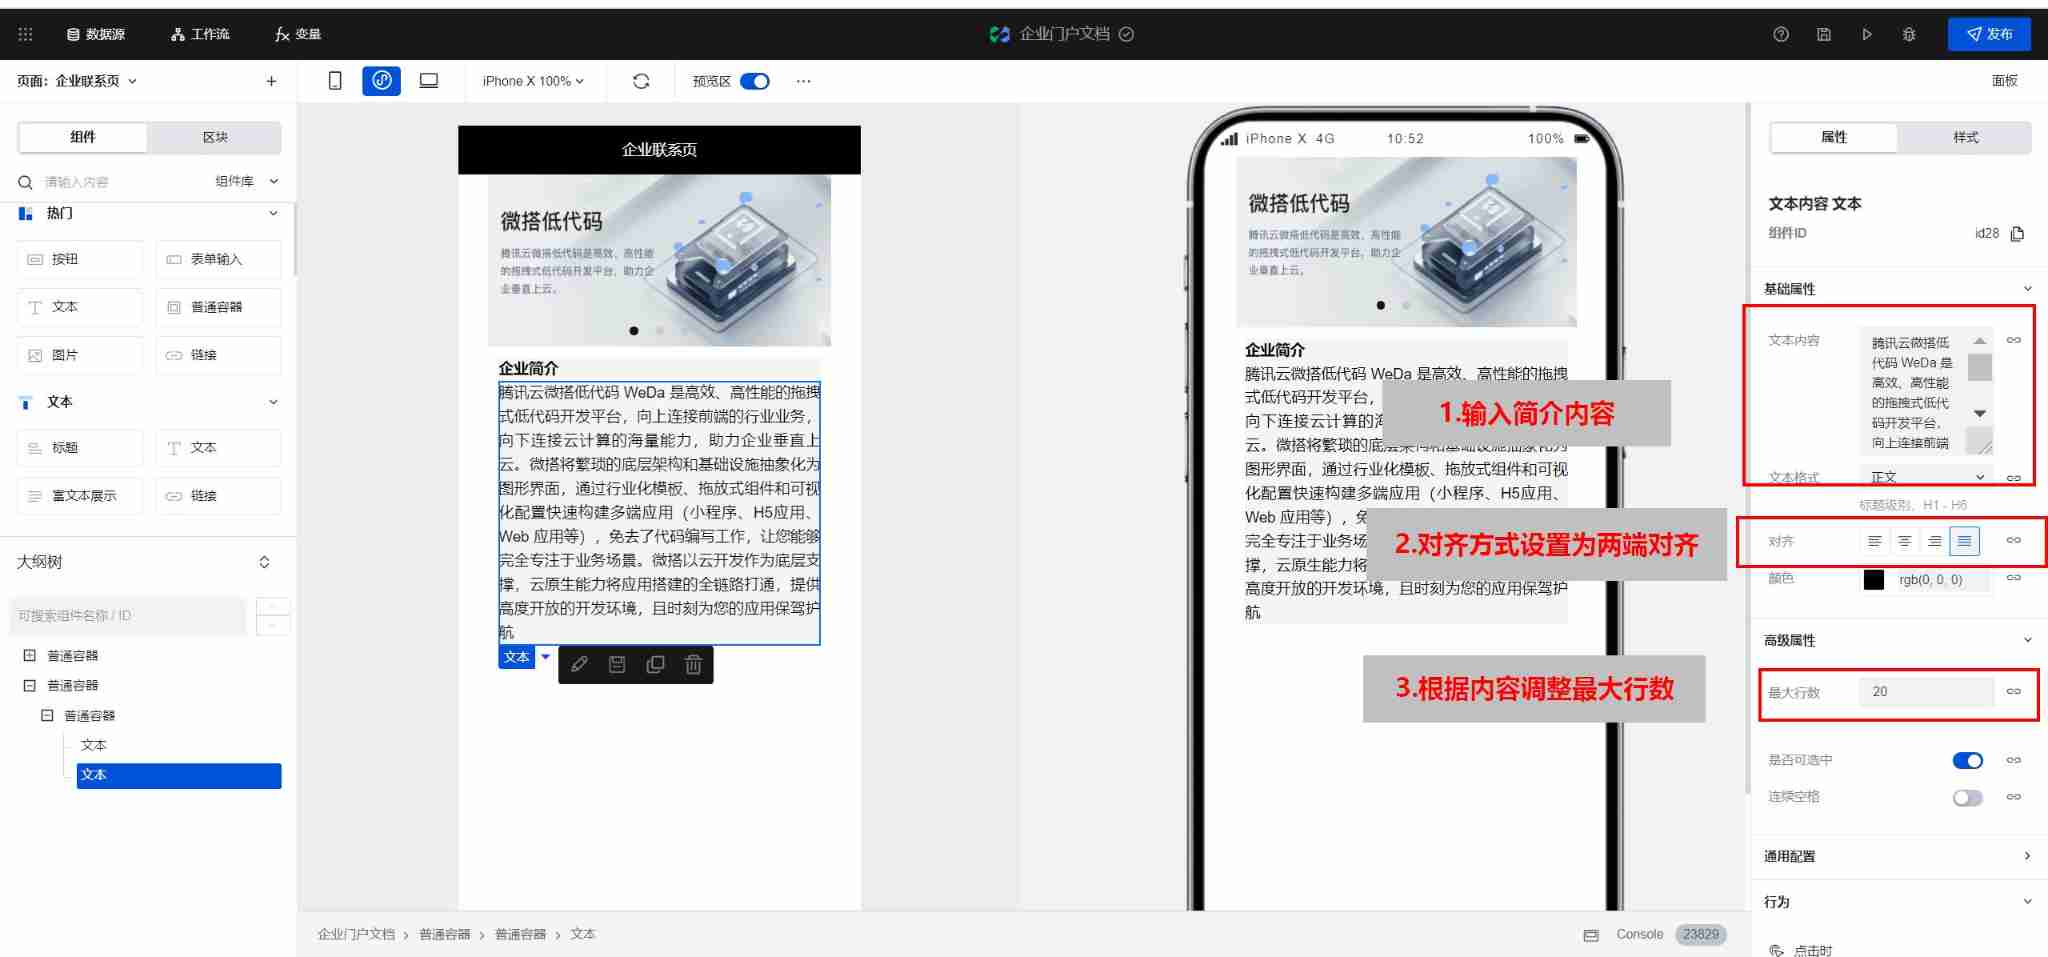
Create a normal container , Add... To a normal container Text component , In the configuration area on the right, modify the content of the text component to " What's new ", Change the alignment to " Align left ", Then click style Tab, Set the property of the text to " crude ".
Create a text list
Add a normal container , Then add... Under the container Graphic display items Components , Then open the component in the right configuration area Custom content Options .
? After the custom content option is turned on , The graphic display item component can display the content in the form of slots , Just place the component in the main content slot .
Adjust the content of the picture and text list component
Delete... In the right configuration area " Content " Text in configuration item , Then insert two text components into the main content slot , After modification, the component style is shown in the following figure :
Create model variables
And step 3 Is created in the same way , Create model variables , Variable binding Enterprise dynamic table , Variable initialization method selection Query list - built-in (WedaGetRecords). Design according to the design drawing , Here are only the four latest developments in time , Therefore, the method parameters are adjusted according to the conditions .
Component binding loop
- Bind a loop for the parent container of the graphic display item , For the binding method, please refer to... Above Loop binding .

- Select the graphic display item component , Bind data for the picture attribute of the graphic display item component .

- Data binding for text components in the same way .

Module style adjustment
- Select the parent container of the graphic display item , Click the style in the configuration area on the right Tab, choice Border type It's a dotted line , Border width by 1, The color selection is gray .

- In the style of the parent container Tab Adjust the spacing of graphic display items in , As shown in the figure below :

- Select the outermost container , Adjust the spacing between the module and the application scenario module . thus , The construction of enterprise dynamic module is completed .

step 5: Enterprise partner module
It is created in the same way as the application scenario module , Use grid layout 、 Text 、 Picture component to realize . For specific implementation steps, see step 3.
The application scenario details page is set up
step 1: New page
New application scenario details page , For the page creation process, see Above, .
step 2: Scenario details module creation
- The scene details module consists of title and details , Create a parent container , Then add text component and rich text display component in the parent container to complete the creation of the module .

- Change text font size , And in the style Tab Bold in .

step 3: Contract customer module creation
See also Application scenarios establish , Created in the same way .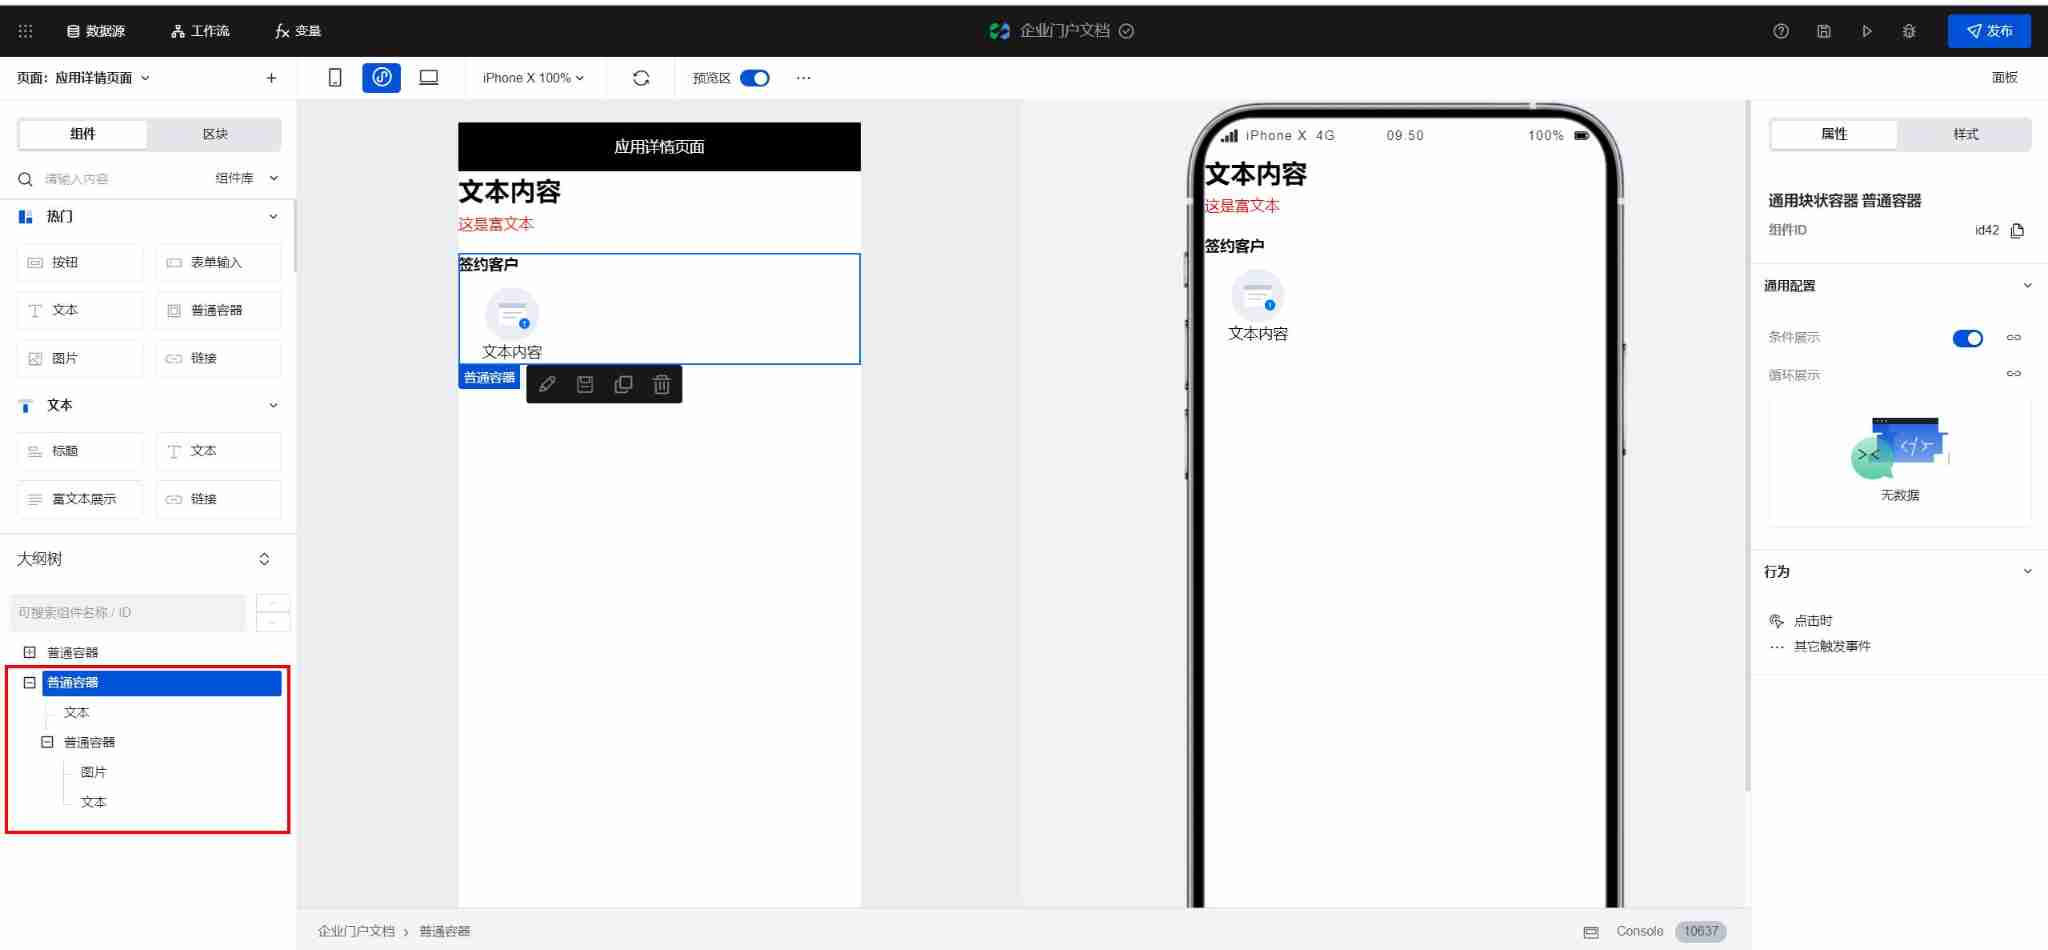
! The display content of the detail page is obtained according to the jump transfer parameters , For the variable binding of this module, see Application scenario page logic design .
The enterprise dynamic details page is set up
step 1: New page
New application scenario details page , For the page creation process, see Above, .
step 2: Scenario details module creation
- The scene details module consists of title and details , Create a parent container , Then add two text components to the parent container ( Corresponding to the title and date respectively ) With the rich text display component, the module can be created .

- Change text font size , And in the style Tab Bold in .

! The display content of the detail page is obtained according to the jump transfer parameters , For the variable binding of this module, see Home page dynamic page logic design .
Dynamic list page construction
The construction method of the dynamic list page is roughly the same as that of the dynamic list module of the home page , It is worth noting that , The dynamic list page here shows all the dynamic , Therefore, the bound model variables are different , Here, the model variable should call view list - built-in (WedaGetList) Method .
The enterprise contact page is set up
step 1: home page banner Figure module
Construction method and home page banner The modules are the same , See Above, .
step 2: Brand profile module
- Create a normal container , And add another container with a width of 80% Container as module background , Set the container background color to gray .

- Select the parent container , The style in the right edit area Tab Select elastic layout , Center the container just used as the background .

- Add two text components to the background container , As the carrier of the title and introduction respectively .

- Select the first text component , In the style of this component Tab Set the font to bold , And modify the text content to enterprise profile .

- Select the second text component , Set the alignment of this component to full-justified , And modify the text content to the corresponding introduction content , And adjust the maximum number of lines of the text component according to the introduction .
step 3: Contact us
- Same as the brand profile module , Create a background container and Center , And add a text component in the background container as the module title , Change the content of the text component to “ Contact us ” And make it bold .

- Then add two grid layout components to the container , In the configuration area, uniformly adjust the column proportion to 12.

- Insert picture component and text component into the slot of the first grid layout component , Replace the component content with icon With the corresponding copy , And adjust the size and location of the components according to the actual needs .

- Repeat the above steps , Add the content of the enterprise mailbox to complete the creation .

Realize the application scenario navigation on the home page and jump to the application scenario details page
Design thinking : Get the current click through the low code method Tab The data model corresponding to the element ID, This was followed by Tab Element to set the jump time , And the data model ID Pass it to the application scenario details page as a parameter , Application scenario details page according to data model ID call WedaGetRecords Method to obtain the corresponding data and implement the front-end page display .
step 1: Create a normal variable
by Enterprise portal home page Page create normal variable , Used to receive click navigation Tab The data model returned when ID. Click above Variable , Create a common variable named... On the current page getId, Data type selection string .
step 2: For navigation Tab Configure events
Binding variable assignment method
- Select navigation... In the outline tree Tab Corresponding ordinary container , Select... In the configuration area on the right Clicking time The trigger condition , Call up the event configuration pop-up window .

- Select the execution action as Variable assignment Variable name select the ordinary variable just created getId.

- Click the image above A variable's value On the right side of the Data binding button Call up the data binding pop-up window , And loop the object Tab Choose from _id.

- When the variable binding is complete, click preservation that will do .

Bound page Jump method
- Check navigation again Tab The corresponding ordinary container and select... In the configuration area on the right Clicking time The trigger condition , Call up the event configuration pop-up window .
- Configure page Jump in the event pop-up window and click New parameter variable .

- After the parameter variable is created , single click Variable binding button .

- The first step of binding is to receive the data model ID Click... After the normal variable preservation that will do .

! Here, you need to pay attention to the order of method creation , You need to assign a variable before binding the page Jump method , Otherwise, it will cause the parameter to be null when the page jumps .
Create model variables
by Application scenario details page Create model variables , Use the home page to navigate Tab Data query and rendering based on the parameters passed .
- Click the upper right corner to switch to Application scenario details page , Click above Variable , Create model variables for this page , After binding the application scenario table, select variable initialization method as Check the list - built-in (wedaGetItem), Then initialize the variable and bind the variable for the data ID at the input parameter .

- In the variable binding pop-up window, select the parameter variable just generated through page Jump and click preservation .

- Select the components in the application scenario details page , And click... In the configuration area on the right Variable binding button .

- Select the newly created model variable to complete the binding .

Method test
Enter the application home page , After opening the live preview, click the application scenario Tab Button , Check whether it can jump normally and whether the content of the detail page is displayed as expected .
Realize the dynamic list navigation of the home page and jump to the dynamic details page
Design thinking : And application scenarios Tab Navigation is implemented in the same way , By passing in the data source when jumping to the details page ID Realize this function .
step 1: Create a normal variable
Create a normal variable for the current page , Used to receive the data model returned when clicking on the list ID. Click above Variable , Create a common variable named... On the current page getListID, Data type selection string .
step 2: Configure events for the list
Bind custom methods
- Select the normal container corresponding to the list in the outline tree , Select... In the configuration area on the right Clicking time The trigger condition , Call up the event configuration pop-up window .

- Select the execution action as Variable assignment Variable name select the ordinary variable just created getListID.

- Click the image above A variable's value On the right side of the Data binding button Call up the data binding pop-up window , And loop the object Tab Choose from _id.

- When the variable binding is complete, click preservation that will do .

Bound page Jump method
- Select the normal container corresponding to the list again and select... In the configuration area on the right Clicking time The trigger condition , Call up the event configuration pop-up window .
- Click... After configuring page Jump and parameter transfer in the event pop-up window preservation .

! Here, you need to pay attention to the order of method creation , You need to assign a variable before binding the page Jump method , Otherwise, it will cause the parameter to be null when the page jumps .
Create model variables
by Enterprise dynamic details page Create model variables , Use the home page to navigate Tab Data query and rendering based on the parameters passed .
- Click the upper right corner to switch to Enterprise dynamic details page , Click above Variable Create model variables for this page , After binding the enterprise dynamic table, select variable initialization method as Check the list - built-in (wedaGetItem), Then bind the variables for the data ID at the variable initialization input parameter .

- Select the components in the dynamic details page in turn , And click... In the configuration area on the right Variable binding button .

- Select the newly created model variable to complete the binding .

Method test
Enter the application home page , After opening the real-time preview, click the list , Check whether it can jump normally and whether the content of the detail page is displayed as expected .
? The module method can be reused for the operation of jumping from the dynamic list page to the detail page .
Achieve the bottom Tab Column jump
- As can be seen from the application design drawing , The application has three pages that need to be created at the bottom Tab Column component , They are the application home page 、 Dynamic list page and enterprise contact page .
- Take the home page as an example , After entering the home page , Select... In the left component area Tab Column component , The component will be automatically fixed to the bottom of the page .
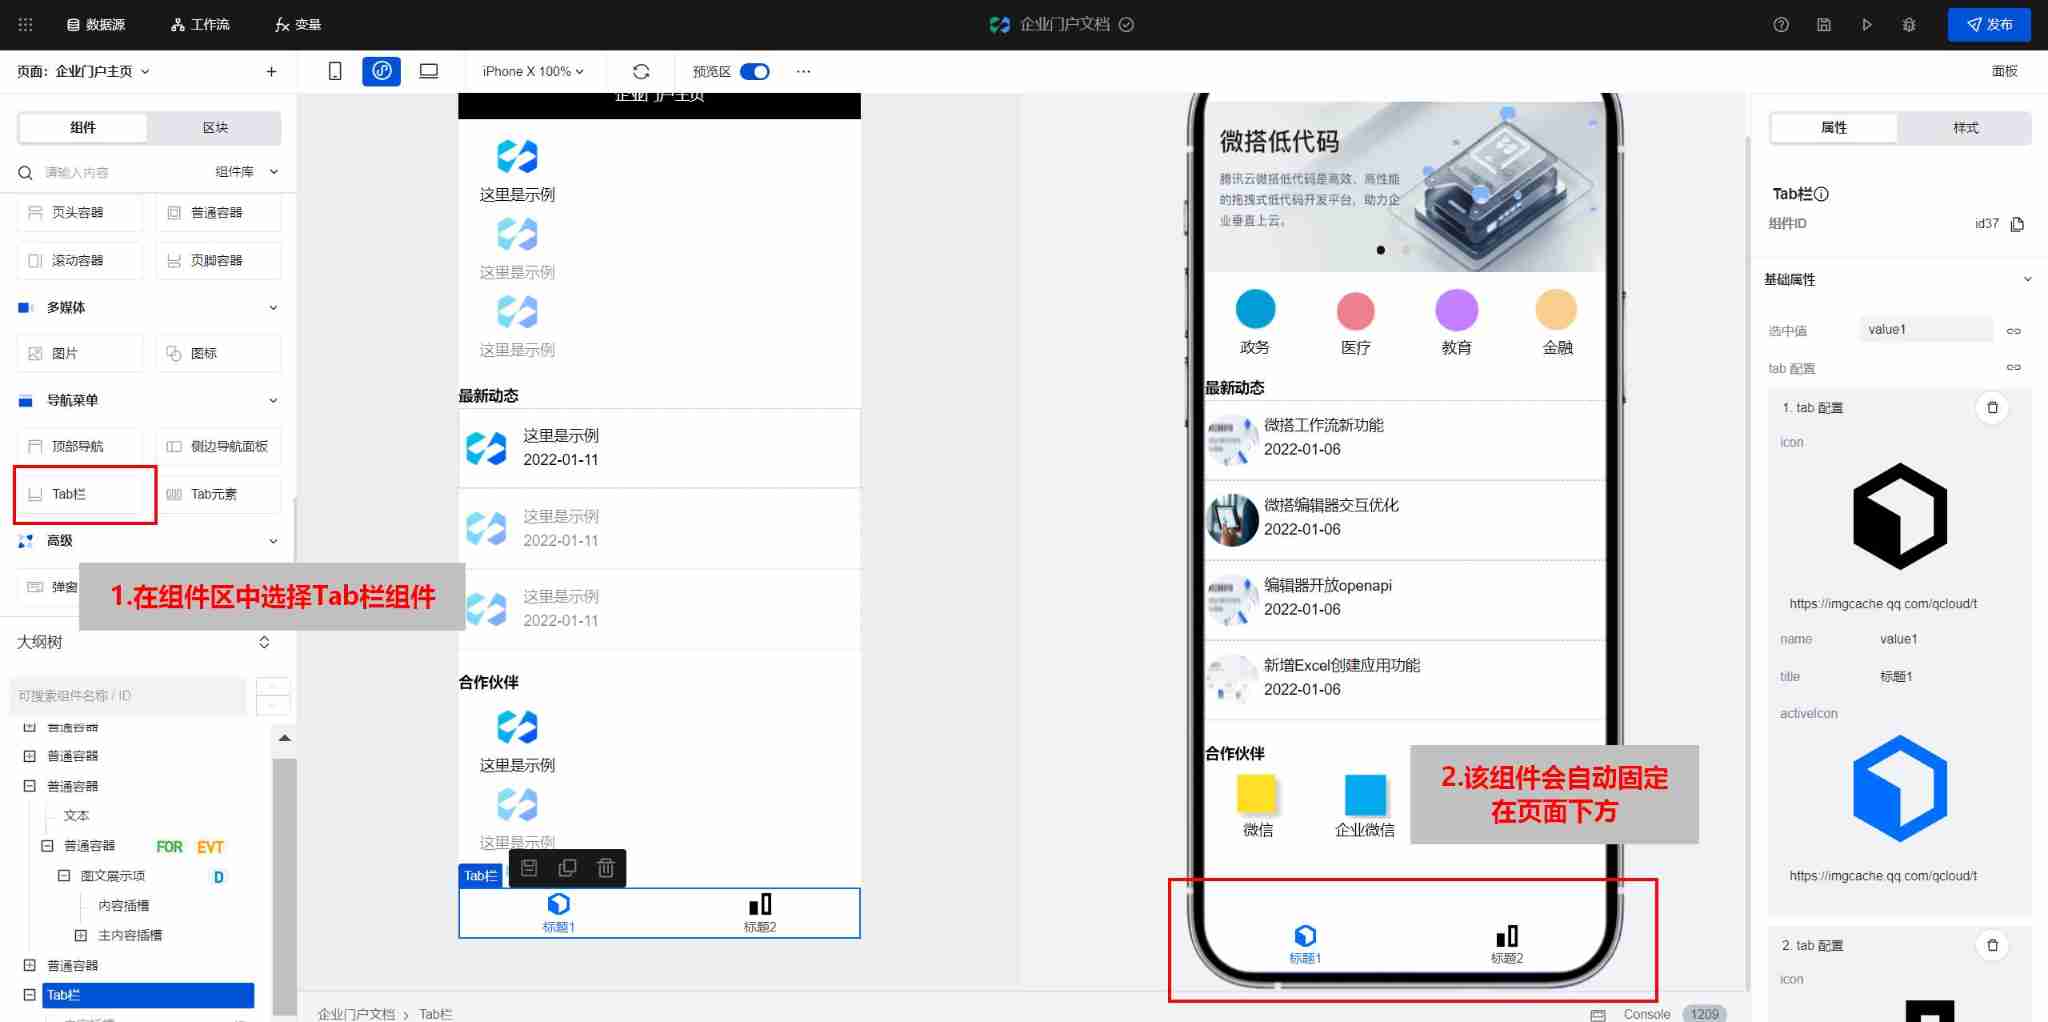
- On the right side of the configuration area Tab Configure the column component , The parameters are described as follows :

- When the configuration is complete , Click the enable routing button below , The routing mode is Jump , When the configuration is complete, click the corresponding button Tab You can jump to the page .

- In the same way, the dynamic list page and the enterprise contact page are modified Tab Just configure the column , So far, we have completed the construction of enterprise portal application .
Cloud development platform is to help enterprises develop in the cloud 、 A one-stop cloud native platform for deploying and running applications . Its secure access 、 The characteristics of reliable operation have been 220 Million developers trust , At present, it has cloud development 、 Cloud hosting 、 Micro build low code 、 Cloud development, native gateway and other products for different development scenarios .
The cloud development platform has flexibility, scalability, operation and maintenance free, etc Serverless Ability , At the same time, as Tencent's ecological connector , Connected to Tencent documents 、 Tencent Conference 、 Enterprise wechat and other ecological products , Help enterprises customize development more easily , Boost performance growth .

![[Yugong series] February 2022 wechat applet -app Networktimeout of JSON configuration attribute](/img/51/dcd0062dbf5fbbd04c6fc3737a0be2.jpg)