当前位置:网站首页>交通标志分类
交通标志分类
2022-06-22 02:45:00 【-小透明-】
简介
交通标志是辅助判断和约束驾驶人的强力工具之一,而交通标志识别系统也是 ADAS(高级驾驶辅助系统) 场景的组成部分之一,该系统会使小车能自动识别前方的交通标志并提醒驾驶人。我们也许能够通过交通标志外观的特点,从图像中提取交通标志的部分。而如何识别提取后的交通标志里面的内容,就成了机器学习模型要做的事情。
1.数据整合
原始数据集按照交通标志的名称存放在各自的目录中,而对于机器学习模型来说,在训练时需要传入的数据只有训练数据和标签。因此,我们需要对待训练的数据进行整合。
Python3 文件:DataIntegration.ipynb
import numpy as np
import os
import cv2 as cv
import tqdm
from tqdm import tqdm
#在该函数中完成数据集的整合,函数接收 1 个参数,即数据集路径
def loadData(oriPath):
#定义模型的输入图像分辨率为 128 * 128 * 3
x = np.empty([0, 128, 128, 3])
#通常数据标签我们用数字来表示,因此定义的标签 shape 为 [0] 即可。
y = np.empty([0])
#用 os.listdir 函数遍历数据集种类列表,返回该路径下的所有文件的名称
classNames = os.listdir(oriPath)
print(classNames)
#遍历数据集种类列表,在每一次循环中读取数据
for i in range(len(classNames)):
if(classNames[i] != '.ipynb_checkpoints'):
#获取当前标签目录下所有的交通标志图像的名称
labelPath = os.listdir(oriPath + '/' + classNames[i])
#遍历交通标志图像名称数组,同样也进行 .ipynb_checkpoints 的特判
for j in tqdm(range(len(labelPath))):
if(labelPath[j] != '.ipynb_checkpoints'):
#组合当前交通标志的相对路径,并存储在 imagePath 变量中
imageName = labelPath[j]
imagePath = oriPath + '/' + classNames[i] + '/' + imageName
#从硬盘中读取图像并存储到 numpy 数组中
image = cv.imread(imagePath)
#将原始 BGR 三通道转换为 RGB 三通道
image = cv.cvtColor(image, cv.COLOR_BGR2RGB)
#机器学习模型要求传入数据的分辨率相同,而通过查看交通标志图像可以发现,
#原始数据的图像分辨率是不一样的
#将图像的分辨率转换为 128 * 128 * 3,该函数可以对图像进行放缩处理
image = cv.resize(image, (128, 128))
#将单个图像数据扩增一个维度,使其成为大小为 1 的图像数组
image = np.expand_dims(image, axis = 0)
#把提取出的图片合并到总图片变量中,该函数可用于合并多 shape 的值,如图像
x = np.concatenate((x, image), axis = 0)
#把提取出的标签合并到总标签中
y = np.append(y, i)
#返回数据集 x 和标签集 y 的值
return x, y#对 Codelab/data 目录内的数据集进行整合
x, y = loadData('data')
#规律存储的数据集对模型训练会造成影响,因此需要对整合完毕的数据集进行随机打乱处理
permutation = np.random.permutation(y.shape[0])
x = x[permutation, :]
y = y[permutation]
#将数据集拆分为 80% 的训练集和 20% 的测试集。
testLength = int(x.shape[0]/100*(0.2*100))
xTest = x[0:testLength, :]
yTest = y[0:testLength]
xTrain = x[testLength:x.shape[0], :]
yTrain = y[testLength:y.shape[0]]
#将数据集导出
np.save('xTrain.npy', xTrain)
np.save('yTrain.npy', yTrain)
np.save('xTest.npy', xTest)
np.save('yTest.npy', yTest)2.数据预处理
Python3 文件:DataProcessing.ipynb
import tensorflow as tf
import tensorflow.keras as keras
import tensorflow.keras.layers as layers
import numpy as np
import matplotlib.pyplot as plt
from random import randint
import datetime
import cv2 as cv
%matplotlib inline
#读取上一步中处理完毕的数据集
xTrain = np.load('xTrain.npy')
yTrain = np.load('yTrain.npy')
xTest = np.load('xTest.npy')
yTest = np.load('yTest.npy')#复制上一步中的标签对应数组,并命名为 labelSets
labelSets = ['limit40', 'limit80', 'parking', 'turnAround', 'walking']
numClasses = len(labelSets)多次运行下面的代码,查看抽样的结果.若输出中标签名称和下方的图相对应,则数据集读取成功
#为了检验数据集是否正确读取以及标签是否对应准确,分别在训练集和测试集中选择 1 张图片使用 matplotlib 进行显示并使用 OpenCV 输出到本地。
index = randint(0, len(xTrain))
print(labelSets[int(yTrain[index])])

trainSingleImage = xTrain[index].astype(np.uint8)
plt.imshow(trainSingleImage)
plt.show()

trainSingleImage = cv.cvtColor(trainSingleImage, cv.COLOR_RGB2BGR)
cv.imwrite('test1.png', trainSingleImage)

print('----------------')

index = randint(0, len(xTest))
print(labelSets[int(yTest[index])])
testSingleImage = xTest[index].astype(np.uint8)
plt.imshow(testSingleImage)
plt.show()

testSingleImage = cv.cvtColor(testSingleImage, cv.COLOR_RGB2BGR)
cv.imwrite('test2.png', testSingleImage)
通常情况下,图像的每个像素点的值都在 0~255 之间,上下跨度较大。如果直接使用原始数据,在训练时会偏向值较高的像素点。因此,为了真正反映数据的实际情况,需要对数据进行预处理。
#把所有像素点的值都除以 255 的方式,将所有的像素点值压缩到 0~1 之间
xTrain /= 255.0
xTest /= 255.0
交通标志识别任务是个多分类任务,在多分类任务中,需要对数据集中的标签值进行 one-hot 操作来扩展特征向量。即将原数据集中表示标签的 1, 2, 3, 4, 5 用只有一个 1 和若干个 0 的特征向量表示
#进行one-hot编码
yTrain = keras.utils.to_categorical(yTrain, numClasses)
yTest = keras.utils.to_categorical(yTest, numClasses)
#输出经过转换的训练集和测试集
print(xTrain[0])
print('-----')
print(yTrain[0])
print('-----')
print(xTest[0])
print('-----')
print(yTest[0])#将处理后的代码存储到本地
np.save('xTrainFinal.npy', xTrain)
np.save('yTrainFinal.npy', yTrain)
np.save('xTestFinal.npy', xTest)
np.save('yTestFinal.npy', yTest)3.构建 CNN 分类器模型
Python3 文件的Training.ipynb
import tensorflow as tf
import tensorflow.keras as keras
import tensorflow.keras.layers as layers
import numpy as np
from random import randint
import datetime
import cv2 as cv
#读取上一步中处理完毕的数据集
xTrain = np.load('xTrainFinal.npy')
yTrain = np.load('yTrainFinal.npy')
xTest = np.load('xTestFinal.npy')
yTest = np.load('yTestFinal.npy')#使用 tf-keras 定义 CNN 模型
#在使用该方法定义模型时是只需要调用对应 API 填入模型各层的参数即可,
#keras 会自动生成训练模型层。该模型的核心为 3 层卷积池化组合,1 层展平和 2 层全连接。
model = keras.Sequential()
model.add(layers.Convolution2D(16, (3, 3),
padding='same',
input_shape=xTrain.shape[1:], activation='relu'))
model.add(layers.MaxPooling2D(pool_size=(2, 2)))
model.add(layers.Convolution2D(32, (3, 3), padding='same', activation= 'relu'))
model.add(layers.MaxPooling2D(pool_size=(2, 2)))
model.add(layers.Convolution2D(64, (3, 3), padding='same', activation= 'relu'))
model.add(layers.MaxPooling2D(pool_size =(2,2)))
model.add(layers.Flatten())
model.add(layers.Dense(128, activation='relu', kernel_regularizer=keras.regularizers.l2(0.001)))
model.add(keras.layers.Dropout(0.75))
model.add(layers.Dense(5, activation='softmax'))#定义优化器并初始化 tf-keras 模型
#设置损失函数为 “多分类的对数损失函数”
#性能评估函数为计算多分类正确率,即最大值的下标值是否和标签值相同。
adam = keras.optimizers.Adam()
model.compile(loss='categorical_crossentropy',
optimizer=adam,
metrics=['categorical_accuracy'])
print(model.summary())#将训练的结果可视化地显示
#我们使用 Tensorboard 回调。Tensorboard 可以将模型训练过程中的损失值,评估值等重要参数记录,帮助优化模型,
#通过一些配置,Tensorboard 还甚至能完成数据集评估预览的功能。
logDir="logs/" + datetime.datetime.now().strftime("%Y%m%d-%H%M%S")
tensorboardCallback = tf.keras.callbacks.TensorBoard(log_dir=logDir, histogram_freq=1)4. 训练并评估模型
#使用 TensorFlow 2.0 中 tf.data 的新特性并行化策略
trainDataTensor = tf.constant(xTrain)
trainLabelTensor = tf.constant(yTrain)

evalDataTensor = tf.constant(xTest)
evalLabelTensor = tf.constant(yTest)
#使用 tf.data 的 from_tensor_slices 创建 tf.data,该函数需要传入一个长度为 2 的元组,
#分别表示训练数据 Tensor 和 训练标签 Tensor,函数返回生成的 tf.data 变量
trainDatasets = tf.data.Dataset.from_tensor_slices((trainDataTensor, trainLabelTensor))
evalDatasets = tf.data.Dataset.from_tensor_slices((evalDataTensor, evalLabelTensor))#设置 tf.data 的 batch 大小为 64,并使用 prefetch 功能。
trainDatasets = trainDatasets.batch(32)
trainDatasets = trainDatasets.prefetch(tf.data.experimental.AUTOTUNE)
evalDatasets = evalDatasets.batch(32)
evalDatasets = evalDatasets.prefetch(tf.data.experimental.AUTOTUNE)#fit 函数执行训练,该函数支持传入 tf.data 的变量作为训练集和测试集
model.fit(x = trainDatasets, validation_data = evalDatasets, epochs = 10, callbacks=[tensorboardCallback])
#同时,在训练回调函数中加入 Tensorboard 记录功能执行程序4,即可看到训练的过程。
等待训练完毕后,左侧目录树中会出现 logs 目录,该目录中即存放着 Tensorboard 文件。
在左侧边栏中双击进入 logs 目录后,选择 Tensorboard 即可查看
#将训练完毕的模型存储到本地
model.save('model.h5')来源--人工智能探索者
边栏推荐
- Must the database primary key be self incremented? What scenarios do not suggest self augmentation?
- 【3.整数与浮点数二分】
- Using neo4j sandbox to learn neo4j graph data science GDS
- [proteus simulation] INT0 and INT1 interrupt count
- 银联支付 返回商户 Nignx post请求405
- 最新发布:Neo4j 图数据科学 GDS 2.0 和 AuraDS GA
- The brand, products and services are working together. What will Dongfeng Nissan do next?
- C++ primer Chapter 2 summary of variables and basic types
- Programming of pytorch interface
- Write your own kubernetes controller
猜你喜欢

Asemi Schottky diode 1N5819 parameters, 1N5819 replacement, 1N5819 source

ATM机模拟系统
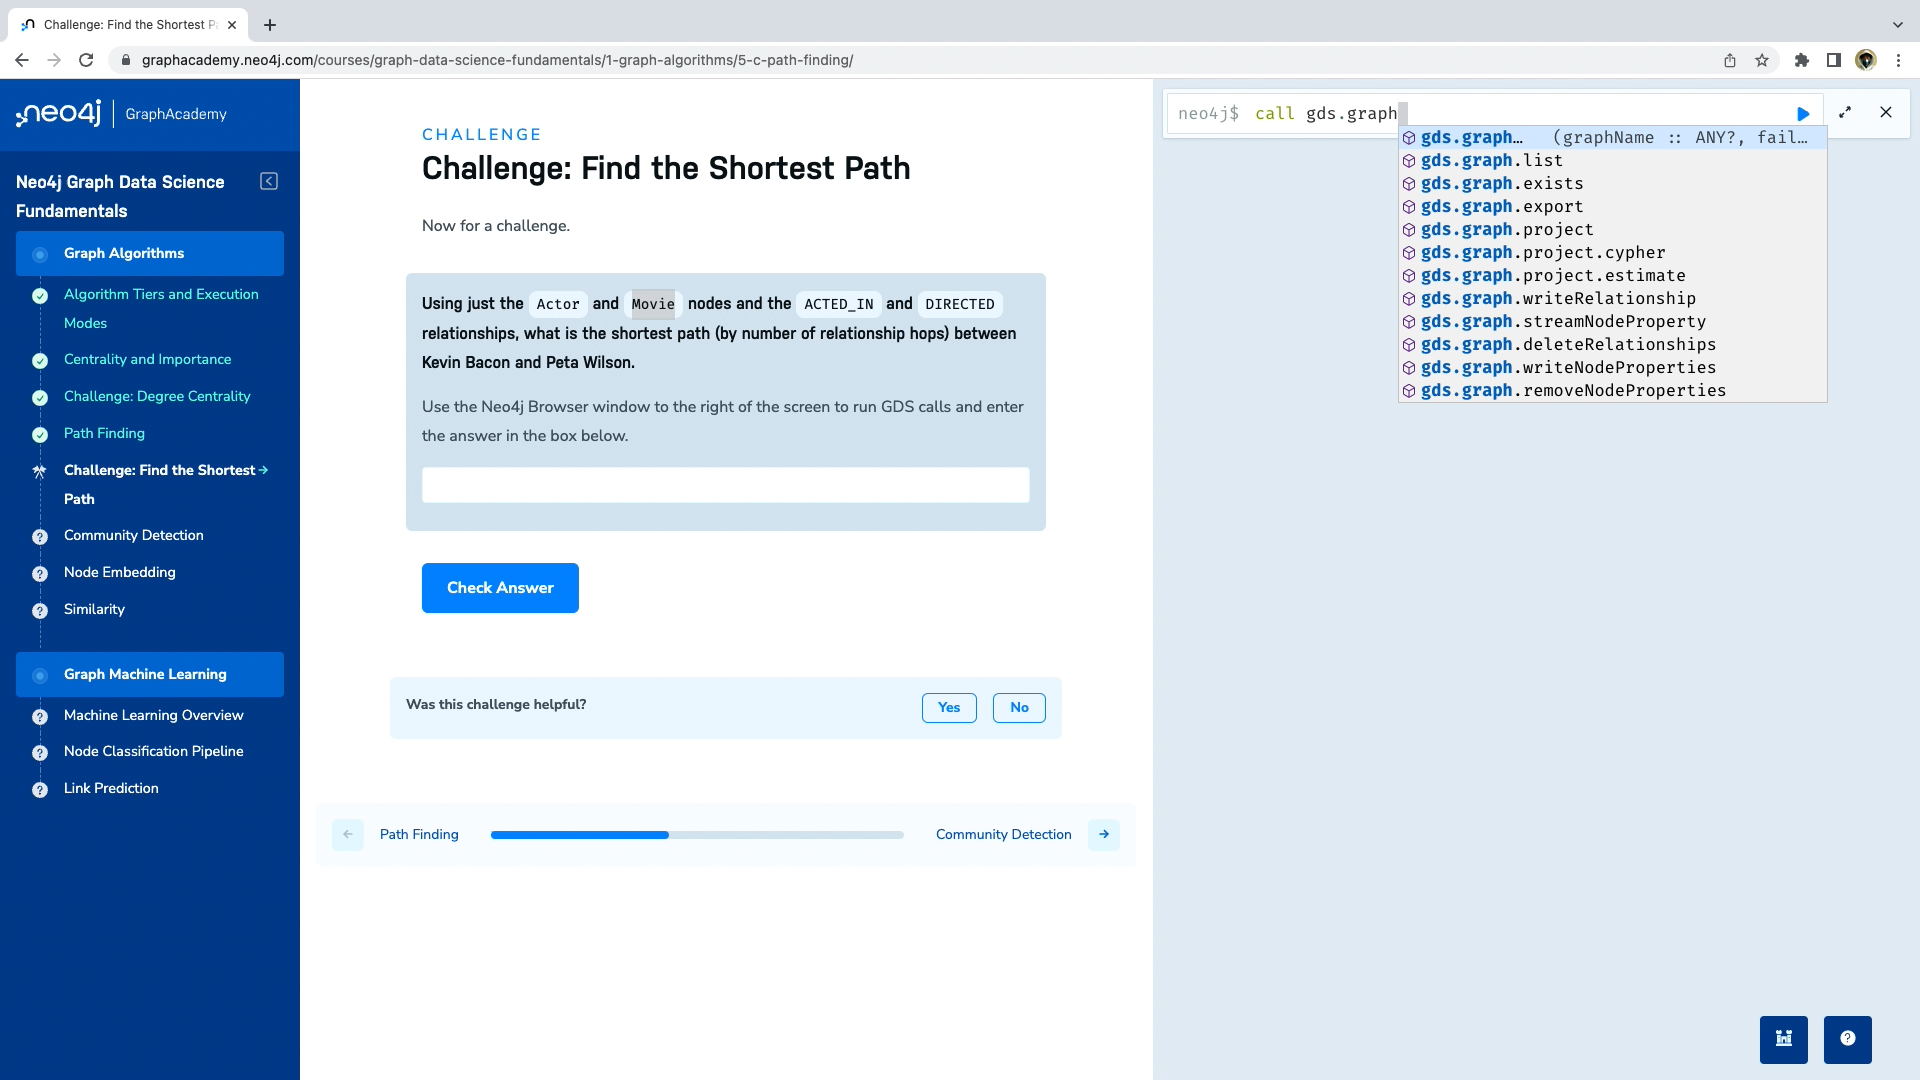
GraphAcademy 课程讲解:《Neo4j 图数据科学基础》

Rely on the robustness of trusted AI to effectively identify deep forgery and help banks fight identity fraud

Object detection -- how to use labelimg annotation tool

基于xposed框架hook使用

C2-qt serial port debugging assistant 2021.10.21

Asemi fast recovery diode FR107 parameter, FR107 real object, FR107 application
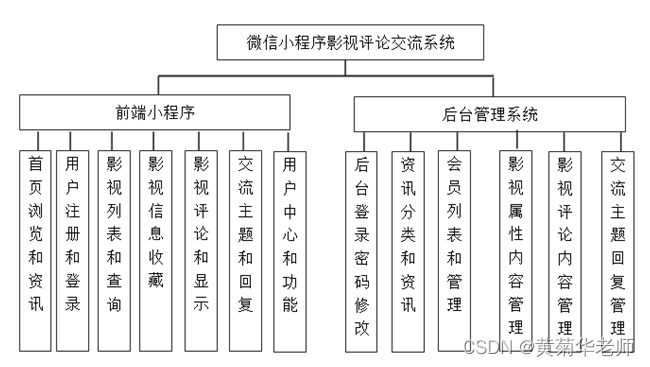
Wechat applet film and television review and exchange platform system graduation design (1) development outline

Neo4j 技能树正式发布,助你轻松掌握Neo4j图数据库
随机推荐
FPGA Xilinx 7 Series FPGA DDR3 hardware design rules
[4. high precision addition]
Introduction to Apache ActiveMQ Artemis
【7. 高精度除法】
Graphacademy course explanation: Fundamentals of neo4j graph data science
Li Kou today's question 1108 IP address invalidation
Try catch of Bash
File upload vulnerability shooting range analysis upload_ LABS
Vscode custom template, take notes with the template?!
GetEmptyBlcoksPre Info
【Docekr学习遇到的坑】
C ++ Primer 第2章 变量和基本类型 总结
Two dot vertical progress styles
使用 Neo4j 沙箱学习 Neo4j 图数据科学 GDS
Wechat applet film and television comment exchange platform system graduation design (3) background function
GoLand启动时闪退
On Monday, I asked the meaning of the | -leaf attribute?
EMC rectification tips
Starting from the classification of database, I understand the graph database
Day13QMainWindow2021-09-28