当前位置:网站首页>事件监听机制
事件监听机制
2022-06-27 15:35:00 【·wangweijun】
相信大家都学过Java中的GUI,不知道你们对GUI中的事件机制有没有产生过好奇心,当我们点击按钮时,就可以触发对应的点击事件,这一过程究竟是如何实现的呢?本篇文章我们就来聊一聊Java中的事件监听机制。
在了解事件监听机制之前,我们先来学习一个设计模式——观察者模式,事件监听机制的原理就是它。
场景设置
假设现在有一个需求,你正在运营一个有关天气的接口,要求是可以将天气信息推送出去,前提是接入了该接口的开发者才能收到天气信息,该如何实现呢?
首先我们来创建一个类:
package com.wwj.spring.guanchazhe;

/**
 * 显示天气信息
 */
public class PushWeather {

    private int temperature;
    private int humidity;
    private int airPressure;

    public void update(int temperature, int humidity, int airPressure) {
        this.temperature = temperature;
        this.humidity = humidity;
        this.airPressure = airPressure;
        show();
    }

    public void show() {
        System.out.print("温度:" + temperature + "\t");
        System.out.print("湿度:" + humidity + "\t");
        System.out.print("气压:" + airPressure + "\t");
        System.out.println();
    }
}
该类模拟的是第三方开发者接入我们的数据接口,显示天气信息,其中成员属性分别为温度、湿度和气压,并提供update方法用于更新数据(该方法是由其它类调用的)。
继续创建一个类:
public class WeatherDataInterface {

    private int temperature;
    private int humidity;
    private int airPressure;
    private PushWeather pushWeather;

    public WeatherDataInterface(PushWeather pushWeather) {
        this.pushWeather = pushWeather;
    }

    public void update() {
        pushWeather.update(temperature, humidity, airPressure);
    }

    public void updateWeatherData(int temperature, int humidity, int airPressure) {
        this.temperature = temperature;
        this.humidity = humidity;
        this.airPressure = airPressure;
        update();
    }
}
该类就是天气数据接口类,类中包含了第三方开发者PushWeather,当我们调用updateWeatherData更新接口中的天气信息时,它会同步调用第三方开发者的update方法实现数据同步,下面我们就来试一试:
public class Main {

    public static void main(String[] args) {
        PushWeather pushWeather = new PushWeather();
        WeatherDataInterface wdi = new WeatherDataInterface(pushWeather);
        wdi.updateWeatherData(10, 20, 30);
        System.out.println("更新天气数据");
        wdi.updateWeatherData(20, 30, 40);
    }
}
运行结果:
温度:10	湿度:20	气压:30
更新天气数据
温度:20	湿度:30	气压:40
这种实现方式是有很大弊端的,因为如果又有一个第三方开发者要接入你的接口,那么修改的代码将会非常多,不信来看看,首先创建第三方开发者:
public class Baidu {

    private int temperature;
    private int humidity;
    private int airPressure;

    public void update(int temperature, int humidity, int airPressure) {
        this.temperature = temperature;
        this.humidity = humidity;
        this.airPressure = airPressure;
        show();
    }

    public void show() {
        System.out.print("百度接入————温度:" + temperature + "\t");
        System.out.print("百度接入————湿度:" + humidity + "\t");
        System.out.print("百度接入————气压:" + airPressure + "\t");
        System.out.println();
    }
}
然后需要修改的是我们的天气数据接口:
public class WeatherDataInterface {

    private int temperature;
    private int humidity;
    private int airPressure;
    private PushWeather pushWeather;
    private Baidu baidu;

    public WeatherDataInterface(PushWeather pushWeather,Baidu baidu) {
        this.pushWeather = pushWeather;
        this.baidu = baidu;
    }

    public void update() {
        pushWeather.update(temperature, humidity, airPressure);
        baidu.update(temperature,humidity,airPressure);
    }

    public void updateWeatherData(int temperature, int humidity, int airPressure) {
        this.temperature = temperature;
        this.humidity = humidity;
        this.airPressure = airPressure;
        update();
    }
}
首先需要添加百度到成员变量,然后修改构造方法, 还需要修改update方法,让其也能更新百度的数据,测试代码:
public class Main {

    public static void main(String[] args) {
        PushWeather pushWeather = new PushWeather();
        Baidu baidu = new Baidu();
        WeatherDataInterface wdi = new WeatherDataInterface(pushWeather,baidu);
        wdi.updateWeatherData(10, 20, 30);
        System.out.println("更新天气数据");
        wdi.updateWeatherData(20, 30, 40);
    }
}
运行结果:
温度:10	湿度:20	气压:30
百度接入————温度:10	百度接入————湿度:20	百度接入————气压:30
更新天气数据
温度:20	湿度:30	气压:40
百度接入————温度:20	百度接入————湿度:30	百度接入————气压:40
观察者模式
观察者模式,又被称为发布——订阅模式,它定义了一种一对多的依赖关系,让多个观察者对象同时监听某一个主题对象,当该主题对象发生数据变化时,会通知所有的观察者对象更新数据。
很显然,在刚才的案例中,第三方开发者就是观察者模式中的观察者,而天气数据接口就是主题对象,当天气数据接口发生变化时,就会通知那些依赖于天气接口的观察者去更新自己的数据,所以刚才的案例是非常适合使用观察者模式来进行改造的,那怎么实现呢?
观察者模式中有几个非常重要的概念:
- Subject:抽象主题,它是用于抽象观察者的,因为主题对象需要管理所有依赖于它的观察者,所以必须对观察者抽象,才能实现统一的管理,提供接口注册和注销观察者
- ConcreteSubject:具体主题,它用于具体实现主题对象,它会将有关状态存入具体的观察者对象,在具体主题数据发生变化时,会给所有已经注册的观察者发送通知
- Observer:抽象观察者,它定义了一个接口,用于对观察者进行抽象
- ConcreteObserver:具体观察者,实现抽象观察者接口,以便在得到主题对象的通知时更新自身数据
\
现在我们就来改造刚才的案例,首先创建抽象主题:
public interface Subject {

    // 注册观察者对象
    void register(Observer observer);

    // 移除观察者对象
    void remove(Observer observer);

    // 通知所有观察者更新数据
    void notify(int temperature, int humidity, int airPressure);
}
然后创建抽象观察者:
public interface Observer {

    // 更新天气数据
    void update(int temperature, int humidity, int airPressure);
}
接着具体实现主题:
public class WeatherDataSubject implements Subject {

    // 管理所有观察者
    private Vector<Observer> vector;

    public WeatherDataSubject() {
        vector = new Vector<>();
    }

    @Override
    public void register(Observer observer) {
        vector.add(observer);
    }

    @Override
    public void remove(Observer observer) {
        vector.remove(observer);
    }

    @Override
    public void notify(int temperature, int humidity, int airPressure) {
        for (Observer observer : vector) {
            observer.update(temperature, humidity, airPressure);
        }
    }
}
最后就是创建具体的观察者,也就是第三方开发者:
public class Baidu implements Observer {

    private int temperature;
    private int humidity;
    private int airPressure;

    public void show() {
        System.out.print("百度接入————温度:" + temperature + "\t");
        System.out.print("百度接入————湿度:" + humidity + "\t");
        System.out.print("百度接入————气压:" + airPressure + "\t");
        System.out.println();
    }

    @Override
    public void update(int temperature, int humidity, int airPressure) {
        this.temperature = temperature;
        this.humidity = humidity;
        this.airPressure = airPressure;
        show();
    }
}
编写测试代码:
public class Main {

    public static void main(String[] args) {
        Baidu baidu = new Baidu();
        WeatherDataSubject subject = new WeatherDataSubject();
        subject.register(baidu);
        subject.notify(10, 20, 30);
        System.out.println("更新天气数据");
        subject.notify(20, 30, 40);
    }
}
运行结果:
百度接入————温度:10	百度接入————湿度:20	百度接入————气压:30
更新天气数据
百度接入————温度:20	百度接入————湿度:30	百度接入————气压:40
现在若是想接入新的第三方开发者,那就变得非常简单了,首先创建新的开发者:
public class Alibaba implements Observer {
    private int temperature;
    private int humidity;
    private int airPressure;

    public void show() {
        System.out.print("阿里巴巴接入————温度:" + temperature + "\t");
        System.out.print("阿里巴巴接入————湿度:" + humidity + "\t");
        System.out.print("阿里巴巴接入————气压:" + airPressure + "\t");
        System.out.println();
    }

    @Override
    public void update(int temperature, int humidity, int airPressure) {
        this.temperature = temperature;
        this.humidity = humidity;
        this.airPressure = airPressure;
        show();
    }
}
然后修改测试代码即可:
public class Main {

    public static void main(String[] args) {
        Baidu baidu = new Baidu();
        Alibaba alibaba = new Alibaba();
        WeatherDataSubject subject = new WeatherDataSubject();
        subject.register(baidu);
        subject.register(alibaba);
        subject.notify(10, 20, 30);
        System.out.println("更新天气数据");
        subject.notify(20, 30, 40);
    }
}
运行结果:
百度接入————温度:10	百度接入————湿度:20	百度接入————气压:30
阿里巴巴接入————温度:10	阿里巴巴接入————湿度:20	阿里巴巴接入————气压:30
更新天气数据
百度接入————温度:20	百度接入————湿度:30	百度接入————气压:40
阿里巴巴接入————温度:20	阿里巴巴接入————湿度:30	阿里巴巴接入————气压:40
通过观察者模式极大地解除了程序间的耦合,虽然主题对象中仍然依赖了一个集合类型,但它已经被抽象化了,所以耦合度其实并不算很高,通过这种方式,我们在接入新的开发者时,只需向主题对象注册即可,若是不想接入了,也可以注销该开发者。
事件监听机制
了解观察者模式之后,我们进入本篇文章的重心,事件监听机制。

在该模型中,有三个非常重要的概念:
- 事件
- 事件源
- 事件监听器
其具体流程是:用户操作(比如点击)导致事件触发,前提是事件监听器已经被注册好了,事件触发后会生成事件对象,此时事件对象会作为参数传递给事件监听器,监听器调用对应的方法进行处理。
\
在这里事件源就是主题对象,而事件监听器就是观察者,当事件源发生变化时,主题对象就会通知所有的观察者处理数据,那么接下来我们就来实现一下。
首先创建事件接口:
public interface Event {

    // 事件回调
    void callback();
}
然后创建具体实现:
public class ValueEvent implements Event {

    // 事件三要素:事件源、事件发生事件、事件消息
    private Object source;
    private LocalDateTime when;
    private String msg;

    public void setSource(Object source) {
        this.source = source;
    }

    public void setWhen(LocalDateTime when) {
        this.when = when;
    }

    public void setMsg(String msg) {
        this.msg = msg;
    }

    public Object getSource() {
        return source;
    }

    public LocalDateTime getWhen() {
        return when;
    }

    public String getMsg() {
        return msg;
    }

    @Override
    public String toString() {
        return "ValueEvent{" +
                "source=" + source +
                ", when=" + when +
                ", msg='" + msg + ''' +
                '}';
    }

    @Override
    public void callback() {
        System.out.println(this);
    }
}
创建监听器接口:
public interface EventListener {

    // 触发事件
    void triggerEvent(Event event);
}
实现监听器:
public class ValueChangeListener implements EventListener {

    @Override
    public void triggerEvent(Event event) {
        // 调用事件回调方法
        event.callback();
    }
}
最后编写事件源接口:
public interface EventSource {

    // 注册监听器
    void addListener(EventListener listener);

    // 通知所有监听器
    void notifyListener();
}
实现事件源接口:
public class ValueSource implements EventSource {

    // 管理所有监听器
    private Vector<EventListener> listeners;

    private String msg;

    public ValueSource() {
        listeners = new Vector<>();
    }

    @Override
    public void addListener(EventListener listener) {
        listeners.add(listener);
    }

    @Override
    public void notifyListener() {
        for (EventListener listener : listeners) {
            ValueEvent event = new ValueEvent();
            event.setSource(this);
            event.setWhen(LocalDateTime.now());
            event.setMsg("更新数据:" + msg);
        }
    }

    public String getMsg() {
        return msg;
    }

    public void setMsg(String msg) {
        this.msg = msg;
        notifyListener();
    }
}
编写测试代码:
public class Main {

    public static void main(String[] args) {
        ValueSource source = new ValueSource();
        source.addListener(new ValueChangeListener());
        source.setMsg("50");
    }
}
运行结果:
ValueEvent{[email protected], when=2021-05-22T13:19:26.806, msg='更新数据:50'}
我们来仔细分析一下这个过程,首先我们创建了一个事件源:
ValueSource source = new ValueSource();
它相当于观察者模式中的主题对象,也就是被观察者,当被观察者数据发生变化时,通知所有监听器进行处理,所以我们为其注册了一个监听器:
source.addListener(new ValueChangeListener());
此时我们修改事件源的数据:
source.setMsg("50");
就会执行setMsg方法:
public void setMsg(String msg) {
    this.msg = msg;
    notifyListener();
}
该方法又调用了notifyListener方法,通知所有监听器处理:
@Override
public void notifyListener() {
    for (EventListener listener : listeners) {
        ValueEvent event = new ValueEvent();
        event.setSource(this);
        event.setWhen(LocalDateTime.now());
        event.setMsg("更新数据:" + msg);
        listener.triggerEvent(event);
    }
}
在该方法中,首先需要创建事件,并设置事件源,也就是当前对象,设置事件发生时间和消息,最后调用监听器的事件处理方法:
@Override
public void triggerEvent(Event event) {
    // 调用事件回调方法
    event.callback();
}
该方法又调用了事件的回调方法:
@Override
public void callback() {
    System.out.println(this);
}
事件回调方法就输出了当前对象,以上就是整个事件监听机制的流程。
总结

最后,我们通过这张图,再总结一下事件监听的整个流程:
- 首先创建事件源,并为其注册事件
- 当调用setMsg方法修改事件源中的数据时,会调用notifyListener方法通知所有监听器
- 在notifyListener方法中会遍历所有的监听器,创建事件对象,并作为参数传入监听器的事件处理方法(triggerEvent)
- 监听器的triggerEvent方法会调用事件的回调方法(callback)
- 回调方法用于编写具体的处理逻辑,比如输出内容给用户反馈
边栏推荐
- Introduce you to ldbc SNB, a powerful tool for database performance and scenario testing
- Design of CAN bus controller based on FPGA (with main codes)
- 利用Redis实现订单30分钟自动取消
- 3.3 one of the fixed number of cycles
- 基于 Nebula Graph 构建百亿关系知识图谱实践
- 正则匹配以什么开头、以什么结尾,以非什么开头,以非什么结尾
- 国家食品安全风险评估中心:不要盲目片面追捧标签为“零添加”“纯天然”食品
- 字节跳动埋点数据流建设与治理实践
- Hongmeng makes efforts! HDD Hangzhou station · offline salon invites you to build ecology
- 郎酒两大王牌产品成都联动共振,持续带动光瓶酒消费浪潮
猜你喜欢

CNN convolutional neural network (the easiest to understand version in History)

鸿蒙发力!HDD杭州站·线下沙龙邀您共建生态
等保三级密码复杂度是多少?多久更换一次?

关于TensorFlow使用GPU加速
The role of the symbol @ in MySQL

PSS:你距离NMS-free+提点只有两个卷积层 | 2021论文

Redis系列2:数据持久化提高可用性

Introduction to TTCAN brick moving

Domain name binding dynamic IP best practices
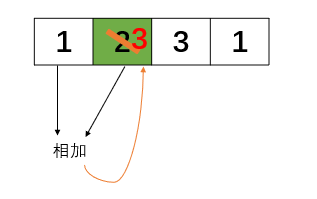
LeetCode每日一练(杨辉三角)

随机推荐
MySQL中符号@的作用
如果想用dms来处理数据库权限问题,想问下账号只能用阿里云的ram账号吗(阿里云的rds)
正则匹配以什么开头、以什么结尾,以非什么开头,以非什么结尾
鴻蒙發力!HDD杭州站·線下沙龍邀您共建生態
[pygame Games] ce jeu "eat Everything" est fantastique? Tu manges tout? (avec code source gratuit)
分布式Session解决方案
关于TensorFlow使用GPU加速
Leetcode daily practice (Yanghui triangle)
鸿蒙发力!HDD杭州站·线下沙龙邀您共建生态
Design principles and ideas: design principles
In the Alibaba cloud experiment, if the k8s forwards to port 3306 and the MySQL client is turned on, it will terminate abnormally. What is the reason?
List to table
Practice of constructing ten billion relationship knowledge map based on Nebula graph
Leetcode daily practice (longest substring without repeated characters)
Source NAT address translation and server mapping web page configuration of firewall Foundation
洛谷_P1008 [NOIP1998 普及组] 三连击_枚举
Redis系列2:数据持久化提高可用性
Four characteristics of transactions
E modulenotfounderror: no module named 'psychopg2' (resolved)
NFT双币质押流动性挖矿dapp合约定制