当前位置:网站首页>Microservice system design -- interface document management design
Microservice system design -- interface document management design
2022-06-24 18:37:00 【Zhuangxiaoyan】
Abstract
The whole system is built by multiple applications , Because the service does not exist alone , The service development team must make service calls with other service teams , It is imperative to expose external interfaces . In the early days of development , People are used to word or excel In the form of , But the disadvantages are obvious , Once the interface changes , Documents need to be updated synchronously , Unfortunately, many interfaces have been updated , But the documents didn't keep up , I believe you have had a painful experience . This article introduces you to several interface document management tools , And realize the online interface document management used in the practice of this case .
We urgently need an interface documentation tool , It can be synchronized with the system interface in real time , No extra cost ( Cost of capital 、 Time cost ) best . Here are a few open source API Tools , You can choose to use .
One 、RAP2
Official address :RAP Interface management platform , The early days were called RAP , Ali mother MUX Team production , The maintenance of the following items is stopped , Transfer to RAP2 project . It can be used online , It can also be deployed locally , There are detailed steps for local deployment , From the deployment manual , The product is still heavy , There are also many environmental dependencies . After deployment , There is also the problem of taking time to keep up with the code , For projects that provide relatively stable interfaces , It's a good choice .

Two 、APIDOC
Official address :apiDoc - Inline Documentation for RESTful web APIs, Generate... Through comments in a fairly formatted form in the code API Interface document , rely on Node.js Environmental Science . It's easy to use , disadvantages : When the interface changes , It takes time to synchronize documents . For a relatively stable interface system , You can make an alternative .

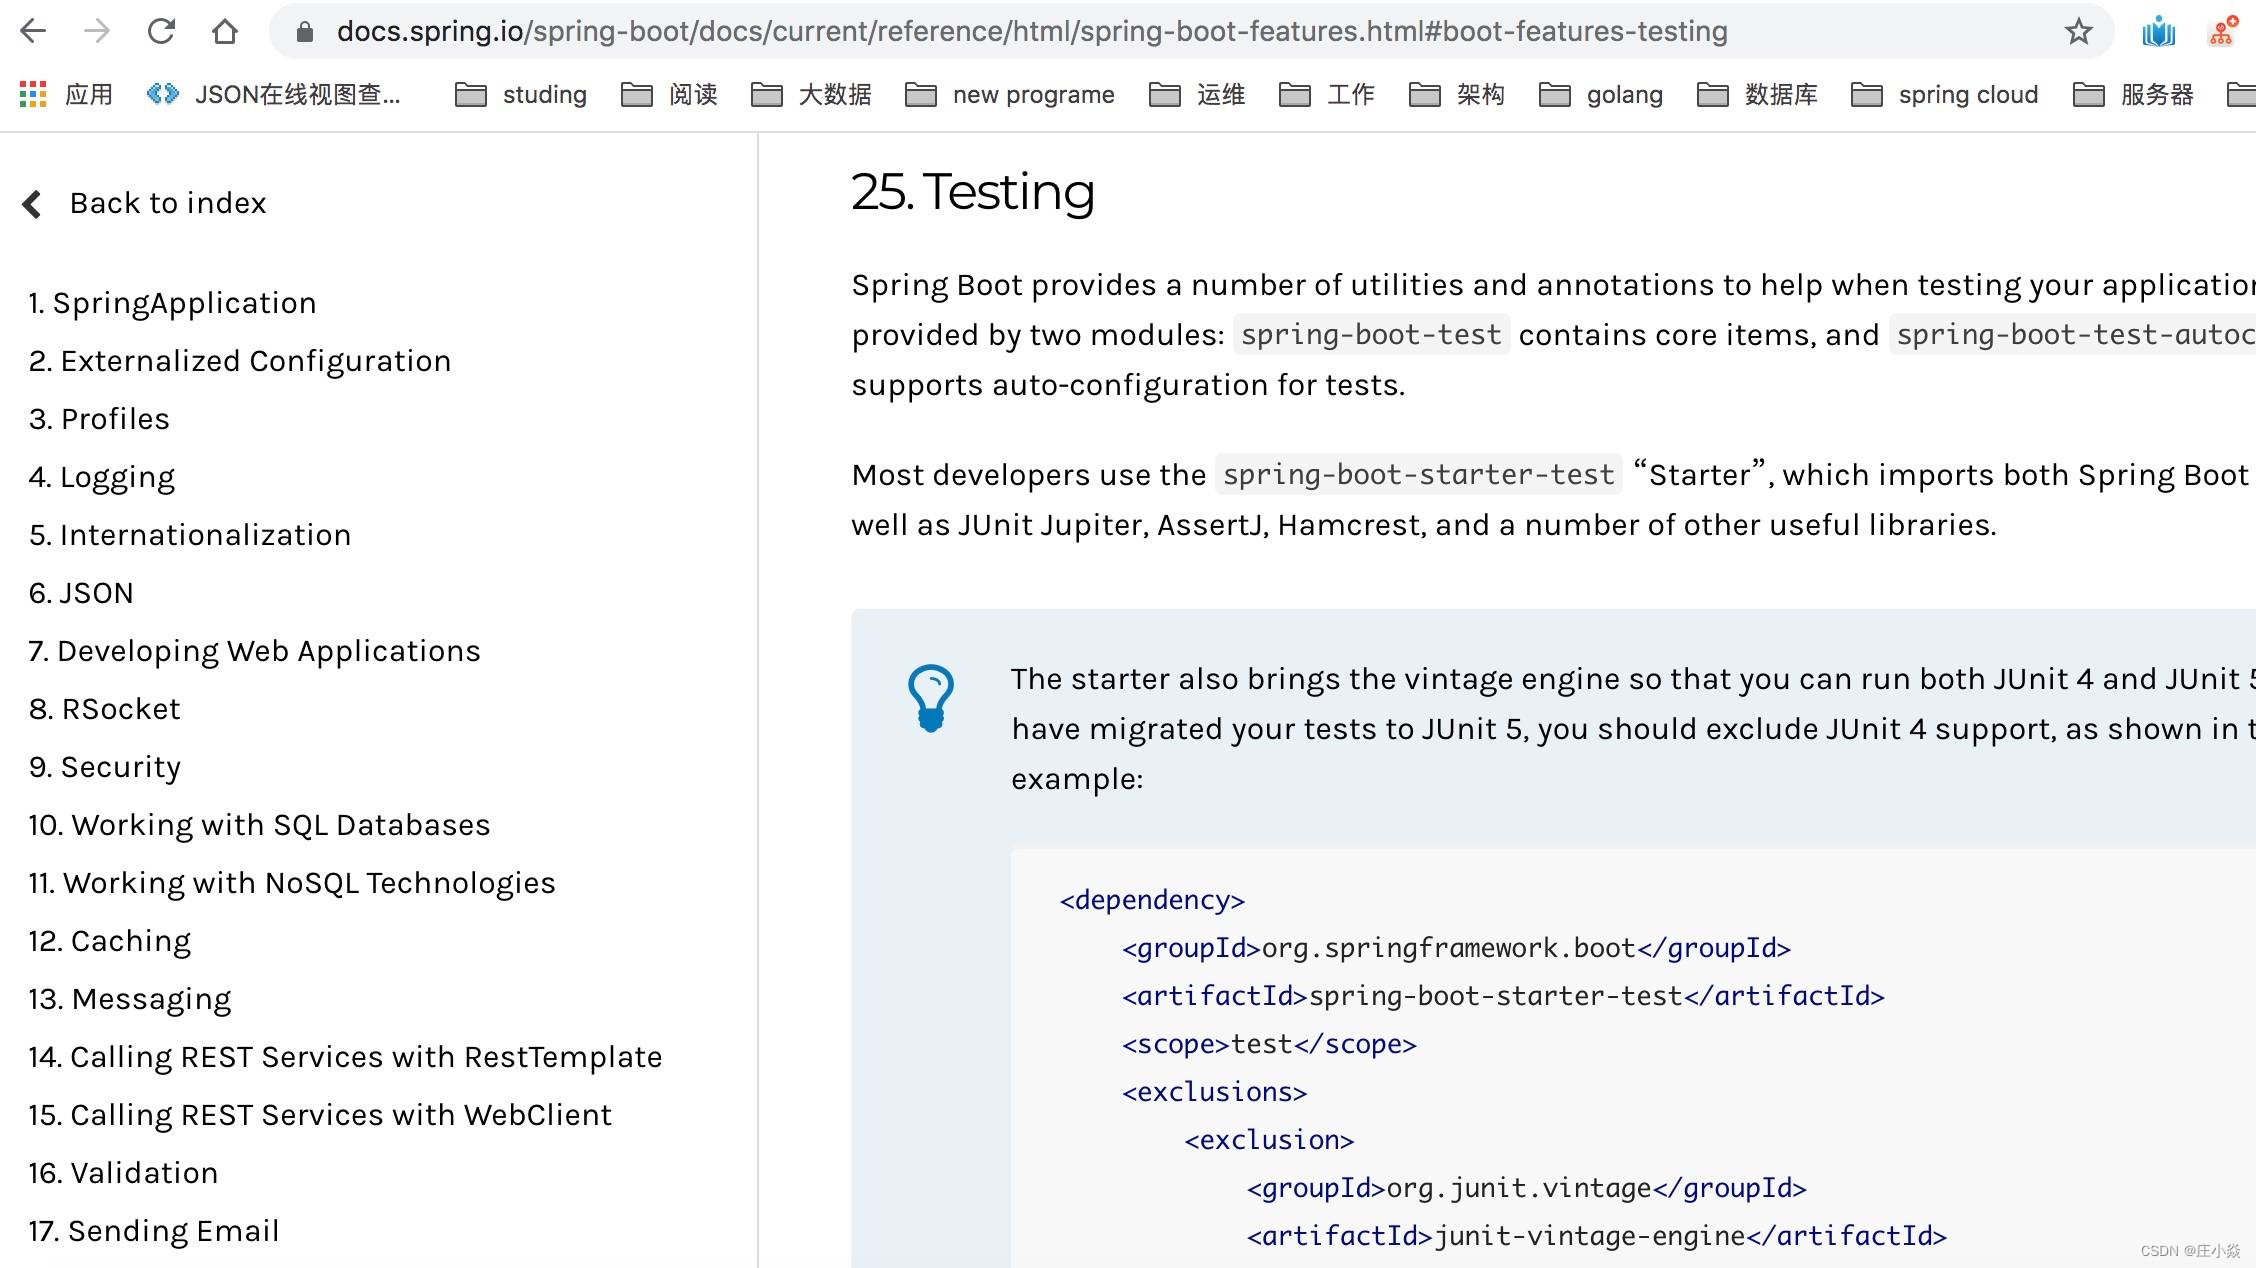
3、 ... and 、Spring REST Docs
Spring There is a lot in the family barrel API file , Are generated based on this component , According to the official usage method, you need to write the corresponding code fragment , There are also corresponding grammatical norms , Then generate offline documents through project construction . The operation is cumbersome , It is not recommended to use . The generated document shape is shown in the following screenshot :
Four 、Swagger
Official website address :https://swagger.io , Is a RESTFU L Documentation of the interface is automatically generated online + Functional test functional software , Is a specification and complete framework , The standard , Language has nothing to do , Used to generate 、 describe 、 Invocation and visualization RESTful Style Web service . The overall goal is to have the client and file system update at the same speed as the server . Method of file , Parameters and models are tightly integrated into server-side code , allow API To stay in sync at all times .Swagger Let deployment management and use powerful API Never so simple . In this practical case, we use Swagger To carry out API Management of .

5、 ... and 、Spring Boot Integrate Swagger2
5.1 Introduce dependencies
Join in Swagger dependent jar rely on , Because each sub module is useful , There will be Swagger At the root pom.xml Unified version management in
<properties>
        <swagger.version>2.8.0</swagger.version>
</properties>
<!--swagger2 -->
<dependency>
        <groupId>io.springfox</groupId>
        <artifactId>springfox-swagger2</artifactId>
        <version>${swagger.version}</version>
</dependency>
<dependency>
        <groupId>io.springfox</groupId>
        <artifactId>springfox-swagger-ui</artifactId>
        <version>${swagger.version}</version>
</dependency>
No configuration is required in the sub module version, Directly introduced , If changes are needed version, Directly at the root pom.xml Revision in China , The versions of all dependent sub modules will also change .
<!--swagger2 -->
<dependency>
        <groupId>io.springfox</groupId>
        <artifactId>springfox-swagger2</artifactId>
</dependency>
<dependency>
        <groupId>io.springfox</groupId>
        <artifactId>springfox-swagger-ui</artifactId>
</dependency>
5.2 Swagger2 To configure
establish config package , newly added Swagger Configuration class . adopt @EnableSwagger2 Annotations to enable Swagger2 , Then configure a Docket Bean , Configure the mapping path and the location of the interface to scan , stay apiInfo in , The main configuration is Swagger2 Information about the document website , For example, website title , Description of the website , Contact information , Protocol used 、 Interface version, etc .
@EnableSwagger2
@Configuration
public class Swagger2Config {

    @Bean
    public Docket createRestApi() {
        return new Docket(DocumentationType.SWAGGER_2).apiInfo(apiInfo()).select()
                .apis(RequestHandlerSelectors.any()).paths(PathSelectors.any()).build();
    }

    private ApiInfo apiInfo() {
        return new ApiInfoBuilder()
                .title("Member  Member module interface layer ( be based on  SpringBoot2+Swagger2).")
                .contact(new Contact("growithus", "https://backkoms.github.io/", "[email protected]"))
                .version("1.0")
                .description("").build();
    }
}
Due to the higher version , Corresponding Controller There is no need to write Swagger Corresponding code comments , Code intrusion is further reduced . Notes related to the old version , Such as @Api、@ApiOperation、@ApiImplicitParams、@ApiImplicitParam,@ApiModel etc. , If it's an old version , The above corresponding comments must be added to the relevant code , It is somewhat intrusive to the code . Go through the above two steps ,Swagger2 Even if the configuration is successful , Very simple . Start project , Input http://localhost:10060/swagger-ui.html, You can see the following UI, It indicates that the configuration is successful .


5.3 API Verification test
Writing test classes , Start project
@RestController
@RequestMapping("test")
public class APITestController {

    @PostMapping("/hello")// Only support  POST  request
  //@RequestMapping(name = "hello", method = { RequestMethod.POST })// Also, only  POST  request
    public String hello(String name) {
        return "hello " + name;
    }

}
Request There are methods 8 Two request types :POST \ GET \ OPTIONS \ HEAD \ PUT \ DELETE \ TRACE \ PATCH, To ensure that unnecessary requests pose a potential threat , It is suggested to directly adopt POST One way , Disable other request methods . @PostMapping("/hello") Function equivalent to @RequestMapping(name= "hello", method = { RequestMethod.POST })
Use it directly Shell The script tests the request :
appledeMacBook-Air:~ apple$ curl -X POST "http://localhost:10060/test?name=world" hello world.

 You can see the normal output , Test whether other request methods can request data normally :

    appledeMacBook-Air:~ apple$ curl -X GET "http://localhost:10060/test?name=world" {"timestamp":"2020-02-01T12:59:09.508+0000","status":405,"error":"Method Not Allowed","message":"Request method 'GET' not supported","path":"/test"}
not used Swagger when , May adopt Postman Test tools for interface debugging .

Now it has been integrated Swagger function , open http://localhost:10060/swagger-ui.html, find api-test-controller The corresponding method below , Click on " try it out ", Input parameters , perform " Execute " function . View the normal output results :
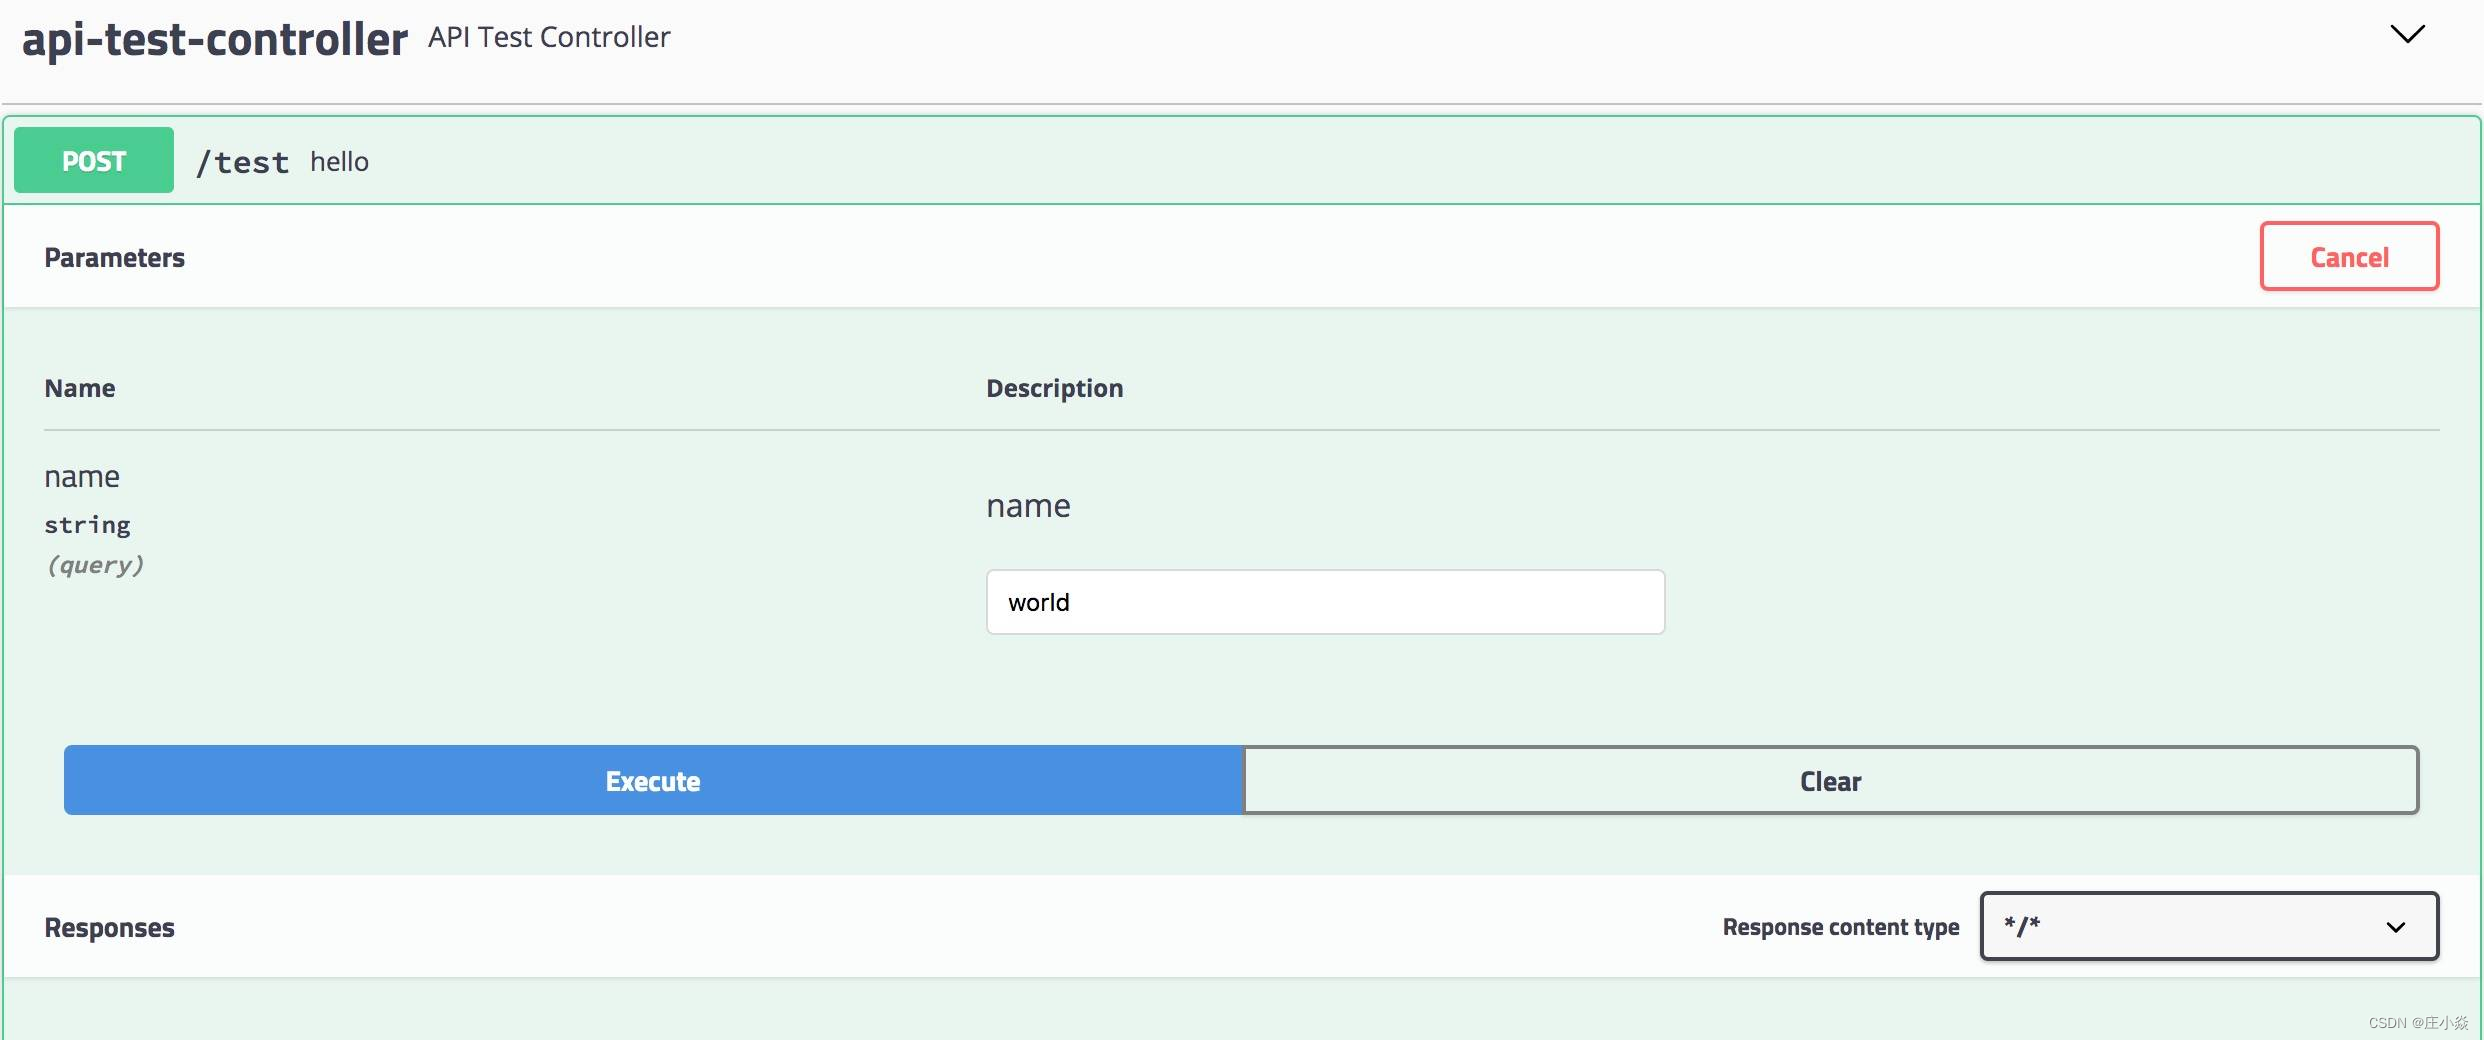
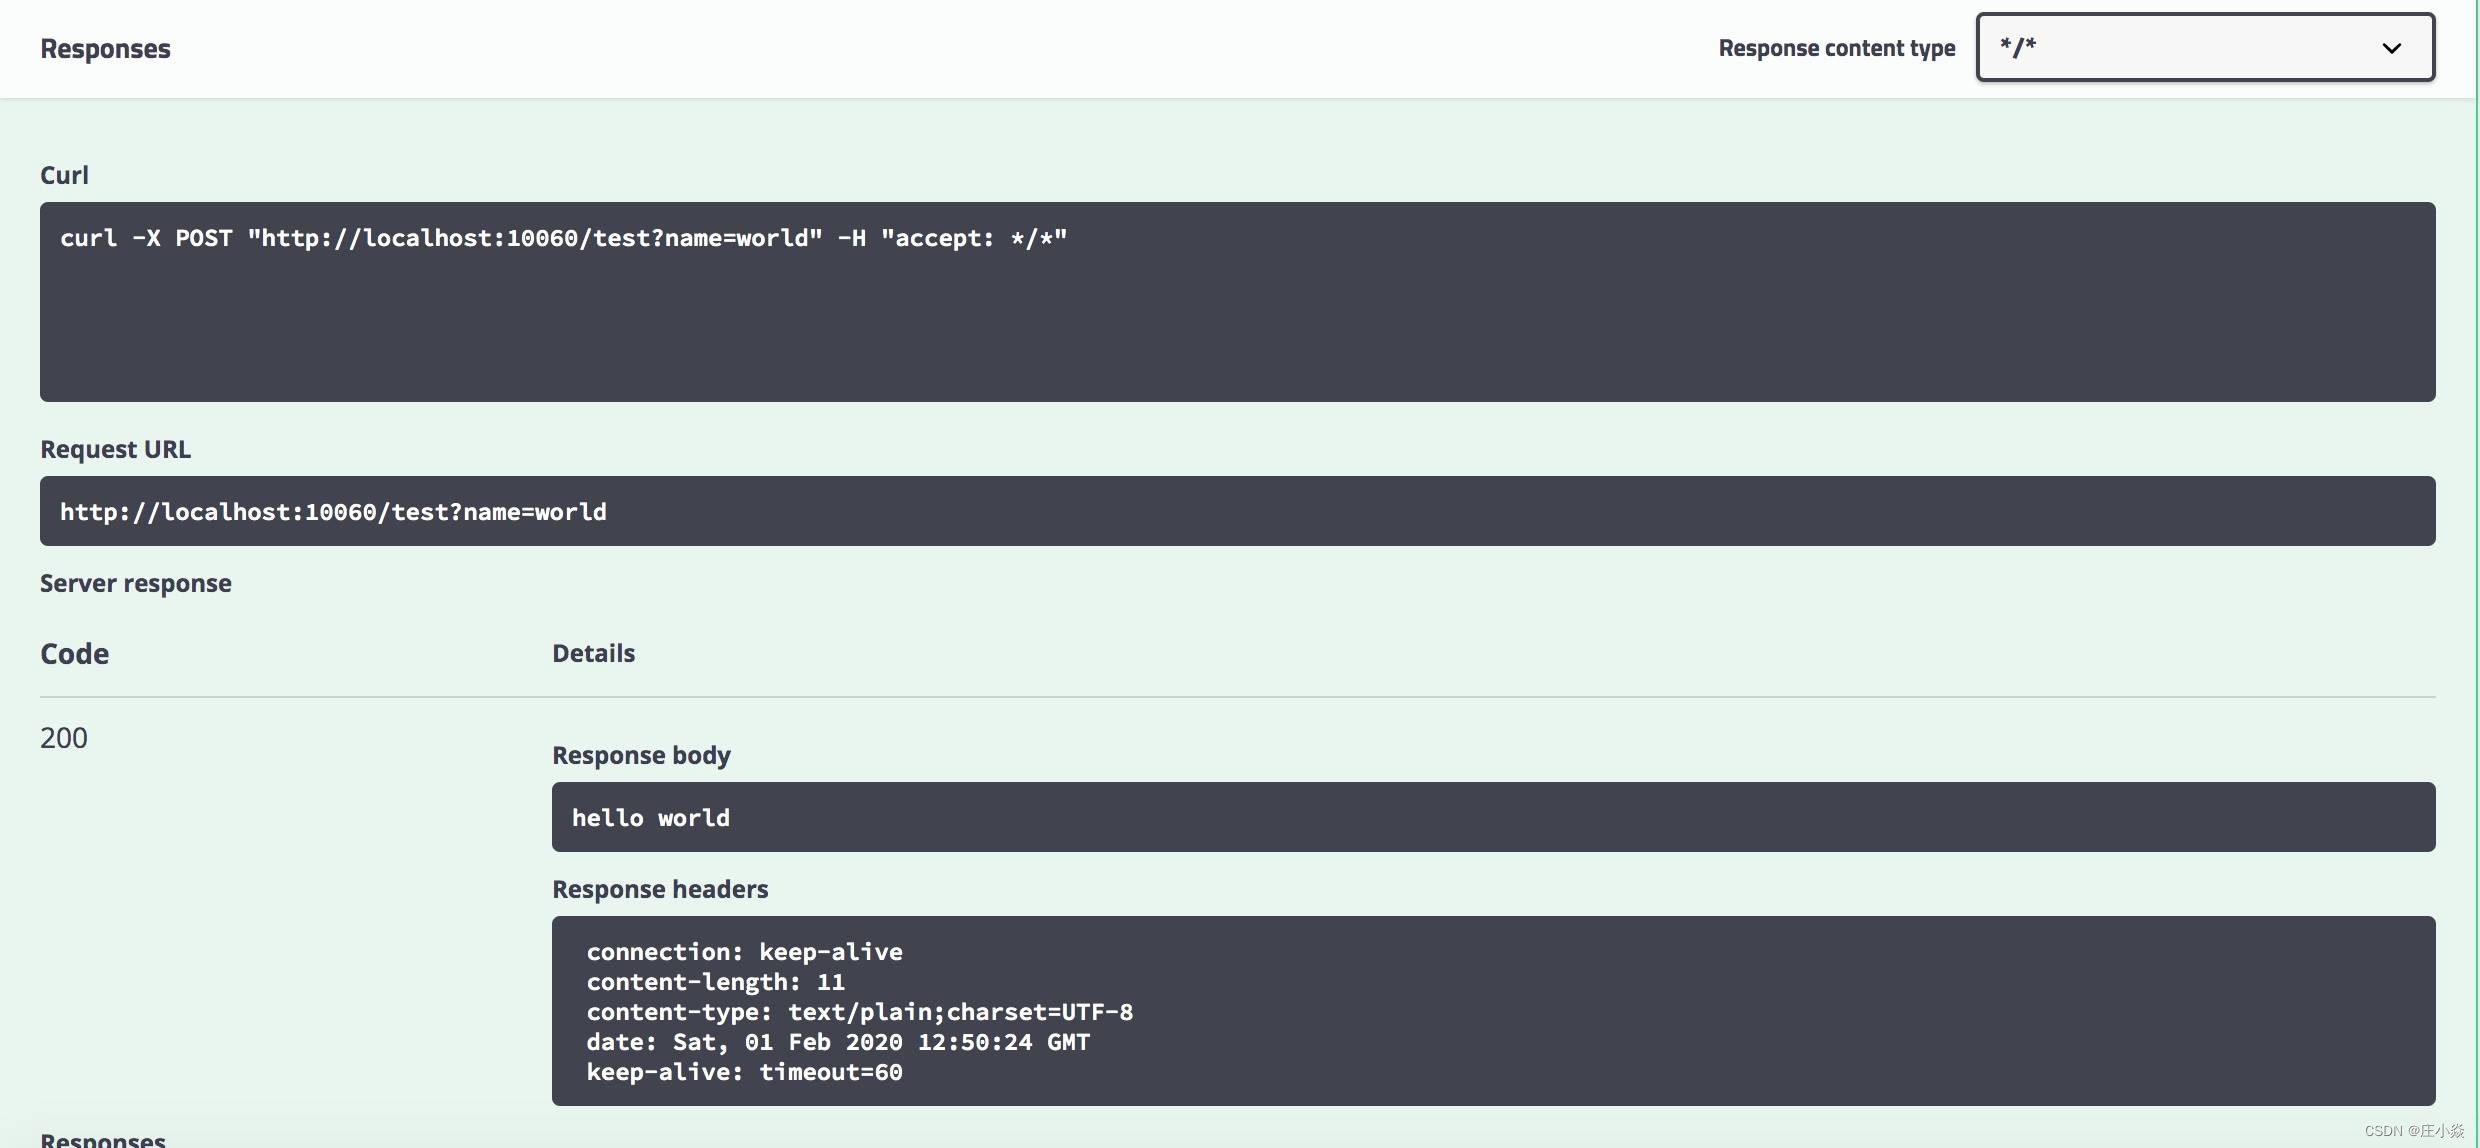
Use Swagger You can directly sense the interface changes online , It can still be in UI Conduct interface test directly on , No longer rely on third-party components .
5.4 Production environment shielding
Use Swagger Greatly improve the efficiency of interface development and testing , If not limited , Exposure to the production environment , That is a potential security risk , So in development 、 The test link is normally used , But shield it in the production environment Swagger The function of . The problem of multi environment configuration was mentioned in the previous article , Here you can use it to make articles .
The implementation is simple , stay Swagger Add annotations to the configuration class @Profile({ "dev", "test" }) , Mark only in dev or test It can only be used normally in the environment swagger Interface debugging function , This class will not be loaded in the production environment , The goal of shielding in the production environment has been achieved . Post startup test found ,swagger-ui.html The page can no longer load the interface for testing .
@EnableSwagger2
@Configuration
@Profile({ "dev", "test" })
public class Swagger2Config {
}
Be careful : whatever @Componen t or @Configuration Annotated classes can use @Profile annotation .
5.5 increase token Uniform parameters
Many internal services can only be used normally after users log in , For example, users sign in to receive points , It can only be used normally after logging in , If you add... To each interface token Parameters , Too much repetition , The design is not elegant , In general, it will token It is appropriate to put it in the request header , Swagger How to explicitly add input in a page token Our position becomes our goal .
stay Swagger The configuration class modifies the configuration , After completion :
@EnableSwagger2
@Configuration
@Profile({ "dev", "test" })
public class Swagger2Config {

    @Bean
    public Docket createRestApi() {
        ParameterBuilder parameterBuilder = new ParameterBuilder();
        List<Parameter> parameters = new ArrayList<>();
        parameterBuilder.modelRef(new ModelRef("String")).name("token").parameterType("header").description("token").defaultValue("").
        // Considering that some requests do not need  token  Of , Required fields cannot be set here
        required(false).build();
        parameters.add(parameterBuilder.build());

        return new Docket(DocumentationType.SWAGGER_2).apiInfo(apiInfo()).select()
                .apis(RequestHandlerSelectors.any()).paths(PathSelectors.any()).build().globalOperationParameters(parameters).securitySchemes(getSecuritySchemes());
    }

    private ApiInfo apiInfo() {
        return new ApiInfoBuilder()
                .title("Member  Member module interface layer ( be based on  SpringBoot2+Swagger2).")
                .contact(new Contact("growithus", "https://backkoms.github.io/", "[email protected]"))
                .version("1.0")
                .description("").build();
    }

    private List<ApiKey> getSecuritySchemes() {
        List<ApiKey> keys = new ArrayList<>();
        ApiKey key  = new ApiKey("token", "token", "header");
        keys.add(key);
        return keys;
    }
}
After starting the project , open swagger-ui.html page , You'll find one more Authorize The button , Enter valid after opening token You can log in , Other interfaces can be used directly , There is no need to enter more than once token ( It is not realized at this time token verification , It can be passed later AOP Programming to verify token The effectiveness of the ).


Here we are ,Swagger It can be normally used in the project , Follow up direct Copy The configuration of this example can be reused .
Each sub service module will expose the interface , If there are many calling services , Will have to face the interface page back and forth switching cumbersome , Is there any way to simplify it ?
Blog reference
边栏推荐
- Palindrome string (two methods)
- Sword finger offer 10- ii Frog jumping on steps
- How MySQL works - Chapter 14
- (Video + graphics) introduction to machine learning series - Chapter 11 support vector machines
- 微服务系统设计——数据模型与系统架构设计
- Four security issues of low code and no code development
- [untitled]
- Millions of dollars worth of NFT were stolen in the attack, and Google issued an emergency warning to 3.2 billion users worldwide | February 21 global network security hotspot
- The country has made a move! Launch network security review on HowNet
- SAP license: SAP s/4 Hana module function introduction
猜你喜欢

Huitongda officially landed at the Hong Kong Stock Exchange: the gross profit margin continued to decline, and the book value of several shareholders still suffered losses

Digital transformation informatization data planning and technology planning

Seven strategies for successfully integrating digital transformation
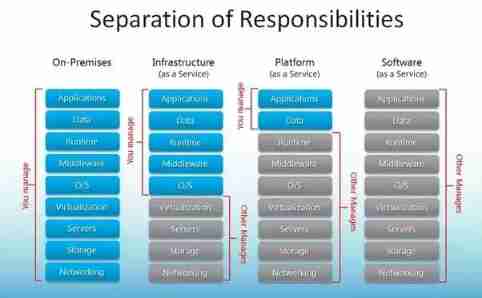
Cloud service selection of enterprises: comparative analysis of SaaS, PAAS and IAAs

Get max value of a bit column - get max value of a bit column

Flutter dart regular regexp matches non printing characters \cl\cj\cm\ck
【leetcode】838. Push domino (Analog)

Skills of writing test cases efficiently

He "painted" what a smart city should look like with his oars

Leetcode weekly buckle 281
随机推荐
variable
Why are more and more people studying for doctors? Isn't it more and more difficult to graduate a doctor?
Online sequence flow chart making tool
解决执行MapReduce程序控制台没有日志信息WARN Please initialize the log4j system properly
History object
2022 network security C module of the secondary vocational group scans the script of the surviving target aircraft (municipal, provincial and national)
JS picture display and hiding cases
Flex box flex attribute
Digital trend analysis of B2B e-commerce market mode and trading capacity in electronic components industry
Sword finger offer 10- ii Frog jumping on steps
Rapidssl getting started SSL certificate
Easynvr fails to use onvif to detect the device. What is the reason why "no data" is displayed?
[North Asia data recovery]_ mdb_ catalog. Mongodb database data recovery case in case of WT file corruption
Leetcode topic [array] -216- combined sum III
[JS Framework] Failed to execute the callback function:
Ten excellent business process automation tools for small businesses
如何在 R 中使用 Fisher 的最小显着性差异 (LSD)
Overall planning and construction method of digital transformation
How can programmers reduce bugs in development?
Keep two decimal places