当前位置:网站首页>LabVIEW generate application (exe) and installer
LabVIEW generate application (exe) and installer
2022-06-29 02:35:00 【Procedural ape without hair loss】
Catalog
2、 Build installer (installer)
Use LabVIEW A written program often needs to be taken to the target computer to run , How to transplant the program from the development computer to the target computer ? There are two ways :
1、 Install... On the target computer LabVIEW And related drivers and toolkits , And then vi Or copy the whole project to the target computer . However, installation LabVIEW And various toolkits will be more time-consuming , And vi It can be modified at will , Easy to cause misoperation , If you just run the program , This method is not recommended .
2、 take LabVIEW The program is compiled on the development computer to generate an independent executable program (exe), Then transplant the executable program to the target computer , The transplantation here is divided into two ways :
- The generated exe Copy to the target computer , Then install... Separately on the target computer LabVIEW Run the engine and the required drivers and toolkits , Installing drivers and toolkits in this method also takes a lot of time , Not recommended .
- The generated exe And some used components installer, The installer , Then run the installer on the target computer , After this installation , It was generated before exe、LabVIEW The running engine and other toolkits will be automatically installed on the target computer , This method is relatively simple to transplant , Is the most commonly used method .
There are two points to note before explaining :
1、 Build installer (installer) You have to be an application before (exe).
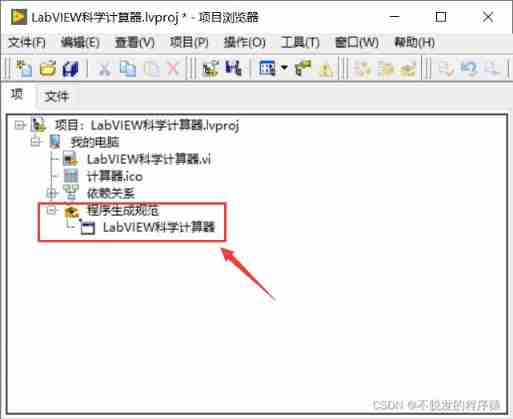
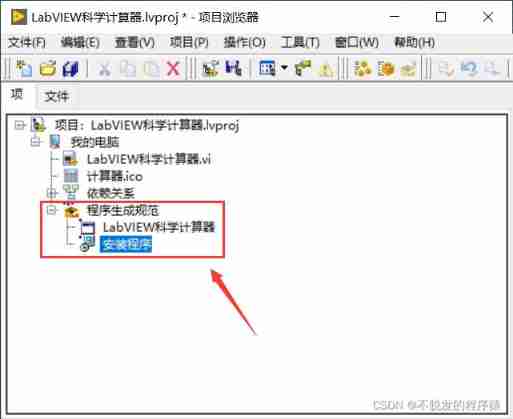
2、 Program VI The file must be in the project , If it's just a single VI File cannot be generated , You need to create a new project , Import VI file , As shown in the figure below :

1、 Build applications (exe)
The first 1 Step : Open the project , Choose “ Program generation specification ”, Click on the right , choice “ newly build ”, newly build “ Applications EXE”, As shown in the figure below :

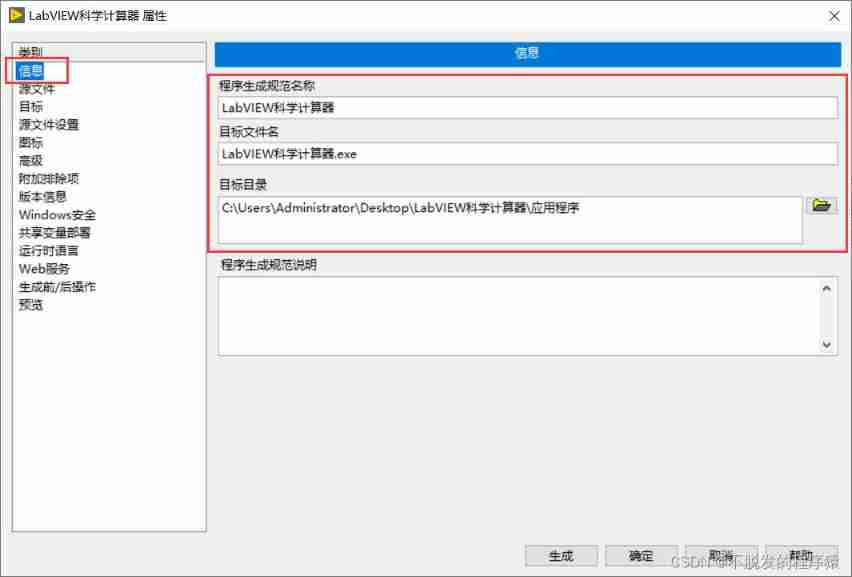
The first 2 Step : Fill in the product generation information , Include : Generated name and path , As shown in the figure below :
The first 3 Step : Add source file , In the project VI file , Import into application (exe) Start of VI, As shown in the figure below :

The first 4 Step : Set icon , You can choose to download the material website or design it yourself .ico file , Here I use the icon file downloaded from the material website , As shown in the figure below :

The first 5 Step : Finally, you can click generate preview , View the path and file generated by preview , As shown in the figure below :

The first 6 Step : Build applications (exe), As shown in the figure below :

You can view the generated application in the project file (exe) file , You can also enter the generation path , Look at the relevant files , As shown in the figure below :

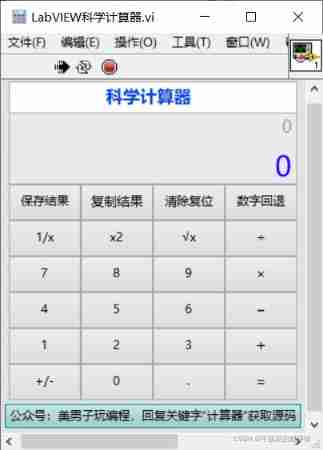
Click on “LabVIEW Scientific calculator .exe” file , Can run the application smoothly .
2、 Build installer (installer)
Building applications (exe) The installer can be generated on the basis of (installer) 了 .
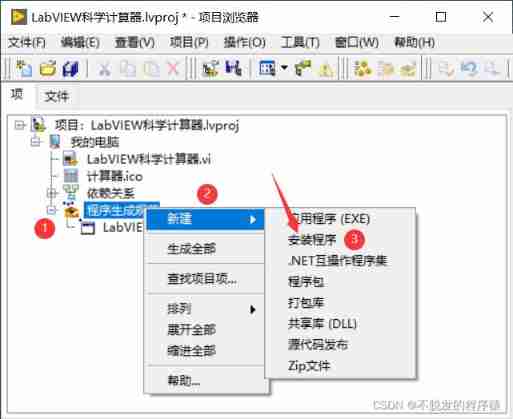
The first 1 Step : In project , Choose “ Program generation specification ”, Click on the right , choice “ newly build ”, newly build “ Erection sequence ”, As shown in the figure below :
The first 2 Step : Fill in the product generation information , Include : Generated name and path , As shown in the figure below :

The first 3 Step : choice “ Source file ”, In the project file view, click to select the application build specification you created earlier , Then click the add arrow , Add the application to the destination folder , In the target view on the right, you can see the result of adding , As shown in the figure below :

The first 4 Step : choice “ Shortcut ”, Modify the shortcut name and subdirectory name on the right . The shortcut name corresponds to the name of the shortcut icon you will see in the start menu in the future , The subdirectory corresponds to the folder name where the shortcut is located in the start menu , As shown in the figure below :

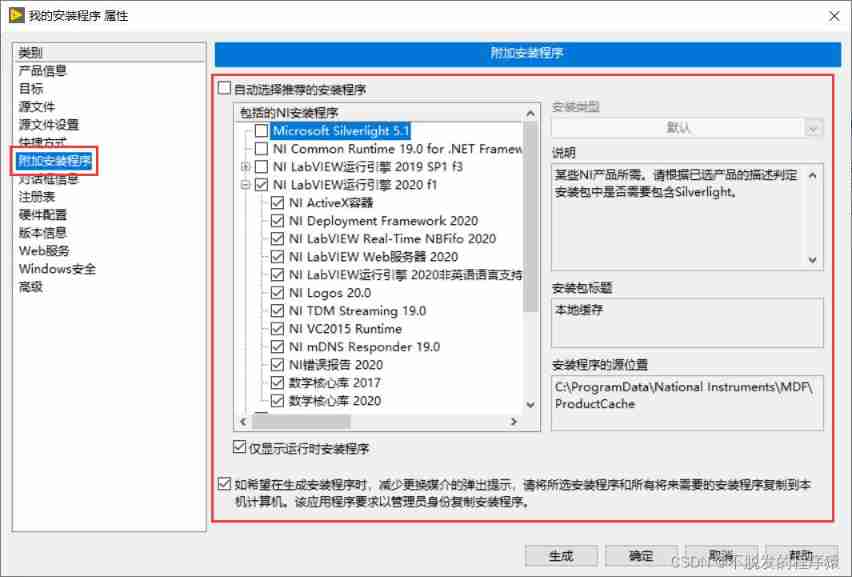
The first 5 Step : choice “ Additional installer ”, Check the appropriate LabVIEW Run the engine and necessary drivers, toolkits, etc , Then these drivers and the toolkit will be included in the generated installer in .LabVIEW Some necessary... Will be automatically checked here NI Erection sequence , But it may not contain all the programs that need to be installed , What drivers and toolkits are used in the program at this time , When configuring here, you need to check which toolkits . As shown in the figure below :
The first 6 Step : Finally, generate the installer (installer), As shown in the figure below :

You can view the generated application in the project file (exe) And setup (installer file , You can also enter the generation path , Look at the relevant files , As shown in the figure below :

Click on “LabVIEW Scientific calculator .exe”, Select installation path , It can be installed , As shown in the figure below :

.ico Icon file download website :
iconfont- Alibaba vector icon library
Icon download ,ICON(SVG/PNG/ICO/ICNS) Icon search download - Easyicon
边栏推荐
猜你喜欢
leetcode 统计无向图中无法互相到达点对数

三角函数计算

Deploy redis high availability cluster

The 10 most commonly used gadgets for waterfall project management can be built and used freely
![[redis] hash type](/img/8b/2585908318f5fe88b455323d3f392e.png)
[redis] hash type
对补wasm环境的一些测试

Oracle recovery tools actual batch bad block repair
Quelques tests pour compléter l'environnement wasm

Differences between web testing and app testing
Trigonometric function calculation
随机推荐
2022.02.15
项目研发,有哪些好用的免费脑图工具软件
Talk about SQL optimization
Centos7 installation php7.2
String method exercise
Com3529 test analysis
thinkphp5.1 runtime文件改成777权限了, 还是无法写入
计算矩形面积
[redis] list type
Programmers whose monthly salary is less than 30K must recite the interview stereotype. I'll eat it first
Have you learned the common SQL interview questions on the short video platform?
Regular expression (?: pattern)
Pyinstaller打包pikepdf失败的问题排查
Is it safe to contact the account manager online to open an account for stock speculation?
扁平结构转换为树结构
PHP database ODBC
EMC、EMI、EMS的關系
Boost the digital economy and face the future office | the launch of the new version of spreadjsv15.0 is about to begin
Cross border information station
Today's sleep quality record 82 points