当前位置:网站首页>Network remote access using raspberry pie
Network remote access using raspberry pie
2022-06-26 13:29:00 【Karmen_】
Network remote access using raspberry pie
One 、 Environmental installation
Raspberry pie mirror image Raspberry Pi OS – Raspberry Pi
SDCardFormatterv5 SD Memory Card Formatter | SD Association (sdcard.org)
Burning tools Raspberry Pi
putty Download PuTTY: latest release (0.77) (greenend.org.uk)
Please refer to :https://blog.csdn.net/xuancailinggan/article/details/93121712
Two 、 Practice
1. SD Card format
Open it up and download okay SDCardFormatter, Click on Format Take us SD Format the card

2. burn
Open our burning tool , Select the image we want to burn and the SD Click burn on the card

Wait for the burning to succeed …

3. The network configuration
open SD card , stay boot Create a directory SSH File create an empty text file wpa_supplicant.conf Enter... In the text
country=CN
ctrl_interface=DIR=/var/run/wpa_supplicant GROUP=netdev
update_config=1

network={

	ssid=" Your wireless network name "
	psk=" Your wireless password "
	key_mgmt=WPA-PSK
	priority=1
}
take SD Unplug the card, insert the raspberry pie and connect the power to the raspberry pie , You can see on your phone that raspberry pie has been connected , Check out the raspberry pie ip Address , You can download one Advanced IP Scanner, Open terminal input ipconfig, View the wireless hotspot IP Address , And then in IP Scanner Mid search .


Make sure that our computers are also connected to mobile phone hotspots , notice ip The address is 10.60.222.228, Search while searching 10.60.222.1-255
That's how we found our raspberry pie IP Address
4. Remote connection
open putty, stay putty Enter the just ip, Then establish a connection , Enter the default user password
Default user :pi
The default password :raspberry
If the default account password is incorrect , Can be in boot Create a userconf.txt file , This file is a single line of text , from username: User name content -password: password form —— That is, the desired user name , Follow a colon , Followed by an encrypted representation of the password to be used .
Or configure the account and password when writing the image

Then enter the account and password again to enter the system

Configure raspberry pie sudo raspi-config

And then choose interface options
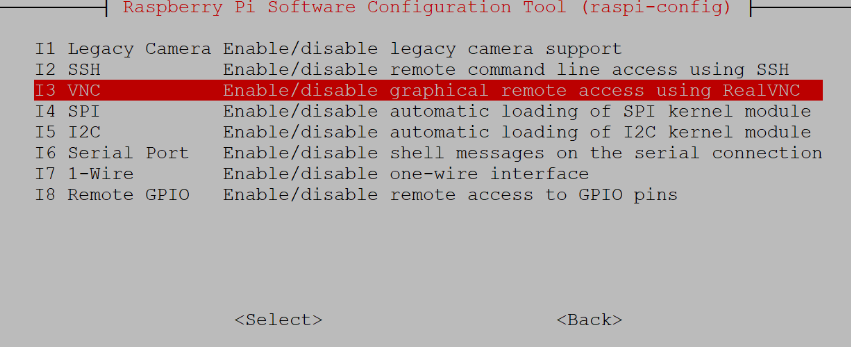
open VNC service

Then open the VNC Viewer, Then enter the name of the raspberry pie IP, Then enter the account and password

3、 ... and 、 Create an account and create... In your personal file assert Assertion C Program
1. Create user
Open the terminal and input the command
su -
useradd -m -s /bin/bash  user name

// password
passwd  user name

When the permission is not enough, you can su prefix sudo that will do , Then go to the created folder /home/ user name / Create file in assert.c, Enter in file
#include <assert.h>
#include <stdio.h>

int main()
{

   int a;
   char str[50];

   printf(" Please enter an integer value : ");
   scanf("%d", &a);
   assert(a >= 10);

   printf(" The integer entered is : %d\n", a);

   printf(" Please enter the string : ");
   scanf("%s", str);
   assert(str != NULL);

   printf(" The input string is : %s\n", str);

   return(0);
}
If you cannot create a file, you can use the command
sudo chmod -R 777 / working directory
touch assert.c
vim asssert.c

Then you can perform the compilation function

Then use GCC compile

Four 、 Use scp The command is on two Linux Data transmission between systems
scp yes secure copy Abbreviation , yes linux Based on ssh Log in for secure remote file copy command .scp It's encrypted. ,rcp It's not encrypted ,scp yes rcp The enhanced .
because scp The transmission is encrypted , It may affect the speed a little . in addition ,scp It doesn't take up resources , It will not increase the system load much , At this point ,rsync It's far less than that . although rsync Than scp It will be faster , But when there are lots of small files ,rsync It will cause the hard disk I/O Very high , and scp Basically does not affect the normal use of the system .
1. spi grammar
** Basic grammar :**
scp [-1246BCpqrv] [-c cipher] [-F ssh_config] [-i identity_file]
[-l limit] [-o ssh_option] [-P port] [-S program]
[[[email protected]]host1:]file1 [...] [[[email protected]]host2:]file2


// Parameter description
-1:  mandatory scp Command usage protocol ssh1
-2:  mandatory scp Command usage protocol ssh2
-4:  mandatory scp The command only uses IPv4 Addressing
-6:  mandatory scp The command only uses IPv6 Addressing
-B:  Use batch mode ( Do not ask for transmission password or phrase during transmission )
-C:  Allow compression .( take -C The sign is passed on to ssh, To turn on compression )
-p:  Keep the modification time of the original document , Access time and access rights .
-q:  Do not show transfer progress bar .
-r:  Recursively copy the entire directory .
-v:  Detailed display output .scp and ssh(1) The debugging information of the whole process will be displayed . This information is used to debug connections , Validation and configuration issues .
-c cipher:         With cipher Encrypt the data transmission , This option will be passed directly to ssh.
-F ssh_config:     Designate an alternative ssh The configuration file , This parameter is passed directly to ssh.
-i identity_file:  The key file used to read the transfer from the specified file , This parameter is passed directly to ssh.
-l limit:          Limit the bandwidth that users can use , With Kbit/s In units of .
-o ssh_option:     If you are used to using ssh_config(5) Parameter passing method in ,
-P port:           Notice that it's capital P, port Is the port number used for data transmission
-S program:        Specify the program to use when encrypting the transmission . This procedure must be able to understand ssh(1) The option to .
2. example
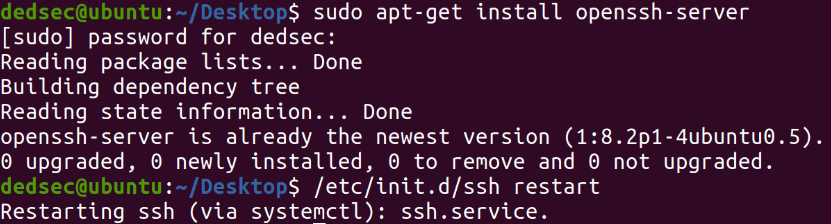
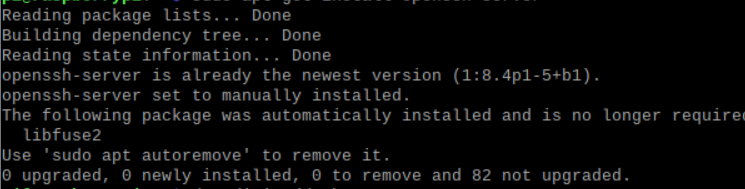
Download on virtual machine and raspberry pie respectively ssh
Put the raspberries in the pie you practiced before assert.c Upload the file to the virtual machine
scp -r [email protected]:/home/lm/assert.c ./

Transmission complete
You can see assert.c The file appears on the desktop

5、 ... and 、 Reference article
边栏推荐
猜你喜欢


随机推荐
Fire warning is completed within 10 seconds, and Baidu AI Cloud helps Kunming Guandu build a new benchmark of smart city
Basic methods for network diagnosis and hardware troubleshooting of Beifu EtherCAT module
Beifu PLC realizes zero point power-off hold of absolute value encoder -- use of bias
HDU 3709 Balanced Number
Analysis of state transition diagram of Beifu NC axis
I have a good word to say, and I admire myself
适配器模式(Adapter)
Mysql database explanation (IV)
Echart stack histogram: add white spacing effect setting between color blocks
Generate JDE dot train
【Spark】. Explanation of several icons of scala file in idea
Mode pont
Aesthetic experience (episode 238) Luo Guozheng
MySQL explanation (I)
Adapter mode
原型模式(prototype)
7-2 picking peanuts
There are many contents in the widget, so it is a good scheme to support scrolling
Reflect the technical depth (unable to speed up)
DataGrip配置的连接迁移