当前位置:网站首页>JS common basic case sorting (continuous update)
JS common basic case sorting (continuous update)
2022-07-03 07:51:00 【Peter Sue】
Catalog
- 041- Rolling parallax effect
- 040- Slide menu indicator
- 039- Mobile drag
- 038-js Achieve the effect of fade in and fade out of the rotation map
- 037-js Lazy image loading
- 036- Web calendar
- 035- Remember the user name (js Code )
- 034-js Basic rotation chart ( Slide round )
- 033- Jingdong magnifying glass effect (js Code )
- 032- Simple animation function encapsulation
- 031- Imitation Taobao fixed sidebar + Back to the top button
- 030- Drag the modal box
- 029- Send SMS countdown case
- 028- The countdown effect
- 027- Simulate the query case of JD express order number
- 026- Simulate Jingdong key input content
- 025- The little man who follows the mouse
- 024- Dynamically generate table cases
- 023- Delete message case
- 022- Sina drop-down menu
- 021-Tab Bar Toggle ( Imitation of Jingdong )
- 020- Full election and reverse election
- 019- The color of the table is different from each other
- 018- Switching light effect
- 017- Imitation Sina registration page box
- 016- Taobao closes QR code case
- 015- Imitation of jd.com shows the effect of hidden passwords
- 014- Find string "abcoefoxyozzopp" All in o Where and how often
- 013- Remove duplicate elements from the array
- 012- Static countdown effect
- 011- Basic bubble sorting
- 010- Delete the elements of the specified array
- 009- Store in the array 100 It's worth
- 008- Find the largest value in the array
- 007- Calculate the sum and average of the array
- 006-while Circular case
- 005- Print the multiplication table
- 004- Print inverted triangle
- 003- Print n That's ok n The stars of the column
- 002- Query fruit cases
- 001- Judge leap year and average year
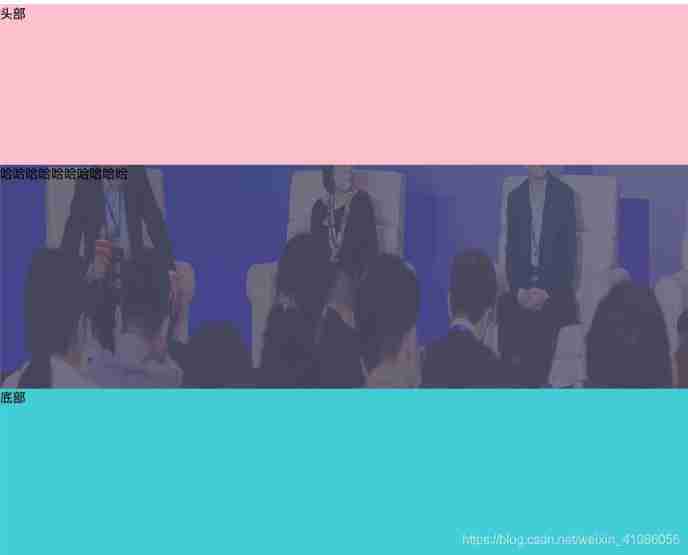
041- Rolling parallax effect
<!DOCTYPE html>
<html lang="en">

<head>
  <meta charset="UTF-8">
  <meta name="viewport" content="width=device-width, initial-scale=1.0">
  <title>Document</title>
  <style>
    * {

      margin: 0;
      padding: 0;
    }

    header {

      width: 100%;
      height: 200px;
      background: pink;
    }

    .a {

      visibility: hidden;
      z-index: -100;
      position: fixed;
      top: 0px;
      left: 0px;
      overflow: hidden;
      height: 280px;
      width: 100%;
    }

    .b {

      position: absolute;
      height: 460px;
      width: 100%;
      max-width: none;
    }

    span {

      display: block;
      height: 280px;
      width: 100%;
    }

    footer {

      height: 1000px;
      background-color: rgb(56, 205, 216);
    }
  </style>
</head>

<body>
  <header>
     Head
  </header>
  <section>
    <span id="d">
       Ha ha ha ha ha ha ha ha
      <div class="a">
        <img class="b" src="./banner-guandian.png">
      </div>
    </span>
  </section>
  <footer>
     Bottom
  </footer>
</body>
<script>
  window.onload = function () {

    let A = document.querySelector('.a') //  Outside the picture div a
    let B = document.querySelector('.b') // picture  b
    let client = document.documentElement.clientHeight // Page visual height
    let dTop = document.getElementById('d').getBoundingClientRect().top //span The distance from the element to the window

    //  The element appears in the viewport
    if (dTop < client) {

      //  Set the picture to visible , modify transform value
      A.style.visibility = 'visible'
      A.style.transform = `translate3d(0px, ${
      client-(client - dTop)}px, 0px)`
      B.style.transform = `translate3d(0px,${
      (-(client * 0.82))+((client - dTop)*0.8)}px, 0px)`
    } else {

      A.style.transform = `translate3d(0px, ${
      client-10}px, 0px)`
      B.style.transform = `translate3d(0px,-${
      (client-10) * 0.82}px, 0px)`
    }

    //  Scroll bar events
    window.onscroll = function () {

      let client = document.documentElement.clientHeight
      let dTop = document.getElementById('d').getBoundingClientRect().top
      //  The element appears in the viewport
      if (dTop < client) {

        //  ditto , Set the picture to visible , modify transform value
        A.style.visibility = 'visible'
        A.style.transform = `translate3d(0px, ${
      client-(client - dTop)}px, 0px)`
        B.style.transform = `translate3d(0px,${
      (-(client * 0.82))+((client - dTop)*0.8)}px, 0px)`
      }
    }
  }
</script>

</html>
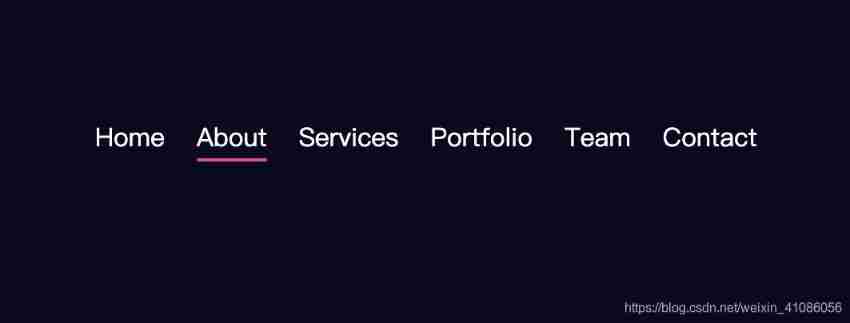
040- Slide menu indicator
<!DOCTYPE html>
<html lang="en">

<head>
  <meta charset="UTF-8">
  <meta http-equiv="X-UA-Compatible" content="IE=edge">
  <meta name="viewport" content="width=device-width, initial-scale=1.0">
  <title>Document</title>
  <style>
    * {

      margin: 0;
      padding: 0;
      box-sizing: border-box;
    }

    body {

      display: flex;
      align-items: center;
      justify-content: center;
      min-height: 100vh;
      background-color: #090a20;
    }

    nav {

      position: relative;
      display: flex;
    }

    nav a {

      position: relative;
      margin: 0 20px;
      font-size: 2em;
      color: #fff;
      text-decoration: none;
    }

    nav #marker {

      position: absolute;
      height: 4px;
      width: 10%;
      background-color: #e35188;
      left: 20px;
      bottom: -8px;
      transition: .5s;
      border-radius: 4px;
    }
  </style>
</head>

<body>
  <nav>
    <div id="marker"></div>
    <a href="#">Home</a>
    <a href="#">About</a>
    <a href="#">Services</a>
    <a href="#">Portfolio</a>
    <a href="#">Team</a>
    <a href="#">Contact</a>
  </nav>
  <script>
    let marker = document.querySelector('#marker')
    let item = document.querySelectorAll('nav a')
    console.log(marker, 'marker');

    function indicator(e) {

      marker.style.left = e.offsetLeft + 'px'
      marker.style.width = e.offsetWidth + 'px'
    }

    item.forEach(link => {

      link.addEventListener('click', e => {

        indicator(e.target)
      })
    })
  </script>
</body>

</html>
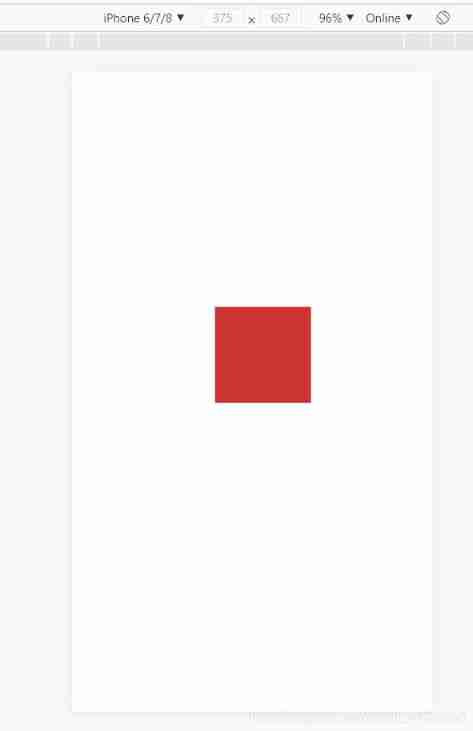
039- Mobile drag
<!DOCTYPE html>
<html lang="en">
<head>
  <meta charset="UTF-8">
  <meta name="viewport" content="width=device-width, initial-scale=1.0">
  <title>Document</title>
</head>
<style>
  div {

    width: 100px;
    height: 100px;
    background: #c33;
    position: absolute;
    left: 0;
    top: 0;
  }
</style>
<body>
  <div></div>
  <script>
    // 1. Touch elements  touchstart:  Get the initial coordinates of the fingers , At the same time, get the original position of the box
    // 2. Move your fingers  touchmove:  Calculate the sliding distance of the fingers , And move the box
    // 3. Fingers away  touchend
    let div = document.querySelector('div');
    let startX = 0 // Get the initial coordinates of the fingers
    let startY = 0
    let x = 0 // Get the original position of the box
    let y = 0;

    div.addEventListener('touchstart',function(e){


      //  Get the initial coordinates of the fingers
      startX = e.targetTouches[0].pageX;
      startY = e.targetTouches[0].pageY;
      x = this.offsetLeft;
      y = this.offsetTop
    })

    div.addEventListener('touchmove',function(e){

      //  Calculate the movement distance of the finger , Subtract the initial coordinates of the finger from the coordinates after the finger moves
      let moveX = e.targetTouches[0].pageX - startX;
      let moveY = e.targetTouches[0].pageY - startY;
      //  Move our box   The original position of the box  +  The distance the finger moves
      this.style.left = x + moveX + 'px'
      this.style.top = y + moveY + 'px'
      e.preventDefault();   // Default behavior to prevent screen scrolling
    })
  </script>
</body>
</html>
038-js Achieve the effect of fade in and fade out of the rotation map

<!DOCTYPE html>
<html lang="en">
<head>
  <meta charset="UTF-8">
  <meta http-equiv="X-UA-Compatible" content="IE=edge">
  <meta name="viewport" content="width=device-width, initial-scale=1.0">
  <title>Document</title>
</head>
<style> .wrap {
      width: 800px; height: 400px; position: relative; } .list {
      width: 800px; height: 400px; list-style: none; position: relative; padding-left: 0px; } .item {
      width: 100%; height: 100%; color:#fff; font-size: 50px; position: absolute; opacity: 0; transition: all .5s; } .btn {
      width: 50px; height: 100px; position: absolute; top: 150px; z-index: 100; } #goPre {
      left: 0; } #goNext {
      right: 0; } .item.active {
      z-index: 10; opacity: 1; } .item:nth-child(1){
      background-color: black; } .item:nth-child(2){
      background-color: red; } .item:nth-child(3){
      background-color: yellow; } .item:nth-child(4){
      background-color: green; } .item:nth-child(5){
      background-color: pink; } /*  Little dots  */ .pointList {
      padding-left: 0px; list-style: none; position:absolute; right: 20px; bottom: 20px; z-index: 1000; border: 2px solid rgba(255, 255, 255, .6); } .point {
      width: 8px; height: 8px; background-color: rgba(0,0,0,.4); border-radius: 100%; float: left; margin-right: 14px; cursor: pointer; } .point.active {
      background-color: rgba(255,255,255,1); } </style>
<body>
  <div class="wrap">
    <ul class="list">
      <li class="item active">0</li>
      <li class="item">1</li>
      <li class="item">2</li>
      <li class="item">3</li>
      <li class="item">4</li>
    </ul>
    <ul class="pointList">
      <li class="point active" data-index='0'></li>
      <li class="point" data-index='1'></li>
      <li class="point" data-index='2'></li>
      <li class="point" data-index='3'></li>
      <li class="point" data-index='4'></li>
    </ul>
    <button type="button" class="btn" id="goPre"><</button>
    <button type="button" class="btn" id="goNext">></button>
  </div>
  <script> let items = document.querySelectorAll('.item') // picture  let points = document.querySelectorAll('.point') // Little dots  let goPreBtn = document.getElementById('goPre') let goNextBtn = document.getElementById('goNext') let index = 0 ;// Indicates which picture is showing   The first index Picture yes active This class name  let clearActive = function(){
      for(let i = 0; i < items.length; i++){
      items[i].className = 'item' } for(let i = 0; i < points.length; i++){
      points [i].className = 'point' } } let goIndex = function(){
      clearActive() items[index].className = 'item active' points[index].className = 'point active' } let goNext = function(){
      if(index < 4){
      index++ }else {
      index =0 } goIndex() } let goPre = function(){
      if(index == 4){
      index=0 }else {
      index -- } goIndex() } goNextBtn.addEventListener('click',function(){
      goNext() }) goPreBtn.addEventListener('click',function(){
      goPre() }) for(let i = 0; i < points.length; i++){
      points[i].addEventListener('click',function(){
      let pointIdx = this.getAttribute('data-index') index = pointIdx goIndex() }) } //  Automatic wheel broadcasting  let timer = setInterval(()=>{
      goNextBtn.click() },3000) </script>
</body>

</html>
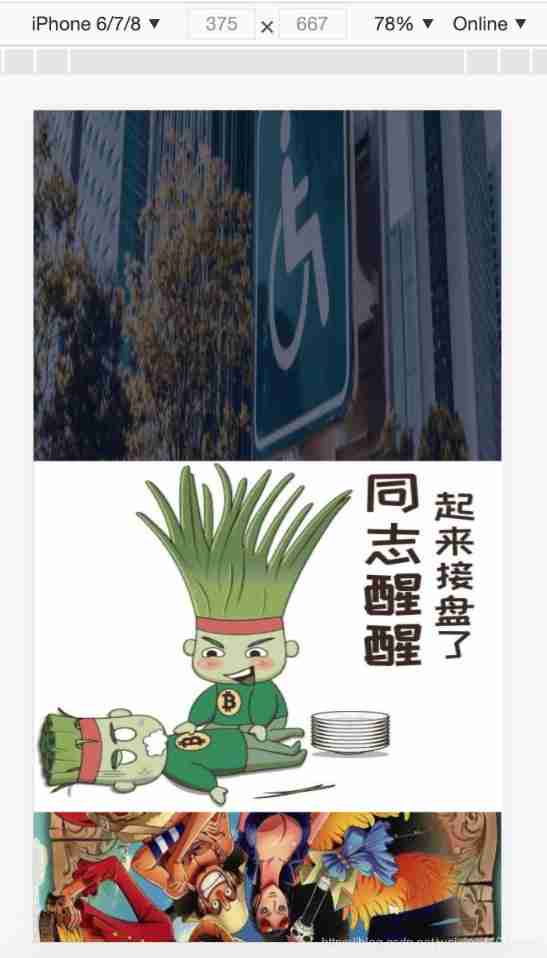
037-js Lazy image loading
<!DOCTYPE html>
<html lang="en">
<head>
  <meta charset="UTF-8">
  <meta name="viewport" content="width=device-width, initial-scale=1.0">
  <title>Document</title>
</head>
<style>
  html body {

    padding: 0;
    margin: 0;
  }
  img {

      width: 400px;
      display: block;
      margin: 0 auto;
      height: 300px;
    }
  div {

    height: 400px;
    border: 1px solid red;
  }
</style>
<body>
  <img data-src="./banner.jpg" alt="">
  <img data-src="./jj.jpeg" alt="" >
  <img data-src="./pic/1.jpg" alt="" >
  <img data-src="./pic/2.jpg" alt="">
  <img data-src="./pic/3.jpg" alt="">
  <img data-src="./pic/4.jpg" alt="">
  <img data-src="./pic/5.jpg" alt="" >
  <script>
  const imgs = document.querySelectorAll('img');
  const len = imgs.length
  function isShow(img) {

    const scrollTop = document.documentElement.scrollTop || document.body.scrollTop;
    const windowHeight = document.documentElement.clientHeight;
    const offsetTop = img.offsetTop
    // Judge the present img Whether it appears in the field of vision .
    return offsetTop < (windowHeight + scrollTop)
  }
  //  Throttling function
  function throttle(fn, delay) {

    // oldTime For the last time the callback was triggered , timer It's a timer.
    let oldTime = 0, timer = null;
    //  take throttle Processing results are returned as functions
    return function () {

      //  Record the time when the callback is triggered
      let nowTime = +new Date()
      //  Determine whether the time difference between the last trigger and the current trigger is less than the threshold of the time interval
      if (nowTime - oldTime < delay) {

        //  If the time interval is less than the time interval threshold we set , Set a new timer for this trigger operation
        clearTimeout(timer)
        timer = setTimeout(function () {

          oldTime = nowTime
          fn()
        }, delay)
      } else {

        //  If the time interval exceeds the time interval threshold we set , Then wait , Give the user a response anyway
        oldTime = nowTime
        fn()
      }
    }
  }
  function lazyLoad() {

    let count = 0;
    // Use closures to save a variable , Record each change src The final position of , In this way, you don't have to traverse all of them every time
    return () => {

      for (var i = count; i < len; i++) {

        // If img Reach the field of vision
        if (isShow(imgs[i])) {

          imgs[i].src = imgs[i].getAttribute('data-src');
          // hold img Of src Switch to data-src The real address inside , And record the last change to that position ,
          count = i;
        }
      }
    }
  }
  // Use variables to receive lazyLoad Running results
  let lazy = lazyLoad()
  // The homepage needs to be loaded just after it is loaded
  lazy()
  window.addEventListener('scroll', throttle(lazy, 300), false)

  </script>
</body>

</html>
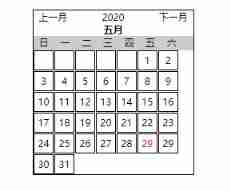
036- Web calendar
<!DOCTYPE html>
<html lang="en">
<head>
  <meta charset="UTF-8">
  <meta name="viewport" content="width=device-width, initial-scale=1.0">
  <title>Document</title>
  <style> *{
      margin: 0; padding: 0; } #data {
      width: 300px; border: 1px solid #000; margin: 20px auto; } #data > p {
      display: flex; } #data > p span{
      padding: 0 10px; } #data > h5 {
      text-align: center; } #prev,#next {
      cursor: pointer; } #nian {
      flex: 1; text-align: center; } #title {
      overflow: hidden; list-style: none; background-color: #ccc; } #title li {
      float: left; width: 40px; height: 26px; line-height: 26px; text-align: center; } #date {
      overflow: hidden; list-style: none; } #date li {
      float: left; width: 34px; height: 34px; margin: 1px 1px; border: 2px solid #000; line-height: 34px; text-align: center; cursor: pointer; list-style: none; } #date > .hover:hover {
      border:2px solid red; } .active{
      color:red } </style>
</head>
<body>
  <div id="data">
    <p>
      <span id="prev"> Last month </span>
      <span id="nian">2022</span>
      <span id="next"> Next month </span>
    </p>
    <h5 id="yue"> January </h5>
    <ul id="title">
      <li> Japan </li>
      <li> One </li>
      <li> Two </li>
      <li> 3、 ... and </li>
      <li> Four </li>
      <li> 5、 ... and </li>
      <li> 6、 ... and </li>
    </ul>
    <ul id="date"></ul>
  </div>

  <script> let date = new Date(); // Get the default time object  add() //  Trigger when the page first enters  function add() {
      let cYear = date.getFullYear(); // Get current year  let cMonth = date.getMonth(); // Get current month  let cDay = date.getDate() //  Current day  console.log(cDay,'1'); //  The first day of each month is the day of the week  let week = new Date(cYear,cMonth,1).getDay() //  Get the number of days per month  let days = new Date(cYear,cMonth+1,-1).getDate()+1; let arr = [' January ',' February ',' March ',' April ',' May ',' June ',' July ',' August ',' September ',' October ',' November ',' December ',] document.getElementById('nian').innerHTML = cYear document.getElementById('yue').innerHTML = arr[cMonth] let html = ''; for(var i = 0; i < week; i++) {
      html += '<li></li>' } for(var i = 1; i <= days; i++) {
      if( i == cDay) {
      html += '<li class="active">'+i+'</li>' } html += '<li class="hover">'+i+'</li>' } document.getElementById('date').innerHTML = html } document.getElementById('prev').onclick = function(){
      date.setMonth(date.getMonth()-1); add() } document.getElementById('next').onclick = function(){
      date.setMonth(date.getMonth()+1); add() } </script>
</body>
</html>
035- Remember the user name (js Code )
design sketch :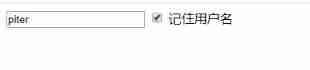
Sample code :
<!DOCTYPE html>
<html lang="en">
  <head>
    <meta charset="UTF-8" />
    <meta name="viewport" content="width=device-width, initial-scale=1.0" />
    <meta http-equiv="X-UA-Compatible" content="ie=edge" />
    <title>Document</title>
  </head>

  <body>
    <input type="text" id="username" />
    <input type="checkbox" name="" id="remember" />  Remember the user name
    <script>
      var username = document.querySelector('#username')
      var remember = document.querySelector('#remember')
      if (localStorage.getItem('username')) {

        username.value = localStorage.getItem('username')
        remember.checked = true
      }
      remember.addEventListener('change', function () {

        if (this.checked) {

          localStorage.setItem('username', username.value)
        } else {

          localStorage.removeItem('username')
        }
      })
    </script>
  </body>
</html>
034-js Basic rotation chart ( Slide round )
design sketch :
Sample code :
window.addEventListener('load', function () {

  // 1.  Get elements
  var arrow_l = document.querySelector('.arrow-l')
  var arrow_r = document.querySelector('.arrow-r')
  var focus = document.querySelector('.focus')
  var focusWidth = focus.offsetWidth
  // 2.  Mouse over focus  Show and hide the left and right buttons
  focus.addEventListener('mouseenter', function () {

    arrow_l.style.display = 'block'
    arrow_r.style.display = 'block'
    clearInterval(timer)
    timer = null //  Clear timer variable
  })
  focus.addEventListener('mouseleave', function () {

    arrow_l.style.display = 'none'
    arrow_r.style.display = 'none'
    timer = setInterval(function () {

      // Manually call the click event
      arrow_r.click()
    }, 2000)
  })
  // 3.  Dynamic generation of small circles   There are several pictures , I just made a few little circles
  var ul = focus.querySelector('ul')
  var ol = focus.querySelector('.circle')
  // console.log(ul.children.length);
  for (var i = 0; i < ul.children.length; i++) {

    //  Create a small li
    var li = document.createElement('li')
    //  Record the index number of the current small circle   Do it through custom attributes
    li.setAttribute('index', i)
    //  Put small li Insert into ol  Inside
    ol.appendChild(li)
    // 4.  The exclusive thought of the little circle   We can directly bind click events while generating small circles
    li.addEventListener('click', function () {

      //  Get rid of everyone   Put all the little li  eliminate  current  Class name
      for (var i = 0; i < ol.children.length; i++) {

        ol.children[i].className = ''
      }
      //  Leave me alone   Current small li  Set up current  Class name
      this.className = 'current'
      // 5.  Click on the small circle , Move picture   Of course, what's moving is  ul
      // ul  The moving distance of   The index number of the small circle   multiply   Width of picture   Notice that it's negative
      //  When we click on a little li  Just get the current little li  The index number of
      var index = this.getAttribute('index')
      //  When we click on a little li  Just put this li  The index number of  num
      num = index
      //  When we click on a little li  Just put this li  The index number of  circle
      circle = index
      // num = circle = index;
      console.log(focusWidth)
      console.log(index)

      animate(ul, -index * focusWidth)
    })
  }
  //  hold ol The first one inside li Set the class name to  current
  ol.children[0].className = 'current'
  // 6.  Clone the first picture (li) Put it in ul  Back most
  var first = ul.children[0].cloneNode(true)
  ul.appendChild(first)
  // 7.  Click the right button ,  Picture scroll one
  var num = 0
  // circle  Control the play of small circles
  var circle = 0
  // flag  throttle valve
  var flag = true
  arrow_r.addEventListener('click', function () {

    if (flag) {

      flag = false //  Close throttle valve
      //  If you go to the last copy of an image , here   our ul  To recover quickly  left  Change it to  0
      if (num == ul.children.length - 1) {

        ul.style.left = 0
        num = 0
      }
      num++
      animate(ul, -num * focusWidth, function () {

        flag = true //  Open throttle valve
      })
      // 8.  Click the right button , The small circle changes with it   You can declare a variable to control the play of the small circle
      circle++
      //  If circle == 4  It means that we've come to the end of this clone   We'll recover
      if (circle == ol.children.length) {

        circle = 0
      }
      //  Call function
      circleChange()
    }
  })

  // 9.  Left button method
  arrow_l.addEventListener('click', function () {

    if (flag) {

      flag = false
      if (num == 0) {

        num = ul.children.length - 1
        ul.style.left = -num * focusWidth + 'px'
      }
      num--
      animate(ul, -num * focusWidth, function () {

        flag = true
      })
      //  Click on the left button , The small circle changes with it   You can declare a variable to control the play of the small circle
      circle--
      //  If circle < 0  Explain the first picture , Then the small circle should be changed to 4 A little circle (3)
      // if (circle < 0) {

      // circle = ol.children.length - 1;
      // }
      circle = circle < 0 ? ol.children.length - 1 : circle
      //  Call function
      circleChange()
    }
  })

  function circleChange() {

    //  Clear the rest of the small circles first current Class name
    for (var i = 0; i < ol.children.length; i++) {

      ol.children[i].className = ''
    }
    //  Leaving the current little circle current Class name
    ol.children[circle].className = 'current'
  }
  // 10.  Auto play carousel
  var timer = setInterval(function () {

    // Manually call the click event
    arrow_r.click()
  }, 2000)
})
033- Jingdong magnifying glass effect (js Code )
design sketch :

Sample code :
window.addEventListener('load', function () {

  var preview_img = document.querySelector('.preview_img')
  var mask = document.querySelector('.mask')
  var big = document.querySelector('.big')
  // 1.  When we mouse past  preview_img  Just show and hide  mask  The shelter   and  big  Big box
  preview_img.addEventListener('mouseover', function () {

    mask.style.display = 'block'
    big.style.display = 'block'
  })
  preview_img.addEventListener('mouseout', function () {

    mask.style.display = 'none'
    big.style.display = 'none'
  })
  // 2.  When the mouse moves , Let the yellow box follow the mouse
  preview_img.addEventListener('mousemove', function (e) {

    // (1).  First calculate the coordinates of the mouse in the box
    var x = e.pageX - this.offsetLeft
    var y = e.pageY - this.offsetTop
    // console.log(x, y);
    // (2)  Minus the box height  300 Half of   yes  150  It's us mask  In the end  left  and top The value of
    // (3)  We mask  Distance traveled
    var maskX = x - mask.offsetWidth / 2
    var maskY = y - mask.offsetHeight / 2
    // (4)  If x  The coordinates are less than 0  Just let him stop at 0  The location of
    //  The maximum moving distance of the occlusion layer
    var maskMax = preview_img.offsetWidth - mask.offsetWidth
    if (maskX <= 0) {

      maskX = 0
    } else if (maskX >= maskMax) {

      maskX = maskMax
    }
    if (maskY <= 0) {

      maskY = 0
    } else if (maskY >= maskMax) {

      maskY = maskMax
    }
    mask.style.left = maskX + 'px'
    mask.style.top = maskY + 'px'
    // 3.  The moving distance of the big picture  =  The moving distance of the occlusion layer  *  Maximum moving distance of large picture  /  The maximum moving distance of the occlusion layer
    //  Big picture
    var bigIMg = document.querySelector('.bigImg')
    //  Maximum moving distance of large picture
    var bigMax = bigIMg.offsetWidth - big.offsetWidth
    //  The moving distance of the big picture  X Y
    var bigX = (maskX * bigMax) / maskMax
    var bigY = (maskY * bigMax) / maskMax
    bigIMg.style.left = -bigX + 'px'
    bigIMg.style.top = -bigY + 'px'
  })
})
032- Simple animation function encapsulation
design sketch :
Sample code :
<!DOCTYPE html>
<html lang="en">
  <head>
    <meta charset="UTF-8" />
    <meta name="viewport" content="width=device-width, initial-scale=1.0" />
    <meta http-equiv="X-UA-Compatible" content="ie=edge" />
    <title>Document</title>
    <style> div {
      position: absolute; left: 0; width: 100px; height: 100px; background-color: pink; } span {
      position: absolute; left: 0; top: 200px; display: block; width: 150px; height: 150px; background-color: purple; } </style>
  </head>

  <body>
    <div></div>
    <span> Summer rain lotus </span>
    <script> //  Simple animation function encapsulation obj Target audience  target  Target location  function animate(obj, target) {
      var timer = setInterval(function () {
      if (obj.offsetLeft >= target) {
      //  Stop Animation   It's essentially a stop timer  clearInterval(timer) } obj.style.left = obj.offsetLeft + 1 + 'px' }, 30) } var div = document.querySelector('div') var span = document.querySelector('span') //  Call function  animate(div, 300) animate(span, 200) </script>
  </body>
</html>
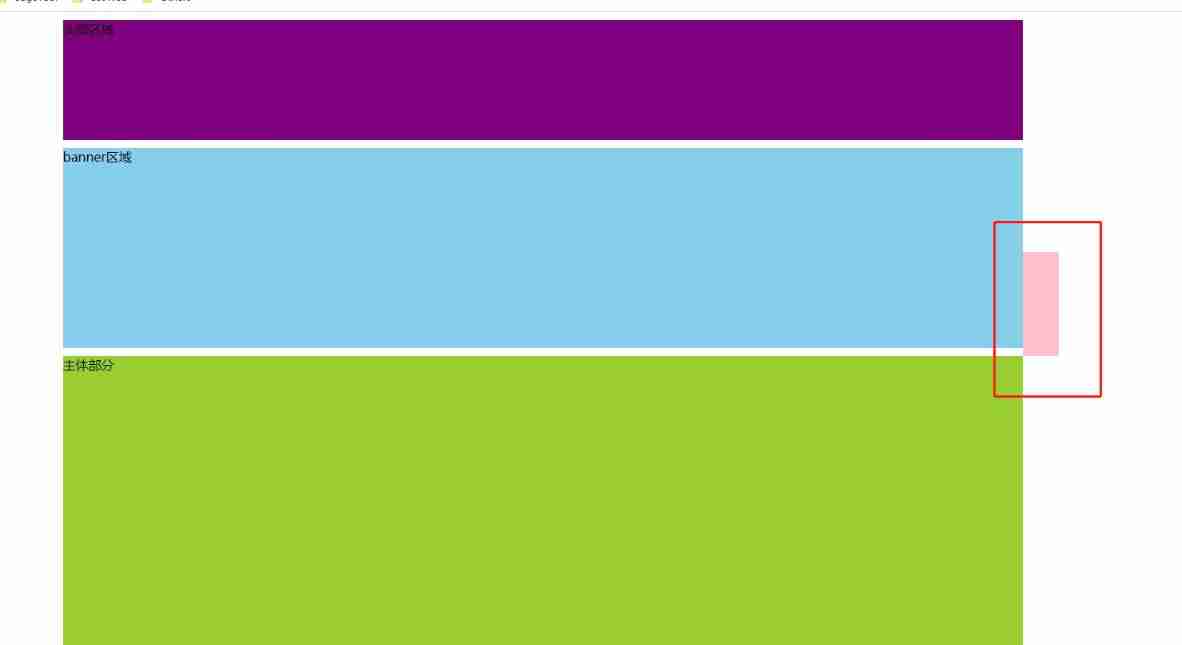
031- Imitation Taobao fixed sidebar + Back to the top button
design sketch :
Sample code :
<!DOCTYPE html>
<html lang="en">
  <head>
    <meta charset="UTF-8" />
    <meta name="viewport" content="width=device-width, initial-scale=1.0" />
    <meta http-equiv="X-UA-Compatible" content="ie=edge" />
    <title>Document</title>
    <style> .slider-bar {
      position: absolute; left: 50%; top: 300px; margin-left: 600px; width: 45px; height: 130px; background-color: pink; } .w {
      width: 1200px; margin: 10px auto; } .header {
      height: 150px; background-color: purple; } .banner {
      height: 250px; background-color: skyblue; } .main {
      height: 1000px; background-color: yellowgreen; } span {
      display: none; position: absolute; bottom: 0; } </style>
  </head>

  <body>
    <div class="slider-bar">
      <span class="goBack"> Return to the top </span>
    </div>
    <div class="header w"> Head area </div>
    <div class="banner w">banner Area </div>
    <div class="main w"> Main part </div>
    <script> //1.  Get elements  var sliderbar = document.querySelector('.slider-bar') var banner = document.querySelector('.banner') // banner.offestTop  It's the size of the head being rolled away   Be sure to write on the outside of the scroll  var bannerTop = banner.offsetTop //  The value that should change when we fix the sidebar  var sliderbarTop = sliderbar.offsetTop - bannerTop //  obtain main  The main element  var main = document.querySelector('.main') var goBack = document.querySelector('.goBack') var mainTop = main.offsetTop // 2.  Page scrolling Events  scroll document.addEventListener('scroll', function () {
      // console.log(11); // window.pageYOffset  The head of the page being rolled away  // console.log(window.pageYOffset); // 3 . When the head of our page is rolled off is greater than or equal to  172  here   The sidebar is going to be fixed  if (window.pageYOffset >= bannerTop) {
      sliderbar.style.position = 'fixed' sliderbar.style.top = sliderbarTop + 'px' } else {
      sliderbar.style.position = 'absolute' sliderbar.style.top = '300px' } // 4.  When we scroll to main The box , Show  goback modular  if (window.pageYOffset >= mainTop) {
      goBack.style.display = 'block' } else {
      goBack.style.display = 'none' } }) // 3.  When we click back to the top module , Let the window scroll at the top of the page  goBack.addEventListener('click', function () {
      //  Inside x and y  Not with the unit   Just write numbers  // window.scroll(0, 0); //  Because it's window scrolling   So the object is window animate(window, 0) }) //  Animation functions  function animate(obj, target, callback) {
      // console.log(callback); callback = function() {}  When called  callback() //  Clear the previous timer first , Only the current timer is kept for execution  clearInterval(obj.timer) obj.timer = setInterval(function () {
      //  The step value is written into the timer  //  Change our step size to an integer   Don't have the problem of decimals  // var step = Math.ceil((target - obj.offsetLeft) / 10); var step = (target - window.pageYOffset) / 10 step = step > 0 ? Math.ceil(step) : Math.floor(step) if (window.pageYOffset == target) {
      //  Stop Animation   It's essentially a stop timer  clearInterval(obj.timer) //  The callback function is written to the end of the timer  // if (callback) {
      // //  Call function  // callback(); // } callback && callback() } //  Add... Every time 1  This step value is changed to a slowly decreasing value   Step formula :( The target  -  The present position ) / 10 // obj.style.left = window.pageYOffset + step + 'px'; window.scroll(0, window.pageYOffset + step) }, 15) } </script>
  </body>
</html>
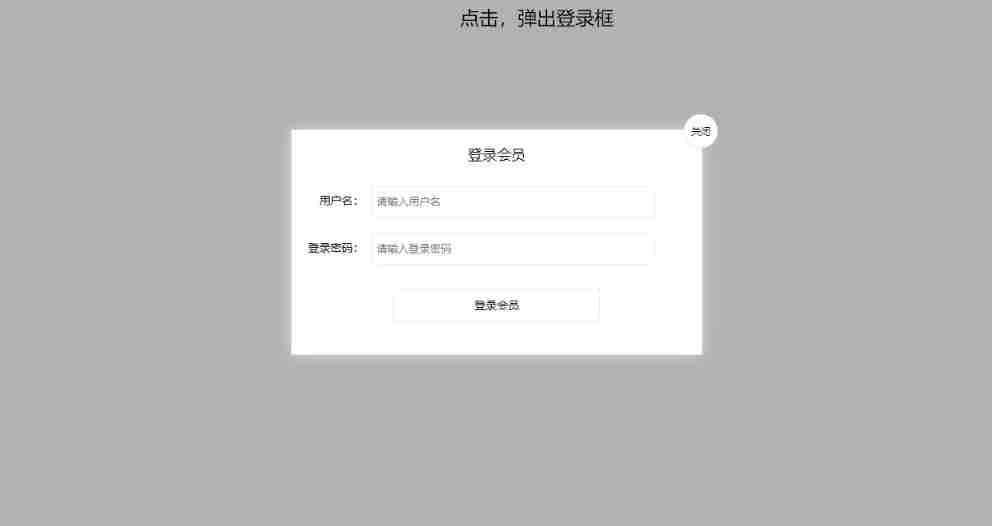
030- Drag the modal box
design sketch :

Sample code :
<!DOCTYPE html>
<html>
  <head lang="en">
    <meta charset="UTF-8" />
    <title></title>
    <style> .login-header {
      width: 100%; text-align: center; height: 30px; font-size: 24px; line-height: 30px; } ul, li, ol, dl, dt, dd, div, p, span, h1, h2, h3, h4, h5, h6, a {
      padding: 0px; margin: 0px; } .login {
      display: none; width: 512px; height: 280px; position: fixed; border: #ebebeb solid 1px; left: 50%; top: 50%; background: #ffffff; box-shadow: 0px 0px 20px #ddd; z-index: 9999; transform: translate(-50%, -50%); } .login-title {
      width: 100%; margin: 10px 0px 0px 0px; text-align: center; line-height: 40px; height: 40px; font-size: 18px; position: relative; cursor: move; } .login-input-content {
      margin-top: 20px; } .login-button {
      width: 50%; margin: 30px auto 0px auto; line-height: 40px; font-size: 14px; border: #ebebeb 1px solid; text-align: center; } .login-bg {
      display: none; width: 100%; height: 100%; position: fixed; top: 0px; left: 0px; background: rgba(0, 0, 0, 0.3); } a {
      text-decoration: none; color: #000000; } .login-button a {
      display: block; } .login-input input.list-input {
      float: left; line-height: 35px; height: 35px; width: 350px; border: #ebebeb 1px solid; text-indent: 5px; } .login-input {
      overflow: hidden; margin: 0px 0px 20px 0px; } .login-input label {
      float: left; width: 90px; padding-right: 10px; text-align: right; line-height: 35px; height: 35px; font-size: 14px; } .login-title span {
      position: absolute; font-size: 12px; right: -20px; top: -30px; background: #ffffff; border: #ebebeb solid 1px; width: 40px; height: 40px; border-radius: 20px; } </style>
  </head>

  <body>
    <div class="login-header">
      <a id="link" href="javascript:;"> Click on , The login box will pop up </a>
    </div>
    <div id="login" class="login">
      <div id="title" class="login-title">
         Login member
        <span ><a id="closeBtn" href="javascript:void(0);" class="close-login" > close </a ></span >
      </div>
      <div class="login-input-content">
        <div class="login-input">
          <label> user name :</label>
          <input type="text" placeholder=" Please enter a user name " name="info[username]" id="username" class="list-input" />
        </div>
        <div class="login-input">
          <label> The login password :</label>
          <input type="password" placeholder=" Please enter the login password " name="info[password]" id="password" class="list-input" />
        </div>
      </div>
      <div id="loginBtn" class="login-button">
        <a href="javascript:void(0);" id="login-button-submit"> Login member </a>
      </div>
    </div>
    <!--  Covering layer  -->
    <div id="bg" class="login-bg"></div>
    <script> // 1.  Get elements  var login = document.querySelector('.login') var mask = document.querySelector('.login-bg') var link = document.querySelector('#link') var closeBtn = document.querySelector('#closeBtn') var title = document.querySelector('#title') // 2.  Click on the pop-up link  link  Give Way mask  and login  Show it  link.addEventListener('click', function () {
      mask.style.display = 'block' login.style.display = 'block' }) // 3.  Click on  closeBtn  Just hide  mask  and  login closeBtn.addEventListener('click', function () {
      mask.style.display = 'none' login.style.display = 'none' }) // 4.  Start dragging  // (1)  When we press the mouse ,  You get the coordinates of the mouse in the box  title.addEventListener('mousedown', function (e) {
      var x = e.pageX - login.offsetLeft var y = e.pageY - login.offsetTop // (2)  When the mouse moves , Mouse coordinates in the page , subtract   The coordinates of the mouse in the box are those of the modal box left and top value  document.addEventListener('mousemove', move) function move(e) {
      login.style.left = e.pageX - x + 'px' login.style.top = e.pageY - y + 'px' } // (3)  The mouse pop-up , Let the mouse movement event remove  document.addEventListener('mouseup', function () {
      document.removeEventListener('mousemove', move) }) }) </script>
  </body>
</html>
029- Send SMS countdown case
design sketch :

Sample code :
<!DOCTYPE html>
<html lang="en">

<head>
    <meta charset="UTF-8">
    <meta name="viewport" content="width=device-width, initial-scale=1.0">
    <meta http-equiv="X-UA-Compatible" content="ie=edge">
    <title>Document</title>
</head>

<body>
     Phone number : <input type="number"> <button> send out </button>
    <script> //  After clicking the button , Will disable  disabled  by true  //  At the same time, the contents of the button will change ,  Be careful  button  The content of it is through  innerHTML modify  //  There is a change in the number of seconds , So you need a timer  //  Define a variable , In the timer , Decreasing  //  If the variable is 0  It means it's time , We need to stop the timer , And reset the initial state of the button  var btn = document.querySelector('button'); var time = 3; //  Define the number of seconds left  btn.addEventListener('click', function() {
      btn.disabled = true; var timer = setInterval(function() {
      if (time == 0) {
      //  Clear timer and reset button  clearInterval(timer); btn.disabled = false; btn.innerHTML = ' send out '; } else {
      btn.innerHTML = ' There is still left ' + time + ' second '; time--; } }, 1000); }) </script>
</body>

</html>
028- The countdown effect
design sketch :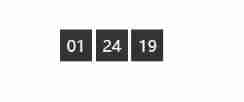
Sample code :
<!DOCTYPE html>
<html lang="en">

<head>
    <meta charset="UTF-8">
    <meta name="viewport" content="width=device-width, initial-scale=1.0">
    <meta http-equiv="X-UA-Compatible" content="ie=edge">
    <title>Document</title>
    <style> div {
      margin: 200px; } span {
      display: inline-block; width: 40px; height: 40px; background-color: #333; font-size: 20px; color: #fff; text-align: center; line-height: 40px; } </style>
</head>

<body>
    <div>
        <span class="hour">1</span>
        <span class="minute">2</span>
        <span class="second">3</span>
    </div>
    <script> // 1.  Get elements   var hour = document.querySelector('.hour'); //  Hour black box  var minute = document.querySelector('.minute'); //  The black box of minutes  var second = document.querySelector('.second'); //  The black box of seconds  var inputTime = +new Date('2050-8-8 18:00:00'); //  Returns the total number of milliseconds of user input time  countDown(); //  Let's call this function once , Prevent blank pages from being refreshed for the first time   // 2.  Turn on timer  setInterval(countDown, 1000); function countDown() {
      var nowTime = +new Date(); //  Returns the total number of milliseconds of the current time  var times = (inputTime - nowTime) / 1000; // times Is the total number of seconds remaining   var h = parseInt(times / 60 / 60 % 24); // when  h = h < 10 ? '0' + h : h; hour.innerHTML = h; //  Give the remaining hours to   Hour black box  var m = parseInt(times / 60 % 60); //  branch  m = m < 10 ? '0' + m : m; minute.innerHTML = m; var s = parseInt(times % 60); //  Current seconds  s = s < 10 ? '0' + s : s; second.innerHTML = s; } </script>
</body>

</html
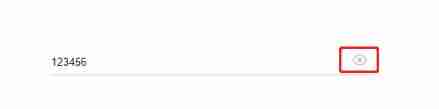
027- Simulate the query case of JD express order number
design sketch :
Sample code :
<!DOCTYPE html>
<html lang="en">
  <head>
    <meta charset="UTF-8" />
    <meta name="viewport" content="width=device-width, initial-scale=1.0" />
    <meta http-equiv="X-UA-Compatible" content="ie=edge" />
    <title>Document</title>
    <style> * {
      margin: 0; padding: 0; } .search {
      position: relative; width: 178px; margin: 100px; } .con {
      display: none; position: absolute; top: -40px; width: 171px; border: 1px solid rgba(0, 0, 0, 0.2); box-shadow: 0 2px 4px rgba(0, 0, 0, 0.2); padding: 5px 0; font-size: 18px; line-height: 20px; color: #333; } .con::before {
      content: ''; width: 0; height: 0; position: absolute; top: 28px; left: 18px; border: 8px solid #000; border-style: solid dashed dashed; border-color: #fff transparent transparent; } </style>
  </head>

  <body>
    <div class="search">
      <div class="con">123</div>
      <input type="text" placeholder=" Please enter your courier number " class="jd" />
    </div>
    <script> //  When you enter the content in the express order No ,  The big font box above (con) Show ( The font size here is bigger ) //  The form detects user input :  Add keyboard events to the form  //  At the same time, the value in the express order number (value) Get and assign to  con The box (innerText) As content  //  If the content in the express order number is empty , Then hide the large font box (con) The box  var con = document.querySelector('.con') var jd_input = document.querySelector('.jd') jd_input.addEventListener('keyup', function () {
      // console.log(' Input content '); if (this.value == '') {
      con.style.display = 'none' } else {
      con.style.display = 'block' con.innerText = this.value } }) //  When we lose focus , Just hide this con The box  jd_input.addEventListener('blur', function () {
      con.style.display = 'none' }) //  When we get the focus , Just show this con The box  jd_input.addEventListener('focus', function () {
      if (this.value !== '') {
      con.style.display = 'block' } }) </script>
  </body>
</html>
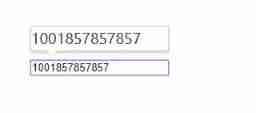
026- Simulate Jingdong key input content
design sketch :

Sample code :
<!DOCTYPE html>
<html lang="en">
  <head>
    <meta charset="UTF-8" />
    <meta name="viewport" content="width=device-width, initial-scale=1.0" />
    <meta http-equiv="X-UA-Compatible" content="ie=edge" />
    <title>Document</title>
  </head>

  <body>
    <input type="text" />
    <script> //  The core idea :  Detect whether the user pressed s  key , If you press s  key , Just position the cursor in the search box  //  Use the... In the keyboard event object keyCode  Judge whether the user pressed s key  //  The search box gets focus :  Use  js  Inside  focus()  Method  var search = document.querySelector('input') document.addEventListener('keyup', function (e) {
      // console.log(e.keyCode); if (e.keyCode === 83) {
      search.focus() } }) </script>
  </body>
</html>
025- The little man who follows the mouse
design sketch :
Sample code :
<!DOCTYPE html>
<html lang="en">

<head>
    <meta charset="UTF-8">
    <meta name="viewport" content="width=device-width, initial-scale=1.0">
    <meta http-equiv="X-UA-Compatible" content="ie=edge">
    <title>Document</title>
    <style> img {
      position: absolute; top: 2px; } </style>
</head>

<body>
    <img src="images/angel.gif" alt="">
    <script> var pic = document.querySelector('img'); document.addEventListener('mousemove', function(e) {
      // 1. mousemove As long as we move the mouse   Will trigger this event  // 2. The core principle :  Every time the mouse moves , We all get the latest mouse coordinates ,  Put this x and y The coordinates are the coordinates of the picture top and left  Value to move the picture  var x = e.pageX; var y = e.pageY; console.log('x Coordinates are ' + x, 'y Coordinates are ' + y); //3 .  Don't forget to give left  and top  add to px  Company  pic.style.left = x - 50 + 'px'; pic.style.top = y - 40 + 'px'; }); </script>
</body>

</html>
024- Dynamically generate table cases
design sketch :
Sample code :
<!DOCTYPE html>
<html lang="en">
  <head>
    <meta charset="UTF-8" />
    <meta name="viewport" content="width=device-width, initial-scale=1.0" />
    <meta http-equiv="X-UA-Compatible" content="ie=edge" />
    <title>Document</title>
    <style> table {
      width: 500px; margin: 100px auto; border-collapse: collapse; text-align: center; } td, th {
      border: 1px solid #333; } thead tr {
      height: 40px; background-color: #ccc; } </style>
  </head>

  <body>
    <table cellspacing="0">
      <thead>
        <tr>
          <th> full name </th>
          <th> subject </th>
          <th> achievement </th>
          <th> operation </th>
        </tr>
      </thead>
      <tbody></tbody>
    </table>
    <script> // 1. data  var datas = [ {
      name: 'test0', subject: 'JavaScript', score: 10, }, {
      name: 'test1', subject: 'JavaScript', score: 9, }, {
      name: 'test2', subject: 'JavaScript', score: 9, }, {
      name: 'test3', subject: 'JavaScript', score: 8, }, {
      name: 'test4', subject: 'JavaScript', score: 1, }, ] // 2.  Go to tbody  Inside, China Construction Bank :  There are several people ( By the length of the array ) Let's just create a few lines  var tbody = document.querySelector('tbody') for (var i = 0; i < datas.length; i++) {
      //  Outside for Circulation management line  tr // 1.  establish  tr That's ok  var tr = document.createElement('tr') tbody.appendChild(tr) // 2.  Create cells in rows ( Data related 3 A cell ) td  The number of cells depends on the number of attributes in each object  for Loop through objects  datas[i] for (var k in datas[i]) {
      //  Inside for Circulating pipe train  td //  Create cells  var td = document.createElement('td') //  Put the attribute value in the object  datas[i][k]  to  td // console.log(datas[i][k]); td.innerHTML = datas[i][k] tr.appendChild(td) } // 3.  Create or delete 2 A word cell  var td = document.createElement('td') td.innerHTML = '<a href="javascript:;"> Delete  </a>' tr.appendChild(td) } // 4.  Delete operation   Start  var as = document.querySelectorAll('a') for (var i = 0; i < as.length; i++) {
      as[i].onclick = function () {
      //  Click on a  Delete   At present a  Where the line is ( Linked dad's Dad ) node.removeChild(child) tbody.removeChild(this.parentNode.parentNode) } } // for(var k in obj) {
      // k  What you get is the attribute name  // obj[k]  The result is the attribute value  // } </script>
  </body>
</html>
023- Delete message case
design sketch :
Sample code :
<!DOCTYPE html>
<html lang="en">
  <head>
    <meta charset="UTF-8" />
    <meta name="viewport" content="width=device-width, initial-scale=1.0" />
    <meta http-equiv="X-UA-Compatible" content="ie=edge" />
    <title>Document</title>
    <style> * {
      margin: 0; padding: 0; } body {
      padding: 100px; } textarea {
      width: 200px; height: 100px; border: 1px solid pink; outline: none; resize: none; } ul {
      margin-top: 50px; } li {
      width: 300px; padding: 5px; background-color: rgb(245, 209, 243); color: red; font-size: 14px; margin: 15px 0; } li a {
      float: right; } </style>
  </head>

  <body>
    <textarea name="" id=""></textarea>
    <button> Release </button>
    <ul></ul>
    <script> // 1.  Get elements  var btn = document.querySelector('button') var text = document.querySelector('textarea') var ul = document.querySelector('ul') // 2.  Registration events  btn.onclick = function () {
      if (text.value == '') {
      alert(' You have not entered anything ') return false } else {
      // (1)  Create elements  var li = document.createElement('li') //  To have a first li  Can be assigned  li.innerHTML = text.value + "<a href='javascript:;'> Delete </a>" // (2)  Additive elements  // ul.appendChild(li); ul.insertBefore(li, ul.children[0]) // (3)  Remove elements   What is deleted is the current linked li  Its father  var del = document.querySelectorAll('a') for (var i = 0; i < del.length; i++) {
      del[i].onclick = function () {
      // node.removeChild(child);  Delete  li  At present a Where li this.parentNode; ul.removeChild(this.parentNode) } } } } </script>
  </body>
</html>
022- Sina drop-down menu
design sketch 
Sample code :
<!DOCTYPE html>
<html lang="en">
  <head>
    <meta charset="UTF-8" />
    <meta name="viewport" content="width=device-width, initial-scale=1.0" />
    <meta http-equiv="X-UA-Compatible" content="ie=edge" />
    <title>Document</title>
    <style> * {
      margin: 0; padding: 0; } li {
      list-style-type: none; } a {
      text-decoration: none; font-size: 14px; } .nav {
      margin: 100px; } .nav > li {
      position: relative; float: left; width: 80px; height: 41px; text-align: center; } .nav li a {
      display: block; width: 100%; height: 100%; line-height: 41px; color: #333; } .nav > li > a:hover {
      background-color: #eee; } .nav ul {
      display: none; position: absolute; top: 41px; left: 0; width: 100%; border-left: 1px solid #fecc5b; border-right: 1px solid #fecc5b; } .nav ul li {
      border-bottom: 1px solid #fecc5b; } .nav ul li a:hover {
      background-color: #fff5da; } </style>
  </head>

  <body>
    <ul class="nav">
      <li>
        <a href="#"> Microblogging </a>
        <ul>
          <li>
            <a href=""> Direct messages </a>
          </li>
          <li>
            <a href=""> Comment on </a>
          </li>
          <li>
            <a href="">@ I </a>
          </li>
        </ul>
      </li>
      <li>
        <a href="#"> Microblogging </a>
        <ul>
          <li>
            <a href=""> Direct messages </a>
          </li>
          <li>
            <a href=""> Comment on </a>
          </li>
          <li>
            <a href="">@ I </a>
          </li>
        </ul>
      </li>
      <li>
        <a href="#"> Microblogging </a>
        <ul>
          <li>
            <a href=""> Direct messages </a>
          </li>
          <li>
            <a href=""> Comment on </a>
          </li>
          <li>
            <a href="">@ I </a>
          </li>
        </ul>
      </li>
      <li>
        <a href="#"> Microblogging </a>
        <ul>
          <li>
            <a href=""> Direct messages </a>
          </li>
          <li>
            <a href=""> Comment on </a>
          </li>
          <li>
            <a href="">@ I </a>
          </li>
        </ul>
      </li>
    </ul>
    <script> // 1.  Get elements  var nav = document.querySelector('.nav') var lis = nav.children //  obtain 4 Small li // 2. Loop register events  for (var i = 0; i < lis.length; i++) {
      lis[i].onmouseover = function () {
      this.children[1].style.display = 'block' } lis[i].onmouseout = function () {
      this.children[1].style.display = 'none' } } </script>
  </body>
</html>
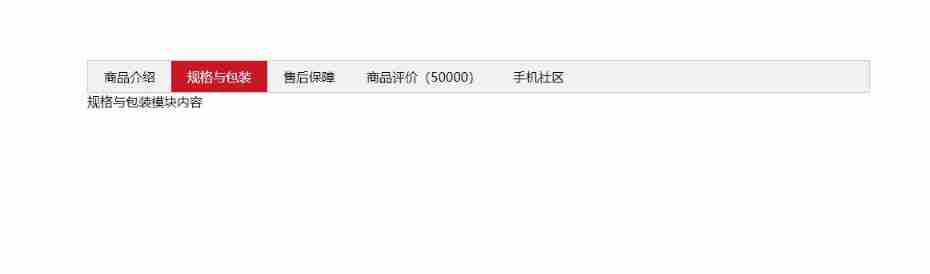
021-Tab Bar Toggle ( Imitation of Jingdong )
design sketch
Sample code :
<!DOCTYPE html>
<html lang="en">
  <head>
    <meta charset="UTF-8" />
    <meta name="viewport" content="width=device-width, initial-scale=1.0" />
    <meta http-equiv="X-UA-Compatible" content="ie=edge" />
    <title>Document</title>
    <style> * {
      margin: 0; padding: 0; } li {
      list-style-type: none; } .tab {
      width: 978px; margin: 100px auto; } .tab_list {
      height: 39px; border: 1px solid #ccc; background-color: #f1f1f1; } .tab_list li {
      float: left; height: 39px; line-height: 39px; padding: 0 20px; text-align: center; cursor: pointer; } .tab_list .current {
      background-color: #c81623; color: #fff; } .item_info {
      padding: 20px 0 0 20px; } .item {
      display: none; } </style>
  </head>

  <body>
    <div class="tab">
      <div class="tab_list">
        <ul>
          <li class="current"> Product introduction </li>
          <li> Specifications and packaging </li>
          <li> After sales support </li>
          <li> Product evaluation (50000)</li>
          <li> Mobile community </li>
        </ul>
      </div>
      <div class="tab_con">
        <div class="item" style="display: block;">
           Product introduction module content
        </div>
        <div class="item">
           Specification and packaging module content
        </div>
        <div class="item">
           Content of after-sales guarantee module
        </div>
        <div class="item">
           Product evaluation (50000) Module content
        </div>
        <div class="item">
           Mobile community module content
        </div>
      </div>
    </div>
    <script> //  Get elements  var tab_list = document.querySelector('.tab_list') var lis = tab_list.querySelectorAll('li') var items = document.querySelectorAll('.item') // for Loop binding click event  for (var i = 0; i < lis.length; i++) {
      //  Start giving 5 Small li  Set the index number  lis[i].setAttribute('index', i) lis[i].onclick = function () {
      // 1.  The modules tab on the , Click on a , The current background color will be red , The rest remains the same ( Exclusive thoughts )  How to modify the class name  //  Get rid of everyone   The rest li eliminate  class  This class  for (var i = 0; i < lis.length; i++) {
      lis[i].className = '' } //  Leave me alone  this.className = 'current' // 2.  The following display content module  var index = this.getAttribute('index') console.log(index) //  Get rid of everyone   Let the rest item  these div  hide  for (var i = 0; i < items.length; i++) {
      items[i].style.display = 'none' } //  Leave me alone   Let the corresponding item  Show it  items[index].style.display = 'block' } } </script>
  </body>
</html>
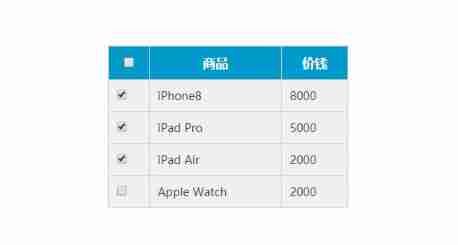
020- Full election and reverse election
design sketch
Sample code :
<!DOCTYPE html>
<html>
  <head lang="en">
    <meta charset="UTF-8" />
    <title></title>
    <style> * {
      padding: 0; margin: 0; } .wrap {
      width: 300px; margin: 100px auto 0; } table {
      border-collapse: collapse; border-spacing: 0; border: 1px solid #c0c0c0; width: 300px; } th, td {
      border: 1px solid #d0d0d0; color: #404060; padding: 10px; } th {
      background-color: #09c; font: bold 16px ' Microsoft YaHei '; color: #fff; } td {
      font: 14px ' Microsoft YaHei '; } tbody tr {
      background-color: #f0f0f0; } tbody tr:hover {
      cursor: pointer; background-color: #fafafa; } </style>
  </head>

  <body>
    <div class="wrap">
      <table>
        <thead>
          <tr>
            <th>
              <input type="checkbox" id="j_cbAll" />
            </th>
            <th> goods </th>
            <th> Price </th>
          </tr>
        </thead>
        <tbody id="j_tb">
          <tr>
            <td>
              <input type="checkbox" />
            </td>
            <td>iPhone8</td>
            <td>8000</td>
          </tr>
          <tr>
            <td>
              <input type="checkbox" />
            </td>
            <td>iPad Pro</td>
            <td>5000</td>
          </tr>
          <tr>
            <td>
              <input type="checkbox" />
            </td>
            <td>iPad Air</td>
            <td>2000</td>
          </tr>
          <tr>
            <td>
              <input type="checkbox" />
            </td>
            <td>Apple Watch</td>
            <td>2000</td>
          </tr>
        </tbody>
      </table>
    </div>
    <script> // 1.  Select all and deselect all :  Let all the check boxes below checked attribute ( Selected state )  Follow   Just press the select all button  //  Get elements  var j_cbAll = document.getElementById('j_cbAll') //  Select all button  var j_tbs = document.getElementById('j_tb').getElementsByTagName('input') //  All check boxes below  //  Registration events  j_cbAll.onclick = function () {
      // this.checked  It can get the selected status of the current check box. If it is true  Is to choose , If it is false  Is unchecked  console.log(this.checked) for (var i = 0; i < j_tbs.length; i++) {
      j_tbs[i].checked = this.checked } } // 2.  All the check boxes below need to be selected ,  Select all above to select the method :  Bind click events to all check boxes below , Every time I click , Cycle through all the check boxes below to see if they are unchecked , If one is not selected ,  If you select all above, you will not select . for (var i = 0; i < j_tbs.length; i++) {
      j_tbs[i].onclick = function () {
      // flag  Controls whether the select all button is selected  var flag = true //  Cycle the checker every time you click the check box below 4 Whether all the small buttons are selected  for (var i = 0; i < j_tbs.length; i++) {
      if (!j_tbs[i].checked) {
      flag = false break //  sign out for loop   This can improve execution efficiency   Because as long as one is not selected , The rest doesn't need circular judgment  } } j_cbAll.checked = flag } } </script>
  </body>
</html>
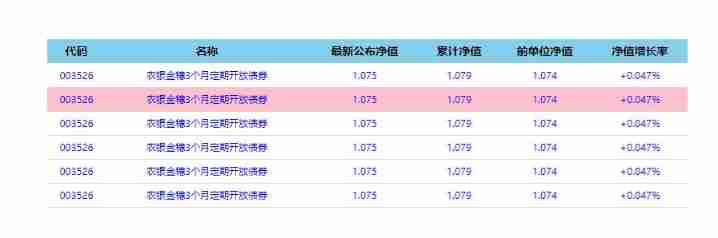
019- The color of the table is different from each other
design sketch
Sample code :
<!DOCTYPE html>
<html lang="en">
  <head>
    <meta charset="UTF-8" />
    <meta name="viewport" content="width=device-width, initial-scale=1.0" />
    <meta http-equiv="X-UA-Compatible" content="ie=edge" />
    <title>Document</title>
    <style> table {
      width: 800px; margin: 100px auto; text-align: center; border-collapse: collapse; font-size: 14px; } thead tr {
      height: 30px; background-color: skyblue; } tbody tr {
      height: 30px; } tbody td {
      border-bottom: 1px solid #d7d7d7; font-size: 12px; color: blue; } .bg {
      background-color: pink; } </style>
  </head>

  <body>
    <table>
      <thead>
        <tr>
          <th> Code </th>
          <th> name </th>
          <th> Latest net worth </th>
          <th> Cumulative net worth </th>
          <th> Net value of previous units </th>
          <th> Net worth growth rate </th>
        </tr>
      </thead>
      <tbody>
        <tr>
          <td>003526</td>
          <td> Agricultural Bank of China Jinsui 3 Open bonds regularly for months </td>
          <td>1.075</td>
          <td>1.079</td>
          <td>1.074</td>
          <td>+0.047%</td>
        </tr>
        <tr>
          <td>003526</td>
          <td> Agricultural Bank of China Jinsui 3 Open bonds regularly for months </td>
          <td>1.075</td>
          <td>1.079</td>
          <td>1.074</td>
          <td>+0.047%</td>
        </tr>
        <tr>
          <td>003526</td>
          <td> Agricultural Bank of China Jinsui 3 Open bonds regularly for months </td>
          <td>1.075</td>
          <td>1.079</td>
          <td>1.074</td>
          <td>+0.047%</td>
        </tr>
        <tr>
          <td>003526</td>
          <td> Agricultural Bank of China Jinsui 3 Open bonds regularly for months </td>
          <td>1.075</td>
          <td>1.079</td>
          <td>1.074</td>
          <td>+0.047%</td>
        </tr>
        <tr>
          <td>003526</td>
          <td> Agricultural Bank of China Jinsui 3 Open bonds regularly for months </td>
          <td>1.075</td>
          <td>1.079</td>
          <td>1.074</td>
          <td>+0.047%</td>
        </tr>
        <tr>
          <td>003526</td>
          <td> Agricultural Bank of China Jinsui 3 Open bonds regularly for months </td>
          <td>1.075</td>
          <td>1.079</td>
          <td>1.074</td>
          <td>+0.047%</td>
        </tr>
      </tbody>
    </table>
    <script> // 1. Get elements   What you get is  tbody  All the lines inside  var trs = document.querySelector('tbody').querySelectorAll('tr') // 2.  Register events with circular binding  for (var i = 0; i < trs.length; i++) {
      // 3.  Mouse over event  onmouseover trs[i].onmouseover = function () {
      // console.log(11); this.className = 'bg' } // 4.  Mouse away from event  onmouseout trs[i].onmouseout = function () {
      this.className = '' } } </script>
  </body>
</html>
018- Switching light effect
design sketch 
Sample code :
<!DOCTYPE html>
<html lang="en">
  <head>
    <meta charset="UTF-8" />
    <meta name="viewport" content="width=device-width, initial-scale=1.0" />
    <meta http-equiv="X-UA-Compatible" content="ie=edge" />
    <title>Document</title>
  </head>

  <body>
    <button id="btn"> Turn on and off the lights </button>
    <script> var btn = document.getElementById('btn') var flag = 0 btn.onclick = function () {
      if (flag == 0) {
      document.body.style.backgroundColor = 'black' flag = 1 } else {
      document.body.style.backgroundColor = '#fff' flag = 0 } } </script>
  </body>
</html>
017- Imitation Sina registration page box
design sketch


Sample code :
<!DOCTYPE html>
<html lang="en">
  <head>
    <meta charset="UTF-8" />
    <meta name="viewport" content="width=device-width, initial-scale=1.0" />
    <meta http-equiv="X-UA-Compatible" content="ie=edge" />
    <title>Document</title>
    <style> div {
      width: 600px; margin: 100px auto; } .message {
      display: inline-block; font-size: 12px; color: #999; background: url(images/mess.png) no-repeat left center; padding-left: 20px; } .wrong {
      color: red; background-image: url(images/wrong.png); } .right {
      color: green; background-image: url(images/right.png); } </style>
  </head>

  <body>
    <div class="register">
      <input type="password" class="ipt" />
      <p class="message"> Please enter 6~16 Bit code </p>
    </div>
    <script> //  The first event to judge is that the form loses focus  onblur //  If the input is correct, the correct information will be prompted. The color is green and the small icon changes  //  If the input is not 6 To 16 position , The color of the error message is red   Small icon changes  //  Because there are many styles in it , We take className Modify the style  // 1. Get elements  var ipt = document.querySelector('.ipt') var message = document.querySelector('.message') //2.  Registration events   Lose focus  ipt.onblur = function () {
      //  According to the length of the value in the form  ipt.value.length if (this.value.length < 6 || this.value.length > 16) {
      // console.log(' error '); message.className = 'message wrong' message.innerHTML = ' The number of digits you entered is not required 6~16 position ' } else {
      message.className = 'message right' message.innerHTML = ' Your input is correct ' } } </script>
  </body>
</html>
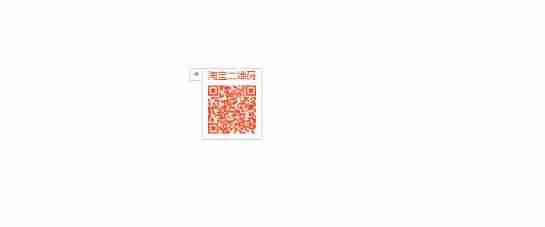
016- Taobao closes QR code case
design sketch
Sample code :
<!DOCTYPE html>
<html lang="en">
  <head>
    <meta charset="UTF-8" />
    <meta name="viewport" content="width=device-width, initial-scale=1.0" />
    <meta http-equiv="X-UA-Compatible" content="ie=edge" />
    <title>Document</title>
    <style> .box {
      position: relative; width: 74px; height: 88px; border: 1px solid #ccc; margin: 100px auto; font-size: 12px; text-align: center; color: #f40; /* display: block; */ } .box img {
      width: 60px; margin-top: 5px; } .close-btn {
      position: absolute; top: -1px; left: -16px; width: 14px; height: 14px; border: 1px solid #ccc; line-height: 14px; font-family: Arial, Helvetica, sans-serif; cursor: pointer; } </style>
  </head>
  <body>
    <div class="box">
       Taobao QR code
      <img src="images/tao.png" alt="" />
      <i class="close-btn">×</i>
    </div>
    <script> // 1.  Get elements  var btn = document.querySelector('.close-btn') var box = document.querySelector('.box') // 2. Registration events   process  btn.onclick = function () {
      box.style.display = 'none' } </script>
  </body>
</html>
015- Imitation of jd.com shows the effect of hidden passwords
design sketch

Sample code :
<!DOCTYPE html>
<html lang="en">
  <head>
    <meta charset="UTF-8" />
    <meta name="viewport" content="width=device-width, initial-scale=1.0" />
    <meta http-equiv="X-UA-Compatible" content="ie=edge" />
    <title>Document</title>
    <style> .box {
      position: relative; width: 400px; border-bottom: 1px solid #ccc; margin: 100px auto; } .box input {
      width: 370px; height: 30px; border: 0; outline: none; } .box img {
      position: absolute; top: 2px; right: 2px; width: 24px; } </style>
  </head>

  <body>
    <div class="box">
      <label for="">
        <img src="images/close.png" alt="" id="eye" />
      </label>
      <input type="password" name="" id="pwd" />
    </div>
    <script> // 1.  Get elements  var eye = document.getElementById('eye') var pwd = document.getElementById('pwd') // 2.  Registration events   The handler  var flag = 0 eye.onclick = function () {
      //  After one click , flag  Be sure to change  if (flag == 0) {
      pwd.type = 'text' eye.src = 'images/open.png' flag = 1 //  Assignment operation  } else {
      pwd.type = 'password' eye.src = 'images/close.png' flag = 0 } } </script>
  </body>
</html>
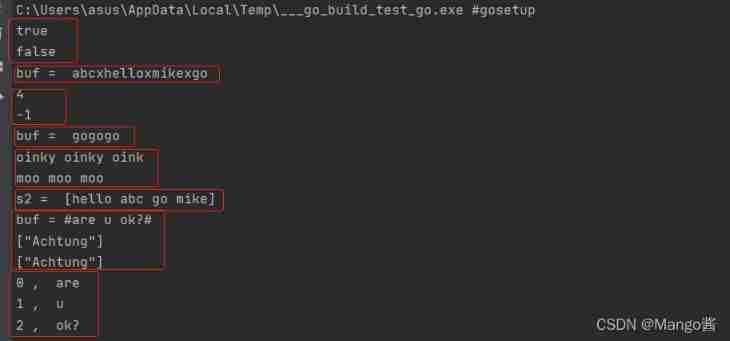
014- Find string "abcoefoxyozzopp" All in o Where and how often
Sample code :
//  The core algorithm : Find the first one first o Position of appearance
        //  then   as long as indexOf  The result returned is not  -1  Just keep looking back
        //  because indexOf  You can only find the first , So the following search , It must be the current index plus 1, To keep looking for
        var str = "oabcoefoxyozzopp";
        var index = str.indexOf('o');
        var num = 0;
        // console.log(index);
        while (index !== -1) {

            console.log(index);
            num++;
            index = str.indexOf('o', index + 1);
        }
        console.log('o The number of times is : ' + num);
          //   Judging a string  'abcoefoxyozzopp'  The most frequently used character in , And count the times .
        // o.a = 1
        // o.b = 1
        // o.c = 1
        // o.o = 4
        //  The core algorithm : utilize  charAt()  Traversing this string
        //  Store every character in the object ,  If the object does not have this property , for 1, If it exists  +1
        //  Traversing objects , Get the maximum value and the character
        var str = 'abcoefoxyozzopp';
        var o = {};
        for (var i = 0; i < str.length; i++) {
            var chars = str.charAt(i); // chars  yes   Every character in a string
            if (o[chars]) { // o[chars]  What you get is the attribute value
                o[chars]++;
            } else {
                o[chars] = 1;
            }
        }
        console.log(o);
        // 2.  Traversing objects
        var max = 0;
        var ch = '';
        for (var k in o) {
            // k  Get is   Property name
            // o[k]  What you get is the attribute value
            if (o[k] > max) {
                max = o[k];
                ch = k;
            }
        }
        console.log(max);
        console.log(' The most common characters are ' + ch);
013- Remove duplicate elements from the array
Sample code :
//  Array weight removal  ['c', 'a', 'z', 'a', 'x', 'a', 'x', 'c', 'b']  It is required to remove duplicate elements in the array .
// 1. The goal is :  Select the non repeating elements in the old array and put them in the new array ,  Duplicate elements retain only one ,  Put it in the new array to redo .
// 2. The core algorithm :  We iterate over the old array ,  Then take the old array element to query the new array ,  If the element does not appear in the new array ,  Let's add ,  Otherwise, do not add .
// 3. How do we know that the element does not exist ?  utilize   New array .indexOf( Array elements )  If you return  - 1  Just explain   There are no changed elements in the new array
//  Encapsulates a   De duplication function  unique  unmatched
      function unique(arr) {

        var newArr = []
        for (var i = 0; i < arr.length; i++) {

          if (newArr.indexOf(arr[i]) === -1) {

            newArr.push(arr[i])
          }
        }
        return newArr
      }
      var demo = unique(['blue', 'green', 'blue'])
      console.log(demo)
012- Static countdown effect
Sample code :
//  The countdown effect
// 1. The core algorithm : The input time minus the current time is the remaining time , The countdown  , But you can't subtract hours, minutes and seconds , such as  05  Fractional subtraction 25 branch , The result will be negative .
// 2. Use time stamps to do . The total number of milliseconds of the user input time minus the total number of milliseconds of the current time , What you get is the number of milliseconds remaining .
// 3. Convert the total number of milliseconds remaining to days 、 when 、 branch 、 second  ( The timestamp is converted to minutes and seconds )
//  The conversion formula is as follows :
// d = parseInt( Total seconds / 60/60 /24); //  Count the days
// h = parseInt( Total seconds / 60/60 %24) //  Calculating hours
// m = parseInt( Total seconds  /60 %60 ); //  score
// s = parseInt( Total seconds %60); //  Calculate the current seconds
function countDown(time) {

    var nowTime = +new Date() //  Returns the total number of milliseconds of the current time
    var inputTime = +new Date(time) //  Returns the total number of milliseconds of user input time
    var times = (inputTime - nowTime) / 1000 // times Is the total number of seconds remaining
    var d = parseInt(times / 60 / 60 / 24) //  God
    d = d < 10 ? '0' + d : d
    var h = parseInt((times / 60 / 60) % 24) // when
    h = h < 10 ? '0' + h : h
    var m = parseInt((times / 60) % 60) //  branch
    m = m < 10 ? '0' + m : m
    var s = parseInt(times % 60) //  second
    s = s < 10 ? '0' + s : s
    return d + ' God ' + h + ' when ' + m + ' branch ' + s + ' second '
}
    console.log(countDown('2020-5-1 18:00:00'))

     //  get Date The total number of milliseconds ( Time stamp )  Not the number of milliseconds of the current time   But distance 1970 year 1 month 1 How many milliseconds have passed
        // 1.  adopt  valueOf() getTime()
        var date = new Date();
        console.log(date.valueOf()); //  Namely   We now have time   distance 1970.1.1  The total number of milliseconds
        console.log(date.getTime());
        // 2.  A simple way of writing  ( The most common way to write )
        var date1 = +new Date(); // +new Date()  The total number of milliseconds is returned
        // 3. H5  Newly added   Get the total number of milliseconds
        console.log(Date.now());
011- Basic bubble sorting
Sample code :
  //  Bubble sort
        // var arr = [5, 4, 3, 2, 1];
        var arr = [4, 1, 2, 3, 5];
        for (var i = 0; i <= arr.length - 1; i++) {
     //  Number of outer circulating pipe trips
            for (var j = 0; j <= arr.length - i - 1; j++) {
     //  The number of exchanges per trip of the circulating pipe inside
                //  Internal exchange 2 Values of variables   Compare the previous and the following array elements
                if (arr[j] < arr[j + 1]) {

                    var temp = arr[j];
                    arr[j] = arr[j + 1];
                    arr[j + 1] = temp;
                }

            }
        }
        console.log(arr);
010- Delete the elements of the specified array
Sample code :
  //  Will array [2, 0, 6, 1, 77, 0, 52, 0, 25, 7] Medium  0  After removal , Form a form that does not contain  0  New array .
        // 1、 You need a new array to hold the filtered data .
        // 2、 Traverse the original array ,  It's not  0  Add the data to the new array ( At this time, pay attention to the array name  +  Receive data in index format ).
        // 3、 The number in the new array ,  use  length  Keep accumulating .
        var arr = [2, 0, 6, 1, 77, 0, 52, 0, 25, 7];
        var newArr = [];
        for (var i = 0; i < arr.length; i++) {

            if (arr[i] != 0) {

                newArr[newArr.length] = arr[i];
            }
        }
        console.log(newArr);
009- Store in the array 100 It's worth
Sample code :
  //  Create a new array , Inside the store 10 It's an integer ( 1~10)
        //  The core principle : Use a loop to append an array .
        // 1、 Declare an empty array  arr.
        // 2、 The counter in the loop  i  Can be stored as an array element .
        // 3、 Because the index number of the array is from 0 At the beginning ,  So the counter starts from  0  It's more appropriate to start , The stored array elements should +1.
        var arr = [];
        for (var i = 0; i < 100; i++) {

            // arr = i;  Don't assign values to array names directly   Otherwise, the previous elements are gone
            arr[i] = i + 1;
        }
        console.log(arr);
008- Find the largest value in the array
Sample code :
  //  Find an array [2,6,1,77,52,25,7] Maximum of
        //  Declare a variable that holds the largest element  max.
        //  The default maximum value can take the first element in the array .
        //  Traverse the array , Put every array element in it and  max  Comparison .
        //  If this array element is larger than max  Just save this array element to  max  Inside , Otherwise, continue with the next round of comparison .
        //  Finally, output this  max
        var arr = [2, 6, 1, 77, 52, 25, 7, 99];
        var max = arr[0];
        for (var i = 1; i < arr.length; i++) {

            if (arr[i] > max) {

                max = arr[i];
            }
        }
        console.log(' The maximum value in this array is :' + max);
 //  Use the function to find the array  [5,2,99,101,67,77]  The maximum value in .
        function getArrMax(arr) {
     // arr  Accept an array  arr = [5,2,99,101,67,77]
            var max = arr[0];
            for (var i = 1; i <= arr.length; i++) {

                if (arr[i] > max) {

                    max = arr[i];
                }
            }
            return max;
        }
        // getArrMax([5, 2, 99, 101, 67, 77]); //  The argument is an array sent to
        //  In our actual development , We often use a variable to accept   The return result of the function   It's easier to use
        // var re = getArrMax([5, 2, 99, 101, 67, 77]);
        var re = getArrMax([3, 77, 44, 99, 143]);
        console.log(re);
//  Utilization function   Find the maximum of two numbers
       function getMax(num1, num2) {

           return num1 > num2 ? num1 : num2;
       }
       console.log(getMax(1, 3));
007- Calculate the sum and average of the array
Sample code :
  // 1.  Find an array  [2,6,1,7, 4]  The sum and average of all the elements in it .
        // (1) Declare a summation variable  sum.
        // (2) Traverse the array , Add each array element to  sum  Inside .
        // (3) Use summation variables  sum  Divide by the length of the array to get the average value of the array .
        var arr = [2, 6, 1, 7, 4];
        var sum = 0;
        var average = 0;
        for (var i = 0; i < arr.length; i++) {

            sum += arr[i]; //  We're adding array elements  arr[i]  It's not a counter  i
        }
        average = sum / arr.length;
        console.log(sum, average); //  Want to output multiple variables , Separated by commas
006-while Circular case
Sample code :
    // 1.  Print one's life , from 1 To the age of 100 year
        var i = 1;
        while (i <= 100) {

            console.log(' This man this year ' + i + ' Year old ');
            i++;
        }
        // 2.  Calculation  1 ~ 100  The sum of all integers between
        var sum = 0;
        var j = 1;
        while (j <= 100) {

            sum += j;
            j++
        }
        console.log(sum);

        // 3.  Pop up a prompt box ,  Do you love me? ?  If I love you , It will prompt the end , otherwise , Keep asking .
        var message = prompt(' Do you love me? ?');
        while (message !== ' I love you! ') {

            message = prompt(' Do you love me? ?');
        }
        alert(' I love you too !');
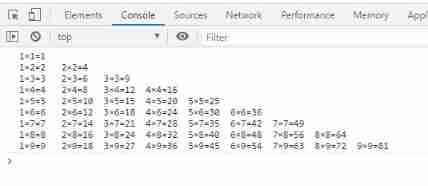
005- Print the multiplication table
Sample code :
   //  multiplication table
        //  Altogether 9 That's ok , But the number of lines is different , So you need to use double  for  loop
        //  The outer  for  Loop controls the number of rows  i , loop 9 Time  , You can print  9  That's ok
        //  The inner layer of the  for  Loop control each line of formula  j
        //  The core algorithm : Every line   The number of formulas is exactly the same as the number of rows , j <= i;
        //  Each line is printed , Need to change a new line
        var str = '';
        for (var i = 1; i <= 9; i++) {
     //  The outer loop controls the number of lines
            for (var j = 1; j <= i; j++) {
     //  The inner loop controls the number of each line  j <= i
                // 1 × 2 = 2
                str += j + '×' + i + '=' + i * j + '\t';
            }
            str += '\n';
        }
        console.log(str);
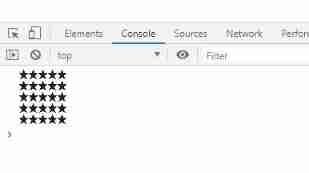
004- Print inverted triangle

Sample code :
    //  Print inverted triangle cases
        var str = '';
        for (var i = 1; i <= 10; i++) {
     //  The outer loop controls the number of lines
            for (var j = i; j <= 10; j++) {
     //  The number of inner layer circular printing is different  j = i
                str = str + '*';
            }
            str += '\n';
        }
        console.log(str);
003- Print n That's ok n The stars of the column
Sample code :
      //  Print n That's ok n The stars of the column
      var rows = prompt(' Please enter the number of lines :')
      var cols = prompt(' Please enter the number of columns :')
      var str = ''
      for (var i = 1; i <= rows; i++) {

        for (var j = 1; j <= cols; j++) {

          str += '*'
        }
        str += '\n'
      }
      console.log(str)
002- Query fruit cases
Sample code :
//  eject  prompt  Input box , Let the user enter the name of the fruit , Take this value and save it in a variable .
//  Take this variable as  switch  The expression in parentheses .
// case  The following values write several different fruit names , Be sure to put quotation marks  , Because it must be a congruent match .
//  Pop up different prices . Also pay attention to each  case  Then add  break , In order to exit  switch  sentence .
//  take  default  Set to no such fruit .
var fruit = prompt(' Please enter the fruit you want to query :');
    switch (fruit) {

        case ' Apple ':
            alert(' The price of apple is  3.5/ Jin ');
            break;
        case ' durian ':
            alert(' The price of durian is  35/ Jin ');
            break;
        default
            alert(' Without this fruit ');
    }
001- Judge leap year and average year
Sample code :
//  Algorithm : Can be 4 Divisible and not divisible 100 Leap year ( Such as 2020 Year is leap year ,1901 Year is not a leap year ) Or can be  400  Divisible is leap year
//  eject prompt  Input box , Let the user enter the year , Take this value and save it in a variable
//  Use  if  Statement to determine whether it is a leap year , If it's a leap year , Is executed  if  The output statement in braces , Otherwise, it will be executed  else The output statement inside
//  Be sure to pay attention to the inside and  &&  And or  ||  Writing , At the same time, note that the way to judge the division is to take the remainder as  0
var year = prompt(' Please enter the year :');
if (year % 4 == 0 && year % 100 != 0 || year % 400 == 0) {

    alert(' The year you entered is a leap year ');
    } else {

        alert(' The year you entered is a normal year ');
    }
边栏推荐
- PAT甲级 1027 Colors in Mars
- How to clear the console password for s7700 device
- RM delete file
- 【cocos creator】点击按钮切换界面
- Huawei switch: configure Telnet, SSH and web access
- Go language foundation ----- 06 ----- anonymous fields, fields with the same name
- Screenshot tool snipaste
- HarmonyOS第三次培训笔记
- Harmonyos third training notes
- Precautions for opensips and TLS SIP trunk docking
猜你喜欢
Go language foundation ----- 10 ----- string related operations (operation function, string conversion)
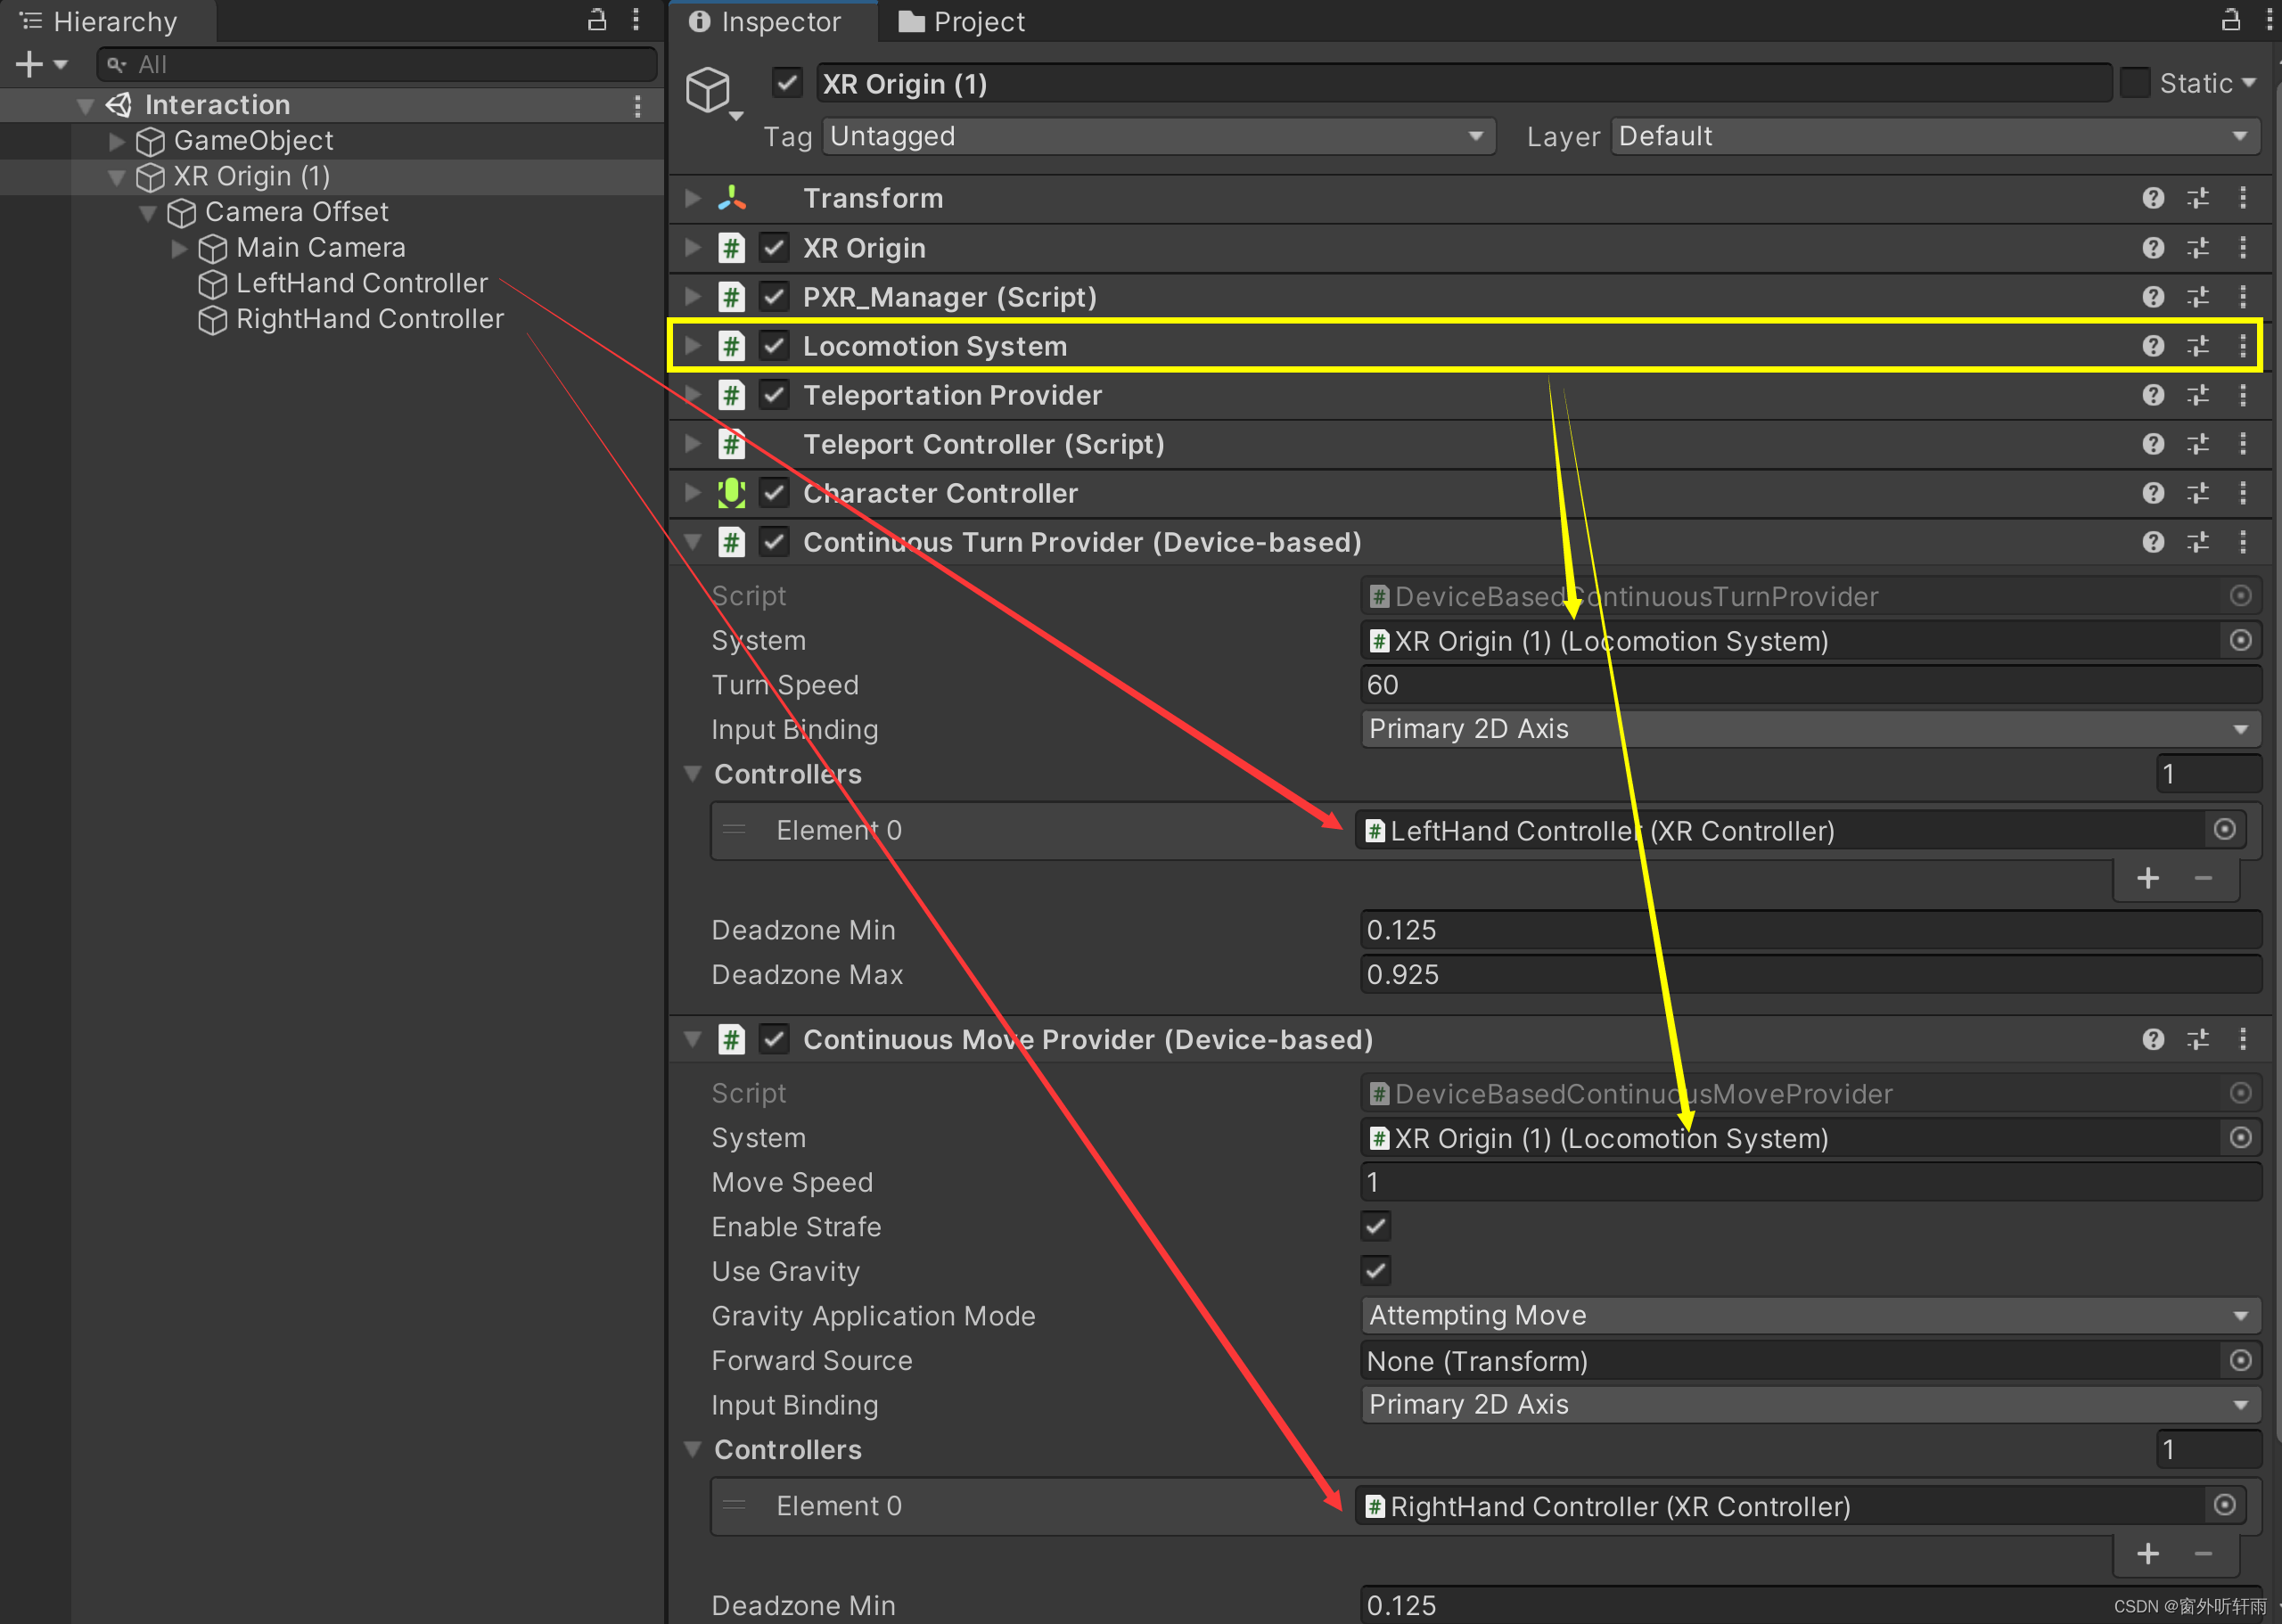
Unity XR realizes interaction (grasping, moving, rotating, transmitting, shooting) -pico

技术干货|利用昇思MindSpore复现ICCV2021 Best Paper Swin Transformer

HarmonyOS第三次培训笔记
HDMI2.1与HDMI2.0的区别以及转换PD信号。

Partage de l'expérience du projet: mise en œuvre d'un pass optimisé pour la fusion IR de la couche mindstore
Technical dry goods | some thoughts on the future of AI architecture
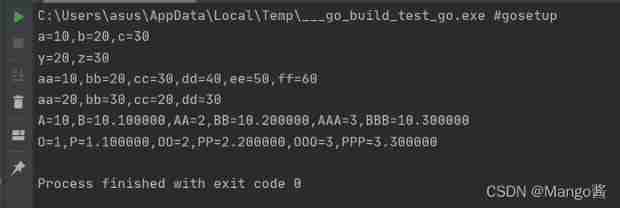
Go language foundation ----- 02 ----- basic data types and operators

Analysis of the problems of the 11th Blue Bridge Cup single chip microcomputer provincial competition

Technical dry goods Shengsi mindspire operator parallel + heterogeneous parallel, enabling 32 card training 242 billion parameter model
随机推荐
Worldview satellite remote sensing image data / meter resolution remote sensing image
Client server model
Go language foundation ----- 07 ----- method
idea取消引用显示效果
Technical dry goods | some thoughts on the future of AI architecture
一篇文章让你读懂-曼彻斯特编码
优质博客——
What to do after the browser enters the URL
HDMI2.1与HDMI2.0的区别以及转换PD信号。
基于RNA的新型癌症疗法介绍
什么是定义?什么是声明?它们有何区别?
什麼是定義?什麼是聲明?它們有何區別?
【LeetCode】4. Best Time to Buy and Sell Stock·股票买卖最佳时机
C2 several methods of merging VCF files
【踩坑系列】mysql 修改root密码失败
Go language foundation ----- 18 ----- collaboration security, mutex lock, read-write lock, anonymous lock, sync Once
Go language foundation ----- 01 ----- go language features
Go language foundation ----- 05 ----- structure
Go language foundation ------17 ----- channel creation, read-write, security shutdown, multiplexing select
Introduction of novel RNA based cancer therapies