当前位置:网站首页>采用QT进行OpenGL开发(三)着色器编程
采用QT进行OpenGL开发(三)着色器编程
2022-08-02 21:33:00 【码农飞飞】
在OpenGL中所有的一切操作都是在三维空间中进行的,但是屏幕和窗口都是由二维的像素组成的。所以OpenGL的很大一部分工作就是将三维坐标图元信息转换成屏幕上的二维像素。在OpenGL中这个三维转二维的过程被渲染管道(graphics pipeline)管理着。渲染管道的渲染过程主要分为两个阶段,阶段1将OpenGL的三维坐标转换成屏幕上的二维坐标,阶段2将二维坐标转换成屏幕上的颜色像素。由于二维坐标是非常精确的小数值,而像素坐标是非常精确的整数值,所以阶段2的转换过程中是一个取近似值的过程。
OpenGL渲染管道的渲染过程可以拆分成多个小步骤,这些步骤之间是紧密关联的,上一步的输出会成为下一步的输入。由于这些处理过程是没有状态的,可以并发运行,所以可以在显卡上同时并发处理大量的图形数据。这些运行在GPU上的小程序被称为着色器程序(shaders)。
渲染管道的部分着色器程序是允许开发者自定义开发的。这就使得开发者可以将部分的渲染工作从CPU上转移到GPU上,从而节约大量的CPU性能。
渲染管道的渲染流程如下图所示:
(渲染过程中,我们可以对顶点着色器、尺寸着色器和片源着色器进行自定义GPU编程)
整体渲染流程大概是这样的:首先外部输入的图形顶点信息(包含位置信息和颜色信息)被传输到顶点着色器,顶点着色器对原始的位置坐标进行位移变换,同时我们可以在顶点着色器中对顶点数据做一些自定义的变换。 变换后的顶点信息被传输到尺寸着色器,尺寸着色器通过插值操作生成一些新的顶点进而生成新的形状。形状信息最后被传输到片源着色器,片源着色器的主要目的是计算像素的最终色值,OpenGL的一些高级图像效果都是在这个阶段来实现。片源着色器包含了场景中所有会对最终渲染接口产生影响的数据,包括:灯光、阴影等等。经过片源着色器处理后的图像在经过简单的处理之后就可以呈现到屏幕上了。
QT通过QOpenGLShaderProgram类封装了图形管道渲染过程,通过使用这个类我们可以编译链接和执行通过OpenGL Shading Language (GLSL)语言编写的着色器程序。我们可以通过QOpenGLShaderProgram::hasOpenGLShaderPrograms()方法判断当前的硬件环境支不支持管道编程。一般来说现在几乎所有的显卡硬件都是支持管道编程的。
QT支持所有种类的着色器编程,其中使用频率最高的是顶点着色器和片源着色器。QT通过QOpenGLShader类封装了着色器,我们可以在构造函数中指定着色器的类型。构造的着色器程序通过QOpenGLShader::compileSourceFile()接口来进行编译,编译好的着色器就可以在未来的渲染过程中进行使用了。我们可以通过着色器的ID来区分不同的着色器。
编译好的着色器通过QOpenGLShaderProgram::addShader()方法添加到着色器程序中。着色器程序添加完毕之后,我们就可以对管道程序进行链接和绑定使用了。下面以一个例子来说明一下管道编程的使用方法。
定义着色器程序
首先定义一个顶点着色器:
(注意:着色器程序文件要保存成UTF-8编码的,不能是UTF8-BOM编码的,要不然在QT中会出问题,可能是BOM引起的解析失败)
//vshader.glsl
//位移变化矩阵
uniform mat4 mvp_matrix;
//输入的顶点坐标
attribute vec4 a_position;
//输入的纹理坐标
attribute vec2 a_texcoord;
//输出给片源着色器的纹理坐标
varying vec2 v_texcoord;
void main()
{

    //gl_Position经位移变化后输出到屏幕的最终坐标
    gl_Position = mvp_matrix * a_position;
    v_texcoord = a_texcoord;
}
顶点着色器主要的作用就是通过各种外部输入的数据矩阵变化得到每个顶点的屏幕坐标gl_Position。
顶点着色器传入的纹理坐标会直接传给片源着色器,片源着色器的实现如下:
//fshader.glsl
//纹理变量
uniform sampler2D texture;
//纹理坐标,从顶点着色器传过来
varying vec2 v_texcoord;
void main()
{

    //通过纹理确定某个点的色值
    gl_FragColor = texture2D(texture, v_texcoord);
}
在片源着色器中主要做的工作就是通过纹理或者输入变量确定某个坐标点的最终颜色gl_FragColor。
完成着色器的编程之后,我们就可以在管道程序类中添加对应的着色器程序了,对应的设置如下:
//QOpenGLShaderProgram program
void MainWidget::initShaders()
{

    //添加顶点着色器
    if (!program.addShaderFromSourceFile(QOpenGLShader::Vertex, ":/vshader.glsl"))
        close();

    //添加片源着色器
    if (!program.addShaderFromSourceFile(QOpenGLShader::Fragment, ":/fshader.glsl"))
        close();

    //链接程序
    if (!program.link())
        close();

    //绑定管道程序
    if (!program.bind())
        close();
}
之后在初始化OpenGL的时候调用着色器程序的初始化操作。
void MainWidget::initializeGL()
{

    ...
    initShaders();
    ...
}
定义顶点缓存
在采用管道编程进行OpenGL绘制的时候,我们不再通过访问数组容器来进行顶点绘制,而是将顶点放到一个缓存类QOpenGLBuffer中进行访问。下面以一个正方体的顶点数据作为样例数据说明一下数据缓存类的用法。首先在初始化的时候定义顶点缓存:
//QOpenGLBuffer* arrayBuf;
void MainWidget::initializeGL()
{

    initializeOpenGLFunctions();
    arrayBuf = new QOpenGLBuffer(QOpenGLBuffer::VertexBuffer);
    //初始化顶点数组
    arrayBuf->create();
    initCubeGeometry();
    ...
}
之后将顶点数据放到缓存中,为后续的调用做好准备。顶点的数据类结构体如下所示:
struct VertexData
{

    QVector3D position; //位置坐标
    QVector2D texCoord; //纹理坐标
};
初始化顶点数据
void MainWidget::initCubeGeometry()
{

    //设置顶点位置坐标和对应的纹理坐标
    VertexData vertices[] = {

        // FRONT FACE
        {
    {
    -0.5, -0.5,  0.5}, {
    0, 0}},        {
    {
     0.5, -0.5,  0.5}, {
    1, 0}},
        {
    {
     0.5,  0.5,  0.5}, {
    1, 1}},        {
    {
    -0.5,  0.5,  0.5}, {
    0, 1}},

        // TOP FACE
        {
    {
    -0.5,  0.5,  0.5}, {
    0, 0}},        {
    {
     0.5,  0.5,  0.5}, {
    1, 0}},
        {
    {
     0.5,  0.5, -0.5}, {
    1, 1}},        {
    {
    -0.5,  0.5, -0.5}, {
    0, 1}},

        // BACK FACE
        {
    {
    -0.5,  0.5, -0.5}, {
    0, 0}},        {
    {
     0.5,  0.5, -0.5}, {
    1, 0}},
        {
    {
     0.5, -0.5, -0.5}, {
    1, 1}},        {
    {
    -0.5, -0.5, -0.5}, {
    0, 1}},

        // BOTTOM FACE
        {
    {
    -0.5, -0.5, -0.5}, {
    0, 0}},        {
    {
     0.5, -0.5, -0.5}, {
    1, 0}},
        {
    {
     0.5, -0.5,  0.5}, {
    1, 1}},        {
    {
    -0.5, -0.5,  0.5}, {
    0, 1}},

        // LEFT FACE
        {
    {
    -0.5, -0.5, -0.5}, {
    0, 0}},        {
    {
    -0.5, -0.5,  0.5}, {
    1, 0}},
        {
    {
    -0.5,  0.5,  0.5}, {
    1, 1}},        {
    {
    -0.5,  0.5, -0.5}, {
    0, 1}},

        // RIGHT FACE
        {
    {
     0.5, -0.5,  0.5}, {
    0, 0}},        {
    {
     0.5, -0.5, -0.5}, {
    1, 0}},
        {
    {
     0.5,  0.5, -0.5}, {
    1, 1}},        {
    {
     0.5,  0.5,  0.5}, {
    0, 1}},

    };
    arrayBuf->bind();
    //绑定并分配顶点信息数组
    arrayBuf->allocate(vertices, 24 * sizeof(VertexData));
}
进行图形绘制
在绘制函数中,我们需要做如下的操作:
1.绑定纹理
2.设置位移变化矩阵
3.绑定顶点缓存
4.设置缓存访问方式
5.进行图形绘制
void MainWidget::paintGL()
{

    //清空颜色内存和深度内存
    glClear(GL_COLOR_BUFFER_BIT | GL_DEPTH_BUFFER_BIT);

    //1.绑定纹理
    texture->bind();
    //使用ID为0的纹理图片
    program.setUniformValue("texture", 0);

    //2.设置位移变换矩阵
    QMatrix4x4 matrix;
    //绕着(x=y)轴旋转rotate_angle度
    matrix.rotate(rotate_angle,1.0,1.0,0.0);
    //将矩阵添加到着色器程序中
    program.setUniformValue("mvp_matrix", matrix);

    //3.绑定需要使用的顶点缓存
    arrayBuf->bind();

    //4.设置缓存的访问方式
    //初始偏移量
    quintptr offset = 0;
    //根据坐标数组中的偏移信息来定位顶点坐标
    int vertexLocation = program.attributeLocation("a_position");
    program.enableAttributeArray(vertexLocation);
    //设置变量的访问方式
    //@1表示shader中变量的名字 @2表示变量的类型 @3表示表示第一个数据从哪里开始,也就是初始偏移量
    //坐标数据从内存中第0位置开始,纹理从第三个位置开始
    //@4表示有几个数据,空间坐标包含三个数据(x,y,z)纹理坐标包含两个数据(x,y)
    //@5表示顶点缓存,多少数据表示一个顶点,这里的顶点结构为VertexData
    program.setAttributeBuffer(vertexLocation, GL_FLOAT, offset, 3, sizeof(VertexData));

    //纹理坐标的初始偏移量
    offset += sizeof(QVector3D);

    //根据偏移量来定位纹理坐标
    int texcoordLocation = program.attributeLocation("a_texcoord");
    program.enableAttributeArray(texcoordLocation);

    //纹理坐标在着色器中的变量名称叫做a_texcoord,变量类型是GL_FLOAT,偏移量为3,每组数据包含两个值
    //顶点的数据结构类型是VertexData
    program.setAttributeBuffer(texcoordLocation, GL_FLOAT, offset, 2, sizeof(VertexData));

    //5.进行图形绘制
    glDrawArrays(GL_QUADS,0,24);

}
添加动画控制
这里我们添加一个定时器,定时修改旋转角度让立方体旋转起来,对应的设置如下:
MainWidget::MainWidget(QWidget *parent) :
    QOpenGLWidget(parent),
    texture(0)
{

    m_timer = new QTimer(this);
    connect(m_timer,&QTimer::timeout,this,[&](){
    rotate_angle += 1.5;update();});
}
void MainWidget::initializeGL()
{

    .....
    m_timer->start(15);
}
当然我们也可以通过QT提供的动画框架来实现更加复杂的动画,这里就不详细介绍了,详细方案可以参考上一篇文章。
绘制效果如下所示:
样例源码
//mainwidget.h
#ifndef MAINWIDGET_H
#define MAINWIDGET_H

#include "geometryengine.h"

#include <QOpenGLWidget>
#include <QOpenGLFunctions>
#include <QMatrix4x4>
#include <QQuaternion>
#include <QVector2D>
#include <QBasicTimer>
#include <QOpenGLShaderProgram>
#include <QOpenGLTexture>
#include <QTimer>

class GeometryEngine;
struct VertexData
{

    QVector3D position;
    QVector2D texCoord;
};
class MainWidget : public QOpenGLWidget, protected QOpenGLFunctions
{

    Q_OBJECT

public:
    explicit MainWidget(QWidget *parent = 0);
    ~MainWidget();


protected:
    void initializeGL() override;
    void paintGL() override;

    void initShaders();
    void initTextures();
    void initCubeGeometry();
private:
    QOpenGLShaderProgram program;
    QOpenGLTexture *texture;
    qreal rotate_angle;
    QTimer* m_timer;
    QOpenGLBuffer* arrayBuf;
};

#endif // MAINWIDGET_H
//mainwidget.cpp
#include "mainwidget.h"
#include <QMouseEvent>
#include <math.h>
#include <QTimer>

MainWidget::MainWidget(QWidget *parent) :
    QOpenGLWidget(parent),
    texture(0)
{

    m_timer = new QTimer(this);
    connect(m_timer,&QTimer::timeout,this,[&](){
    rotate_angle += 1.5;update();});
}

MainWidget::~MainWidget()
{

    makeCurrent();
    delete texture;
    doneCurrent();
}

void MainWidget::initializeGL()
{

    initializeOpenGLFunctions();

    arrayBuf = new QOpenGLBuffer(QOpenGLBuffer::VertexBuffer);
    //初始化顶点数组
    arrayBuf->create();
    initCubeGeometry();

    glClearColor(0, 0, 0, 1);

    //初始化着色器
    initShaders();

    //初始化纹理
    initTextures();

    //启动深度内存
    glEnable(GL_DEPTH_TEST);
    glEnable(GL_CULL_FACE);

    m_timer->start(15);
}

//QOpenGLShaderProgram program
void MainWidget::initShaders()
{

    //添加顶点着色器
    if (!program.addShaderFromSourceFile(QOpenGLShader::Vertex, ":/vshader.glsl"))
        close();

    //添加片源着色器
    if (!program.addShaderFromSourceFile(QOpenGLShader::Fragment, ":/fshader.glsl"))
        close();

    //链接程序
    if (!program.link())
        close();

    //绑定管道程序
    if (!program.bind())
        close();
}

void MainWidget::initTextures()
{

    texture = new QOpenGLTexture(QImage(":/background.jpg").mirrored());
    texture->setMinificationFilter(QOpenGLTexture::Nearest);
    texture->setMagnificationFilter(QOpenGLTexture::Linear);
    texture->setWrapMode(QOpenGLTexture::Repeat);
}


void MainWidget::paintGL()
{

    //清空颜色内存和深度内存
    glClear(GL_COLOR_BUFFER_BIT | GL_DEPTH_BUFFER_BIT);

    //1.绑定纹理
    texture->bind();
    //使用ID为0的纹理图片
    program.setUniformValue("texture", 0);

    //2.设置位移变换矩阵
    QMatrix4x4 matrix;
    //绕着(x=y)轴旋转rotate_angle度
    matrix.rotate(rotate_angle,1.0,1.0,0.0);
    //将矩阵添加到着色器程序中
    program.setUniformValue("mvp_matrix", matrix);

    //3.绑定需要使用的顶点缓存
    arrayBuf->bind();

    //4.设置缓存的访问方式
    //初始偏移量
    quintptr offset = 0;
    //根据坐标数组中的偏移信息来定位顶点坐标
    int vertexLocation = program.attributeLocation("a_position");
    program.enableAttributeArray(vertexLocation);

    //@1表示shader中变量的名字 @2表示变量的类型 @3表示表示第一个数据从哪里开始,也就是初始偏移量
    //坐标数据从内存中第0位置开始,纹理从第三个位置开始
    //@4表示有几个数据,空间坐标包含三个数据(x,y,z)纹理坐标包含两个数据(x,y)
    //@5表示顶点缓存,多少数据表示一个顶点,这里的顶点结构为VertexData
    program.setAttributeBuffer(vertexLocation, GL_FLOAT, offset, 3, sizeof(VertexData));

    //纹理坐标的初始偏移量
    offset += sizeof(QVector3D);

    //根据偏移量来定位纹理坐标
    int texcoordLocation = program.attributeLocation("a_texcoord");
    program.enableAttributeArray(texcoordLocation);

    //纹理坐标在着色器中的变量名称叫做a_texcoord,变量类型是GL_FLOAT,偏移量为3,每组数据包含两个值
    //顶点的数据结构类型是VertexData
    program.setAttributeBuffer(texcoordLocation, GL_FLOAT, offset, 2, sizeof(VertexData));

    //5.进行图形绘制
    glDrawArrays(GL_QUADS,0,24);

}

void MainWidget::initCubeGeometry()
{

    //设置顶点位置坐标和对应的纹理坐标
    VertexData vertices[] = {

        // FRONT FACE
        {
    {
    -0.5, -0.5,  0.5}, {
    0, 0}},        {
    {
     0.5, -0.5,  0.5}, {
    1, 0}},
        {
    {
     0.5,  0.5,  0.5}, {
    1, 1}},        {
    {
    -0.5,  0.5,  0.5}, {
    0, 1}},

        // TOP FACE
        {
    {
    -0.5,  0.5,  0.5}, {
    0, 0}},        {
    {
     0.5,  0.5,  0.5}, {
    1, 0}},
        {
    {
     0.5,  0.5, -0.5}, {
    1, 1}},        {
    {
    -0.5,  0.5, -0.5}, {
    0, 1}},

        // BACK FACE
        {
    {
    -0.5,  0.5, -0.5}, {
    0, 0}},        {
    {
     0.5,  0.5, -0.5}, {
    1, 0}},
        {
    {
     0.5, -0.5, -0.5}, {
    1, 1}},        {
    {
    -0.5, -0.5, -0.5}, {
    0, 1}},

        // BOTTOM FACE
        {
    {
    -0.5, -0.5, -0.5}, {
    0, 0}},        {
    {
     0.5, -0.5, -0.5}, {
    1, 0}},
        {
    {
     0.5, -0.5,  0.5}, {
    1, 1}},        {
    {
    -0.5, -0.5,  0.5}, {
    0, 1}},

        // LEFT FACE
        {
    {
    -0.5, -0.5, -0.5}, {
    0, 0}},        {
    {
    -0.5, -0.5,  0.5}, {
    1, 0}},
        {
    {
    -0.5,  0.5,  0.5}, {
    1, 1}},        {
    {
    -0.5,  0.5, -0.5}, {
    0, 1}},

        // RIGHT FACE
        {
    {
     0.5, -0.5,  0.5}, {
    0, 0}},        {
    {
     0.5, -0.5, -0.5}, {
    1, 0}},
        {
    {
     0.5,  0.5, -0.5}, {
    1, 1}},        {
    {
     0.5,  0.5,  0.5}, {
    0, 1}},

    };
    arrayBuf->bind();
    arrayBuf->allocate(vertices, 24 * sizeof(VertexData));
}
着色器使用扩展
使用单一颜色
修改片源着色器将gl_FragColor指定成固定颜色,这样渲染出来的图形就是单一颜色的了。修改内容如下:
//fshader.glsl
//纹理变量
uniform sampler2D texture;
//纹理坐标
varying vec2 v_texcoord;
void main()
{

    //图片固定填充颜色
    //色值:RGBA(255*0.5,255*0.3,255*0.2,255)
    gl_FragColor = vec4(0.5,0.3,0.2,1.0);
}
显示效果如下:
纹理颜色混合
通过修改片源着色器将纹理的色值和某个固定的颜色进行混合,这样渲染出来的图形就会呈现混合效果。
//fshader.glsl
//纹理变量
uniform sampler2D texture;
//纹理坐标
varying vec2 v_texcoord;
void main()
{

    //纹理颜色混合
    //色值:RGBA(255*0.5,255*0.3,255*0.2,255)
    gl_FragColor = texture2D(texture, v_texcoord) * vec4(0.5,0.3,0.2,1.0);
}
显示效果如下:
使用复合纹理
和纹理颜色混合类似,我们也可以将多个纹理按照一定的百分比进行混合渲染。混合渲染之前先在片源着色器中定义两个纹理变量,并在渲染的时候进行混合。
//fshader.glsl
//纹理1
uniform sampler2D texture1;
//纹理2
uniform sampler2D texture2;
//纹理坐标
varying vec2 v_texcoord;
void main()
{

    //各占50%进行混合
    gl_FragColor = mix(texture2D(texture1, v_texcoord),texture2D(texture2,v_texcoord),0.5);
}
之后我们在绘制调用中初始化两个纹理,并将其与片源着色器中的变量进行绑定。
//初始化纹理
void MainWidget::initTextures()
{

    texture = new QOpenGLTexture(QImage(":/background.jpg").mirrored());
    texture->setMinificationFilter(QOpenGLTexture::Nearest);
    texture->setMagnificationFilter(QOpenGLTexture::Linear);
    texture->setWrapMode(QOpenGLTexture::Repeat);

    flower_texture = new QOpenGLTexture(QImage(":/flower.jpg").mirrored());
    flower_texture->setMinificationFilter(QOpenGLTexture::Nearest);
    flower_texture->setMagnificationFilter(QOpenGLTexture::Linear);
    flower_texture->setWrapMode(QOpenGLTexture::Repeat);
}

//绑定纹理
void MainWidget::paintGL()
{

    //清空颜色内存和深度内存
    glClear(GL_COLOR_BUFFER_BIT | GL_DEPTH_BUFFER_BIT);
    glEnable(GL_TEXTURE_2D);
    //1.绑定纹理
    program.setUniformValue("texture1", 0);
    texture->bind(0);
    program.setUniformValue("texture2",1);
    flower_texture->bind(1);
    ....
}
显示效果如下所示:
边栏推荐
- 二叉搜索树的实现
- How to seize the new trend of NFT, yuan|universe|universe?
- Jmeter二次开发实现rsa加密
- ML之PDP:基于titanic泰坦尼克是否获救二分类预测数据集利用PDP部分依赖图对RF随机森林和LightGBM模型实现可解释性案例
- CS5213 chip | HDMI to VGA converter chip data sharing
- 你我都会遇到的需求:如何导出MySQL中的数据~ 简单!实用!
- 若依如何实现添加水印功能
- golang刷leetcode:按位与结果大于零的最长组合
- Intensive reading of the Swin Transformer paper and analysis of its model structure
- 不堪哥哥殴打谩骂,妹妹申请人身安全保护令获支持
猜你喜欢
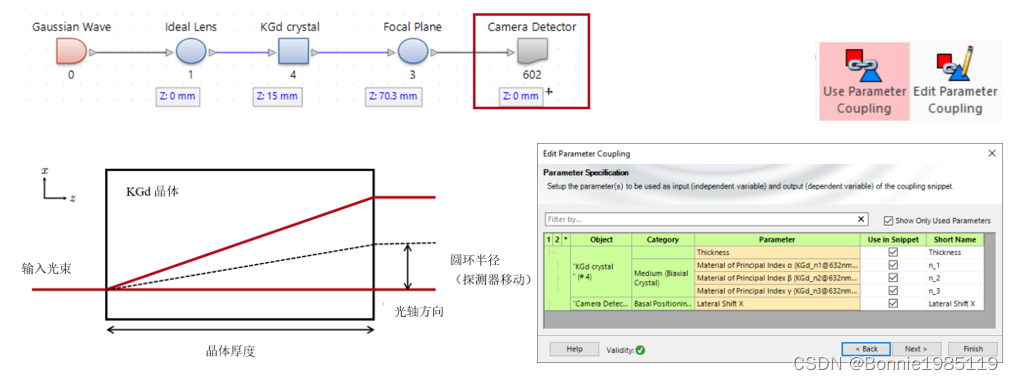
双轴晶体中的锥形折射
字节内部技术图谱 惊艳级实用

What is the core business model of the "advertising e-commerce" that has recently become popular in the circle of friends, and is the advertising revenue really reliable?
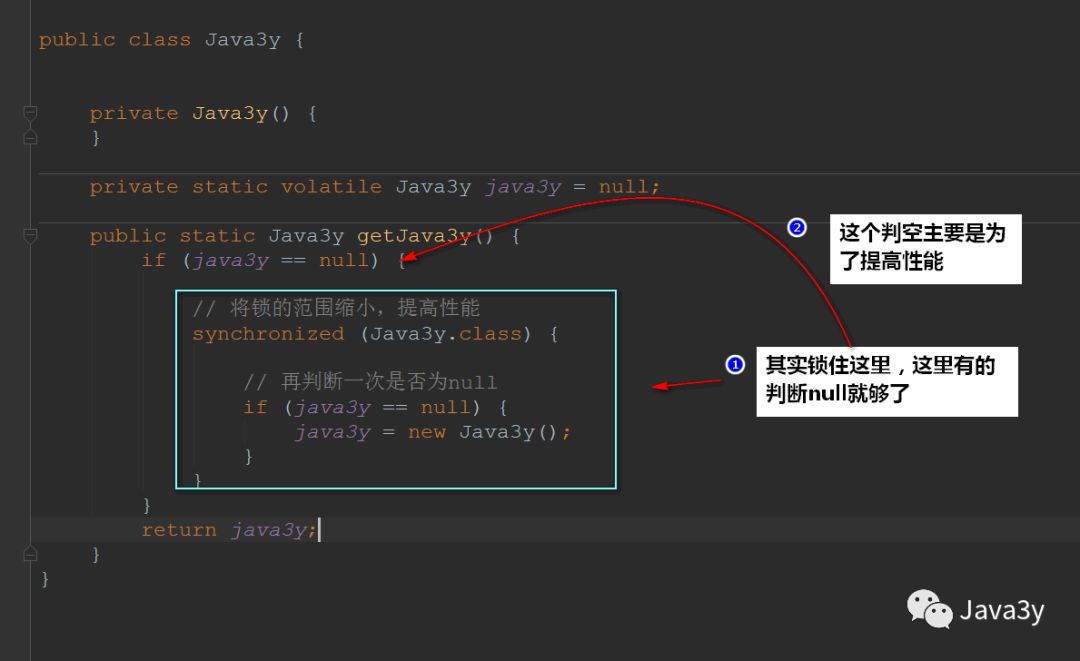
How many ways do you know the singleton pattern?
LeetCode 2359. 找到离给定两个节点最近的节点 基环树
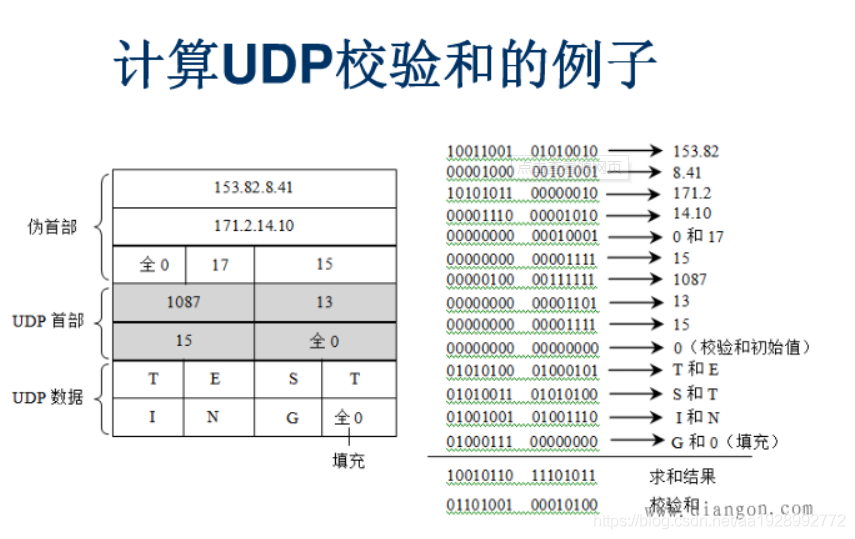
UDP (User Datagram Protocol)
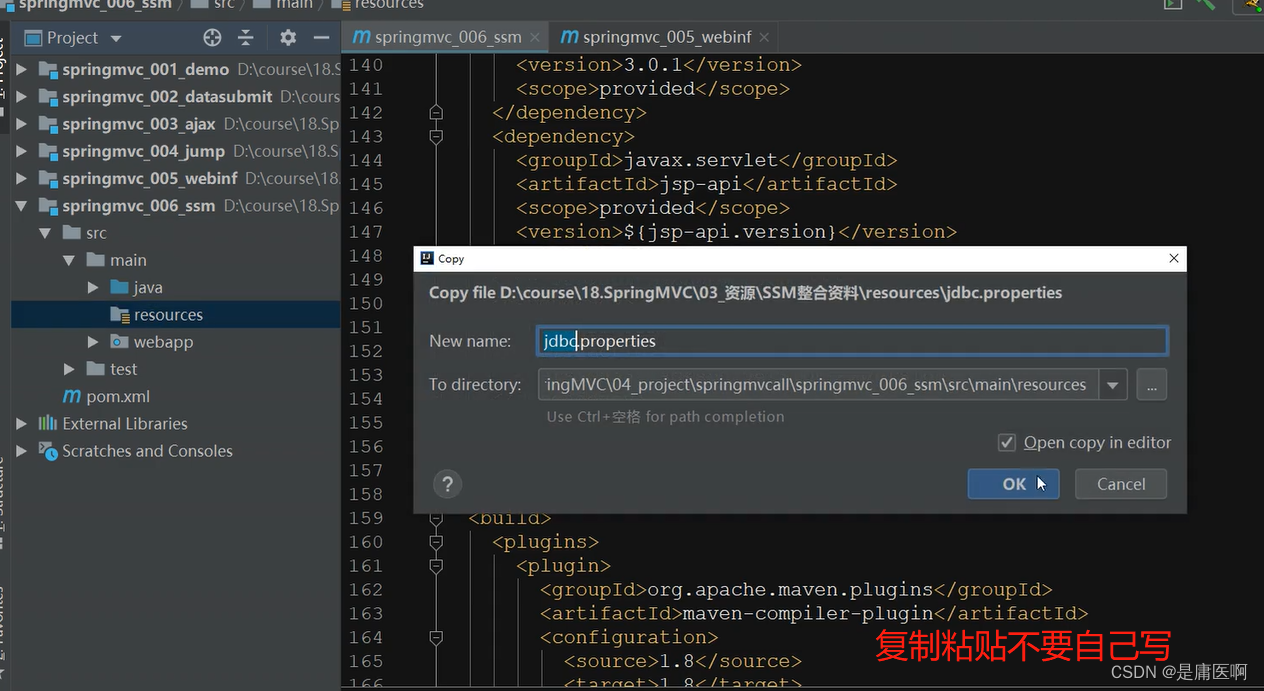
SSM integration steps (emphasis)
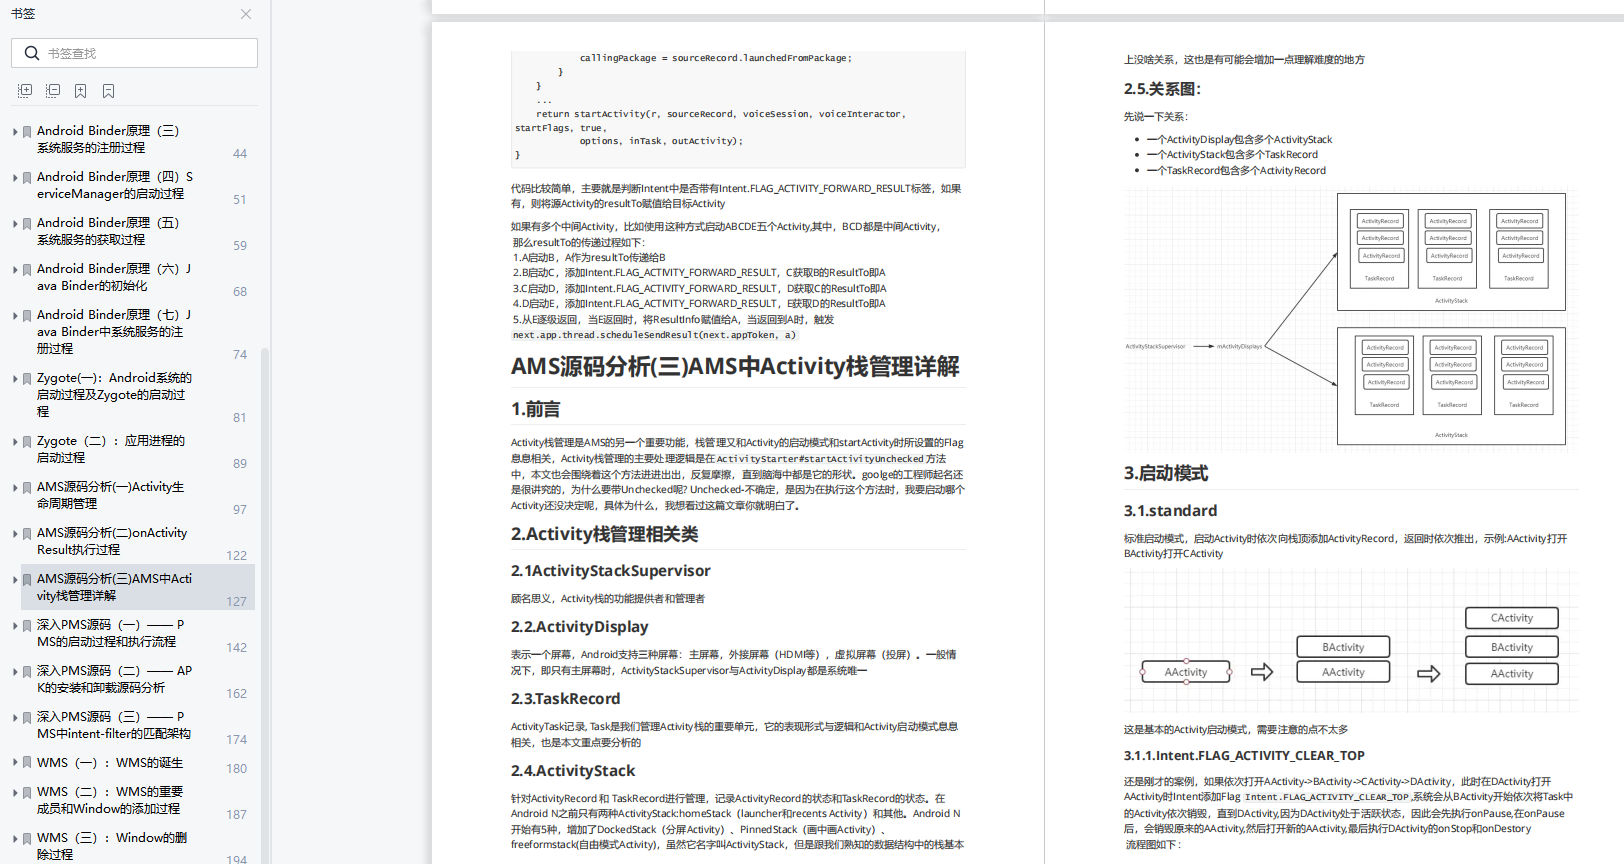
30天啃透这份Framework 源码手册直接面进大厂
四、字符常量 & 字符串
CS5213 chip | HDMI to VGA converter chip data sharing
随机推荐
[C题目]力扣142. 环形链表 II
JS函数防抖&函数节流及其使用场景
增删改查这么多年,最后栽在MySQL的架构设计上!
js function anti-shake and function throttling and other usage scenarios
golang刷leetcode: 小于等于 K 的最长二进制子序列
无线振弦采集仪远程修改参数的方式
You and I will meet the needs of: how to export the data in a MySQL simple ~!Practical!
解道6-编程技术3
# 医院管理系统完整项目代码以及数据库建表语句分享
源码构建LAMP环境-3
搭建直播平台,使用node生成验证码图片,并进行验证
Vscode快速入门、 插件安装、插件位置、修改vscode默认引用插件的路径、在命令行总配置code、快捷键
二叉搜索树的实现
golang刷leetcode:我能赢吗
go 序列化与反序列化
字节内部技术图谱 惊艳级实用
圆锥折射作为偏振计量工具的模拟
博客主题美化第二弹
Ansible installation and configuration
管理工具|宝藏书签收藏管理工具