当前位置:网站首页>基于flask的三方登陆的流程
基于flask的三方登陆的流程
2022-07-31 05:09:00 【城南花开了^】
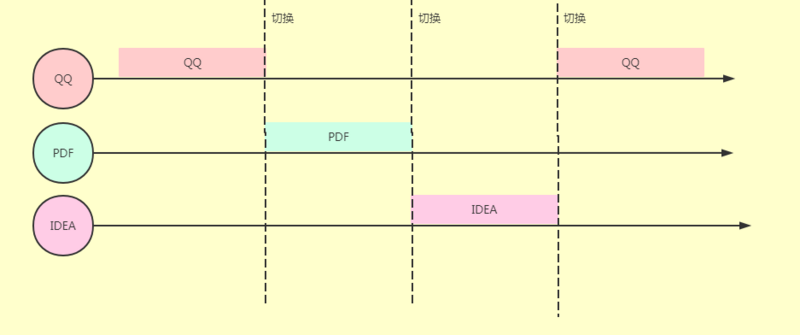
第三方登录的流程图

具体实现步骤:
- 在前端页面点击第三方的图标,进行页面的跳转
- 跳转页面有钉钉或者是QQ登录的二维码,进行登录或注册
- 返回给后端服务器用户的信息生成token,然后传参给前端浏览器
- 浏览器保存token信息,下次扫码时验证token直接登录第三方应用
举例:
前端页面的方法:
        // qq登录
        QQ:function(){
            // var data = {}  //正规的写法
            // qq_login(data).then(resp=>{
            //     console.log('qq登录的响应',resp)
            //     if(resp.code==200){
            //      let url = resp.url
            //     console.log(url)
            //     window.location.href = url
            //     }
            // }).catch(err=>{
            // })
            //  https://graph.qq.com/oauth2.0/show?which=Login&display=pc&response_type=code&client_id=101474184&redirect_uri=http%3A%2F%2Fwww.meiduo.site%3A8080%2Foauth_callback.html&state=%2F&scope=get_user_info
            var app_id = '101474184'
            var app_key = 'c6ce949e04e12ecc909ae6a8b09b637c'
            var state = '/'
            // var redirect_uri = config['beasurl']+'qq'//'http://www.meiduo.site:8080/oauth_callback.html'
            var redirect_uri = 'http://www.meiduo.site:8080/oauth_callback.html'
            var url = 'https://graph.qq.com/oauth2.0/authorize?response_type=code&client_id='+app_id+'&redirect_uri='
            +redirect_uri+'&state='+state+'&scope=get_user_info'

            window.location.href = url
flask后端的具体实现:
# 1.生成qq扫码登录的url,返回给前端用户
# 2.用户扫码,进行登录,qq对用户进行鉴权
# 3.用户在手机上进行确认登录,返回一个code,code代表的是登陆成功的信息
# 4.code 要返回给网站,网站拿到后判断是否有账号绑定
    #1.绑定过账号,直接登录成功
    #2.没有绑定过账号
class OauthUser(Resource): def get(self): """ 生成qq扫码登录的url,返回给前端用户 :params: response_type=code # 扫码登录 :params: state, redirect_uri :return: https://graph.qq.com/oauth2.0/show?which=Login&display=pc&response_type=code&state=9B93F12415BCB93941FDA383B66278470B75111C8D2BDC15474EF49E12D42E28F4FBBFC996B3C21250B8B7D1F915AA0A&client_id=100273020&redirect_uri=https%3A%2F%2Fqq.jd.com%2Fnew%2Fqq%2Fcallback.action%3Fview%3Dnull%26uuid%3D72a93e228e5c4386a2a743091db6e5fd """ base_url = 'https://graph.qq.com/oauth2.0/authorize?' params = { 'response_type': 'code', 'client_id': current_app.config.get('QQ_APP_ID'), 'redirect_uri': current_app.config.get('QQ_REDIRECT_URL'), 'state': current_app.config.get('QQ_STATE'), 'scope': 'get_user_info' # 返回qq用户的openid } # urlencode 会把字典转换成url的查询字符串 data = urlencode(params) url = base_url + data return {'url':url,'code':200} class QQUserinfo(Resource): def code_value(self,code): base_url='https://graph.qq.com/oauth2.0/token' if code: data ={ 'grant_type':'authorization_code', 'client_id':current_app.config.get('QQ_APP_ID'), 'client_secret':current_app.config.get('QQ_APP_KEY'), 'code':code, 'redirect_uri': current_app.config.get('QQ_REDIRECT_URL'), } resp = requests.request('GET',base_url,params=data) print('>>>>',resp) token_value =resp.text.split('&')[0][3] return token_value def get_openid(self,token_v): # 获取qq的openid base_url = 'https://graph.qq.com/oauth2.0/token' data = {'access_token': token_v} resp = requests.request('GET', base_url, params=data) user_dict = json.loads(resp.text) openid = user_dict['openid'] return openid def get_qq_nickname(self,openid,token): base_url = 'https://graph.qq.com/user/get_user_info' data={ 'ouath_consumer_key':current_app.config.get('QQ_APP_ID'), 'access_token':token, 'openid':openid } resp =requests.request('GET',base_url,params=data) nick_name = json def get(self): parse = reqparse.RequestParser() parse.add_argument('code') args= parse.parse_args() code= args.get('code') print('>>>>',code) token_v= self.code_value(code) openid= self.get_openid(token_v) qq_nickname=self.get_qq_nickname(openid,token_v) return 'hhh'
边栏推荐
- SQL injection of DVWA
- SQL语句中对时间字段进行区间查询
- Pytorch教程Introduction中的神经网络实现示例
- mysql5.7.35安装配置教程【超级详细安装教程】
- Input length must be multiple of 8 when decrypting with padded cipher
- 数据集划分以及交叉验证法
- Unity resources management series: Unity framework how to resource management
- MySQL_关于JSON数据的查询
- Minesweeper game (written in c language)
- PCL calculates the point cloud coordinate maximum and its index
猜你喜欢


随机推荐
PCL calculates the point cloud coordinate maximum and its index
<urlopen error [Errno 11001] getaddrinfo failed>的解决、isinstance()函数初略介绍
sql语句之多表查询
Temporal线上部署
ABC D - Distinct Trio (Number of k-tuples
Flink sink ES 写入 ES(带密码)
关于LocalDateTime的全局返回时间带“T“的时间格式处理
限流的原理
SQL statement to range query time field
MySQL(更新中)
About the problems encountered by Xiaobai installing nodejs (npm WARN config global `--global`, `--local` are deprecated. Use `--location=glob)
ERROR 1819 (HY000) Your password does not satisfy the current policy requirements
【一起学Rust】Rust的Hello Rust详细解析
DVWA installation tutorial (understand what you don't understand · in detail)
tf.keras.utils.get_file()
精解四大集合框架:List 核心知识总结
CentOS7 安装MySQL 图文详细教程
信息系统项目管理师核心考点(五十五)配置管理员(CMO)的工作
mysql使用on duplicate key update批量更新数据
【MySQL8入门到精通】基础篇- Linux系统静默安装MySQL,跨版本升级