当前位置:网站首页>Principle and implementation of parallax effect
Principle and implementation of parallax effect
2022-07-02 05:18:00 【Director of Moral Education Department】
Preface
- The case code of this article is not original by the author .
- This article mainly explains How the parallax effect is achieved ( Original three piece set ) , This article does not cover the knowledge points related to performance optimization ( Think of me as a rogue ).
- This article will start from the principle , Then combine several cases to achieve the final effect .
- Give me a compliment after school ~
<br>
In this paper, the 『 recommend 』 Don't miss the part ~ <br> Because daily development rarely uses the native way to do parallax effect .
<br>
<br>
The case of this paper is shown in the figure

<br><br>
principle
pc The parallax effect at the end is usually According to the mouse 、 keyboard 、 Change and operation of scroll bar Visual differentiation control .
The mobile terminal may also have Gravity gyroscope And that kind of interaction , This article does not talk about mobile terminals .
<br>
Give some examples. :
- Move the mouse to the top left of the screen : An element flies to the lower right of the screen ( Reverse the mouse ).
- The page slides down : The background image doesn't move , Other elements such as text elements move up .
- ……
<br>
Let me give you some examples to intuitively feel :
【 Click jump online preview : Parallax effect of mouse movement 】

<br>
【 Click jump online preview : Use GSAP Parallax layer effects ( Scroll the mouse wheel )】
<br>
【 Click jump online preview : Tilt effect ( Mouse movement )】
<br>
【 Click jump online preview : Parallax effect of creative advertising ( Mouse movement )】
<br><br>
Realization
Understand the principle of implementation , The key to the realization is Event monitoring addEventListener 了 .
<br>
A simple example
Let's start with a simple example
The effect of this example is : Move the mouse to the left , The element moves to the right ; Move the mouse up , The element moves down .
<style>.box { width: 200px; height: 300px; background: lightblue; position: absolute; /* Absolute positioning */}</style><div class="box"></div><script> // obtain .box Elements const box = document.querySelector('.box') // Event listening for the entire document ( Mouse movement mousemove) document.addEventListener('mousemove', e => { // Gets the current position of the mouse x also y coordinate , They are set in .box Of right and bottom box.style.right = e.clientX + 'px' box.style.bottom = e.clientY + 'px' })</script><br>
When the mouse is at the top left of the page ( Join in x and y The coordinates are 10 and 20), The setting element is at the bottom right of the page ( Right :10, Next :20).
It is based on 《 principle 》 To achieve... As mentioned in .
<br>
If you don't understand clientX and clientY , Take a look at the following article :
《JS Event object clientX , clientY , screenX , screenY , offsetX , offsetY The difference between 》
<br>
Be careful :
This example uses the right and left Move elements . The reason for doing this , Is to explain and implement it in the simplest way .
This will bring some difficulties in actual development Layout problems and Performance issues ( Can cause layout changes or redraws , And will cause animation instability .) , Recommended and preferred transforms Move elements, etc .
<br><br>
premium
Fun interaction in addition to moving elements , You can also move the location of the background image 、 Operations such as rotating elements .
At the same time, we also need to consider the Animation amplitude . Like the above example, the element movement is not controlled at all , So when the mouse moves to the right or bottom of the screen , The element will go beyond the screen . This may not be a good operating experience .
<br>
Speaking of Animation amplitude , Think about object of reference Things about . Common references are browser width and height 、 The container is wide and high 、 Container location, etc .
<br>
Take this example :
The elements manipulated in this example look a lot , But it's actually split layer by layer , It's easy to control layer by layer .
Factors to consider include :
- The container rotates
- The background image moves slightly
- The character moves with the mouse
<br>
The reference here is The ratio of the mouse position to the width and height of the document , And limit the range of element movement or rotation through the formula set by yourself .
<br>
1、 The container rotates
Create a div Containers , Set the shadow .

<div class="card"></div><style> html, body { width: 100%; height: 100%; margin: 0; padding: 0; } body { display: flex; justify-content: center; align-items: center; } /* Containers */ .card { width: 175px; height: 250px; border-radius: 8px; box-shadow: 0px 10px 20px 20px rgba(0, 0, 0, 0.17); }</style><br>
adopt JS Control container rotation
// Get container element const card = document.querySelector('.card')// Calculation function function computedTransform(num, doc) { return (num / doc * 40 - 20).toFixed(1)}// Add a mouse movement event listener to the document document.addEventListener('mousemove', e => { // Rotate the container card.style.transform = ` rotateX(${computedTransform(e.clientX, window.innerWidth)}deg) rotateY(${computedTransform(e.clientY, window.innerHeight)}deg) `})<br>
2、 Move background
Add background
<!-- Omit some duplicate code --><style> .card { width: 175px; height: 250px; border-radius: 8px; box-shadow: 0px 10px 20px 20px rgba(0, 0, 0, 0.17); background-image: url(./img/3dr_spirited.jpg); background-repeat: no-repeat; background-position: 50% 50%; background-size: 110% 110%; }</style> This paragraph css It mainly depends on the last added 4 That's ok (background relevant ).
Directly in css Pass through background-image Add a background image , The background image is not repeated , The starting position is in the center , The background image is slightly larger than the container , But not beyond the container .
<br>
JS control : The background image also follows the mouse
Recorded GIF A little bit of a problem , Finally, there was a remnant of the mouse , Make do with it first and see the effect .
/* Omit some duplicate code */const card = document.querySelector('.card')// Calculation function computedBGPosition(num, doc) { return (60 - Number((num / doc * 20).toFixed(1)) + '%')}// Add event listener for mouse movement to the document document.addEventListener('mousemove', e => { // Mobile background card.style.backgroundPosition = ` ${computedBGPosition(e.clientX, window.innerWidth)} ${computedBGPosition(e.clientY, window.innerHeight)} `}) I control the moving range of this part within a relatively small range , Use background-position To control the starting position of the background image .
combining 『1、 The container rotates 』 Code for , It becomes the effect shown below :
<br>
3、 Move picture ( figure )
The character moves with the mouse
Complete code
<style> html, body { width: 100%; height: 100%; margin: 0; padding: 0; } body { display: flex; justify-content: center; align-items: center; } /* Containers */ .card { width: 175px; height: 250px; overflow: hidden; background-image: url(./img/3dr_spirited.jpg); background-repeat: no-repeat; background-position: 50% 50%; background-size: 110% 110%; transform-origin: 50% 50%; perspective: 1800px; transform-style: preserve-3d; border-radius: 8px; box-shadow: 0px 10px 20px 20px rgba(0, 0, 0, 0.17); } /* The picture style ( Xiaoqian ) */ .card img { height: 100%; position: relative; top: 25px; left: 25px; }</style><div class="card"> <img src="./img/3dr_chihiro.png" alt=""></div><script> // Containers const card = document.querySelector('.card') // figure ( Xiaoqian ) const img = card.querySelector('img') // Calculation method of moving background image function computedBGPosition(num, doc) { return (60 - Number((num / doc * 20).toFixed(1)) + '%') } // Calculation translate function computedTransform(num, doc) { return (num / doc * 40 - 20).toFixed(1) } // Add a mouse movement event listener to the document document.addEventListener('mousemove', e => { // Rotate the container card.style.transform = ` rotateX(${computedTransform(e.clientX, window.innerWidth)}deg) rotateY(${computedTransform(e.clientY, window.innerHeight)}deg) ` // Mobile background card.style.backgroundPosition = ` ${computedBGPosition(e.clientX, window.innerWidth)} ${computedBGPosition(e.clientY, window.innerHeight)} ` // Move picture img.style.transform = ` translateX(${computedTransform(e.clientX, window.innerWidth)}px) translateY(${computedTransform(e.clientY, window.innerHeight)}px) ` })</script>Style part :
- Containers : Need to set up
overflow: hidden;, The excess part of the picture during moving will not be displayed - Images of people : Characters need to be set
position: relative;, And move down a little , This can hide the lower body .
JS part :
const img = card.querySelector('img')// Calculation translatefunction computedTransform(num, doc) { return (num / doc * 40 - 20).toFixed(1)}img.style.transform = ` translateX(${computedTransform(e.clientX, window.innerWidth)}px) translateY(${computedTransform(e.clientY, window.innerHeight)}px)`This part is mainly added , adopt Current mouse position and screen width and height To calculate the distance the picture moves .
<br><br>
ultimate
above 『 premium 』 The secret of realizing parallax effect is explained .
Usually see more complex effects , In fact, you can split the elements one by one , Control one by one .
For example, the final effect of this article :
<br>
The explanation of this part is put in the code comments , It is recommended to build a project to run .
If you don't understand something, you can communicate and discuss it in the comment area .
The full code is shown below .
<style> .page__x { width: 1000px; height: 700px; /* Center layout */ display: flex; justify-content: center; align-items: center; overflow: hidden; /* Set the view where the element is viewed */ perspective: 1800px; /* Background color ( Compatibility writing ) */ background: #642b73; background: linear-gradient(to bottom, #c6426e, #642b73); } /* Popular */ h1 { /* Bottom outer margin */ margin-bottom: 30px; /* z Axis offset */ transform: translateZ(35px); /* Letter spacing */ letter-spacing: -1px; /* Font size */ font-size: 32px; /* The font size */ font-weight: 800; /* The font color */ color: #3e3e42; } /* Movies */ h3 { /* Bottom outer margin */ margin-bottom: 6px; /* z Axis offset */ transform: translateZ(25px); /* Font size */ font-size: 16px; /* The font color */ color: #eb285d; } /* Card main container */ .cards { /* Inline block element */ display: inline-block; /* Minimum width */ min-width: 595px; /* padding */ padding: 30px 35px; /* Set the view where the element is viewed */ perspective: 1800px; /* Rotate the base point */ transform-origin: 50% 50%; /* Make the transformed child element keep its 3D transformation */ transform-style: preserve-3d; /* Round corners */ border-radius: 15px; /* Align text left */ text-align: left; /* Background color */ background: #fff; /* Projection */ box-shadow: 0px 10px 20px 20px rgba(0, 0, 0, 0.17); } /* card */ .card { /* Inline block element */ display: inline-block; /* wide */ width: 175px; /* high */ height: 250px; /* Relative positioning */ position: relative; /* Hide overflow */ overflow: hidden; /* Set the view where the element is viewed */ perspective: 1200px; /* Make the transformed child element keep its 3D transformation */ transform-style: preserve-3d; /* z Axis offset */ transform: translatez(35px); /* transition */ transition: transform 200ms ease-out; /* Center text */ text-align: center; /* Round corners */ border-radius: 15px; /* Projection */ box-shadow: 5px 5px 20px -5px rgba(0, 0, 0, 0.6); } /* Cards other than the last card */ .card:not(:last-child) { /* Right outer margin */ margin-right: 30px; } /* Picture of the card */ .card__img { /* Relative positioning */ position: relative; /* Height */ height: 100%; } /* Card background */ .card__bg { bottom: -50px; left: -50px; position: absolute; right: -50px; top: -50px; /* Rotate the base point */ transform-origin: 50% 50%; transform: translateZ(-50px); z-index: 0; } /* Princess ghost picture */ .princess-mononoke .card__img { top: 14px; right: -10px; height: 110%; } /* Princess ghost background */ .princess-mononoke .card__bg { background: url("img/3dr_monobg.jpg") center/cover no-repeat; } /* Spirited away picture */ .spirited-away .card__img { top: 25px; } /* Spirited away background */ .spirited-away .card__bg { background: url("img/3dr_spirited.jpg") center/cover no-repeat; } /* Hal's mobile castle picture */ .howl-s-moving-castle .card__img { top: 5px; left: -4px; height: 110%; } /* Hal's mobile castle background */ .howl-s-moving-castle .card__bg { background: url("img/3dr_howlbg.jpg") center/cover no-repeat; } /* The text content of the card */ .card__text { /* Elastic layout */ display: flex; /* The principal axis is perpendicular */ flex-direction: column; /* Spindle center alignment */ justify-content: center; /* Align the midpoint of the intersecting axis */ align-items: center; /* wide */ width: 100%; /* high */ height: 70px; /* Absolute positioning */ position: absolute; /* Stacking order */ z-index: 2; /* Distance from the bottom */ bottom: 0; /* Background color : The gradient */ background: linear-gradient(to bottom, rgba(0, 0, 0, 0) 0%, rgba(0, 0, 0, 0.55) 100%); } /* The title of the card */ .card__title { /* Bottom outer margin */ margin-bottom: 3px; /* Set left and right 10px padding */ padding: 0 10px; /* Font size */ font-size: 18px; /* The thickness of the font */ font-weight: 700; /* The font color */ color: #fff; }</style><div class="page__x" id="pageX"> <div class="cards"> <h3>Movies</h3> <h1>Popular</h1> <!-- Princess ghost --> <div class="card princess-mononoke"> <div class="card__bg"></div> <img class="card__img" src="./img/3dr_mono.png" /> <div class="card__text"> <p class="card__title">Princess Mononoke</p> </div> </div> <!-- Spirited away --> <div class="card spirited-away"> <div class="card__bg"></div> <img class="card__img" src="./img/3dr_chihiro.png" /> <div class="card__text"> <p class="card__title">Spirited Away</p> </div> </div> <!-- Hal's mobile castle --> <div class="card howl-s-moving-castle"> <div class="card__bg"></div> <img class="card__img" src="./img/3dr_howlcastle.png" /> <div class="card__text"> <p class="card__title">Howl's Moving Castle</p> </div> </div> </div></div><script>// Page container const pageX = document.querySelector('#pageX')// Card containers const cards = document.querySelector('.cards')// All pictures const images = document.querySelectorAll('.card__img')// All the background const backgrounds = document.querySelectorAll('.card__bg')// Rotation angle coefficient let range = 40// The rotation formula ( return -20 ~ 20, Retain 1 Is a decimal )let calcValue = (a, b) => (a / b * range - range / 2).toFixed(1)// Default return undefinedlet timeout = void 0// Parallax animation function // e: Parameters of mouse movement event function parallax(e) { let x = e.x // The pointer x Axis position let y = e.y // The pointer y Axis position // If timeout Already exist , Just cancel a previous call window.requestAnimationFrame() Method to add to the animation frame request in the plan . if (timeout) { // This is an experimental function , Some browsers for this feature are still under development window.cancelAnimationFrame(timeout); } // Update the animation by calling the specified callback function before the next redraw. timeout = window.requestAnimationFrame(function () { // adopt calcValue The calculated value based on the current mouse position and the container aspect ratio let xValue = calcValue(x, pageX.offsetWidth) let yValue = calcValue(y, pageX.offsetHeight) // Set the rotation angle of the card container cards.style.transform = "rotateX(" + yValue + "deg) rotateY(" + xValue + "deg)"; // Set the displacement of all pictures images.forEach(item => { item.style.transform = "translateX(" + -xValue + "px) translateY(" + yValue + "px)" }) // Set the position of all background images backgrounds.forEach(item => { item.style.backgroundPosition = xValue * .45 + "px " + -yValue * .45 + "px" }) })}window.onload = () => { // Monitor the mouse in pageX The container moves pageX.addEventListener('mousemove', parallax, false)}// Remove listening before leaving the page window.onbeforeunload = () => { pageX.removeEventListener('mousemove', parallax)}</script><br>
<br>
Supplementary notes to knowledge points
《JS Event object clientX , clientY , screenX , screenY , offsetX , offsetY The difference between 》
《JS Event monitoring addEventListener()》
《JS Remove event listener removeEventListener()》
<br>
<br>
recommend
In daily development, parallax effect is rarely realized directly in the original way .
Here's a recommended one Light weight JS Animation library :『Anime.js』
The usage of this library is too simple , Look directly at 《 Official documents 》 I know how to use it , This article does not explain .
<br>
《 pure css Realization 117 individual Loading effect 》
《 pure CSS: Dynamic gradient background 【 Learn in a minute 】》
《 this 18 A website can make your page background cool 》
《 pure CSS Magical border effect 》
《 Principle and implementation method of parallax effect 》 give the thumbs-up + Focus on + Collection = Learned to
边栏推荐
- Gee: analyze the change of spatial centroid of remote sensing image [centroid acquisition analysis]
- C # picture display occupancy problem
- A new attribute value must be added to the entity entity class in the code, but there is no corresponding column in the database table
- el form 表单validate成功后没有执行逻辑
- Gee series: unit 9 generate sampling data in GEE [random sampling]
- ERP management system development and design existing source code
- fastText文本分类
- Basic differences between Oracle and MySQL (entry level)
- Fabric.js 右键菜单
- Fabric.js 3个api设置画布宽高
猜你喜欢
CubeMx DMA笔记
视差特效的原理和实现方法

About PROFIBUS: communication backbone network of production plant

LS1046nfs挂载文件系统
![[opencv] image binarization](/img/7e/b56a59ffae3bf6cac9c0bb7e090b85.jpg)
[opencv] image binarization
![Gee series: unit 10 creating a graphical user interface using Google Earth engine [GUI development]](/img/78/a17034d4b77d5c0dbe741f84a8ecd7.jpg)
Gee series: unit 10 creating a graphical user interface using Google Earth engine [GUI development]
Pyechats 1.19 generate a web version of Baidu map
![Gee series: Unit 5 remote sensing image preprocessing [GEE grid preprocessing]](/img/1e/cf0aa09c2fce2278386f12eae4a6cd.jpg)
Gee series: Unit 5 remote sensing image preprocessing [GEE grid preprocessing]
Cubemx DMA notes
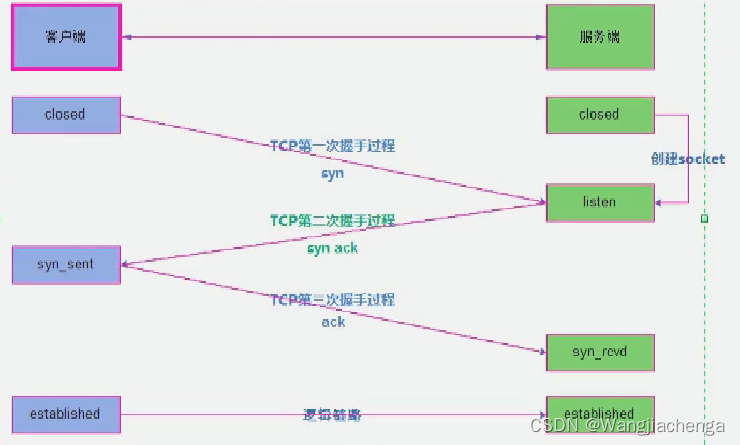
7.TCP的十一种状态集
随机推荐
Online English teaching app open source platform (customized)
Domestic all Chinese automatic test software apifox
go实现leetcode旋转数组
6. Network - Foundation
js中的Map(含leetcode例题)
国产全中文-自动化测试软件Apifox
黑馬筆記---Set系列集合
The El cascader echo only selects the questions that are not displayed
Pyflink writes MySQL examples with JDBC
Detailed explanation of Pointer use
Summary of MySQL key challenges (2)
Go Chan's underlying principles
Gee: explore the change of water area in the North Canal basin over the past 30 years [year by year]
7.1 Résumé du concours de simulation
Exercise notes 13 (effective letter ectopic words)
Pycharm breakpoint management: temporarily cancel some breakpoints + run directly to a line
黑马笔记---Set系列集合
Gee series: Unit 1 Introduction to Google Earth engine
[opencv] image binarization
案例分享|智慧化的西部机场