当前位置:网站首页>[In-depth and easy-to-follow FPGA learning 13---------Test case design 1]
[In-depth and easy-to-follow FPGA learning 13---------Test case design 1]
2022-07-31 00:16:00 【ape】
深入浅出玩转FPGA学习13---测试用例设计
Simulate serial port self-transmitting communication
该Testbenchis for notes16designed for the door-to-door communication experiment.Serial communication experiment design,CPLD将接收到的数据又发送出去.因此,在Testbenchin the use case design,Traversal testing and random testing were used,The data sent out and the data received are detected and compared,Finally, the tester can judge whether the design of the source code meets the requirements according to the information printed out.
The detailed test script is as follows:
'timescale 1ns/1ns
module tb_uart;
reg clk;  //50MHZ主时钟频率
reg rst_n;  //低电平复位信号
reg rs232_rx;  //RS-232发送数据信号,FPGA接收
wire rs232_tx;  //RS-232接收数据信号,FPGA发送
//Instantiate the project under testmy_uart_top
my_uart_top	uut(
						.clk(clk),
						.rst_n(rst_n),
						.rs232_rx(rs232_rx),
						.rs232_tx(rs232_tx)
						);
//-------------------------------------------------------------------------------------------------//
//FPGAInput clock and reset generation
//-------------------------------------------------------------------------------------------------//
parameter PERIOD = 20;  //时钟周期,单位ns
parameter RST_ING = 1'b0;  //有效复位值,默认低电平复位
//The clock signal is generated
initial begin
		clk = 0;
		forever
				#( PERIOD/2) clk = ~clk;
end
//Reset the task package
task sys_reset;
		input[31:0] reset_time;   //复位时间输入,单位ns
		begin
			rst_n = RST_ING;  //复位中
			# reset_time;  //复位时间
			rst_n = ~ RST_ING;   //撤销复位
		end
endtask
//-----------------------------------------------------------------------------------------------------//
//常用信息打印任务封装
//-----------------------------------------------------------------------------------------------------//
//警告信息打印任务
task warning;
		input[80*8:1] msg;
		begin
			$ write("WARNING at %t: %s", $time,msg);
		end
endtask
//错误信息打印任务
task error;
		input[80*8:1] msg;
		begin
				$ write ("ERROR at %t: %s", $time, msg);
		end
endtask
//致命错误打印并停止仿真任务
task fatal;
		input[80*8:1] msg;
		begin
				$write("FATAL at %t : %s", $time, msg);
				$write("Simulation false\n");
				$ stop;
		end
endtask
//完成仿真任务
task terminate;
		begin
				%write("Simulation Successful\n");
				%stop;
		end
endtask
//--------------------------------------------------------------------------------------------//
//测试用例设计
//--------------------------------------------------------------------------------------------------//
/波特率参数
parameter	BPS9600 =32'd104_167,  //9600bps
					BPS19200 = 32'd52_083,  //19200bps
					BPS38400 = 32'd26_041,  //38400bps
					BPS57600 = 32'd17_361,  //57600bps
					BPS115200 = 32'd8_681,  //115200bps
integer tx_bps;  //Serial port send baud rate setting,It needs to be set before accepting
integer rx_bps;  //Serial port receive baud rate setting,It needs to be set before receiving
reg[7:0] cnt;   //发送数据计数器
reg[7:0] data_temp;  //Serial port receive data register
reg rx_flag;     //接收标志位,A falling edge indicates the completion of receiving a data
reg tx_data;  //Random transmit data register
initial begin
sys_reset(500);   //After power-on500ns的复位
rs232_rx = 1'b1;
#1000;   //1us延时
rx_bps = BPS9600;   //Serial port receive baud rate setting
tx_bps = BPS9600;   //Serial port send baud rate setting
//遍历测试//
for(cnt =0; cnt < 255; cnt= cnt + 1)
	begin
		tx_task(cnt);    //发送数据
		@(nedge rx_flag);   //等待接收到数据
		if(data_temp == cnt)
				$write("transmit: %d, receive: %d; ture\n", cnt, data_temp);
				//The data sent and received is correct
		else begin
				$write("transmit: %d, receibe: %d; error\n", cnt, data_temp);
				//Self-transceived data error
				error("false");
		end
end
#10_000;  //10us延时
//随机测试//
for(cnt =0; cnt<255; cnt = cnt+1) begin     //顺序发送0~255
		tx_data = {$random};
		tx_task(tx_data);  //Send random data
		@(negedge rx_flag);   //等待接收到数据
		if(data_temp == tx_data)
				$write("transmit : %d, receive: %d; ture\n", cnt, data_temp);
				//The data sent and received is correct
		else begin
				$write(" transmit: %d, receive: %d; error\n", cnt, data_temp);
				//Self-transceived data error
				error("false");
		end
end
terminate;
end
//Serial port sending task
task tx_task;
		input[7:0] txdata;  //发送数据输入
		integer i;
		begin
				rs232_rx = 0;  //起始位
				#tx_bps;
				for(i=0; i<8; i=i+1) begin   //8位数据发送
						rs232_rx = txdata[7-i];
						# tx_bps;
		end
		rs232_rx = 1;  //停止位
		# tx_bps;
		end
endtask
integer j;
//串口接收
always @ (posedge rs232_tx) begin //起始位检测
		#(tx_bps/2);
		if(rs232_tx == 0) begin
				rx_flag = 1;
				#tx_bps;
				for (j=0; j<8;j=j+1) begin
						data_temp[7-j] = rs232_tx;
						#tx_bps;
				end
				rx_flag =0;
		end
	end
endmodule
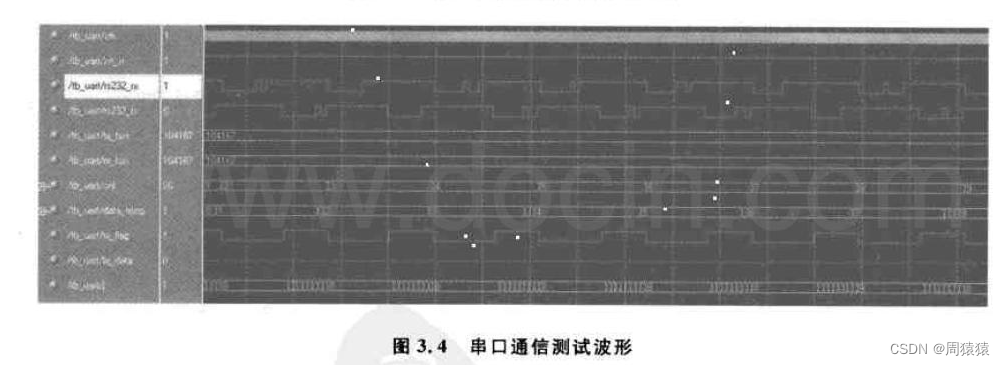
图3.3和图3.4They are the screenshot of the print information window and the screenshot of the waveform of the test case.For these two different test observation means,Although the waveform observation is more intuitive,But all in this use case512All the results are observed with the naked eye, which must be confusing,And it's a waste of time.所以,在TestbenchAdd self-test,It is more convenient and intelligent to observe by printing the information of the window.
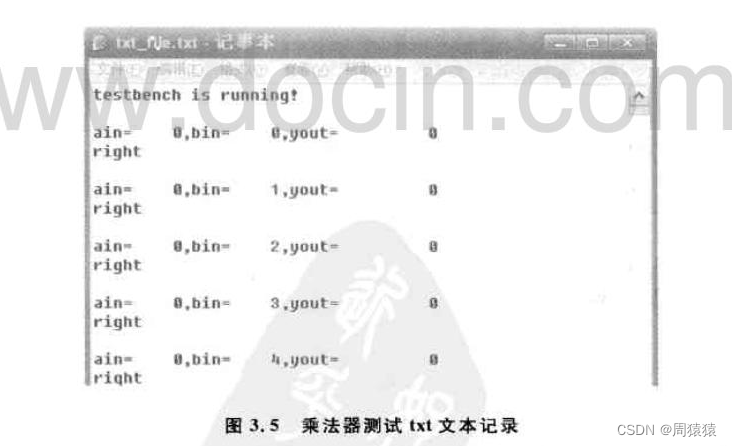
Multiplier full coverage test
This test script implements full coverage testing of the multiplier design,That is, all possible are generated continuously2个16An unsigned combination of bits as input.After entering the multiplicand,Start the multiplier,直到FPGAValid operation output flag bitdone位置时,The test script will multiply、The multiplicand and the product are saved totxt文本中,如图3.5所示,And judge whether the output is correct,输出判断结果.After all tests are done ,The test script outputs the count of test errors.
The detailed test script is as follows:
'timescale 1ns/1ns
module vtf_muxtest;
reg clk; //Chip clock signal
reg rst_n;
//低电平复位、清零信号.定义为0Indicates chip reset;定位为1Indicates that the reset signal is invalid
reg start;
//芯片使能信号.定义为0表示信号无效;定义为1Indicates the multiplier and multiplicand that the chip reads into the input pin,and reset the product to zero
reg[15:0] ain;   //输入a(被乘数), Its data bit width is 16位
reg[15:0] bin;   //输入b(乘数),Its data bit width is 16位
wire[31:0] yout;  //Product output,Its data bit width is 32位
wire done;   //The chip outputs the flag signal,定义为1Indicates that the multiplication operation is complete
mux16 uut(
				.clk(clk),
				.rst_n(rst_n),
				.start(start),
				.ain(ain),
				.bin(bin),
				.yout(yout),
				.done(done)
				);
initial begin
		clk = 0;
		forever
		#10 clk = ~ clk;  //产生50MHZground clock frequency
		end
integer i,j;
integer wrong_timer;  //Operation error counter
integer txt_file;  //定义文件指针
initial begin
//信号初始化
		start=1'b0;
		ain = 16'd0;
		bin =16'd0;
		wrong_timer = 0;
//txt初始化
txt_file = $ fopen("txt_file.txt");
//上电复位
rst_n = 1'b0;
#1000;
rst_n = 1'b1;
#fdisplay(txt_file,"testbench is running!\n");
for(i=0;i<16'hffff;i=i+1) begin
		for(j=0;j< 16'hffff;j=j+1) begin
				mux_task(i, j);
		end
end
$fdisplay(txt_file,"%d wrong!\n",wrong_timer);
$fdisplay(txt_file, "testbench is over!\n");
$stop;
end
reg[31:0] mux_resulet;   //Multiplication output result register
//Multiplication performs the task
task mux_task;
		input[15:0] mux_a;
		input[15:0] mux_b;
		begin
				ain = mux_a;   //send multiplier
				bin = mux_ b;  //送被乘数
				@(posedge clk);
				#2 start = 1; //Start the multiplier
				@(posedge done); //Wait for the operation to complete
				@(posedge clk);
				# 2 mux_result = yout;  //Read out the operation result
				@(posedge clk);
				#2 start = 0;   //结束运算
				@(posedge clk);
		end
endtask
always @(posedge done) begin
	@(posedge clk);
	@(posedge clk);   //Wait for the operation result to be latched
	$fdisplay(txt_file, "ain= %d,bin=%d, yout=%d\t", ain,bin,mux_result);
	//打印运算结果
	if(ain*bin==yout) $fdisplay(txt_file, "right\n");   //The report is correct
	else begin
			$fdisplay(txt_file, "wrong\n");   /Report an operation error
			wrong_timer = wrong_timer + 1;  //Error count
	end
	@(posedge clk);
end
endmodule
Compared with the previous test cases, the biggest difference is that the degree of automation is greatly improved,The tester is not required to observe a long series of waveforms,Test results can also be effectively recorded.At the same time, testers do not have to worry about the loss of test data.In fact, this test script can be made more flexible,For example, when the test fails, let the test terminate immediately and report an error,This way the tester can immediately communicate with the designer(如果条件许可)沟通,It is convenient for designers to quickly locate the problem,There's no need to wait until all tests are done to check for errors.
边栏推荐
- Error ER_NOT_SUPPORTED_AUTH_MODE Client does not support authentication protocol requested by serv
- .NET Cross-Platform Application Development Hands-on Tutorial | Build a Kanban-style Todo App with Uno Platform
- encrypted transmission process
- Oracle一个诡异的临时表空间不足的问题
- 软件开发设计流程
- joiplay模拟器不支持此游戏类型怎么解决
- DNS resolution process [visit website]
- MySQL数据库(基础)
- MySQL的grant语句
- 45. [Application of list linked list]
猜你喜欢


![DNS resolution process [visit website]](/img/58/ae9464dc714c4fcb958424ac134c99.png)
随机推荐
The performance management method OKR is used by all companies
pytorch双线性插值
joiplay模拟器如何调中文
网络常用的状态码
binglog log tracking: data backup and backup tracking
牛客网刷题训练(四)
firewalld
Shell programming conditional statement test command Integer value, string comparison Logical test File test
数据库的严格模式
[动态规划] 0-1背包问题和完全背包问题
encrypted transmission process
Point Cloud Scene Reconstruction with Depth Estimation
How to solve the error of joiplay simulator
pytorch的安装注意事项
加密传输过程
A Brief Talk About MPI
PHP图片添加文字水印
joiplay模拟器不支持此游戏类型怎么解决
边缘计算与小程序也能结合!智能家居是否能借势上台阶
Optimization of aggregate mentioned at DATA AI Summit 2022