当前位置:网站首页>Esp32c3 based on the example tutorial of esp32 Rainmaker development under Arduino framework
Esp32c3 based on the example tutorial of esp32 Rainmaker development under Arduino framework
2022-07-25 11:11:00 【perseverance52】
ESP32C3 be based on Arduino Under the framework of ESP32 RainMaker Develop sample tutorials
ESP RainMaker
ESP RainMaker It is an end-to-end platform launched by Lexin . Based on this platform , Users do not need to manage infrastructure , You can directly use Lexin ESP32-S2 SoC Quickly realize the ideas and ideas of the Internet of things .
- Lexin official ESP RainMaker Introduce :https://www.espressif.com.cn/zh-hans/news/ESP-RainMaker
Currently through examples , Burn the program to ESP32C3 On , Only connect to the device via Bluetooth , In the process of accessing the network , Always make mistakes , The code may need to be improved .
esp-rainmaker- be based on android Version of APP App download address
This Android based mobile terminal APP, In every university APP The application market is really hard to find , It's also better to provide through the official website github eureka .
Release v2.3.0
- https://github.com/espressif/esp-rainmaker-android/releases

- Other versions :https://github.com/espressif/esp-rainmaker/wiki
Sample code
//This example demonstrates the ESP RainMaker with a standard Switch device.
#include "RMaker.h"
#include "WiFi.h"
#include "WiFiProv.h"

#define DEFAULT_POWER_MODE true
const char *service_name = "PROV_1234";
const char *pop = "abcd1234";

//GPIO for push button
#if CONFIG_IDF_TARGET_ESP32C3
static int gpio_0 = 9;
static int gpio_switch = 7;
#else
//GPIO for virtual device
static int gpio_0 = 0;
static int gpio_switch = 16;
#endif

/* Variable for reading pin status*/
bool switch_state = true;

//The framework provides some standard device types like switch, lightbulb, fan, temperaturesensor.
static Switch my_switch("Switch", &gpio_switch);

void sysProvEvent(arduino_event_t *sys_event)
{

    switch (sys_event->event_id) {

        case ARDUINO_EVENT_PROV_START:
#if CONFIG_IDF_TARGET_ESP32S2
        Serial.printf("\nProvisioning Started with name \"%s\" and PoP \"%s\" on SoftAP\n", service_name, pop);
        printQR(service_name, pop, "softap");
#else
        Serial.printf("\nProvisioning Started with name \"%s\" and PoP \"%s\" on BLE\n", service_name, pop);
        printQR(service_name, pop, "ble");
#endif
        break;
        default:;
    }
}

void write_callback(Device *device, Param *param, const param_val_t val, void *priv_data, write_ctx_t *ctx)
{

    const char *device_name = device->getDeviceName();
    const char *param_name = param->getParamName();

    if(strcmp(param_name, "Power") == 0) {

        Serial.printf("Received value = %s for %s - %s\n", val.val.b? "true" : "false", device_name, param_name);
        switch_state = val.val.b;
        (switch_state == false) ? digitalWrite(gpio_switch, LOW) : digitalWrite(gpio_switch, HIGH);
        param->updateAndReport(val);
    }
}

void setup()
{

    Serial.begin(115200);
    pinMode(gpio_0, INPUT);
    pinMode(gpio_switch, OUTPUT);
    digitalWrite(gpio_switch, DEFAULT_POWER_MODE);

    Node my_node;
    my_node = RMaker.initNode("ESP RainMaker Node");

    //Standard switch device
    my_switch.addCb(write_callback);

    //Add switch device to the node
    my_node.addDevice(my_switch);

    //This is optional
    RMaker.enableOTA(OTA_USING_PARAMS);
    //If you want to enable scheduling, set time zone for your region using setTimeZone().
    //The list of available values are provided here https://rainmaker.espressif.com/docs/time-service.html
    // RMaker.setTimeZone("Asia/Shanghai");
    // Alternatively, enable the Timezone service and let the phone apps set the appropriate timezone
    RMaker.enableTZService();

    RMaker.enableSchedule();

    RMaker.start();

    WiFi.onEvent(sysProvEvent);
#if CONFIG_IDF_TARGET_ESP32S2
    WiFiProv.beginProvision(WIFI_PROV_SCHEME_SOFTAP, WIFI_PROV_SCHEME_HANDLER_NONE, WIFI_PROV_SECURITY_1, pop, service_name);
#else
    WiFiProv.beginProvision(WIFI_PROV_SCHEME_BLE, WIFI_PROV_SCHEME_HANDLER_FREE_BTDM, WIFI_PROV_SECURITY_1, pop, service_name);
#endif
}

void loop()
{

    if(digitalRead(gpio_0) == LOW) {
     //Push button pressed

        // Key debounce handling
        delay(100);
        int startTime = millis();
        while(digitalRead(gpio_0) == LOW) delay(50);
        int endTime = millis();

        if ((endTime - startTime) > 10000) {

          // If key pressed for more than 10secs, reset all
          Serial.printf("Reset to factory.\n");
          RMakerFactoryReset(2);
        } else if ((endTime - startTime) > 3000) {

          Serial.printf("Reset Wi-Fi.\n");
          // If key pressed for more than 3secs, but less than 10, reset Wi-Fi
          RMakerWiFiReset(2);
        } else {

          // Toggle device state
          switch_state = !switch_state;
          Serial.printf("Toggle State to %s.\n", switch_state ? "true" : "false");
          my_switch.updateAndReportParam(ESP_RMAKER_DEF_POWER_NAME, switch_state);
          (switch_state == false) ? digitalWrite(gpio_switch, LOW) : digitalWrite(gpio_switch, HIGH);
      }
    }
    delay(100);
}
- Serial port printing information

ESP32 RainMaker Mobile terminal connection process
- Turn on... On your phone
ESP32 RainMaker APPApplications , choiceAdd Device
- Connect to the device by scanning or manual scanning .( It is difficult to successfully identify the QR code in the serial port monitor by scanning )

- After the program is burned on the target board , Turn on the serial monitor , The following information with QR code will be printed , If you don't see it, please restart the device .
- Not recognized by QR code , You can manually connect to the device through the button below .


- Choose Bluetooth
BLE, The mobile phone must be turned onbluetoothfunction , Some mobile phones have to be turned onlocationfunction , Otherwise, the Bluetooth device cannot be found .
- You can search for a belt
PROVBluetooth devices
- Click and connect this device , Will ask for input PIN Code to connect .( The default is
bcd1234, You can see relevant information through serial port information )

- The second step is to connect WiFi, Access to the Internet .( Here, by default, which mobile phone you are connected to WiFi The signal ,)

- But at this point , I don't know why the message of sending failure is displayed
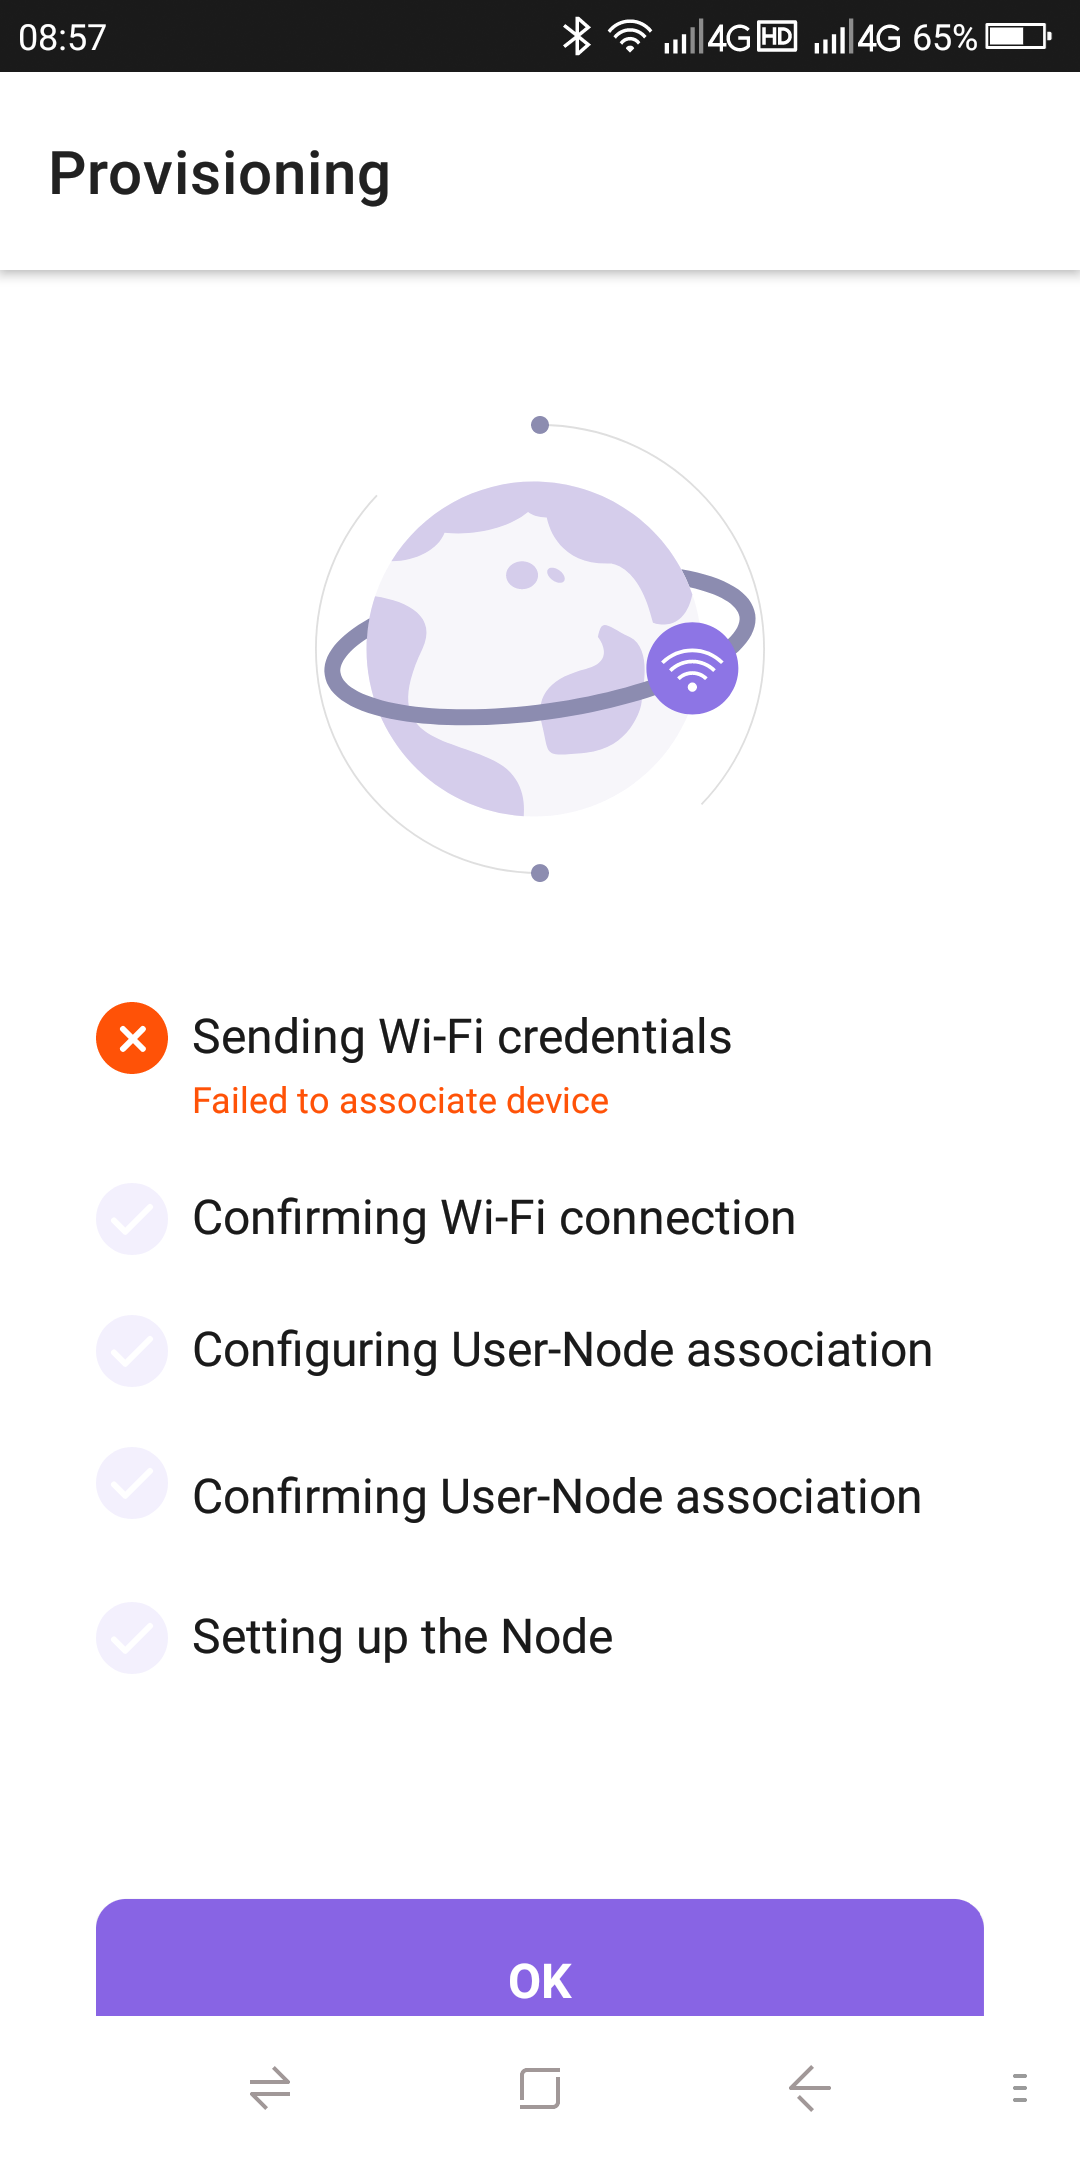
Therefore, there is no access to the Internet to realize the development function of mobile phone control buttons .
边栏推荐
- Google Earth engine -- Statistics on the frequency of land classification year by year
- Learn NLP with Transformer (Chapter 7)
- How to notify users of wechat applet version update?
- Motivation of enterprises to practice open source
- The most comprehensive UE4 file operation in history, including opening, reading, writing, adding, deleting, modifying and checking
- 【IJCAI 2022】参数高效的大模型稀疏训练方法,大幅减少稀疏训练所需资源
- The integration of two in one has a long way to go
- Flask框架——消息闪现
- AI技术栈太庞大!吴恩达给出职业生涯规划:终生学习
- 性能测试中TPS的计算【杭州多测师】【杭州多测师_王sir】
猜你喜欢

The University of Gottingen proposed clipseg: a model that can perform three segmentation tasks simultaneously using text and image prompts

mysql主从复制与读写分离
学习周刊 - 总第 63 期 - 一款开源的本地代码片段管理工具

HCIA实验(06)

I, AI doctoral student, online crowdfunding research topic

Using numpy for elevation statistics and visualization
![[flask advanced] combined with the source code, explain the operation mechanism of flask (in and out of the stack)](/img/a0/9110b83ff5c7965809bbc9f3948956.jpg)
[flask advanced] combined with the source code, explain the operation mechanism of flask (in and out of the stack)

BGP federal experiment

Learn NLP with Transformer (Chapter 8)
ESP32C3基于Arduino框架下的 ESP32 RainMaker开发示例教程

随机推荐
Last week's hot review (7.18-7.24)
MySQL master-slave replication and read-write separation
C3d model pytorch source code sentence by sentence analysis (I)
信号完整性(SI)电源完整性(PI)学习笔记(三十四)100条估计信号完整性效应的经验法则
HCIP(12)
Learn NLP with Transformer (Chapter 1)
[flask advanced] solve the classic error reporting of flask by combining the source code: working outside of application context
Learning Weekly - total issue 63 - an open source local code snippet management tool
Flask framework - flask WTF form: data validation, CSRF protection
JDBC的APi补充
The University of Gottingen proposed clipseg: a model that can perform three segmentation tasks simultaneously using text and image prompts
Learn NLP with Transformer (Chapter 7)
Flask framework - session and cookies
2021 scenery written examination summary
上周热点回顾(7.18-7.24)
代码的表示学习:CodeBERT及其他相关模型介绍
Motivation of enterprises to practice open source
Signal integrity (SI) power integrity (PI) learning notes (XXXIV) 100 rules of thumb for estimating signal integrity effects
Cloud native ide: the first general codeless development platform of IVX for free
HCIA experiment (07) comprehensive experiment