当前位置:网站首页>How to install and start VNC remote desktop service on cloud GPU?
How to install and start VNC remote desktop service on cloud GPU?
2022-08-03 17:38:00 【InfoQ】
The platform does not provide a desktop by default. If you need desktop services, you can install and use it according to the following documentation steps.
The platform provides the xfce4 desktop of Ubuntu in the installation documentation.
.
Hengyuan cloud platform address: https://gpushare.com/
Installing the desktop
Execute the following command to install the desktop.
#Download installation script
~# curl -OL https://download.gpushare.com/download/platform/install_desktop/install_desktop

#InstallThe script is given execution permission
~# chmod +x ./install_desktop

#Execute the installation desktop script. The installation speed depends on the bandwidth of the instance. The fastest time is 5-10 minutes, and the slowest may be required30-60 minutes.
~# ./install_desktop

#At the end of the installation, you will be prompted to enter the VNC password. The password needs to be defined by yourself. Later, you need to log in to the desktop through VNC. In the document, gpushare is used as the VNC password.
Please enter the VNC connection password, which needs to be customized: gpushare
Your VNC password is: gpushare
spawn vncpasswd
Password:
Verify:
Would you like to enter a view-only password (y/n)? n
Start the desktop
After the desktop is installed, it needs to be managed through VNC, so it needs to startAfter the VNC service, connect the instance desktop through VNC.
#Execute the manage_vnc command to view the usage method
~# manage_vnc

 usage:
 1): VNC Server startup command
 manage_vncstart

 2): VNC Server shutdown command
 manage_vnc stop

#Then execute manage_vnc start to start the VNC service
~# manage_vnc start

The VNC server has been successfully started!
Accessing the desktop
After the VNC service is started, the instance's port 8080 is occupied by default, open the console - "clickA custom service can access desktop services through a browser.
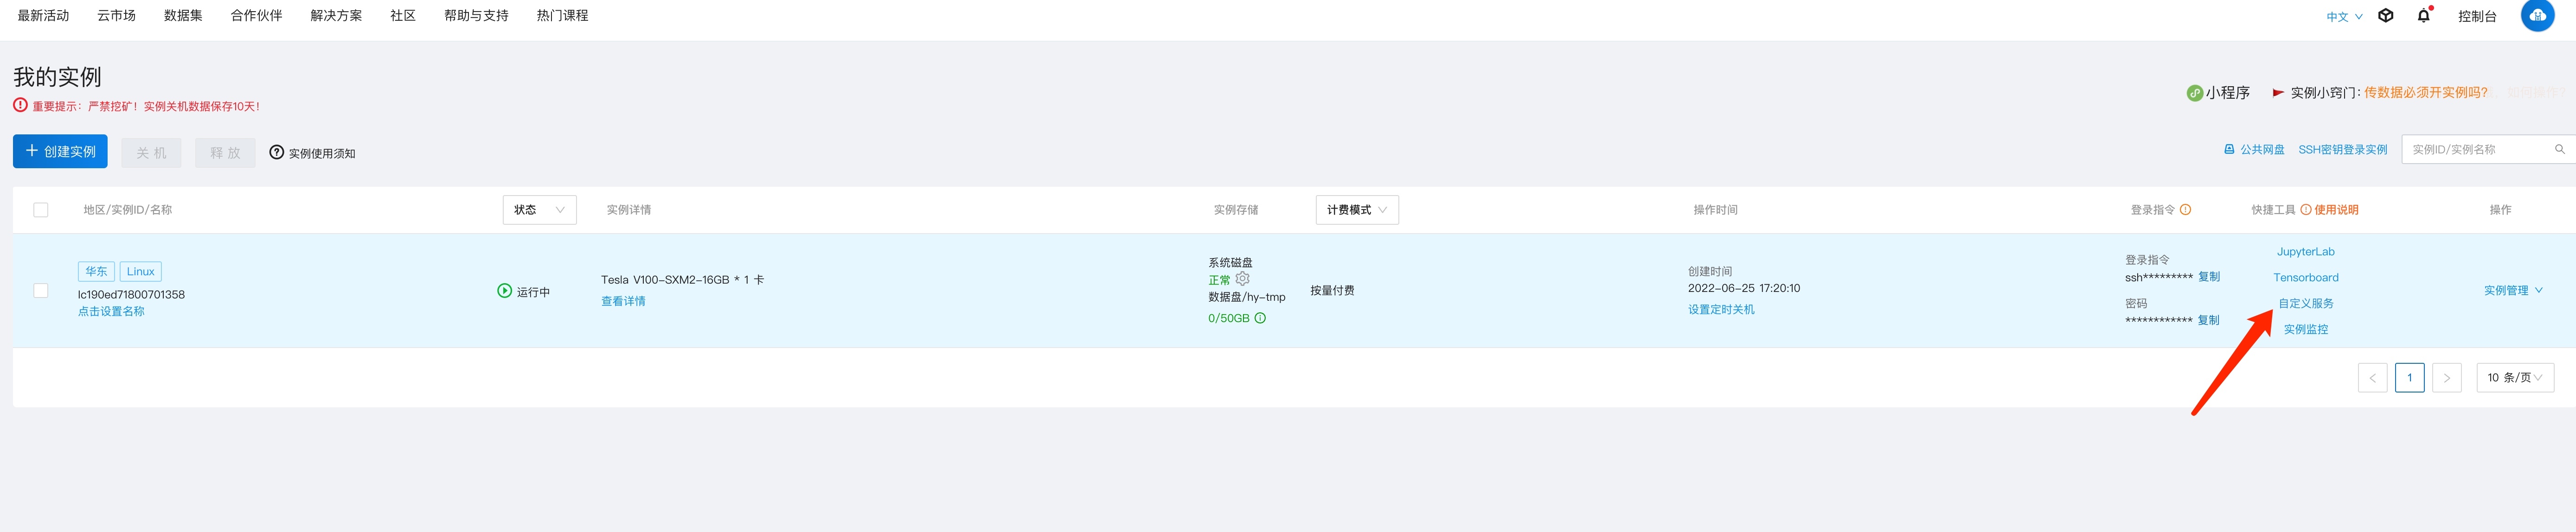
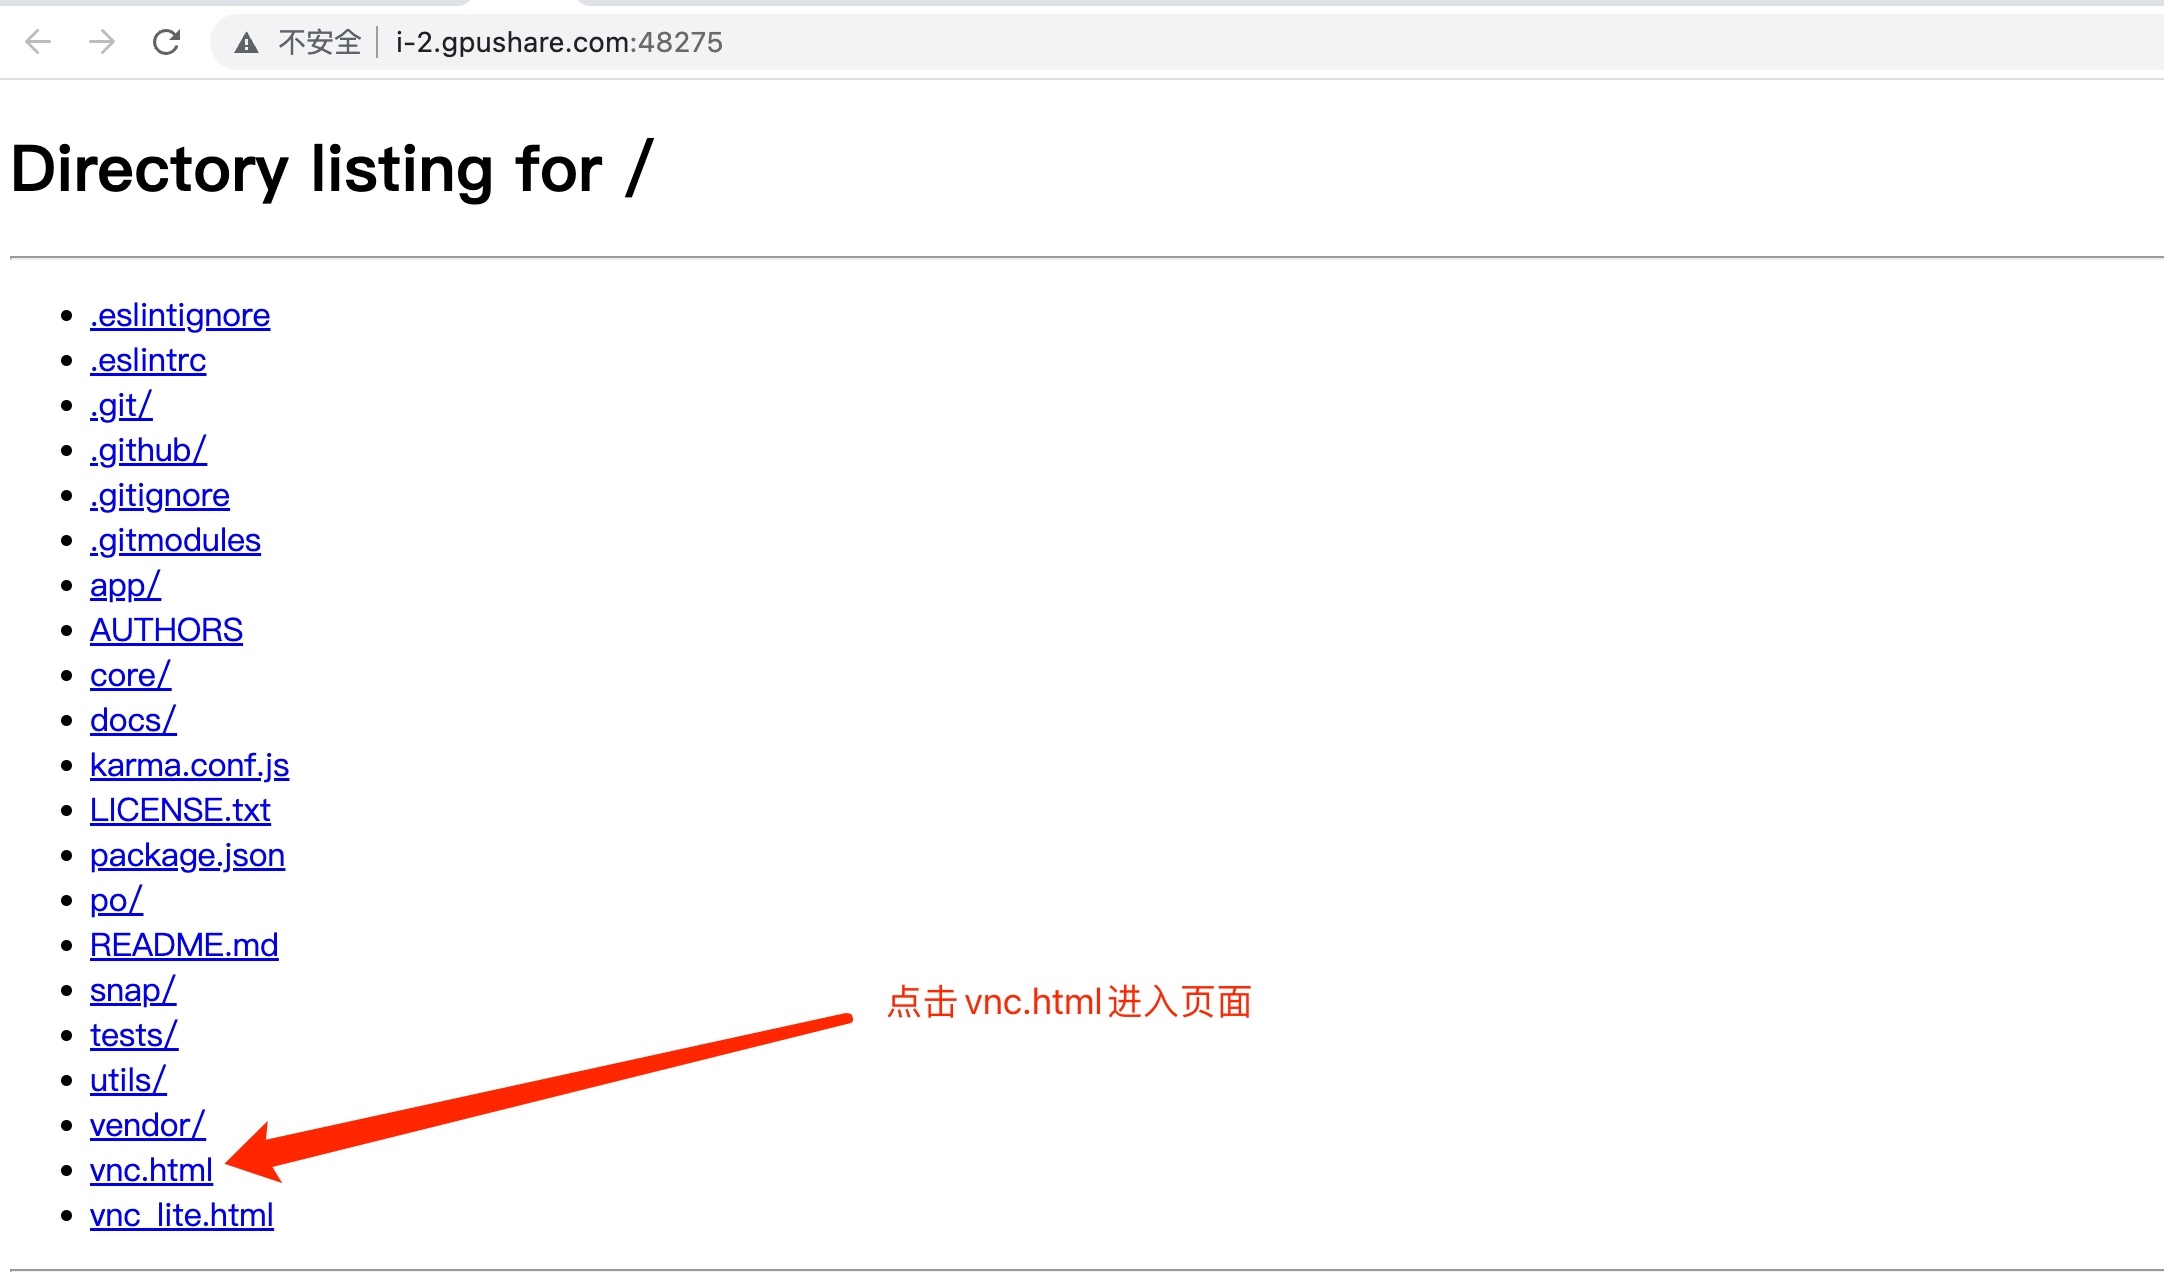
Click vnc.html to enter the VNC page.
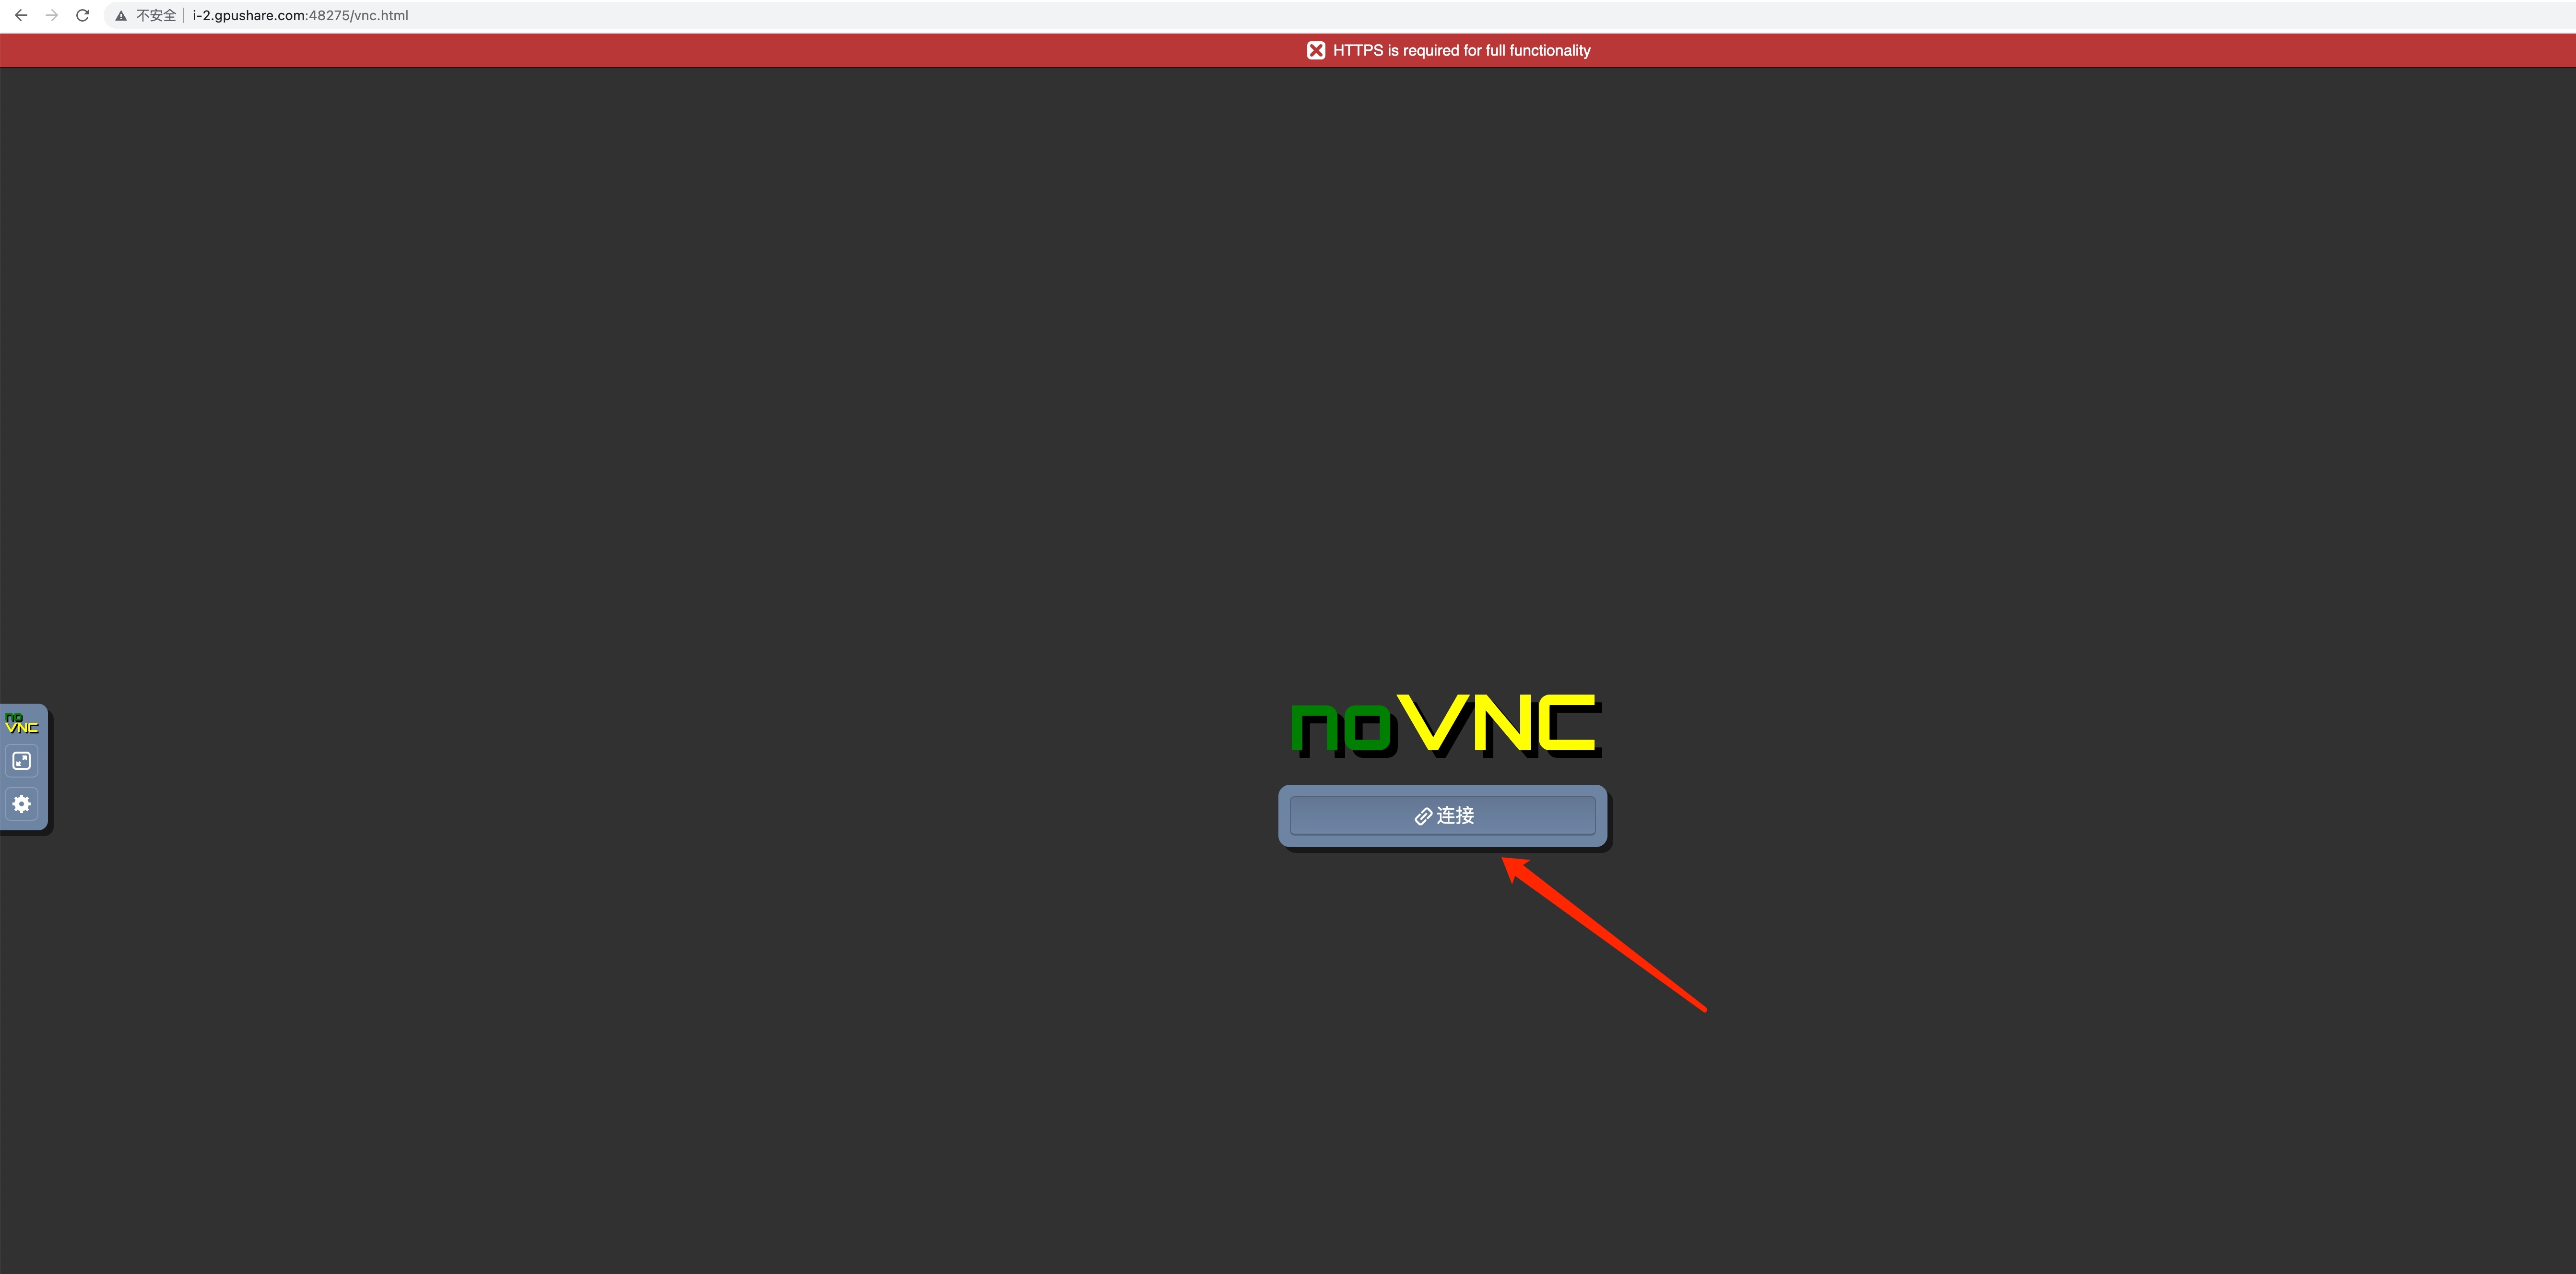
Click to connect after entering the VNC page.
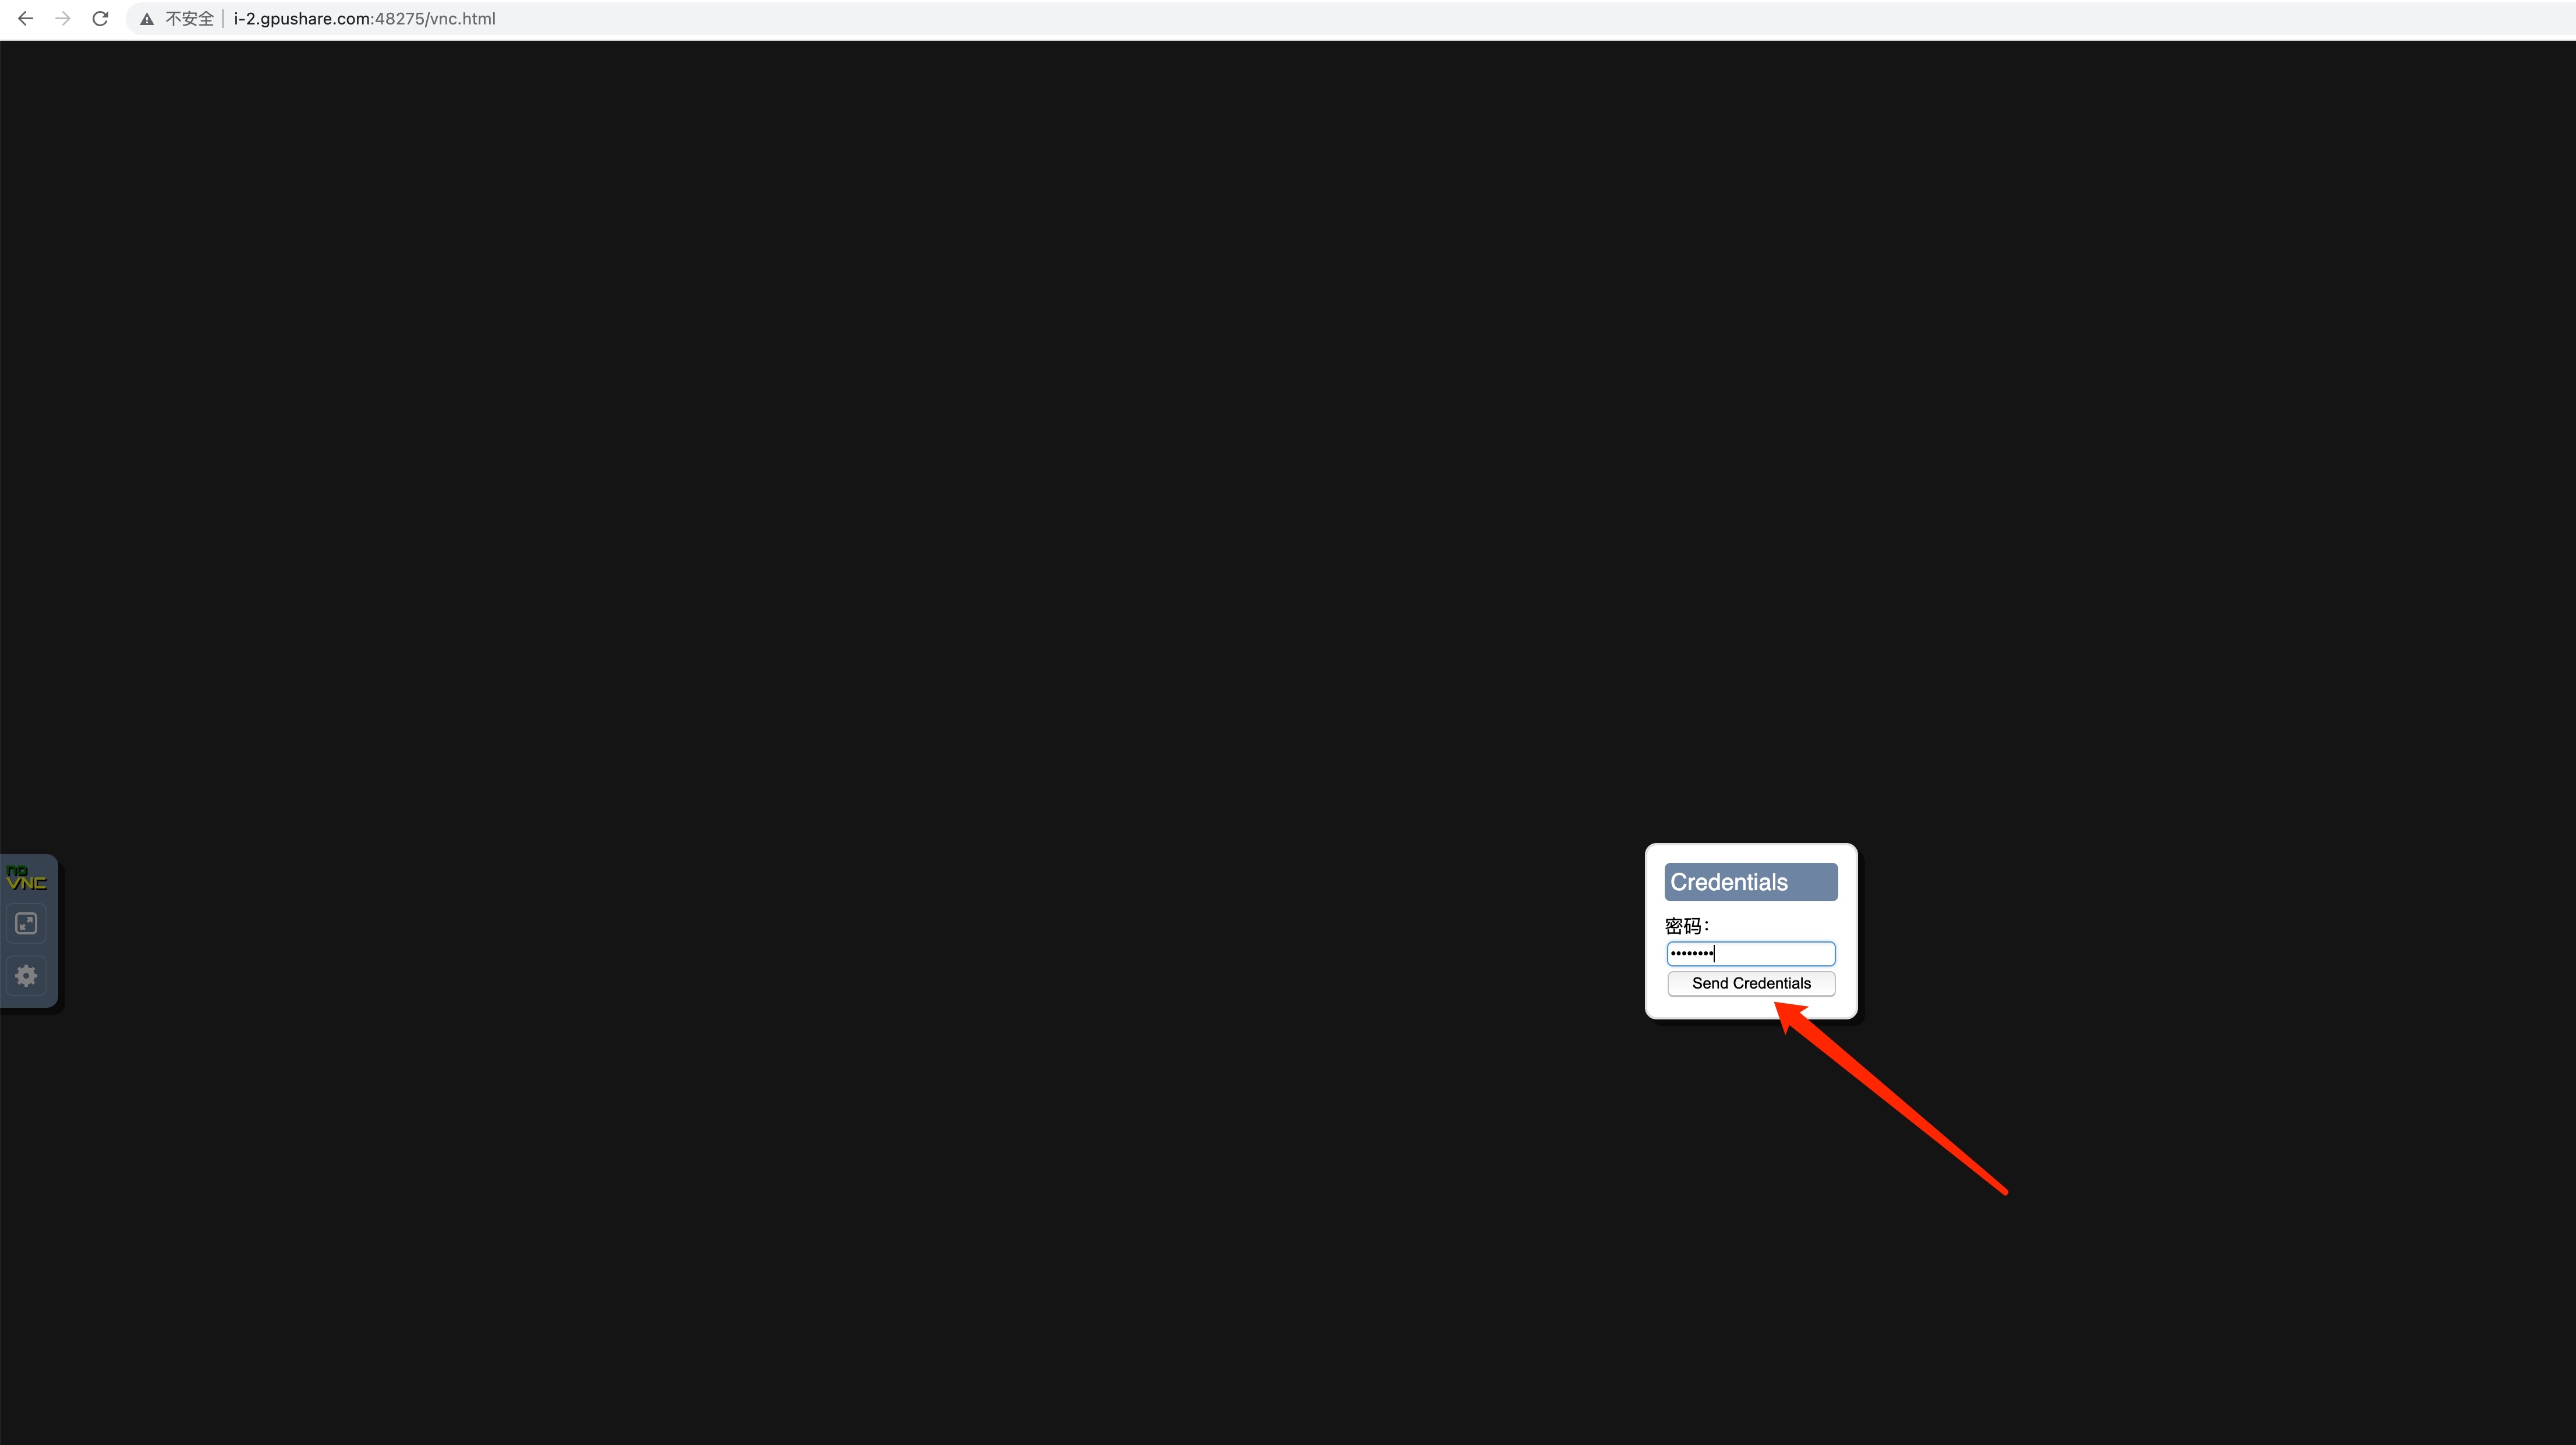
Enter at the end of installing Desktop ServicesCustomize the entered VNC password and click Send Credentials to log in.
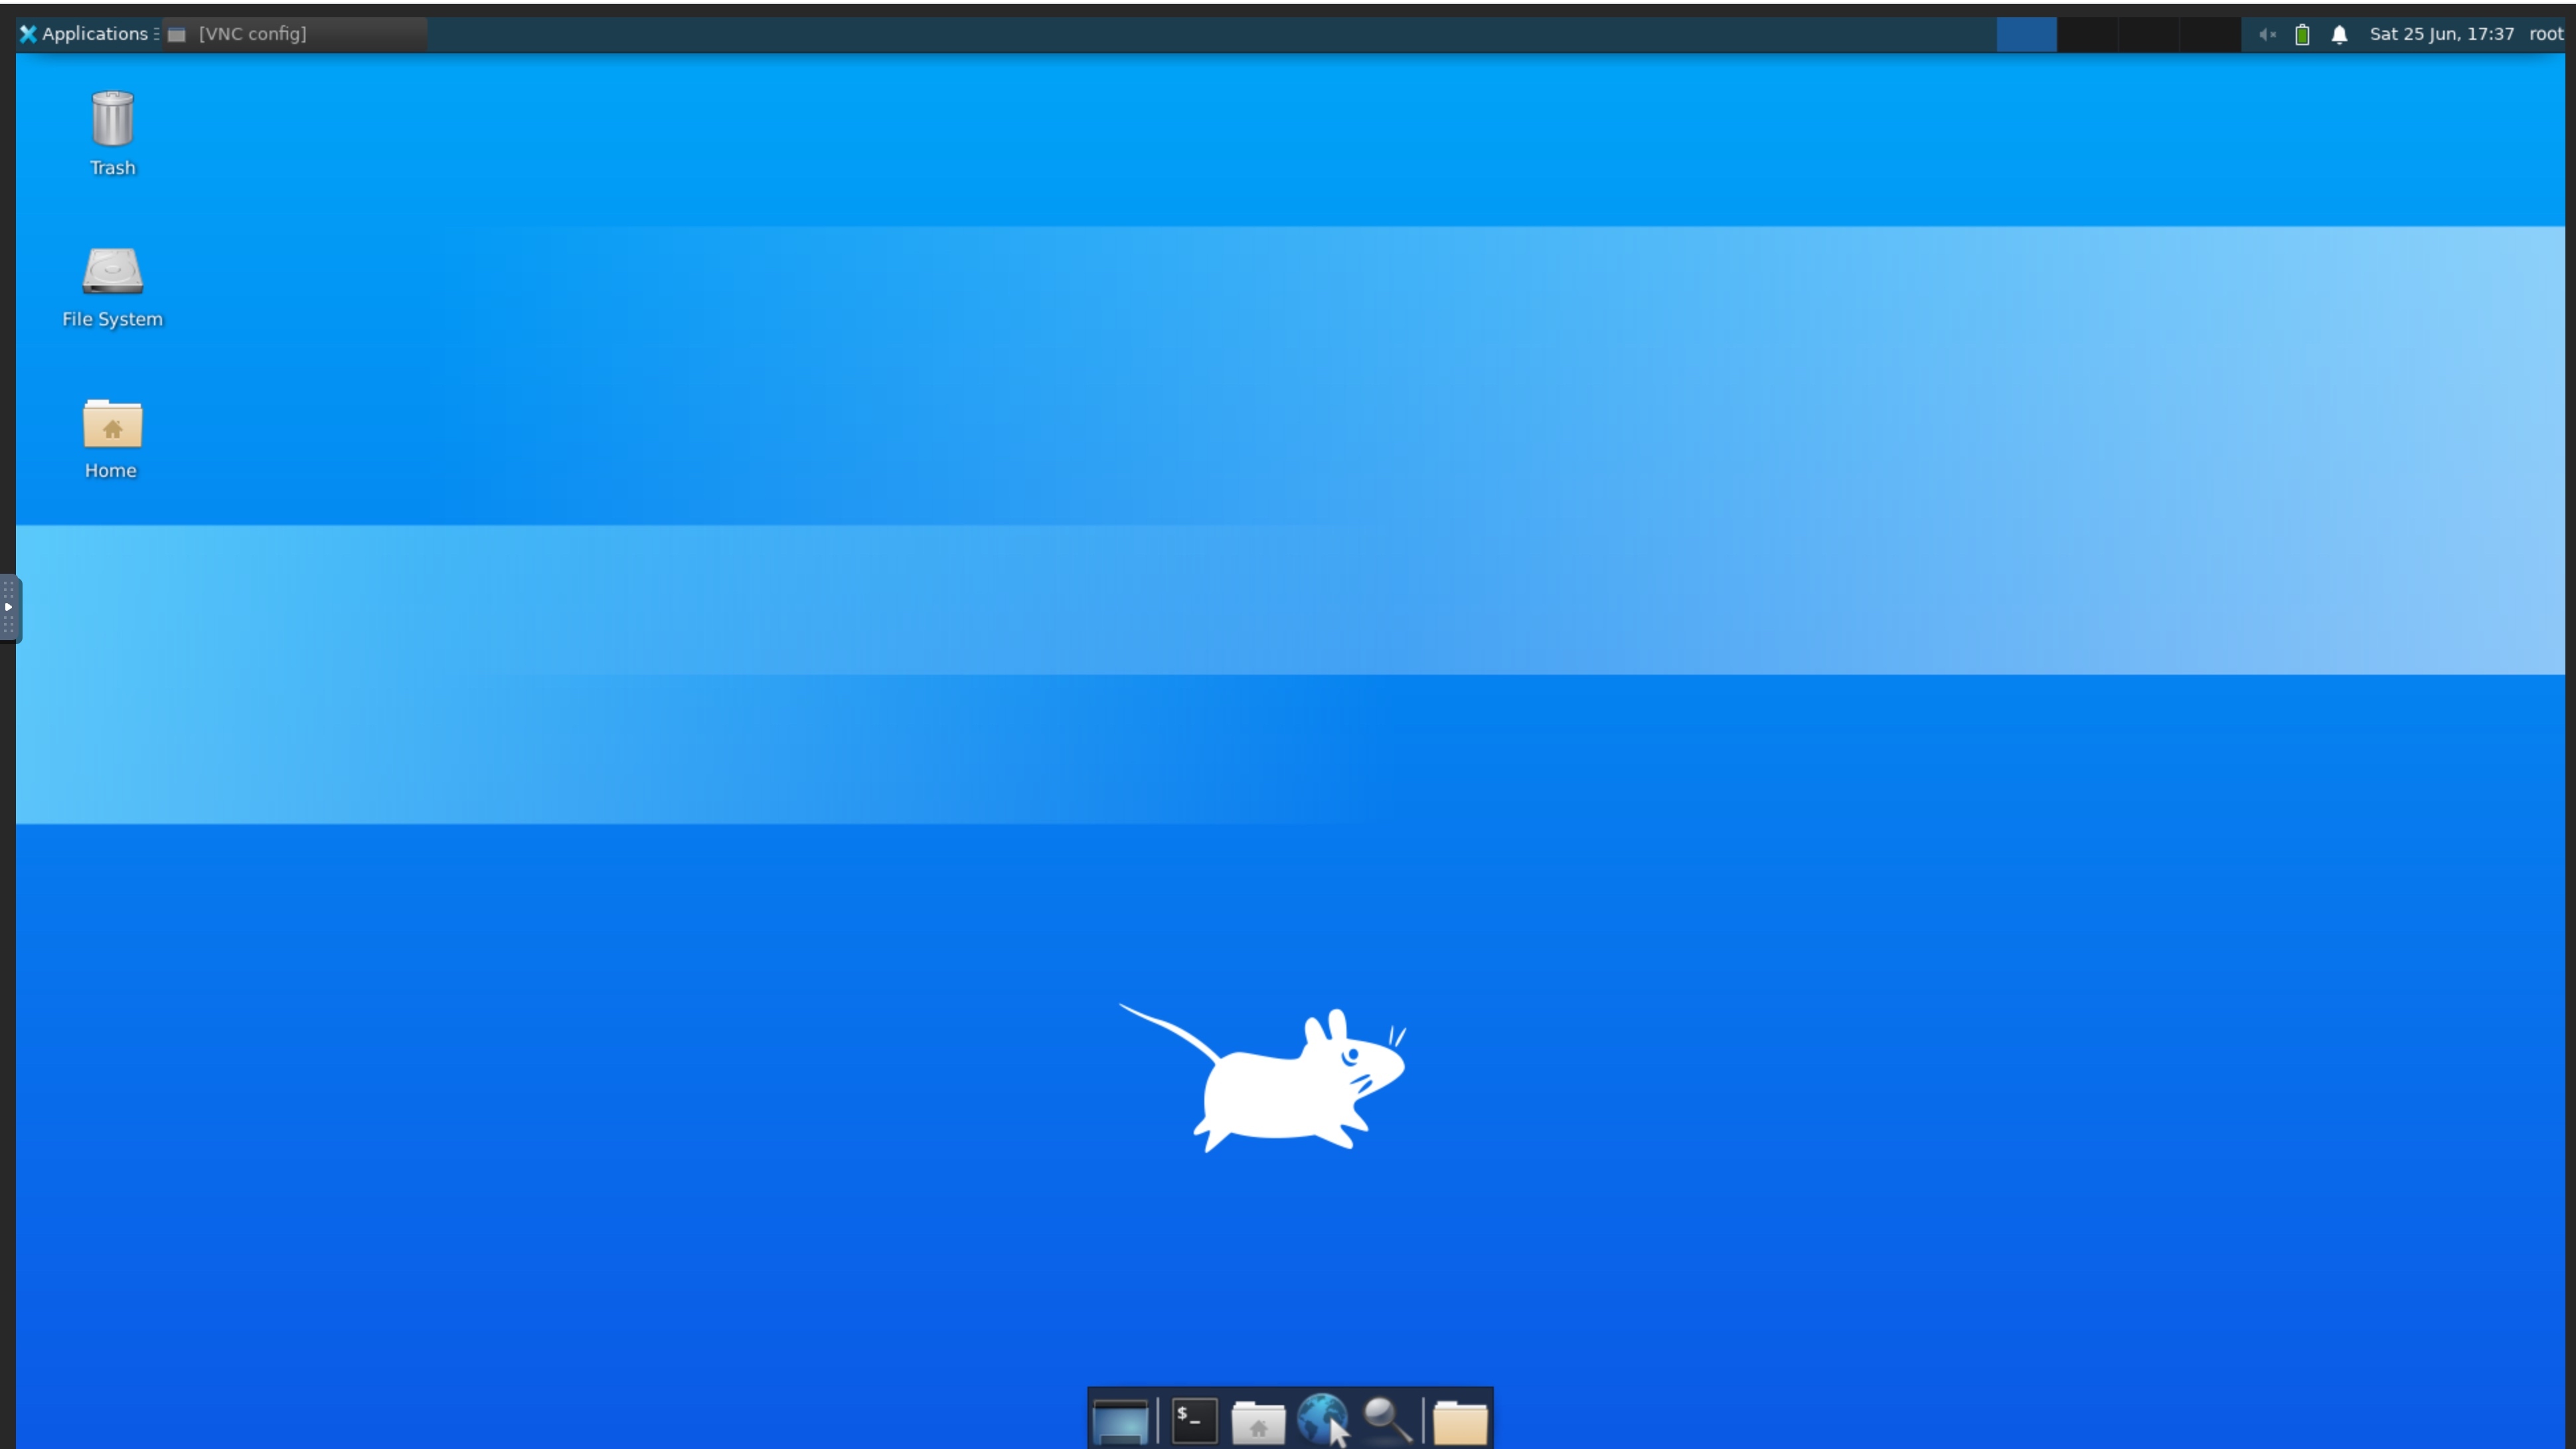
The following is displayed and the desktop has been successfully logged in
Desktop settings (important)
1.Modify the screen-off time of the instance desktop
By default, if the desktop is not operated for a long time, the screen will be off. After the screen is off, the desktop cannot be activated by clicking the mouse.Restart the VNC service, so the first thing to do after accessing the desktop is to modify the desktop screen-off time to not turn off the screen.
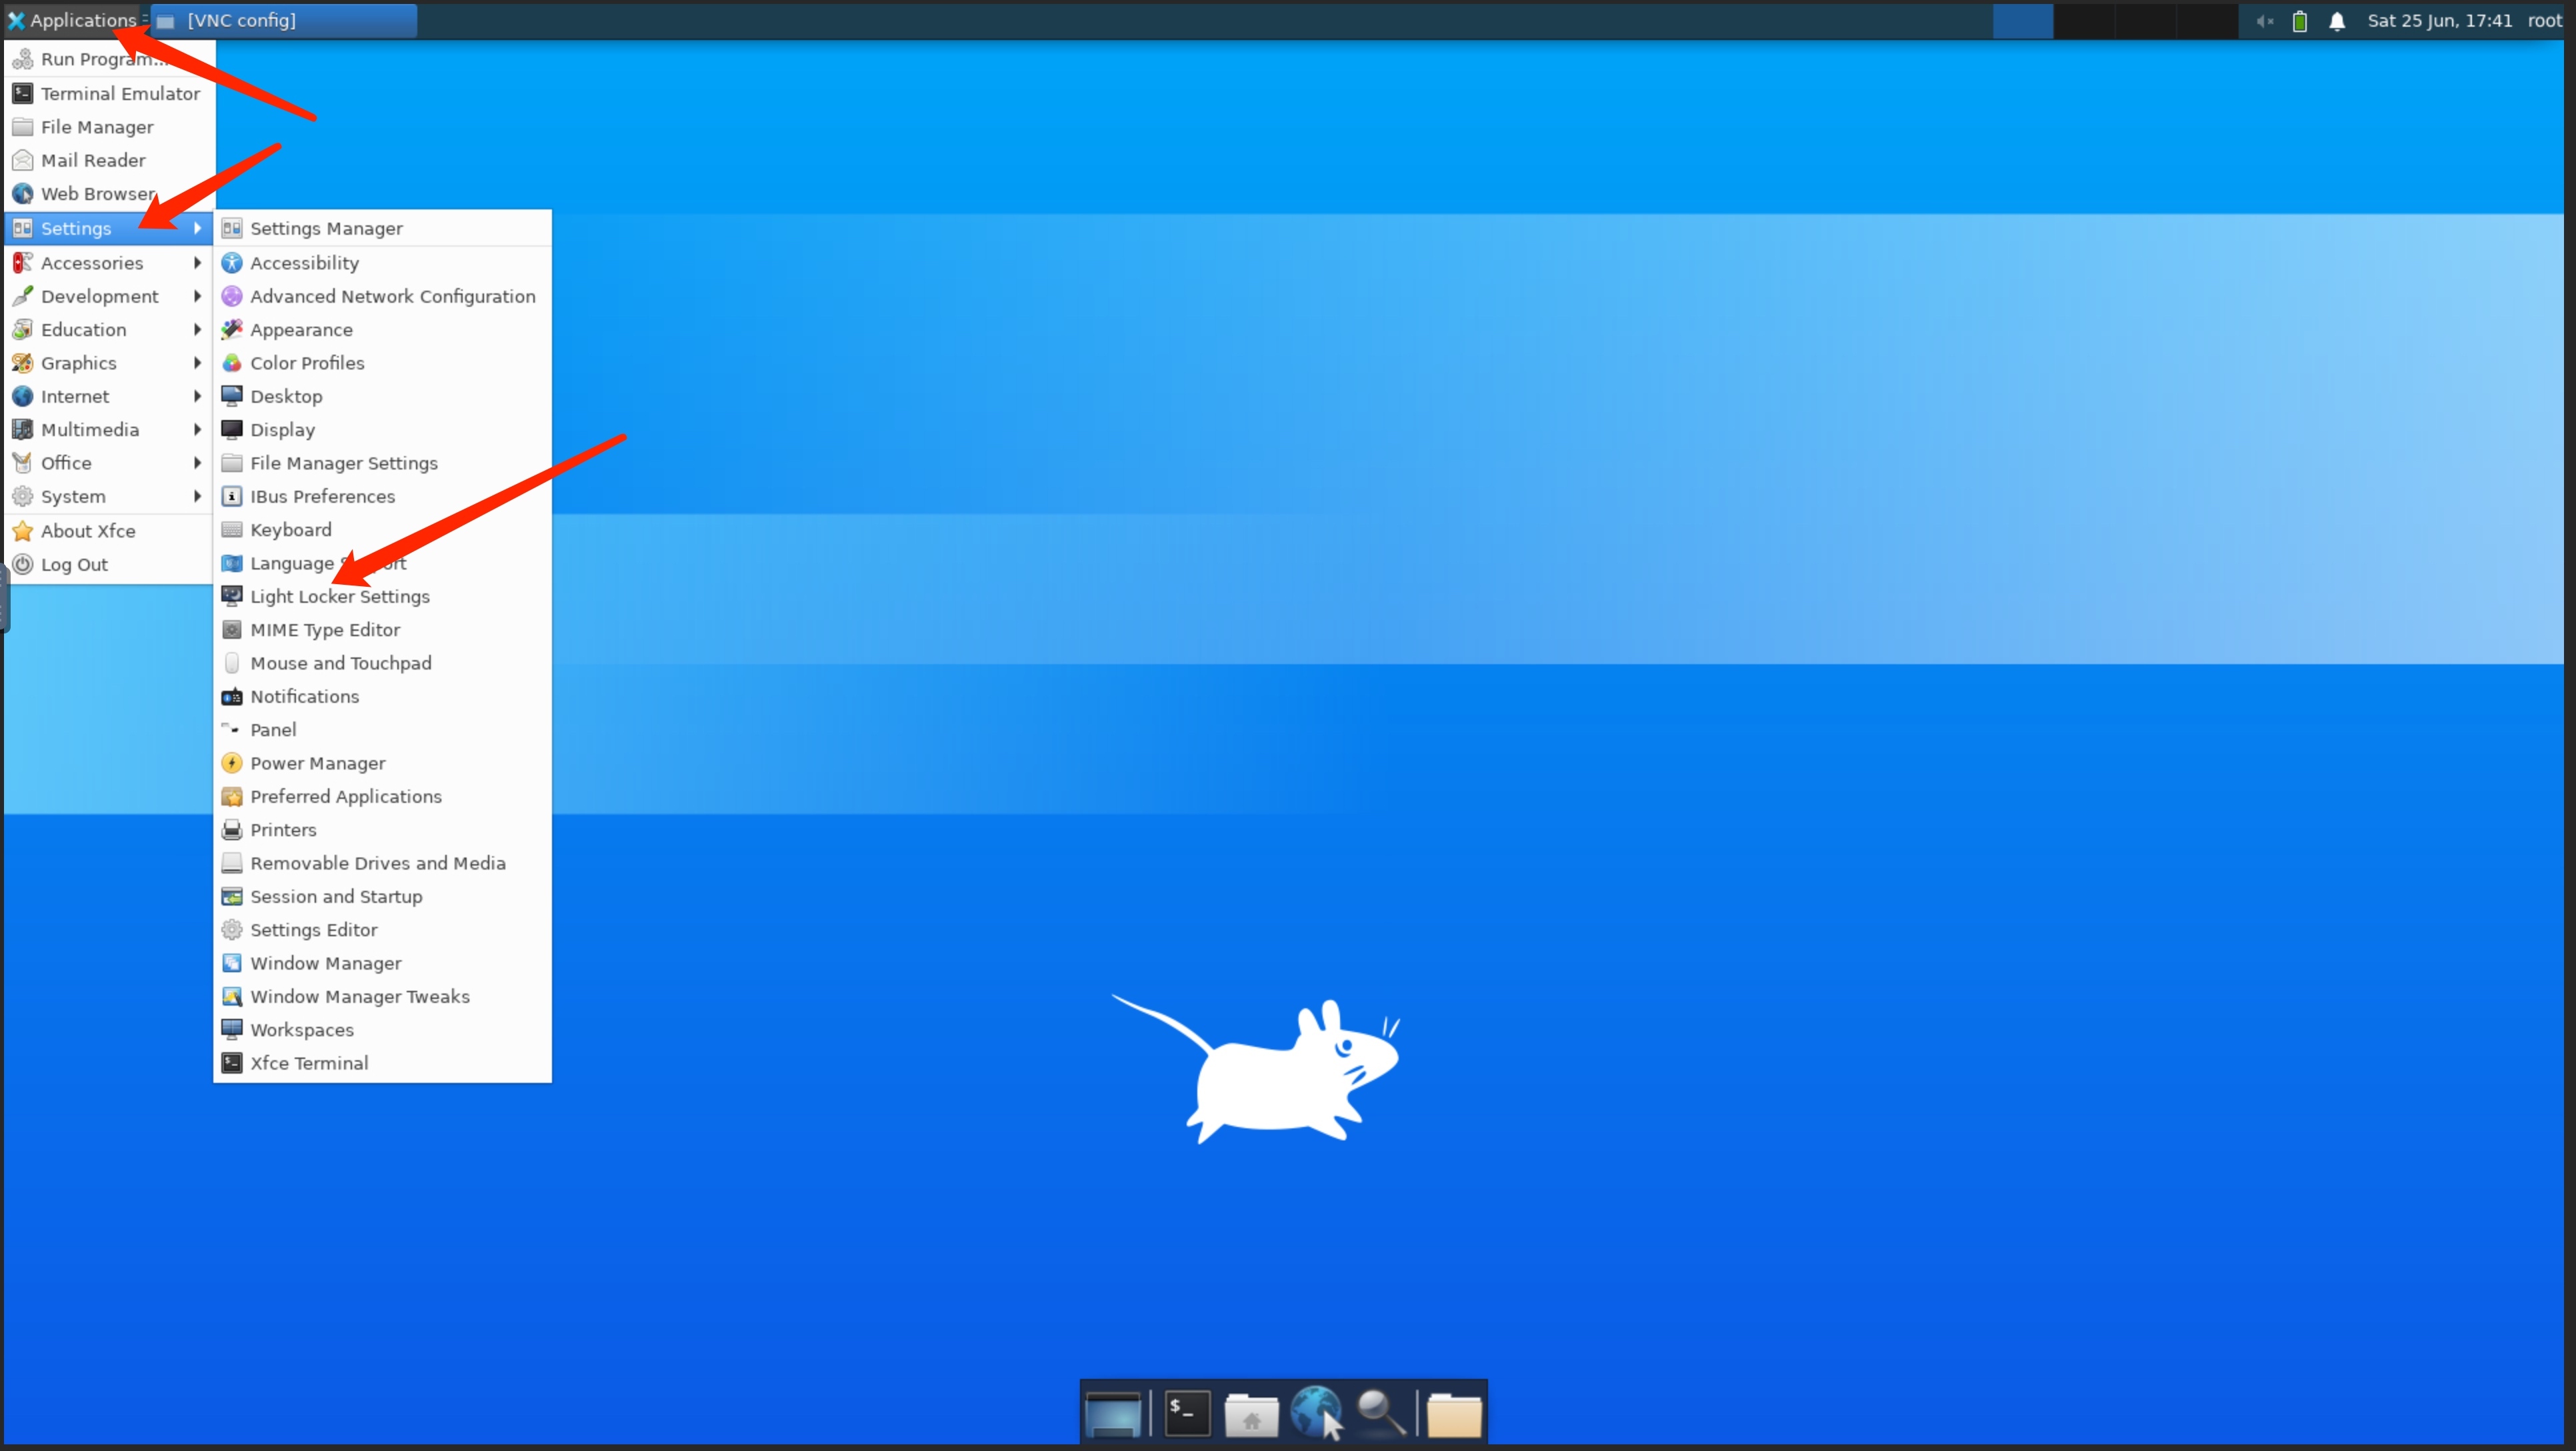
Click on Applications -> Settings -> Light Locker Settings in the upper left corner, and then change the following options to Never.
2. Create BrowseBrowser shortcut
When the desktop service is installed above, Firefox and Chrome browsers are installed at the same time, here they are created as shortcuts to the desktop.
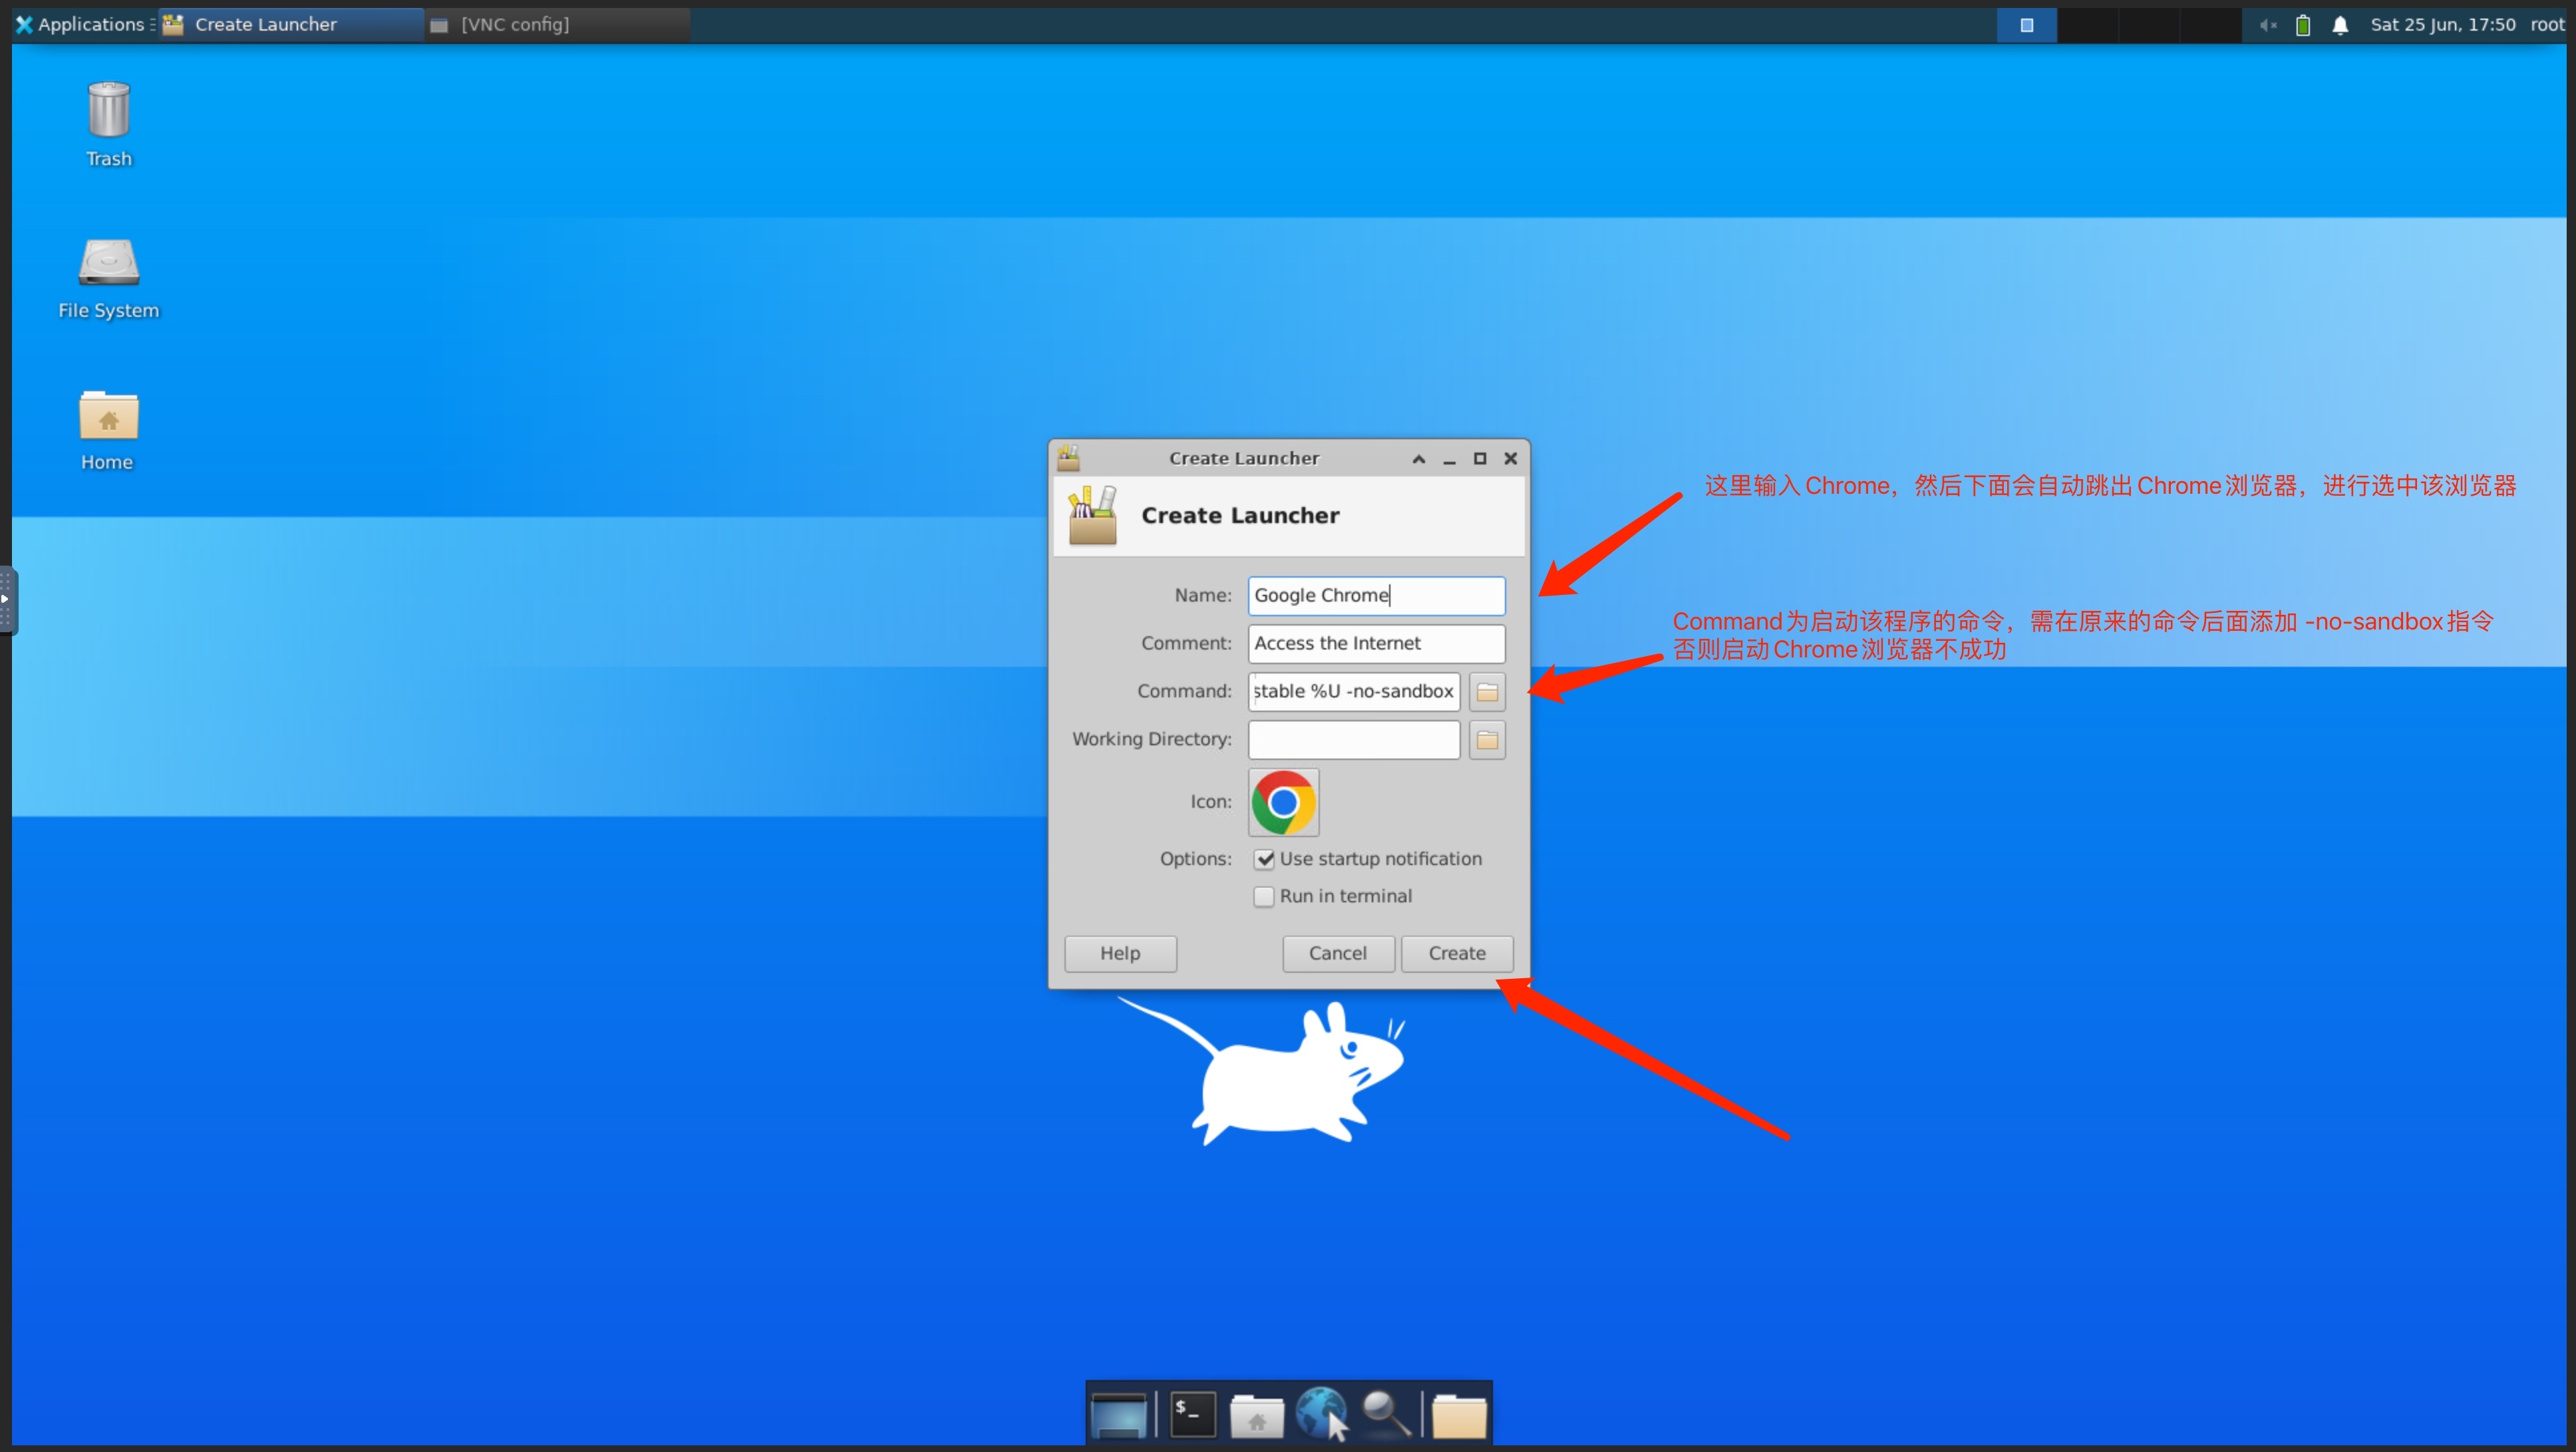
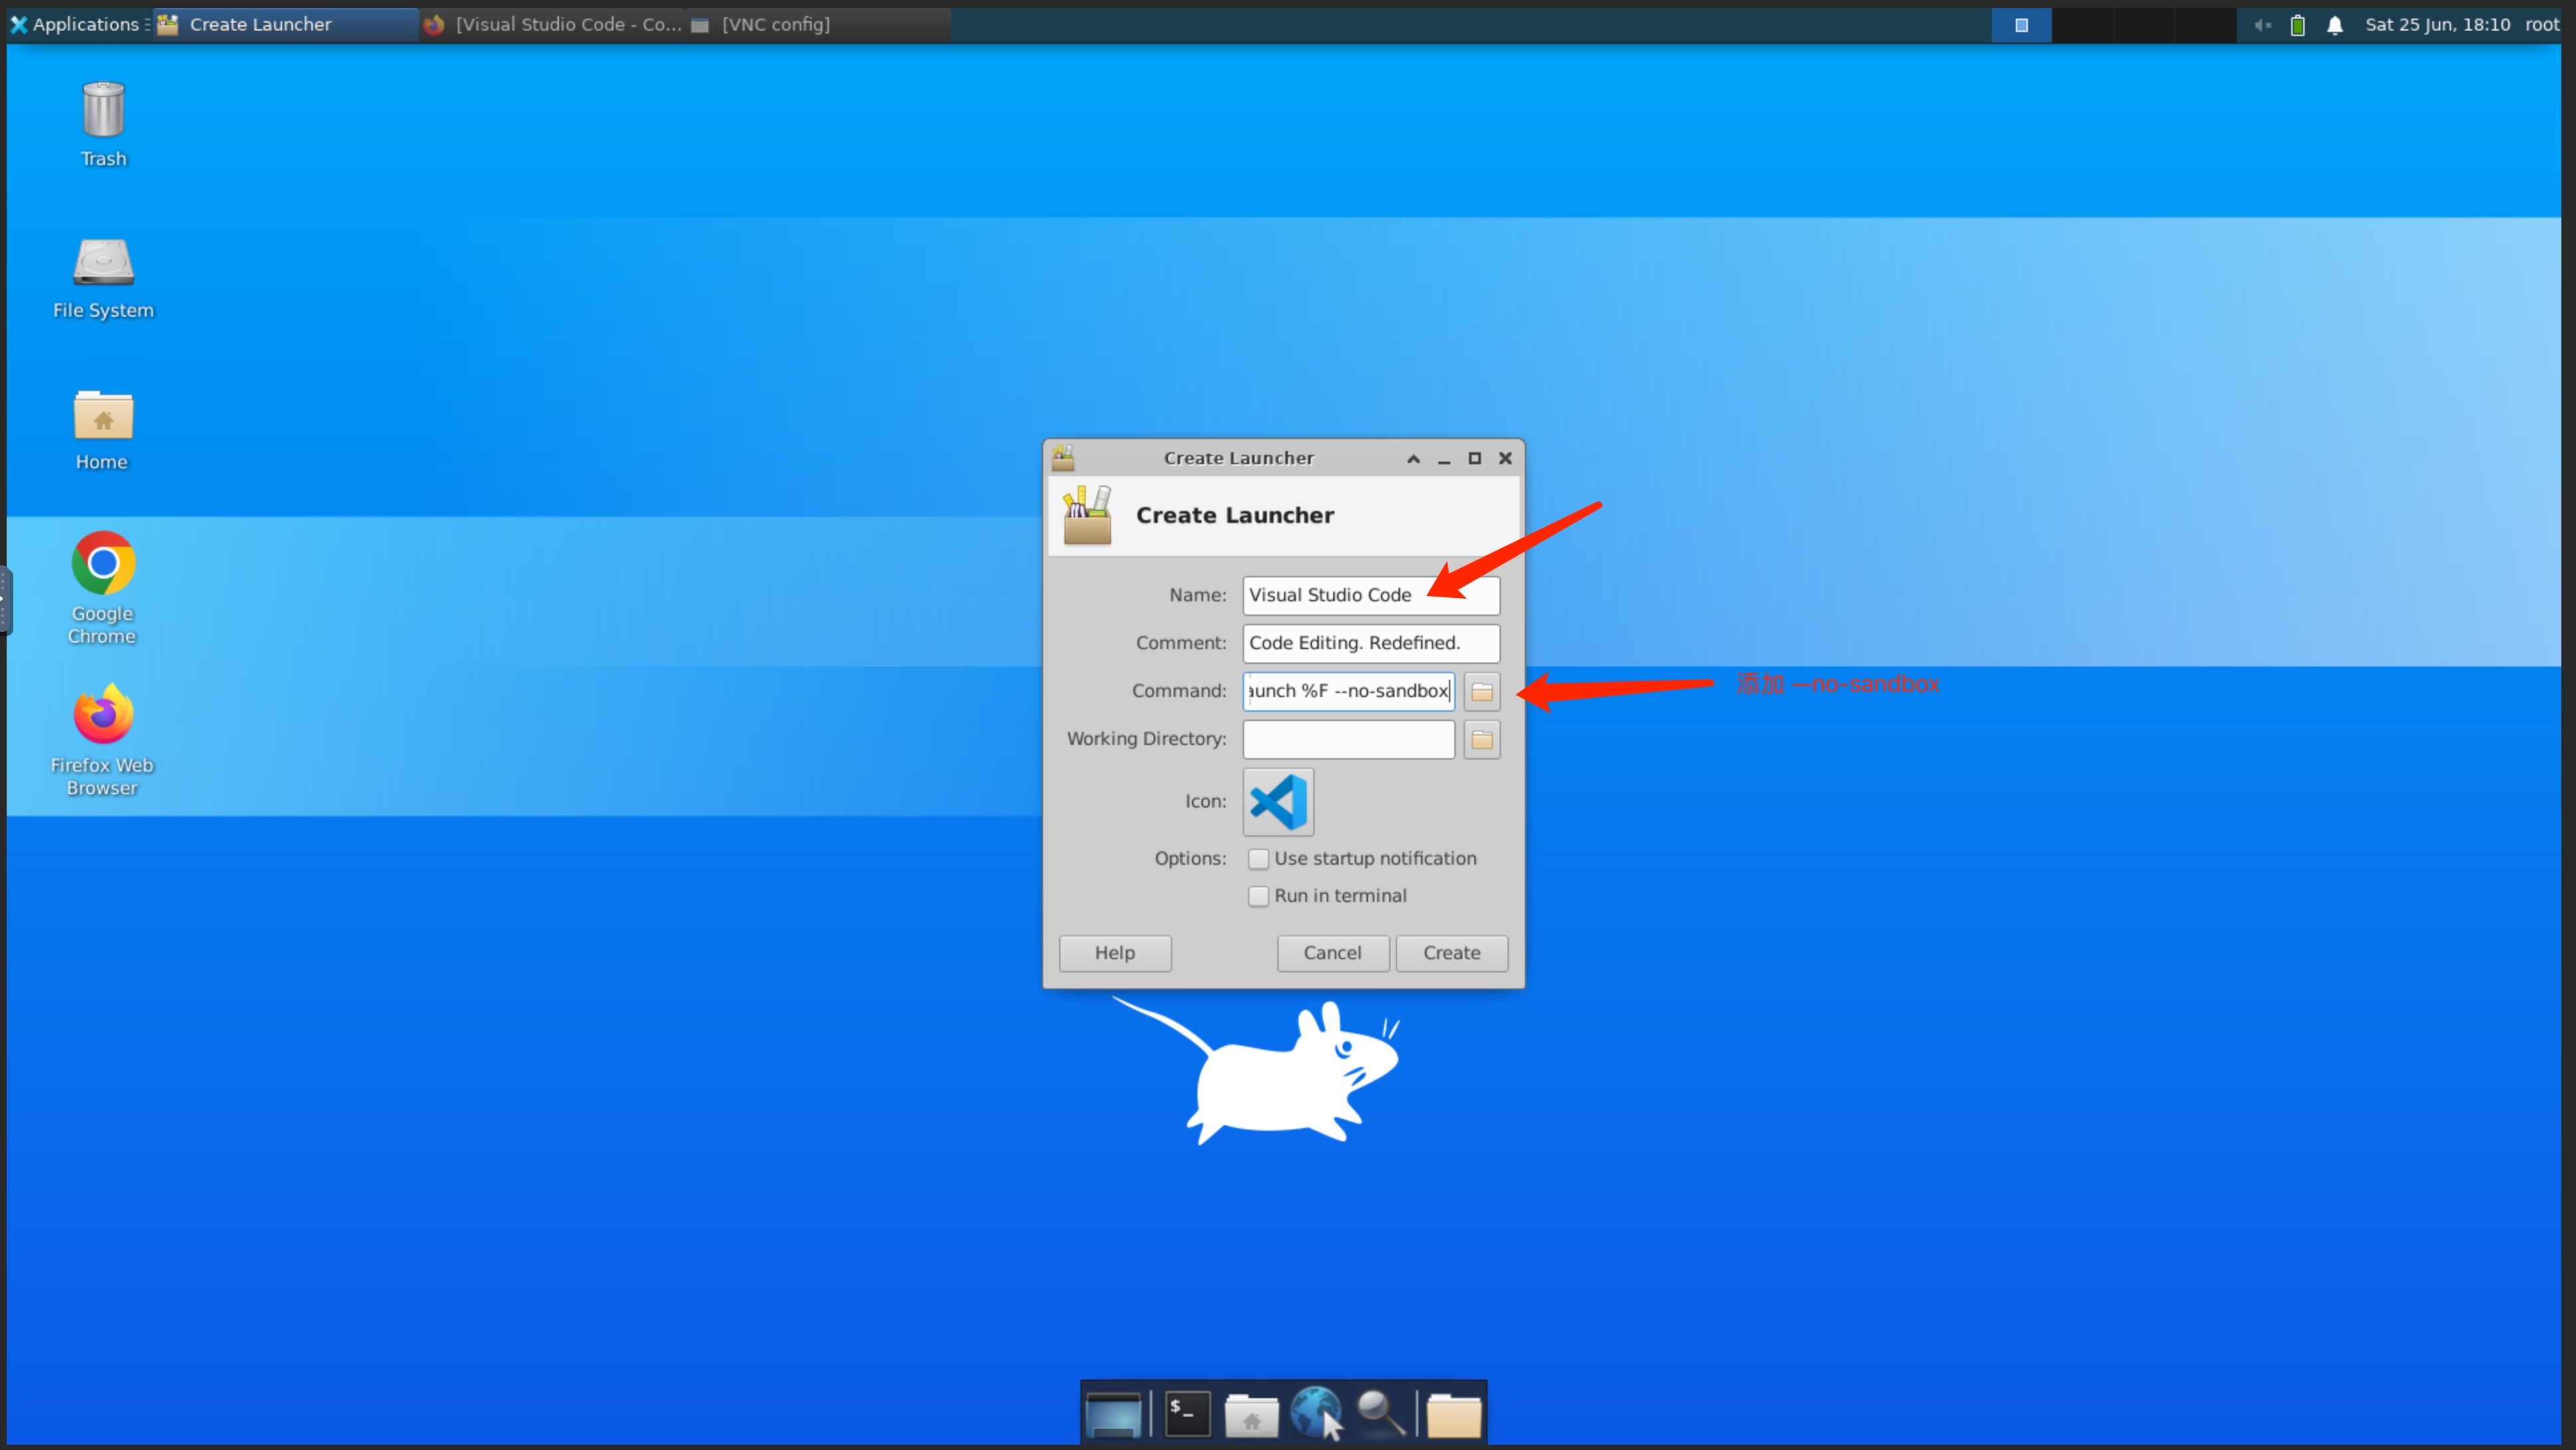
(Create Chrome browser shortcut) Right-click ->Create Launcher
The following options, the Name option is filled in Chrome, and then it will jump out of ChromeBrowser, click on the browser that pops up below.Command is the command to start the browser. You need to add the –no-sandbox command after the automatically generated command, otherwise the Chrome browser will crash when it starts.
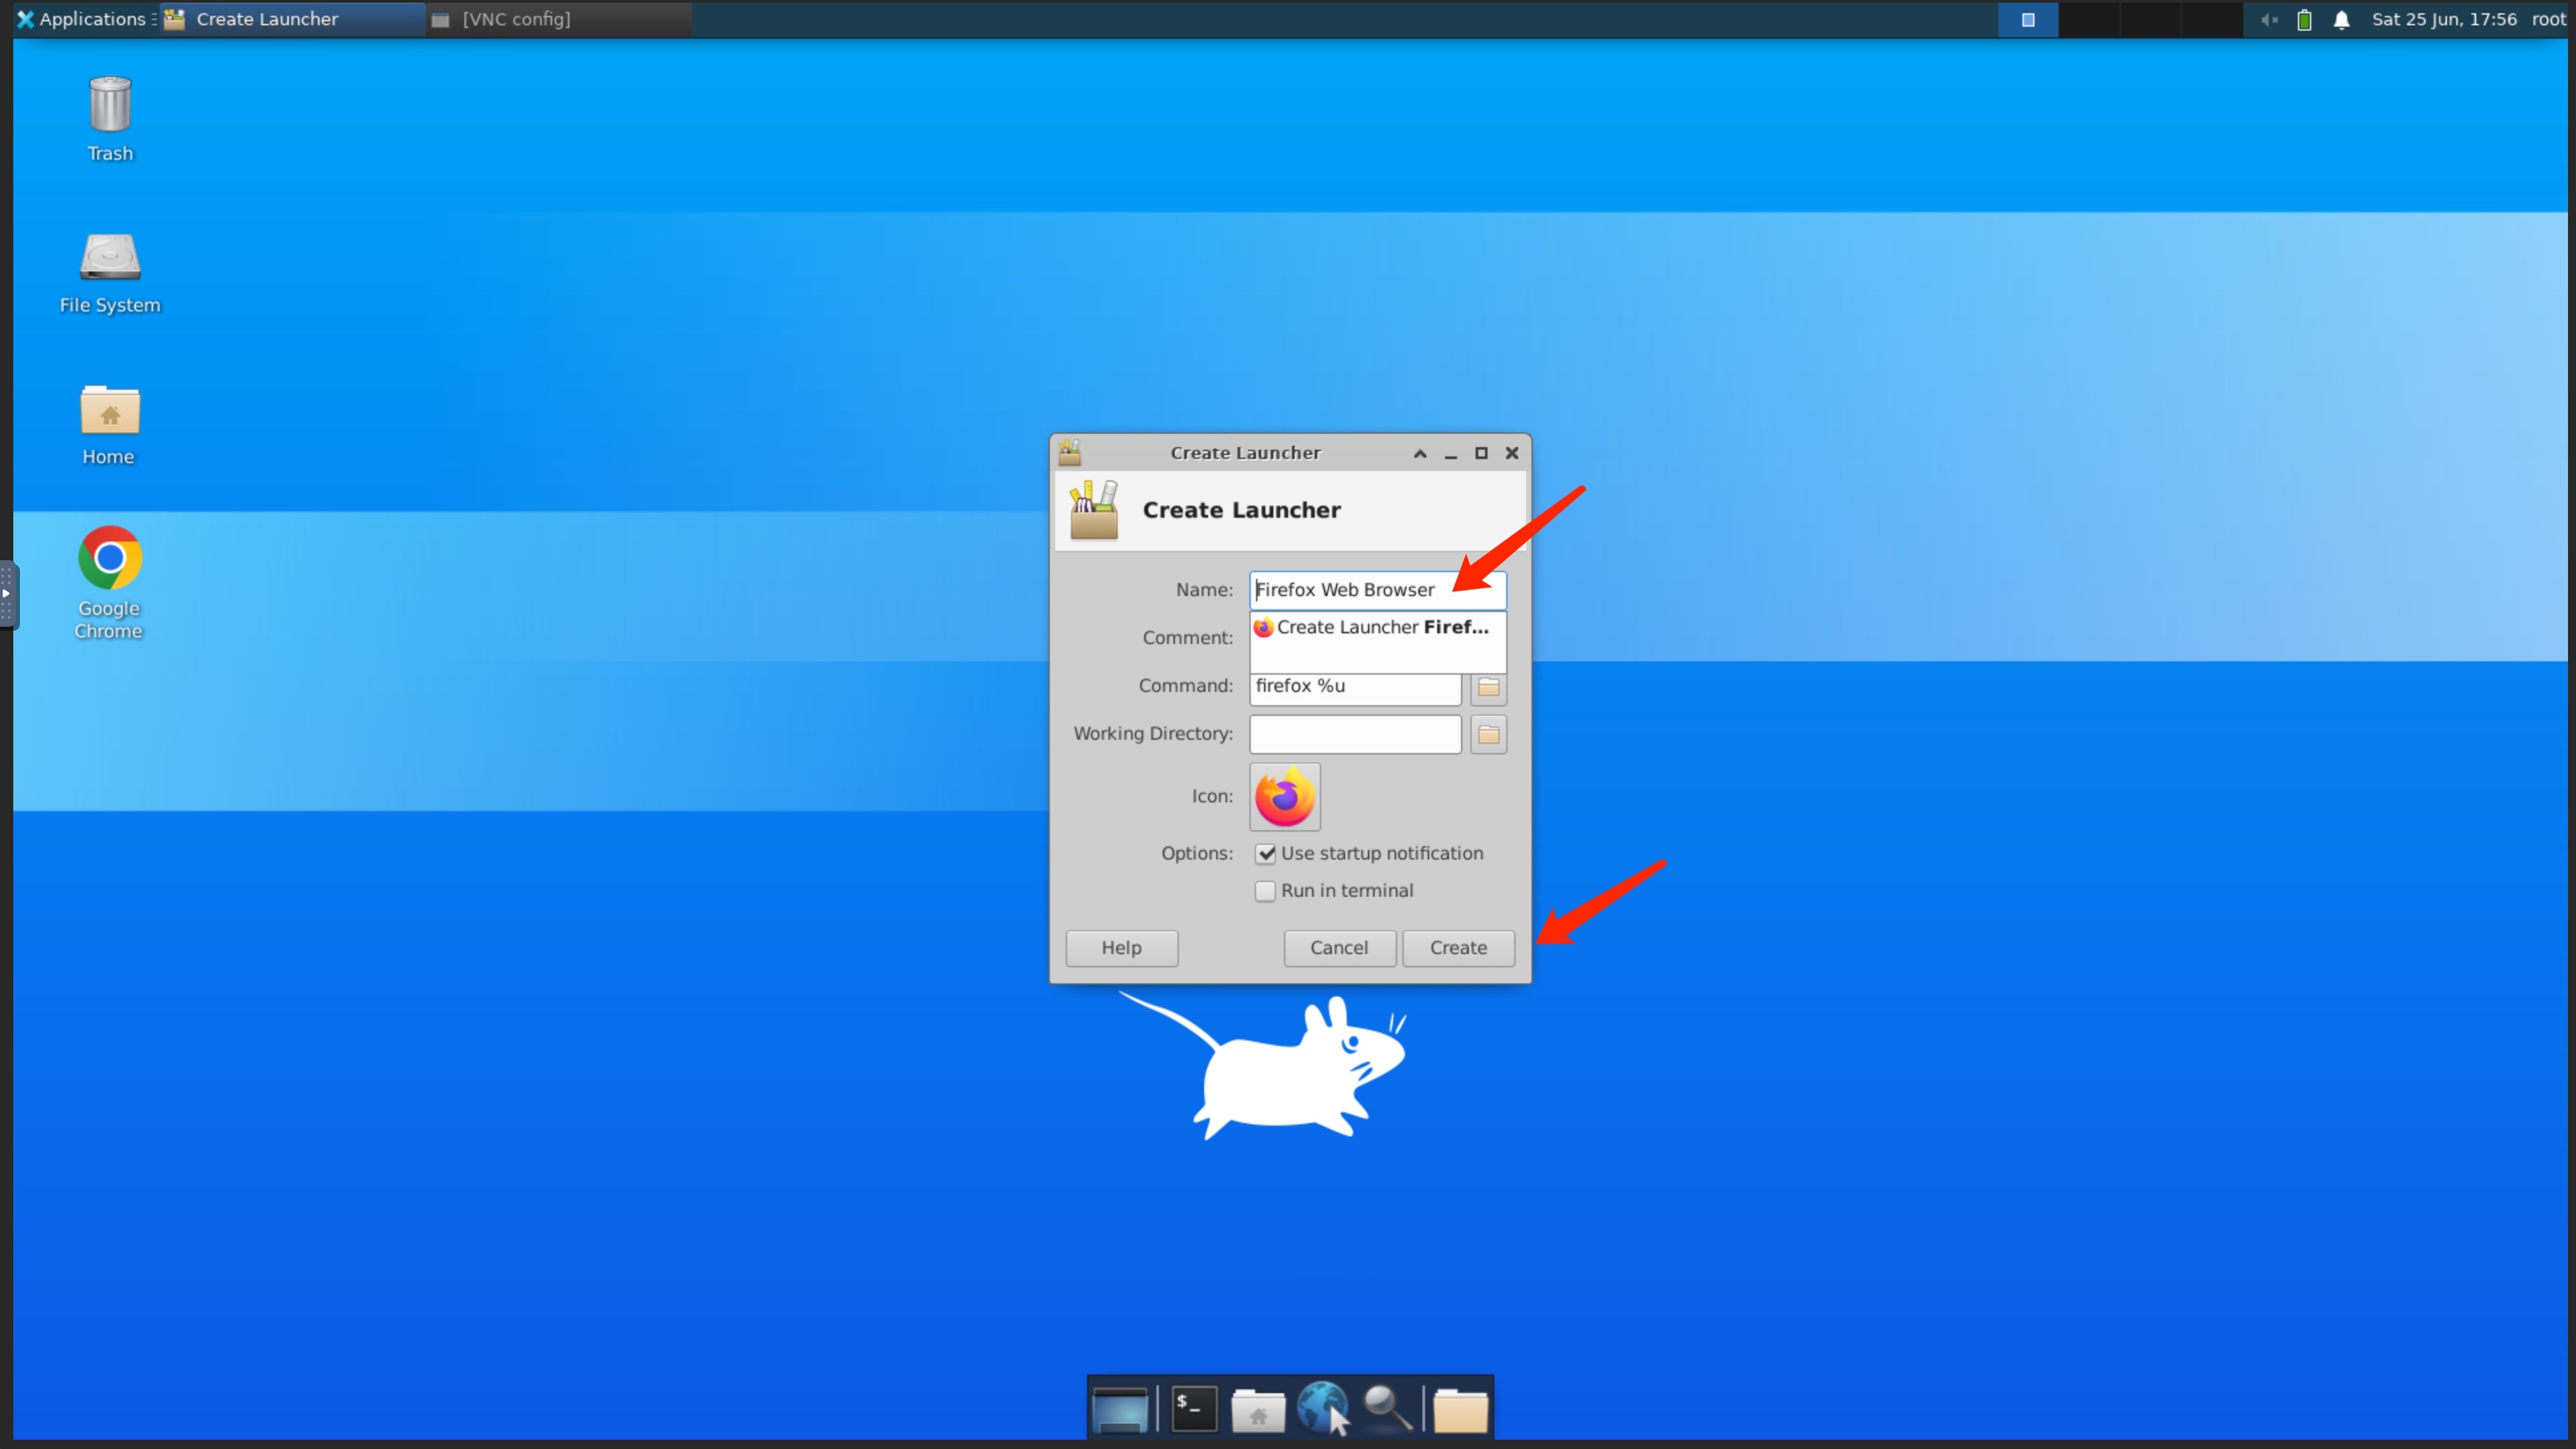
(create Firefox browser shortcut) Click the right mouse button->Create Launcher
Name option to fill in Firefox, jump out of the Firefox browser, and click the browser that jumps out below.There is no need to change the Command command of the Firefox browser, just click Create in the lower right corner.
After the creation is complete, the desktop will displayOpen the icons of the two browsers created and click Run.
Tips: Modify the browser search engine
After the browser is installed, the default is the google search engine, which needs to be changed to a domestic accessible search engine, otherwise the search will time out.
Installation tools (optional)
Install VScode
#Download VsCode
~# sudo wget https://az764295.vo.msecnd.net/stable/30d9c6cd9483b2cc586687151bcbcd635f373630/code_1.68.1-1655263094_amd64.deb

#Install VsCode
~# sudo chmod +x code_1.68.1-1655263094_amd64~.deb/>sudo apt-get install ./code_1.68.1-1655263094_amd64.deb
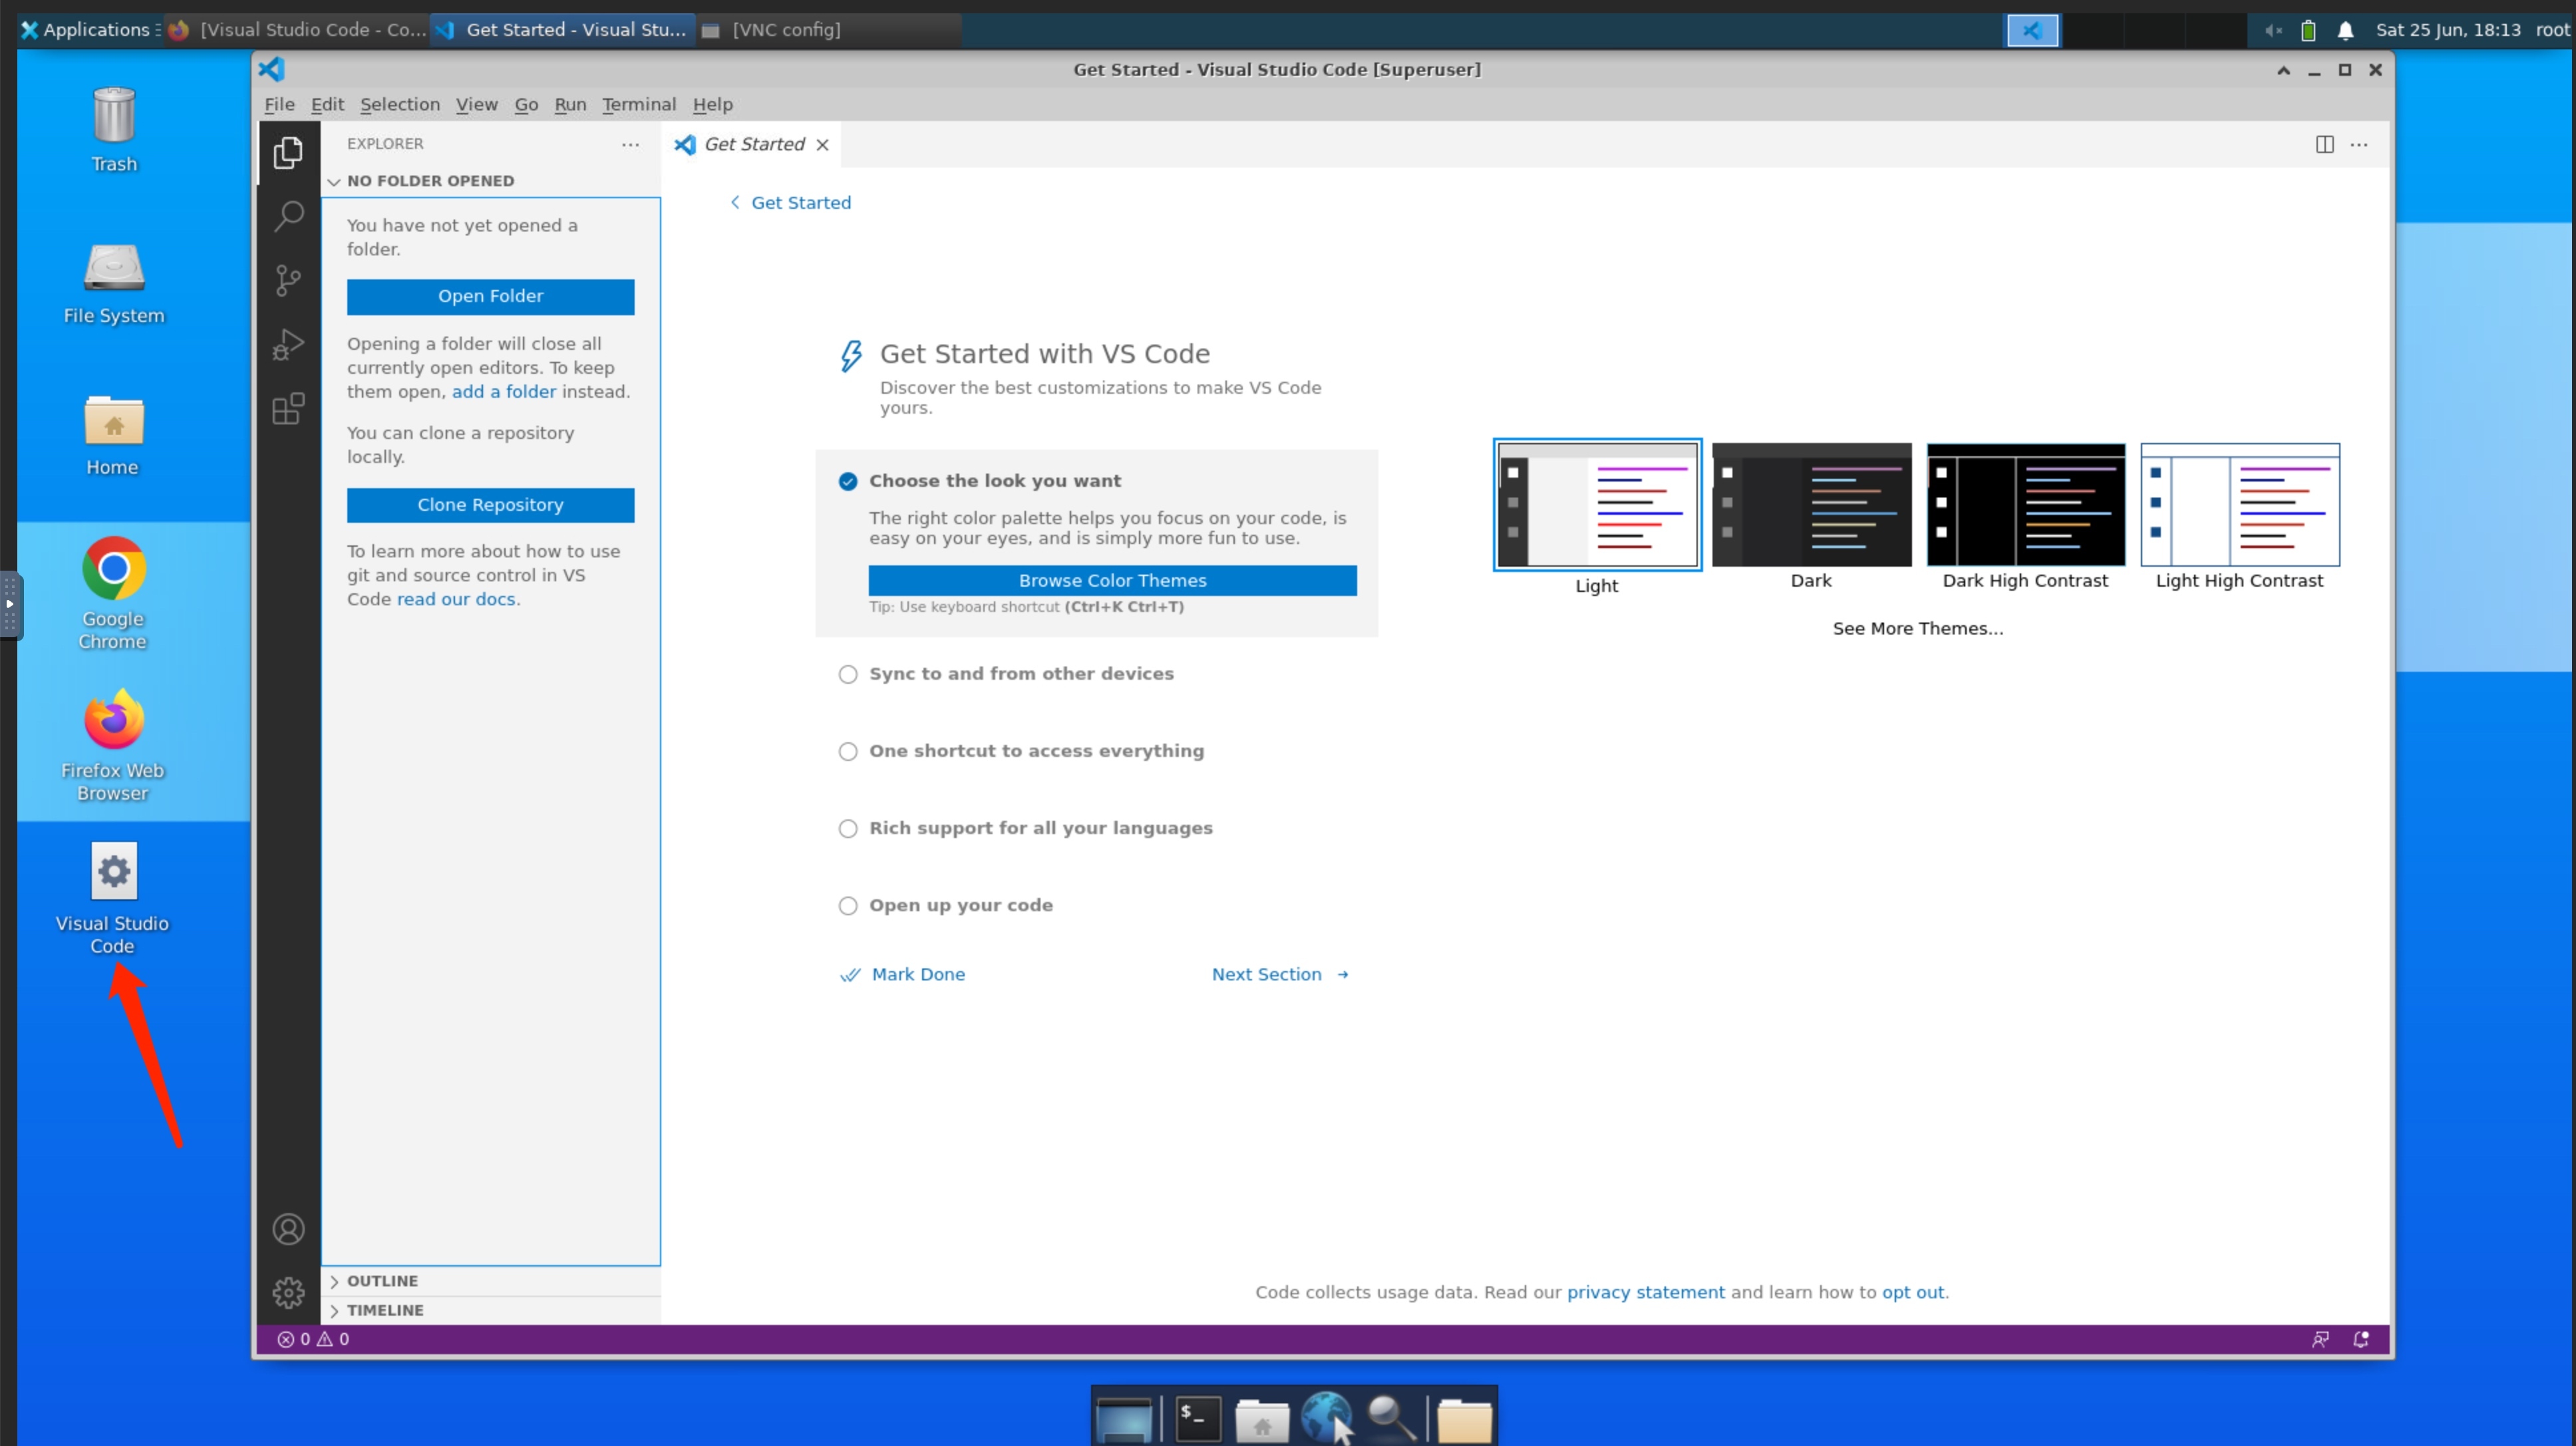
Create a VsCode desktop shortcut, fill in the code with Name, then select the jumped out VsCode, and then add --no-sandbox command to start Command.
Then click on the VsCode added to the desktopTo use
边栏推荐
猜你喜欢


随机推荐
Web3 security risks daunting?How should we respond?
华为ECS云服务器上安装Docker及部署Redis详细教程【华为云至简致远】
Halcon 小笔记 C# 图片是否有效
分享一个开源的USB-CAN工具!
数字资产的价值激发:NFT 质押
EasyExcel implements dynamic column parsing and table storage
【目标检测】Focal Loss for Dense Object Detection
软件测试<进阶篇-->测试分类>
“68道 Redis+168道 MySQL”精品面试题(带解析),你背废了吗?
软考 --- 软件工程(1)概念、开发模型
使用.NET简单实现一个Redis的高性能克隆版(一)
酷开科技 × StarRocks:统一 OLAP 分析引擎,全面打造数字化的 OTT 模式
工程仪器设备在线监测管理系统常见问题和注意事项
高效的组织信息共享知识库是一种宝贵的资源
分享 14 个你必须知道的 JS 函数
【机器学习】机器学习的基本概念/术语2
ATM银行系统(对象初级练习)
php之相似文章标题similar_text()函数使用
cell delay和net delay
WebGL管网展示(及TubeGeometry优化)