当前位置:网站首页>pytorch、tensorflow对比学习—计算图和微分机制
pytorch、tensorflow对比学习—计算图和微分机制
2022-08-01 04:57:00 【卖香油的少掌柜】
计算图和微分机制
前言
本文是《pytorch-tensorflow-Comparative study》,pytorch和tensorflow对比学习专栏,第二章——计算图和微分机制。
虽然说这两个框架在语法和接口的命名上有很多地方是不同的,但是深度学习的建模过程确实基本上都是一个套路的。
所以该笔记的笔记方式是:在使用相同的处理功能模块上,对比记录pytorch和tensorflow两者的API接口,和语法。
1,有利于深入理解深度学习建模过程流程。
2,有利于理解pytorch,和tensorflow设计上的不同,更加灵活的使用在自己的项目中。
3,有利于深入理解各个功能模块的使用。
本章节主要对比学习pytorch 和tensorflow有关计算图和微分机制部分的API接口,和语法。

计算图
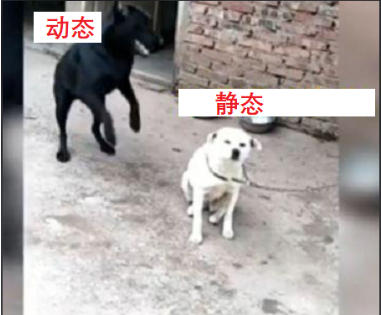
pytorch中只有动态计算图的编码方式。
tensorflow1.x的时代,只有静态图。在2.x时代引入了动态图的编码方式。
| 编码方式(优点) | pytorch | tensorflow |
|---|---|---|
| (方便调试,更易读编码) | 动态计算图 | 动态计算 |
| (运算速度快) | 无 | 静态计算图 |
| (更易读编码,运算速度快) | 无 | Autograph |

pytorch

Pytorch的计算图由节点和边组成,节点表示张量或者Function(算子),边表示张量和Function之间的依赖关系。
Pytorch中的计算图是动态图。这里的动态主要有两重含义。
第一层含义是:计算图的正向传播是立即执行的。无需等待完整的计算图创建完毕,每条语句都会在计算图中动态添加节点和边,并立即执行正向传播得到计算结果。
第二层含义是:计算图在反向传播后立即销毁。下次调用需要重新构建计算图。如果在程序中使用了backward方法执行了反向传播,或者利用torch.autograd.grad方法计算了梯度,那么创建的计算图会被立即销毁,释放存储空间,下次调用需要重新创建。
tensorflow

计算图由节点(nodes)和线(edges)组成。节点表示操作符Operator,或者称之为算子,线表示计算间的依赖。实线表示有数据传递依赖,传递的数据即张量。虚线通常可以表示控制依赖,即执行先后顺序。
与pytorch另一个不同点是:它有三种计算图的构建方式:静态计算图,动态计算图,以及Autograph.
在TensorFlow1.0时代,采用的是静态计算图,需要先使用TensorFlow的各种算子创建计算图,然后再开启一个会话Session,显式执行计算图。
而在TensorFlow2.0时代,采用的是动态计算图,即每使用一个算子后,该算子会被动态加入到隐含的默认计算图中立即执行得到结果,而无需开启Session。
使用动态计算图即Eager Excution(迫切执行,不在经过C++编译)的好处是方便调试程序,它会让TensorFlow代码的表现和Python原生代码的表现一样,写起来就像写numpy一样,各种日志打印,控制流全部都是可以使用的。
使用动态计算图的缺点是运行效率相对会低一些。因为使用动态图会有许多次Python进程和TensorFlow的C++进程之间的通信。而静态计算图构建完成之后几乎全部在TensorFlow内核上使用C++代码执行,效率更高。此外静态图会对计算步骤进行一定的优化,剪去和结果无关的计算步骤。
如果需要在TensorFlow2.0中使用静态图,可以使用@tf.function装饰器将普通Python函数转换成对应的TensorFlow计算图构建代码。运行该函数就相当于在TensorFlow1.0中用Session执行代码。使用tf.function构建静态图的方式叫做 Autograph.
静态计算图
tensorflow
静态计算图是tensorflow1.x中使用的机制,pytorch中没有静态图。在1.x的静态图发展到2.x时代,与引入的动态图结合,演变为Autograph机制,Autograph在后边展开。
在TensorFlow1.0中,使用静态计算图分两步,第一步定义计算图,第二步在会话中执行计算图。
# 一下代码可以在tensorflow1.x中跑通。
import tensorflow as tf

#定义计算图
g = tf.Graph()
with g.as_default():
    #placeholder为占位符,执行会话时候指定填充对象
    x = tf.placeholder(name='x', shape=[], dtype=tf.string)
    y = tf.placeholder(name='y', shape=[], dtype=tf.string)
    z = tf.string_join([x,y],name = 'join',separator=' ')

#执行计算图
with tf.Session(graph = g) as sess:
    print(sess.run(fetches = z,feed_dict = {
    x:"hello",y:"world"}))
TensorFlow2.0 怀旧版静态计算图
TensorFlow2.0为了确保对老版本tensorflow项目的兼容性,在tf.compat.v1子模块中保留了对TensorFlow1.0那种静态计算图构建风格的支持。
可称之为怀旧版静态计算图,已经不推荐使用了。
import tensorflow as tf

g = tf.compat.v1.Graph()
with g.as_default():
    x = tf.compat.v1.placeholder(name='x', shape=[], dtype=tf.string)
    y = tf.compat.v1.placeholder(name='y', shape=[], dtype=tf.string)
    z = tf.strings.join([x,y],name = "join",separator = " ")

with tf.compat.v1.Session(graph = g) as sess:
    # fetches的结果非常像一个函数的返回值,而feed_dict中的占位符相当于函数的参数序列。
    result = sess.run(fetches = z,feed_dict = {
    x:"hello",y:"world"})
    print(result)
# b'hello world'
动态计算图
pytorch
动态计算图机制是pytroch一直沿用至今的,动态图计算容易理解,符合python编码习惯,大大降低了学习的门槛,受到了学术界和新手的欢迎。这些年pytroch大有赶超tensorflow的势头。这也促使了tensorflow在2.x的版本改进中引入动态计算图的机制。
# 计算图的正向传播是立即执行的。
import torch
w = torch.tensor([[3.0,1.0]],requires_grad=True)
b = torch.tensor([[3.0]],requires_grad=True)
X = torch.randn(10,2)
Y = torch.randn(10,1)
Y_hat = [email protected].t() + b  # Y_hat定义后其正向传播被立即执行,与其后面的loss创建语句无关
loss = torch.mean(torch.pow(Y_hat-Y,2))
print(loss.data)

# tensor(17.8969)
# 计算图在反向传播后立即销毁。
import torch
w = torch.tensor([[3.0,1.0]],requires_grad=True)
b = torch.tensor([[3.0]],requires_grad=True)
X = torch.randn(10,2)
Y = torch.randn(10,1)
Y_hat = [email protected].t() + b  # Y_hat定义后其正向传播被立即执行,与其后面的loss创建语句无关
loss = torch.mean(torch.pow(Y_hat-Y,2))

#计算图在反向传播后立即销毁,如果需要保留计算图, 需要设置retain_graph = True
loss.backward()  #loss.backward(retain_graph = True)

#loss.backward() #如果再次执行反向传播将报错
计算图中的Function
pytorch中动态计算图中的 张量我们已经比较熟悉了, 计算图中的另外一种节点是Function(算子), 实际上就是 Pytorch中各种对张量操作的函数。
这些Function和我们Python中的函数有一个较大的区别,那就是它同时包括正向计算逻辑和反向传播的逻辑。
我们可以通过继承torch.autograd.Function来创建这种支持反向传播的Function
import torch
w = torch.tensor([[3.0,1.0]],requires_grad=True)
b = torch.tensor([[3.0]],requires_grad=True)
X = torch.tensor([[-1.0,-1.0],[1.0,1.0]])
Y = torch.tensor([[2.0,3.0]])

class MyReLU(torch.autograd.Function):
    #正向传播逻辑,可以用ctx存储一些值,供反向传播使用。
    @staticmethod
    def forward(ctx, input):
        ctx.save_for_backward(input)
        return input.clamp(min=0)
    #反向传播逻辑
    @staticmethod
    def backward(ctx, grad_output):
        input, = ctx.saved_tensors
        grad_input = grad_output.clone()
        grad_input[input < 0] = 0
        return grad_input

relu = MyReLU.apply # relu现在也可以具有正向传播和反向传播功能
Y_hat = relu([email protected].t() + b)
loss = torch.mean(torch.pow(Y_hat-Y,2))
loss.backward()

print(w.grad)
print(b.grad)
# tensor([[4.5000, 4.5000]])
# tensor([[4.5000]])

# Y_hat的梯度函数即是我们自己所定义的 MyReLU.backward
print(Y_hat.grad_fn)
# <torch.autograd.function.MyReLUBackward object at 0x1205a46c8>
计算图与反向传播
了解了Function的功能,我们可以简单地理解一下反向传播的原理和过程。理解该部分原理需要一些高等数学中求导链式法则的基础知识。
import torch
x = torch.tensor(3.0,requires_grad=True)
y1 = x + 1
y2 = 2*x
loss = (y1-y2)**2

loss.backward()
loss.backward()语句调用后,依次发生以下计算过程。
1,loss自己的grad梯度赋值为1,即对自身的梯度为1。
2,loss根据其自身梯度以及关联的backward方法,计算出其对应的自变量即y1和y2的梯度,将该值赋值到y1.grad和y2.grad。
3,y2和y1根据其自身梯度以及关联的backward方法, 分别计算出其对应的自变量x的梯度,x.grad将其收到的多个梯度值累加。
(注意,1,2,3步骤的求梯度顺序和对多个梯度值的累加规则恰好是求导链式法则的程序表述)
正因为求导链式法则衍生的梯度累加规则,张量的grad梯度不会自动清零,在需要的时候需要手动置零。
叶子节点和非叶子节点
执行下面代码,我们会发现 loss.grad并不是我们期望的1,而是 None。
类似地 y1.grad 以及 y2.grad也是 None.
这是为什么呢?这是由于它们不是叶子节点张量。
在反向传播过程中,只有 is_leaf=True 的叶子节点,需要求导的张量的导数结果才会被最后保留下来。
那么什么是叶子节点张量呢?叶子节点张量需要满足两个条件。
1,叶子节点张量是由用户直接创建的张量,而非由某个Function通过计算得到的张量。
2,叶子节点张量的 requires_grad属性必须为True.
Pytorch设计这样的规则主要是为了节约内存或者显存空间,因为几乎所有的时候,用户只会关心他自己直接创建的张量的梯度。
所有依赖于叶子节点张量的张量, 其requires_grad 属性必定是True的,但其梯度值只在计算过程中被用到,不会最终存储到grad属性中。
如果需要保留中间计算结果的梯度到grad属性中,可以使用 retain_grad方法。 如果仅仅是为了调试代码查看梯度值,可以利用register_hook打印日志。
(tensorflow中对常量张量也可以求导,可以直接在磁带中增加watch,后面会讲到)
x = torch.tensor(3.0,requires_grad=True)
y1 = x + 1
y2 = 2*x
loss = (y1-y2)**2
loss.backward()
print("loss.grad:", loss.grad)
print("y1.grad:", y1.grad)
print("y2.grad:", y2.grad)
print(x.grad)
# loss.grad: None
# y1.grad: None
# y2.grad: None
# tensor(4.)
print(x.is_leaf)
print(y1.is_leaf)
print(y2.is_leaf)
print(loss.is_leaf)
# True
# False
# False
# False
利用retain_grad可以保留非叶子节点的梯度值,利用register_hook可以查看非叶子节点的梯度值。
#非叶子节点梯度显示控制
y1.register_hook(lambda grad: print('y1 grad: ', grad))
y2.register_hook(lambda grad: print('y2 grad: ', grad))
loss.retain_grad()

#反向传播
loss.backward()
print("loss.grad:", loss.grad)
print("x.grad:", x.grad)
# y2 grad: tensor(4.)
# y1 grad: tensor(-4.)
# loss.grad: tensor(1.)
# x.grad: tensor(4.)
tensorflow
在TensorFlow2.0中,使用的是动态计算图和Autograph.
在TensorFlow1.0中,使用静态计算图分两步,第一步定义计算图,第二步在会话中执行计算图。
动态计算图已经不区分计算图的定义和执行了,而是定义后立即执行。因此称之为 Eager Excution.
Eager这个英文单词的原意是"迫不及待的",也就是立即执行的意思。
# 动态计算图在每个算子处都进行构建,构建后立即执行
x = tf.constant("hello")
y = tf.constant("world")
z = tf.strings.join([x,y],separator=" ")
tf.print(z)

# hello world
# 可以将动态计算图代码的输入和输出关系封装成函数
def strjoin(x,y):
    z =  tf.strings.join([x,y],separator = " ")
    tf.print(z)
    return z

result = strjoin(tf.constant("hello"),tf.constant("world"))
print(result)
# hello world
# tf.Tensor(b'hello world', shape=(), dtype=string)
Autograph
tensorflow
Autograph是TensorFlow2.0的机制。
动态计算图运行效率相对较低。
可以用@tf.function装饰器将普通Python函数转换成和TensorFlow1.0对应的静态计算图构建代码。
在TensorFlow1.0中,使用计算图分两步,第一步定义计算图,第二步在会话中执行计算图。
在TensorFlow2.0中,如果采用Autograph的方式使用计算图,第一步定义计算图变成了定义函数,第二步执行计算图变成了调用函数。
不需要使用会话了,一些都像原始的Python语法一样自然。
实践中,我们一般会先用动态计算图调试代码,然后在需要提高性能的的地方利用@tf.function切换成Autograph获得更高的效率。
示例:
import tensorflow as tf

# 使用autograph构建静态图
@tf.function
def strjoin(x,y):
    z =  tf.strings.join([x,y],separator = " ")
    tf.print(z)
    return z

result = strjoin(tf.constant("hello"),tf.constant("world"))
print(result)

# hello world
# tf.Tensor(b'hello world', shape=(), dtype=string)
AutoGraph的机制原理
当我们使用@tf.function装饰一个函数的时候,后面到底发生了什么呢?
import tensorflow as tf
import numpy as np

@tf.function(autograph=True)
def myadd(a,b):
    for i in tf.range(3):
        tf.print(i)
    c = a+b
    print("tracing")
    return c
后面什么都没有发生。仅仅是在Python堆栈中记录了这样一个函数的签名。
当我们第一次调用这个被@tf.function装饰的函数时,后面到底发生了什么?
myadd(tf.constant("hello"),tf.constant("world"))
# tracing
# 0
# 1
# 2
发生了2件事情,
第一件事情是创建计算图。
即创建一个静态计算图,跟踪执行一遍函数体中的Python代码,确定各个变量的Tensor类型,并根据执行顺序将算子添加到计算图中。 在这个过程中,如果开启了autograph=True(默认开启),会将Python控制流转换成TensorFlow图内控制流。 主要是将if语句转换成 tf.cond算子表达,将while和for循环语句转换成tf.while_loop算子表达,并在必要的时候添加 tf.control_dependencies指定执行顺序依赖关系。
相当于在 tensorflow1.0执行了类似下面的语句:
g = tf.Graph()
with g.as_default():
    a = tf.placeholder(shape=[],dtype=tf.string)
    b = tf.placeholder(shape=[],dtype=tf.string)
    cond = lambda i: i<tf.constant(3)
    def body(i):
        tf.print(i)
        return(i+1)
    loop = tf.while_loop(cond,body,loop_vars=[0])
    loop
    with tf.control_dependencies(loop):
        c = tf.strings.join([a,b])
    print("tracing")
第二件事情是执行计算图。
相当于在 tensorflow1.0中执行了下面的语句:
with tf.Session(graph=g) as sess:
    sess.run(c,feed_dict={
    a:tf.constant("hello"),b:tf.constant("world")})
因此我们先看到的是第一个步骤的结果:即Python调用标准输出流打印"tracing"语句。
然后看到第二个步骤的结果:TensorFlow调用标准输出流打印1,2,3。
当我们再次用相同的输入参数类型调用这个被@tf.function装饰的函数时,后面到底发生了什么?
myadd(tf.constant("good"),tf.constant("morning"))
# 0
# 1
# 2
只会发生一件事情,那就是上面步骤的第二步,执行计算图。
所以这一次我们没有看到打印"tracing"的结果。
当我们再次用不同的的输入参数类型调用这个被@tf.function装饰的函数时,后面到底发生了什么?
myadd(tf.constant(1),tf.constant(2))
# tracing
# 0
# 1
# 2
由于输入参数的类型已经发生变化,已经创建的计算图不能够再次使用。
需要重新做2件事情:创建新的计算图、执行计算图。
所以我们又会先看到的是第一个步骤的结果:即Python调用标准输出流打印"tracing"语句。
然后再看到第二个步骤的结果:TensorFlow调用标准输出流打印1,2,3。
需要注意的是,如果调用被@tf.function装饰的函数时输入的参数不是Tensor类型,则每次都会重新创建计算图。
例如我们写下如下代码。两次都会重新创建计算图。因此,一般建议调用@tf.function时应传入Tensor类型。
myadd("hello","world")
myadd("good","morning")
# tracing
# 0
# 1
# 2
# tracing
# 0
# 1
# 2
AutoGraph的使用规范
Autograph机制可以将动态图转换成静态计算图,兼收执行效率和编码效率之利。
当然Autograph机制能够转换的代码并不是没有任何约束的,有一些编码规范需要遵循,否则可能会转换失败或者不符合预期。
1,被@tf.function修饰的函数应尽可能使用TensorFlow中的函数而不是Python中的其他函数。例如使用tf.print而不是print,使用tf.range而不是range,使用tf.constant(True)而不是True.
(解释:Python中的函数仅仅会在跟踪执行函数以创建静态图的阶段使用,普通Python函数是无法嵌入到静态计算图中的,所以 在计算图构建好之后再次调用的时候,这些Python函数并没有被计算,而TensorFlow中的函数则可以嵌入到计算图中。使用普通的Python函数会导致 被@tf.function修饰前【eager执行】和被@tf.function修饰后【静态图执行】的输出不一致。)
2,避免在@tf.function修饰的函数内部定义tf.Variable.
(解释:如果函数内部定义了tf.Variable,那么在【eager执行】时,这种创建tf.Variable的行为在每次函数调用时候都会发生。但是在【静态图执行】时,这种创建tf.Variable的行为只会发生在第一步跟踪Python代码逻辑创建计算图时,这会导致被@tf.function修饰前【eager执行】和被@tf.function修饰后【静态图执行】的输出不一致。实际上,TensorFlow在这种情况下一般会报错。)
3,被@tf.function修饰的函数不可修改该函数外部的Python列表或字典等数据结构变量。
(解释:静态计算图是被编译成C++代码在TensorFlow内核中执行的。Python中的列表和字典等数据结构变量是无法嵌入到计算图中,它们仅仅能够在创建计算图时被读取,在执行计算图时是无法修改Python中的列表或字典这样的数据结构变量的。)
示例:
1,被@tf.function修饰的函数应尽量使用TensorFlow中的函数而不是Python中的其他函数。
import numpy as np
import tensorflow as tf

@tf.function
def np_random():
    a = np.random.randn(3,3)
    tf.print(a)

@tf.function
def tf_random():
    a = tf.random.normal((3,3))
    tf.print(a)
#np_random每次执行都是一样的结果。
np_random()
np_random()
# array([[ 0.22619201, -0.4550123 , -0.42587565],
# [ 0.05429906, 0.2312667 , -1.44819738],
# [ 0.36571796, 1.45578986, -1.05348983]])
# array([[ 0.22619201, -0.4550123 , -0.42587565],
# [ 0.05429906, 0.2312667 , -1.44819738],
# [ 0.36571796, 1.45578986, -1.05348983]])
#tf_random每次执行都会有重新生成随机数。
tf_random()
tf_random()
# [[-1.38956189 -0.394843668 0.420657277]
# [2.87235498 -1.33740318 -0.533843279]
# [0.918233037 0.118598573 -0.399486482]]
# [[-0.858178258 1.67509317 0.511889517]
# [-0.545829177 -2.20118237 -0.968222201]
# [0.733958483 -0.61904633 0.77440238]]
2,避免在@tf.function修饰的函数内部定义tf.Variable.
# 避免在@tf.function修饰的函数内部定义tf.Variable.

x = tf.Variable(1.0,dtype=tf.float32)
@tf.function
def outer_var():
    x.assign_add(1.0)
    tf.print(x)
    return(x)

outer_var()
outer_var()
# ===============================================
@tf.function
def inner_var():
    x = tf.Variable(1.0,dtype = tf.float32)
    x.assign_add(1.0)
    tf.print(x)
    return(x)

#执行将报错
#inner_var()
#inner_var()
3,被@tf.function修饰的函数不可修改该函数外部的Python列表或字典等结构类型变量。
tensor_list = []
#@tf.function #加上这一行切换成Autograph结果将不符合预期!!!
def append_tensor(x):
    tensor_list.append(x)
    return tensor_list

append_tensor(tf.constant(5.0))
append_tensor(tf.constant(6.0))
print(tensor_list)
# [<tf.Tensor: shape=(), dtype=float32, numpy=5.0>, <tf.Tensor: shape=(), dtype=float32, numpy=6.0>]
#============================================================
tensor_list = []
@tf.function #加上这一行切换成Autograph结果将不符合预期!!!
def append_tensor(x):
    tensor_list.append(x)
    return tensor_list


append_tensor(tf.constant(5.0))
append_tensor(tf.constant(6.0))
print(tensor_list)
# [<tf.Tensor 'x:0' shape=() dtype=float32>]
Autograph和tf.Module
前面在介绍Autograph的编码规范时提到构建Autograph时应该避免在@tf.function修饰的函数内部定义tf.Variable.
但是如果在函数外部定义tf.Variable的话,又会显得这个函数有外部变量依赖,封装不够完美。
一种简单的思路是定义一个类,并将相关的tf.Variable创建放在类的初始化方法中。而将函数的逻辑放在其他方法中。
这样一顿猛如虎的操作之后,我们会觉得一切都如同人法地地法天天法道道法自然般的自然。
惊喜的是,TensorFlow提供了一个基类tf.Module,通过继承它构建子类,我们不仅可以获得以上的自然而然,而且可以非常方便地管理变量,还可以非常方便地管理它引用的其它Module,最重要的是,我们能够利用tf.saved_model保存模型并实现跨平台部署使用。
应用tf.Module封装Autograph
# 定义一个简单的function(函数)。
import tensorflow as tf
x = tf.Variable(1.0,dtype=tf.float32)

#在tf.function中用input_signature限定输入张量的签名类型:shape和dtype
@tf.function(input_signature=[tf.TensorSpec(shape = [], dtype = tf.float32)])
def add_print(a):
    x.assign_add(a)
    tf.print(x)
    return(x)
add_print(tf.constant(3.0))
#add_print(tf.constant(3)) #输入不符合张量签名的参数将报错
# 4
下面利用tf.Module的子类化将其封装一下。
class DemoModule(tf.Module):
    def __init__(self,init_value = tf.constant(0.0),name=None):
        super(DemoModule, self).__init__(name=name)
        with self.name_scope:  #相当于with tf.name_scope("demo_module")
            self.x = tf.Variable(init_value,dtype = tf.float32,trainable=True)


    @tf.function(input_signature=[tf.TensorSpec(shape = [], dtype = tf.float32)])
    def addprint(self,a):
        with self.name_scope:
            self.x.assign_add(a)
            tf.print(self.x)
            return(self.x)
#执行
demo = DemoModule(init_value = tf.constant(1.0))
result = demo.addprint(tf.constant(5.0))
# 6
#查看模块中的全部变量和全部可训练变量
print(demo.variables)
print(demo.trainable_variables)
# (<tf.Variable 'demo_module/Variable:0' shape=() dtype=float32, numpy=6.0>,)
# (<tf.Variable 'demo_module/Variable:0' shape=() dtype=float32, numpy=6.0>,)

#查看模块中的全部子模块
demo.submodules

#使用tf.saved_model 保存模型,并指定需要跨平台部署的方法
tf.saved_model.save(demo,"./data/demo/1",signatures = {
    "serving_default":demo.addprint})
#加载模型
demo2 = tf.saved_model.load("./data/demo/1")
demo2.addprint(tf.constant(5.0))
# 11
# 查看模型文件相关信息,红框标出来的输出信息在模型部署和跨平台使用时有可能会用到
saved_model_cli show --dir ./data/demo/1 --all (#在终端输入命令可见)
除了利用tf.Module的子类化实现封装,我们也可以通过给tf.Module添加属性的方法进行封装。
mymodule = tf.Module()
mymodule.x = tf.Variable(0.0)

@tf.function(input_signature=[tf.TensorSpec(shape = [], dtype = tf.float32)])
def addprint(a):
    mymodule.x.assign_add(a)
    tf.print(mymodule.x)
    return (mymodule.x)

mymodule.addprint = addprint
mymodule.addprint(tf.constant(1.0)).numpy()
# 1.0
print(mymodule.variables)
# (<tf.Variable 'Variable:0' shape=() dtype=float32, numpy=0.0>,)

#使用tf.saved_model 保存模型
tf.saved_model.save(mymodule,"./data/mymodule",
    signatures = {
    "serving_default":mymodule.addprint})

#加载模型
mymodule2 = tf.saved_model.load("./data/mymodule")
mymodule2.addprint(tf.constant(5.0))
# INFO:tensorflow:Assets written to: ./data/mymodule/assets
# 5
自动微分机制
神经网络通常依赖反向传播求梯度来更新网络参数,求梯度过程通常是一件非常复杂而容易出错的事情。
而深度学习框架可以帮助我们自动地完成这种求梯度运算。
Pytorch中:一般通过反向传播 backward 方法 实现这种求梯度计算。该方法求得的梯度将存在对应自变量张量的grad属性下。
除此之外,也能够调用torch.autograd.grad 函数来实现求梯度计算。
Tensorflow中:一般使用梯度磁带tf.GradientTape来记录正向运算过程,然后反播磁带自动得到梯度值。

一阶求导示例:
pytorch
利用backward方法求导数
backward 方法通常在一个标量张量上调用,该方法求得的梯度将存在对应自变量张量的grad属性下。
如果调用的张量非标量,则要传入一个和它同形状 的gradient(梯度)参数张量。
相当于用该gradient参数张量与调用张量作向量点乘,得到的标量结果再反向传播。(tensorflow则不用考虑,它会自动匹配相应尺寸的梯度张量)。
# 标量的反向传播
import numpy as np
import torch

# f(x) = a*x**2 + b*x + c的导数

x = torch.tensor(0.0,requires_grad = True) # x需要被求导
a = torch.tensor(1.0)
b = torch.tensor(-2.0)
c = torch.tensor(1.0)
y = a*torch.pow(x,2) + b*x + c

y.backward()
dy_dx = x.grad
print(dy_dx)
# tensor(-2.)
# 非标量的反向传播

# f(x) = a*x**2 + b*x + c
x = torch.tensor([[0.0,0.0],[1.0,2.0]],requires_grad = True) # x需要被求导
a = torch.tensor(1.0)
b = torch.tensor(-2.0)
c = torch.tensor(1.0)
y = a*torch.pow(x,2) + b*x + c

gradient = torch.tensor([[1.0,1.0],[1.0,1.0]])

print("x:\n",x)
print("y:\n",y)
y.backward(gradient = gradient)
x_grad = x.grad
print("x_grad:\n",x_grad)
# x:
# tensor([[0., 0.],
# [1., 2.]], requires_grad=True)
# y:
# tensor([[1., 1.],
# [0., 1.]], grad_fn=<AddBackward0>)
# x_grad:
# tensor([[-2., -2.],
# [ 0., 2.]])
# 非标量的反向传播可以用标量的反向传播实现

# f(x) = a*x**2 + b*x + c

x = torch.tensor([[0.0,0.0],[1.0,2.0]],requires_grad = True) # x需要被求导
a = torch.tensor(1.0)
b = torch.tensor(-2.0)
c = torch.tensor(1.0)
y = a*torch.pow(x,2) + b*x + c

gradient = torch.tensor([[1.0,1.0],[1.0,1.0]])
z = torch.sum(y*gradient)

print("x:",x)
print("y:",y)
z.backward()
x_grad = x.grad
print("x_grad:\n",x_grad)
# x: tensor([[0., 0.],
# [1., 2.]], requires_grad=True)
# y: tensor([[1., 1.],
# [0., 1.]], grad_fn=<AddBackward0>)
# x_grad:
# tensor([[-2., -2.],
# [ 0., 2.]])
tensorflow
利用梯度磁带求导数
import tensorflow as tf
import numpy as np

# f(x) = a*x**2 + b*x + c的导数
x = tf.Variable(0.0,name = "x",dtype = tf.float32)
a = tf.constant(1.0)
b = tf.constant(-2.0)
c = tf.constant(1.0)

with tf.GradientTape() as tape:
    y = a*tf.pow(x,2) + b*x + c

dy_dx = tape.gradient(y,x)
print(dy_dx)

# tf.Tensor(-2.0, shape=(), dtype=float32)
# 对常量张量也可以求导,需要增加watch

with tf.GradientTape() as tape:
    tape.watch([a,b,c])
    y = a*tf.pow(x,2) + b*x + c

dy_dx,dy_da,dy_db,dy_dc = tape.gradient(y,[x,a,b,c])
print(dy_da)
print(dy_dc)
# tf.Tensor(0.0, shape=(), dtype=float32)
# tf.Tensor(1.0, shape=(), dtype=float32)
# 可以在autograph中使用
@tf.function
def f(x):
    a = tf.constant(1.0)
    b = tf.constant(-2.0)
    c = tf.constant(1.0)

    # 自变量转换成tf.float32
    x = tf.cast(x,tf.float32)
    with tf.GradientTape() as tape:
        tape.watch(x)
        y = a*tf.pow(x,2)+b*x+c
    dy_dx = tape.gradient(y,x)

    return((dy_dx,y))

tf.print(f(tf.constant(0.0)))# (-2, 1)
tf.print(f(tf.constant(1.0)))# (0, 0)
二阶求导示例:
pytorch
利用autograd.grad方法求导数,这个方法就很类似于tensorflow中的磁带求导。
# f(x) = a*x**2 + b*x + c的导数

x = torch.tensor(0.0,requires_grad = True) # x需要被求导
a = torch.tensor(1.0)
b = torch.tensor(-2.0)
c = torch.tensor(1.0)
y = a*torch.pow(x,2) + b*x + c


# create_graph 设置为 True 将允许创建更高阶的导数
dy_dx = torch.autograd.grad(y,x,create_graph=True)[0]
print(dy_dx.data)

# 求二阶导数
dy2_dx2 = torch.autograd.grad(dy_dx,x)[0]

print(dy2_dx2.data)
# tensor(-2.)
# tensor(2.)
import numpy as np
import torch

x1 = torch.tensor(1.0,requires_grad = True) # x需要被求导
x2 = torch.tensor(2.0,requires_grad = True)

y1 = x1*x2
y2 = x1+x2


# 允许同时对多个自变量求导数
(dy1_dx1,dy1_dx2) = torch.autograd.grad(outputs=y1,inputs = [x1,x2],retain_graph = True)
print(dy1_dx1,dy1_dx2)

# 如果有多个因变量,相当于把多个因变量的梯度结果求和
(dy12_dx1,dy12_dx2) = torch.autograd.grad(outputs=[y1,y2],inputs = [x1,x2])
print(dy12_dx1,dy12_dx2)
tensor(2.) tensor(1.)
tensor(3.) tensor(2.)
tensorflow
# 可以求二阶导数
with tf.GradientTape() as tape2:
    with tf.GradientTape() as tape1:
        y = a*tf.pow(x,2) + b*x + c
    dy_dx = tape1.gradient(y,x)
dy2_dx2 = tape2.gradient(dy_dx,x)

print(dy2_dx2)
# tf.Tensor(2.0, shape=(), dtype=float32)
利用自动微分和优化器求最小值
pytorch
# f(x) = a*x**2 + b*x + c的最小值

x = torch.tensor(0.0,requires_grad = True) # x需要被求导
a = torch.tensor(1.0)
b = torch.tensor(-2.0)
c = torch.tensor(1.0)

optimizer = torch.optim.SGD(params=[x],lr = 0.01)


def f(x):
    result = a*torch.pow(x,2) + b*x + c
    return(result)

for i in range(500):
    optimizer.zero_grad()
    y = f(x)
    y.backward()
    optimizer.step()


print("y=",f(x).data,";","x=",x.data)
# y= tensor(0.) ; x= tensor(1.0000)
tensorflow
# 求f(x) = a*x**2 + b*x + c的最小值
# 使用optimizer.apply_gradients

x = tf.Variable(0.0,name = "x",dtype = tf.float32)
a = tf.constant(1.0)
b = tf.constant(-2.0)
c = tf.constant(1.0)

optimizer = tf.keras.optimizers.SGD(learning_rate=0.01)
for _ in range(1000):
    with tf.GradientTape() as tape:
        y = a*tf.pow(x,2) + b*x + c
    dy_dx = tape.gradient(y,x)
    optimizer.apply_gradients(grads_and_vars=[(dy_dx,x)])

tf.print("y =",y,"; x =",x)
# y = 0 ; x = 0.999998569
# 求f(x) = a*x**2 + b*x + c的最小值
# 使用optimizer.minimize
# optimizer.minimize相当于先用tape求gradient,再apply_gradient

x = tf.Variable(0.0,name = "x",dtype = tf.float32)

#注意f()无参数
def f():
    a = tf.constant(1.0)
    b = tf.constant(-2.0)
    c = tf.constant(1.0)
    y = a*tf.pow(x,2)+b*x+c
    return(y)

optimizer = tf.keras.optimizers.SGD(learning_rate=0.01)
for _ in range(1000):
    optimizer.minimize(f,[x])

tf.print("y =",f(),"; x =",x)
# y = 0 ; x = 0.999998569

说明
笔记中很多代码案例来自于:
《20天吃掉那只Pytorch》
- github项目地址: https://github.com/lyhue1991/eat_pytorch_in_20_days
《30天吃掉那只TensorFlow2》
- github项目地址: https://github.com/lyhue1991/eat_tensorflow2_in_30_days
感兴趣的同学可以进入学习。
===========================================================================
我的笔记一部分是将这两项目中内容整理归纳,一部分是相应功能的内容自己找资料整理归纳。
笔记以MD格式存入我的git仓库,另外代码案例所需要数据集文件也在其中:可以clone下来学习使用。
《pytorch-tensorflow对比学习笔记》
github项目地址: https://github.com/Boris-2021/pytorch-tensorflow-Comparative-study
===========================================================================
笔记中增加了很多趣味性的图片,增加阅读乐趣。
===========================================================================
感觉对你的学习有帮助,就点个星,点个赞,点个关注再走把,整理不易,拒绝白嫖从我做起!
边栏推荐
猜你喜欢


随机推荐
请问shake数据库中想把源的db0的数据同步到目的db5,参数怎么设置呢?
PAT serie b write the number 1002
基于Arduino制作非接触式测温仪
USB3.0:VL817Q7-C0的LAYOUT指南(三)
PAT乙级 1001 害死人不偿命的(3n+1)猜想
C# | 使用Json序列化对象时忽略只读的属性
MySQL-DML语言-数据库操作语言-insert-update-delete-truncate
Pyspark Machine Learning: Vectors and Common Operations
【云原生之kubernetes实战】kubernetes集群的检测工具——popeye
[MySQL] 多表查询
typescript21 - Comparison of Interfaces and Type Aliases
Swastika line-by-line parsing and realization of the Transformer, and German translation practice (a)
Mysql基础篇(Mysql数据类型)
typescript27 - what about enumeration types
[kali-information collection] enumeration - DNS enumeration: DNSenum, fierce
High Numbers | 【Re-integration】Line Area Score 880 Examples
Mysql基础篇(约束)
【愚公系列】2022年07月 Go教学课程 023-Go容器之列表
项目风险管理必备内容总结
报错:AttributeError: module ‘matplotlib’ has no attribute ‘figure’