当前位置:网站首页>Minecraft 1.18.1, 1.18.2 module development 23.3D animation armor production
Minecraft 1.18.1, 1.18.2 module development 23.3D animation armor production
2022-08-02 05:44:00 【Jay_fearless】
Minecraft 1.16.5模组开发3D盔甲
Minecraft 1.12.2模组开发3D盔甲
我们本次在1.18.2's version is implemented with animation effects3D盔甲
1.首先,为了实现这些效果,我们需要首先使用到一个模组:geckolib(下载地址)
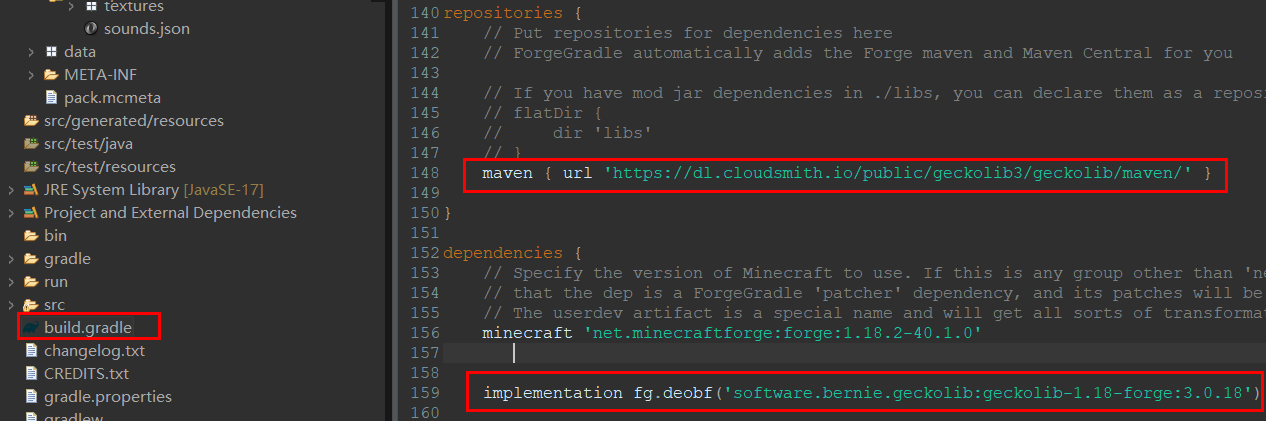
找到项目的build.gradle文件,在repositories和dependencies中添加依赖.
repositories {

    //添加这个
    maven { url 'https://dl.cloudsmith.io/public/geckolib3/geckolib/maven/' }

}
dependencies {
    minecraft 'net.minecraftforge:forge:1.18.2-40.1.0'

    //添加这个
    implementation fg.deobf('software.bernie.geckolib:geckolib-1.18-forge:3.0.18')

}
之后我们重新构建gradle项目

构建好了项目后在项目的Main类中添加一句geckolib的初始化语句:
Main.java
	public Main() {
		IEventBus bus = FMLJavaModLoadingContext.get().getModEventBus();

		ItemInit.ITEMS.register(bus);


        //添加GeckoLib初始化函数
        GeckoLib.initialize();


		MinecraftForge.EVENT_BUS.register(this);
	}
2.之后,与之前的教程一样,我们需要在blockbenchMade in a mod3D盔甲:
进入软件后我们要找到一个插件按钮,然后再搜索栏中输入GeckoLib Animation Utils,并下载这个插件

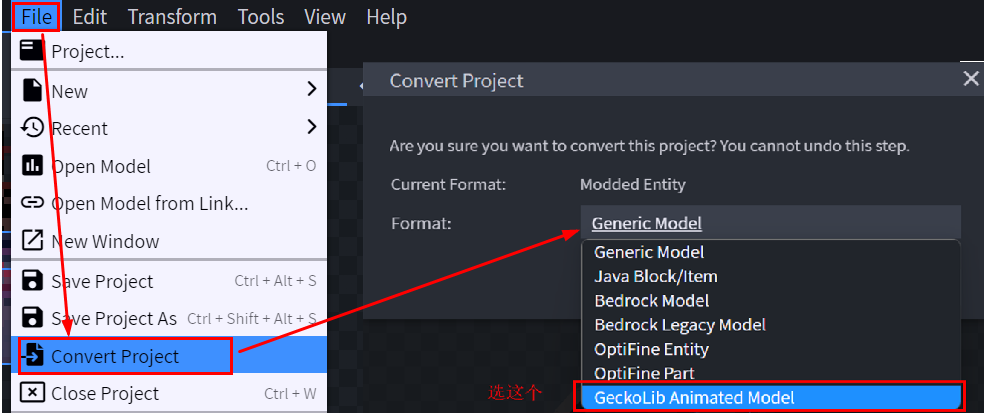
将我们制作好的生物实体进行模型转换工作,找到Convert Project,之后选择Geckolib Animated Model
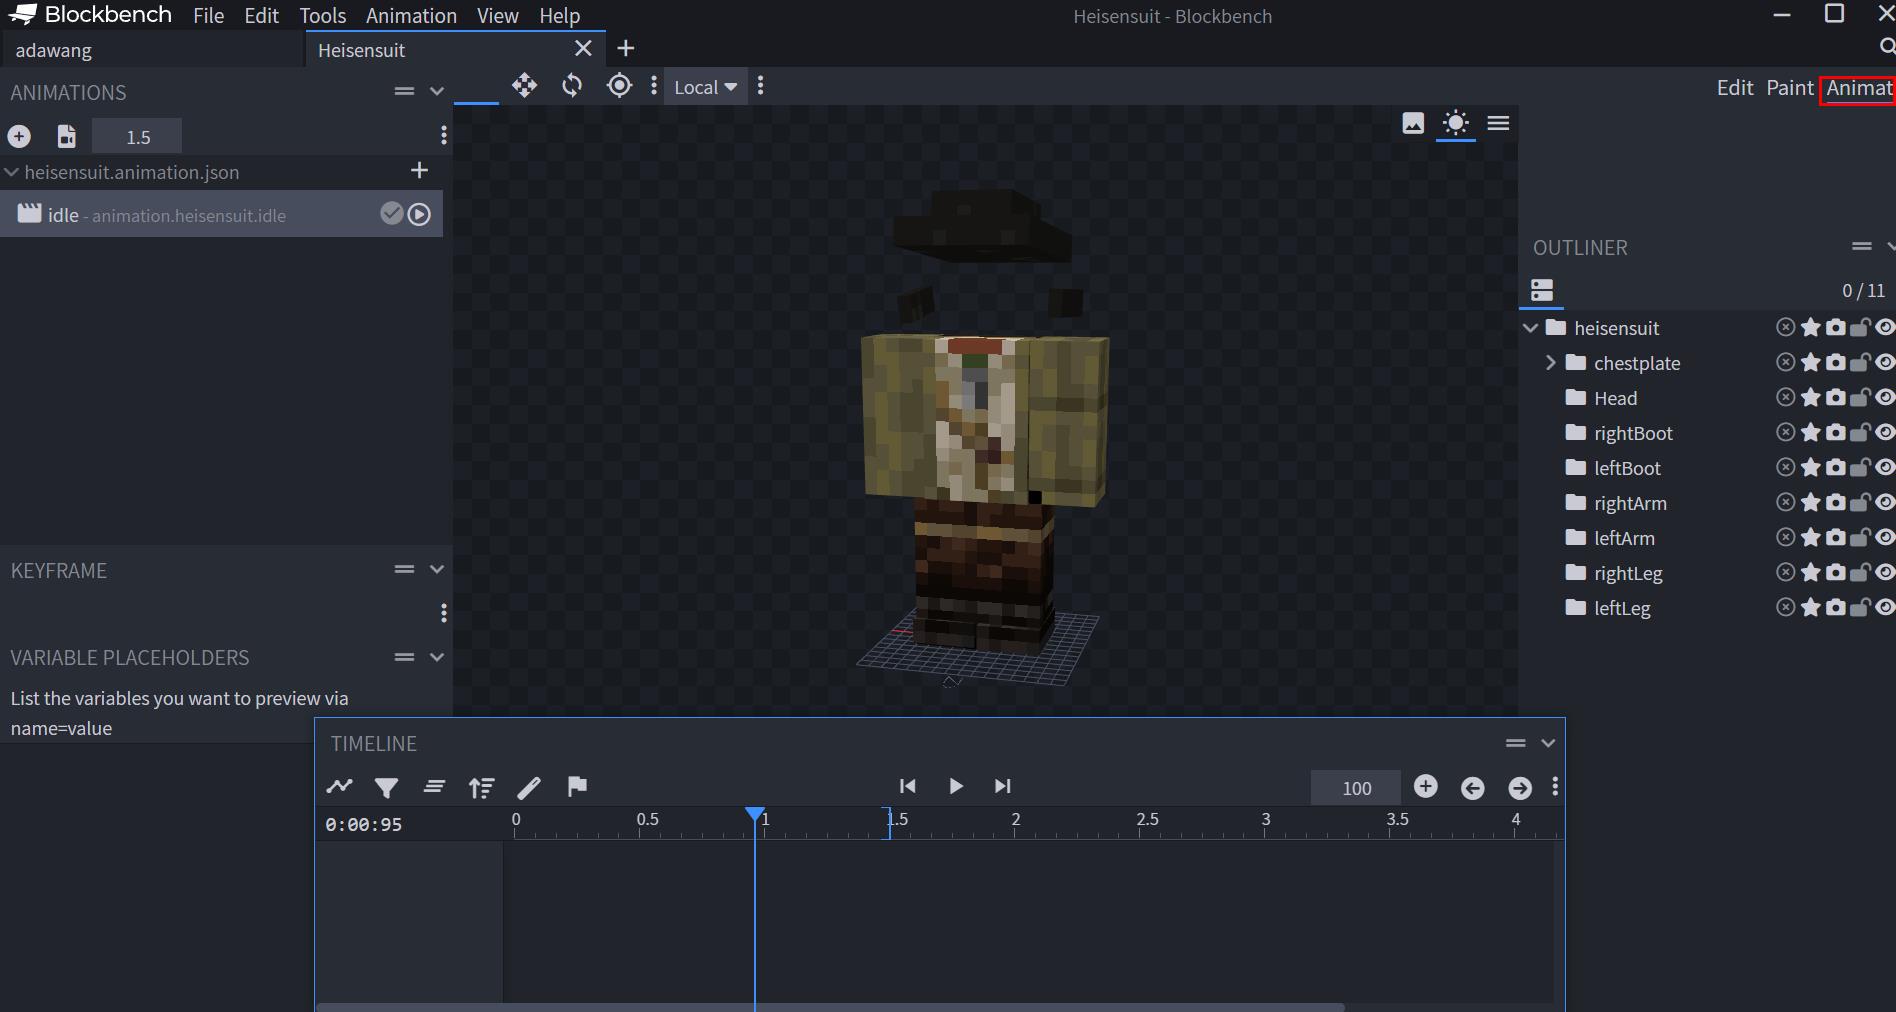
在这之后,你会发现你的生物实体栏多了一个Animate栏,点击进去:
具体动作制作的视频:Blockbench动画制作
注:Our armor is to be made exactly like this:

在制作好所有的动画后我们导出模型和动画json文件.

3.模型制作完成,Next we need to make our armor class
在items包中新建armor包 -> armorCreate our suit class in the packageHeisensuitArmorItem
HeisensuitArmorItem.java
package com.joy187.re8joymod.items.armor;

import java.util.ArrayList;
import java.util.Arrays;
import java.util.List;
import java.util.Map;

import com.google.common.collect.ImmutableMap;
import com.joy187.re8joymod.Main;
import com.joy187.re8joymod.init.EffectInit;
import com.joy187.re8joymod.init.ItemInit;
import com.joy187.re8joymod.util.CustomArmorMaterial;

import net.minecraft.world.effect.MobEffectInstance;
import net.minecraft.world.effect.MobEffects;
import net.minecraft.world.entity.EquipmentSlot;
import net.minecraft.world.entity.LivingEntity;
import net.minecraft.world.entity.decoration.ArmorStand;
import net.minecraft.world.entity.player.Player;
import net.minecraft.world.item.ArmorItem;
import net.minecraft.world.item.ArmorMaterial;
import net.minecraft.world.item.Item;
import net.minecraft.world.item.ItemStack;
import net.minecraft.world.level.Level;
import software.bernie.geckolib3.core.IAnimatable;
import software.bernie.geckolib3.core.PlayState;
import software.bernie.geckolib3.core.builder.AnimationBuilder;
import software.bernie.geckolib3.core.controller.AnimationController;
import software.bernie.geckolib3.core.event.predicate.AnimationEvent;
import software.bernie.geckolib3.core.manager.AnimationData;
import software.bernie.geckolib3.core.manager.AnimationFactory;
import software.bernie.geckolib3.item.GeoArmorItem;


public class HeisensuitArmorItem extends GeoArmorItem implements IAnimatable{
	private AnimationFactory factory = new AnimationFactory(this);

	public HeisensuitArmorItem(ArmorMaterial materialIn, EquipmentSlot slot, Properties builder) {
		super(materialIn, slot, builder.tab(Main.TUTORIAL_TAB));
	}

    //动画状态机,Judge the animation state of our armor at each moment
	@SuppressWarnings("unused")
	private <P extends IAnimatable> PlayState predicate(AnimationEvent<P> event) {
		// This is all the extradata this event carries. The livingentity is the entity
		// that's wearing the armor. The itemstack and equipmentslottype are self
		// explanatory.
		List<EquipmentSlot> slotData = event.getExtraDataOfType(EquipmentSlot.class);
		List<ItemStack> stackData = event.getExtraDataOfType(ItemStack.class);
		LivingEntity livingEntity = event.getExtraDataOfType(LivingEntity.class).get(0);

		// Always loop the animation but later on in this method we'll decide whether or
		// not to actually play it
		event.getController().setAnimation(new AnimationBuilder().addAnimation("animation.heisensuit.idle", true));

		// If the living entity is an armorstand just play the animation nonstop
		if (livingEntity instanceof ArmorStand) {
			return PlayState.CONTINUE;
		}

		// The entity is a player, so we want to only play if the player is wearing the
		// full set of armor
		else if (livingEntity instanceof Player) {
			Player player = (Player) livingEntity;

			// Get all the equipment, aka the armor, currently held item, and offhand item
			List<Item> equipmentList = new ArrayList<>();
			player.getAllSlots().forEach((x) -> equipmentList.add(x.getItem()));

			// Contains four armor positions
			List<Item> armorList = equipmentList.subList(2, 6);

            //If the player wears all the suits the corresponding animation will be played
			// Make sure the player is wearing all the armor. If they are, continue playing
			// the animation, otherwise stop
			//ItemInit.HEISEN_BOOTS.get(), ItemInit.HEISEN_LEGGINGS.get(),ItemInit.HEISEN_CHEST.get(), ItemInit.HEISEN_HEAD.get()
			boolean isWearingAll = armorList
					.containsAll(Arrays.asList(ItemInit.HEISEN_BOOTS.get(), ItemInit.HEISEN_LEGG.get()
							,ItemInit.HEISEN_SUIT.get(), ItemInit.HEISEN_HEAD.get()));
			return isWearingAll ? PlayState.CONTINUE : PlayState.STOP;
		}
		return PlayState.STOP;
	}

	//Register our standby animation
	@SuppressWarnings({ "unchecked", "rawtypes" })
	@Override
	public void registerControllers(AnimationData data) {
		data.addAnimationController(new AnimationController(this, "controller", 20, this::predicate));
	}

	@Override
	public AnimationFactory getFactory() {
		return this.factory;
	}

    private static final Map<ArmorMaterial, MobEffectInstance> MATERIAL_TO_EFFECT_MAP =
            (new ImmutableMap.Builder<ArmorMaterial, MobEffectInstance>())
                    .put(CustomArmorMaterial.ARMOR_MATERIAL_HEISENSUIT,
                            new MobEffectInstance(MobEffects.DAMAGE_RESISTANCE, 100, 1)).build();

    //Gives effect after wearing
    @Override
    public void onArmorTick(ItemStack stack, Level world, Player player) {
        if(!world.isClientSide()) {
            //Putting on the helmet grants a potion effect
            if(!player.getInventory().getArmor(3).isEmpty()) {
                MobEffectInstance mapStatusEffect1 = new MobEffectInstance(MobEffects.DAMAGE_RESISTANCE, 100, 2);
                ArmorItem helmet = ((ArmorItem)player.getInventory().getArmor(3).getItem());
                if(helmet.getMaterial() == CustomArmorMaterial.ARMOR_MATERIAL_HEISENSUIT) {
                    boolean hasPlayerEffect = player.hasEffect(mapStatusEffect1.getEffect());
                    if(!hasPlayerEffect) {
                        player.addEffect(new MobEffectInstance(mapStatusEffect1.getEffect(),mapStatusEffect1.getDuration(), mapStatusEffect1.getAmplifier()));
                    }
                }
            }
            //Wearing the breastplate grants a potion effect
            if(!player.getInventory().getArmor(2).isEmpty()) {
                MobEffectInstance mapStatusEffect2 = new MobEffectInstance(MobEffects.FIRE_RESISTANCE, 100, 1);

                ArmorItem breastplate = ((ArmorItem)player.getInventory().getArmor(2).getItem());
                if(breastplate.getMaterial() == CustomArmorMaterial.ARMOR_MATERIAL_HEISENSUIT) {
                    boolean hasPlayerEffect = player.hasEffect(mapStatusEffect2.getEffect());
                    if(!hasPlayerEffect) {
                        player.addEffect(new MobEffectInstance(mapStatusEffect2.getEffect(),mapStatusEffect2.getDuration(), mapStatusEffect2.getAmplifier()));
                    }
                }
            }
            //Wearing the leggings grants a potion effect
            if(!player.getInventory().getArmor(1).isEmpty()) {
                MobEffectInstance mapStatusEffect3 = new MobEffectInstance(MobEffects.SLOW_FALLING, 100, 1);

                ArmorItem leggings = ((ArmorItem)player.getInventory().getArmor(1).getItem());
                if(leggings.getMaterial() == CustomArmorMaterial.ARMOR_MATERIAL_HEISENSUIT) {
                    boolean hasPlayerEffect = player.hasEffect(mapStatusEffect3.getEffect());
                    if(!hasPlayerEffect) {
                        player.addEffect(new MobEffectInstance(mapStatusEffect3.getEffect(),mapStatusEffect3.getDuration(), mapStatusEffect3.getAmplifier()));
                    }
                }
            }
            //Putting on the boots grants a potion effect
            if(!player.getInventory().getArmor(0).isEmpty()) {
                MobEffectInstance mapStatusEffect4 = new MobEffectInstance(MobEffects.MOVEMENT_SPEED, 100, 0);
                ArmorItem boots = ((ArmorItem)player.getInventory().getArmor(0).getItem());
                if(boots.getMaterial() == CustomArmorMaterial.ARMOR_MATERIAL_HEISENSUIT) {
                    boolean hasPlayerEffect = player.hasEffect(mapStatusEffect4.getEffect());
                    if(!hasPlayerEffect) {
                        player.addEffect(new MobEffectInstance(mapStatusEffect4.getEffect(),mapStatusEffect4.getDuration(), mapStatusEffect4.getAmplifier()));
                    }
                }
            }
        }
    }

}
之后我们需要在armor包中新建model包->modelCreate a new model class for our armor in the packageModelHeisensuit:
ModelHeisensuit.java
package com.joy187.re8joymod.items.armor.model;

import com.joy187.re8joymod.Main;
import com.joy187.re8joymod.items.armor.HeisensuitArmorItem;

import net.minecraft.resources.ResourceLocation;
import software.bernie.geckolib3.model.AnimatedGeoModel;


public class ModelHeisensuit extends AnimatedGeoModel<HeisensuitArmorItem> {

	//The address of the armor model file
	@Override
	public ResourceLocation getModelLocation(HeisensuitArmorItem object) {
		return new ResourceLocation(Main.MOD_ID, "geo/heisensuit.geo.json");
	}

	//The address of the armor texture file
	@Override
	public ResourceLocation getTextureLocation(HeisensuitArmorItem object) {
		return new ResourceLocation(Main.MOD_ID, "textures/models/armor/heisensuit_layer_1.png");
	}

	//Armor animation file address
	@Override
	public ResourceLocation getAnimationFileLocation(HeisensuitArmorItem animatable) {
		return new ResourceLocation(Main.MOD_ID, "animations/heisensuit.animation.json");
	}
}
之后我们需要在armor包中新建render包->renderCreate a new model class for our armor in the packageModelHeisensuit:
``
package com.joy187.re8joymod.items.armor.render;

import com.joy187.re8joymod.items.armor.HeisensuitArmorItem;
import com.joy187.re8joymod.items.armor.model.ModelHeisensuit;

import software.bernie.geckolib3.renderers.geo.GeoArmorRenderer;


public class RenderHeisensuit extends GeoArmorRenderer<HeisensuitArmorItem> {
    //Renders the effect of each part of the armor worn on the body
	public RenderHeisensuit() {
		super(new ModelHeisensuit());

		//Here's to you with the second stepblockbenchThere is a one-to-one correspondence between the names modeled in
		this.headBone = "Head";
		this.bodyBone = "chestplate";
		this.rightArmBone = "rightArm";
		this.leftArmBone = "leftArm";
		this.rightLegBone = "rightLeg";
		this.leftLegBone = "leftLeg";
		this.rightBootBone = "rightBoot";
		this.leftBootBone = "leftBoot";
	}
}
4.在ClientModEventSubscriberclass to register our armor rendering class:
ClientModEventSubscriber.java
@Mod.EventBusSubscriber(modid = Main.MOD_ID, value = Dist.CLIENT, bus = Mod.EventBusSubscriber.Bus.MOD)
public class ClientModEventSubscriber extends ModEventSubscriber{

    @OnlyIn(Dist.CLIENT)
	@SubscribeEvent
	public static void registerRenderers(final EntityRenderersEvent.AddLayers event) {

		//Rendering classes are registered
		GeoArmorRenderer.registerArmorRenderer(HeisensuitArmorItem.class, new RenderHeisensuit());
	}
}
5.在ItemInitThe class will declare our armor,Please refer to the previous tutorial for armor attributes1.18.2 盔甲套装:
ItemInit.java
    //头盔
	public static final RegistryObject<HeisensuitArmorItem> HEISEN_HEAD = ITEMS.register("heisenhead",
			() -> new HeisensuitArmorItem(CustomArmorMaterial.ARMOR_MATERIAL_HEISENSUIT, EquipmentSlot.HEAD, new Item.Properties()));
	//胸甲
	public static final RegistryObject<HeisensuitArmorItem> HEISEN_SUIT = ITEMS.register("heisensuit",
			() -> new HeisensuitArmorItem(CustomArmorMaterial.ARMOR_MATERIAL_HEISENSUIT, EquipmentSlot.CHEST, new Item.Properties()));
	//护腿
	public static final RegistryObject<HeisensuitArmorItem> HEISEN_LEGG = ITEMS.register("heisenlegg",
			() -> new HeisensuitArmorItem(CustomArmorMaterial.ARMOR_MATERIAL_HEISENSUIT, EquipmentSlot.LEGS, new Item.Properties()));
	//靴子
	public static final RegistryObject<HeisensuitArmorItem> HEISEN_BOOTS = ITEMS.register("heisenboots",
			() -> new HeisensuitArmorItem(CustomArmorMaterial.ARMOR_MATERIAL_HEISENSUIT, EquipmentSlot.FEET, new Item.Properties()));
6.代码部分结束,Then came the texture pack production part:
在resources\assets\你的modid中的lang包中的en_us.jsonAdded the English name of the armor:
  "item.re8joymod.heisenhead":"H",
  "item.re8joymod.heisensuit":"H",
  "item.re8joymod.heisenlegg":"Hei",
  "item.re8joymod.heisenboots":"Heis",
在models\itemModel files for all armors are added to the package:
头盔
heisenhead.json
{
	"parent": "item/generated",
	"textures": {
		"layer0": "re8joymod:item/heisenhead"
	}
}
胸甲
heisensuit.json
{
	"parent": "item/generated",
	"textures": {
		"layer0": "re8joymod:item/heisensuit"
	}
}
护腿
heisenlegg.json
{
	"parent": "item/generated",
	"textures": {
		"layer0": "re8joymod:item/heisenlegg"
	}
}
靴子
heisenboots.json
{
	"parent": "item/generated",
	"textures": {
		"layer0": "re8joymod:item/heisenboots"
	}
}
在textures\itemArmor's hand-held textures are added in :
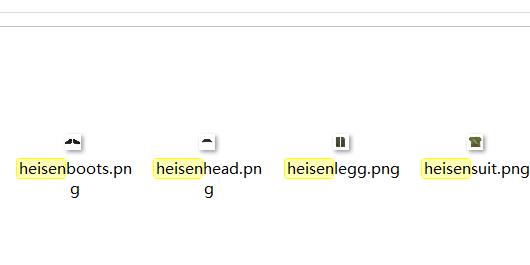
在textures\models\armorAdded post-wear textures for armor:
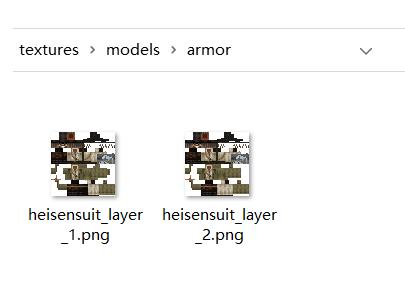
在assets\minecraft\textures\models\armorAlso add our post-wear texture in :

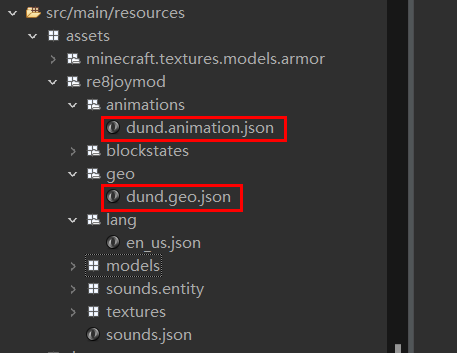
新建一个geo包和animation包,把第二步中的模型和动画文件分别放进去
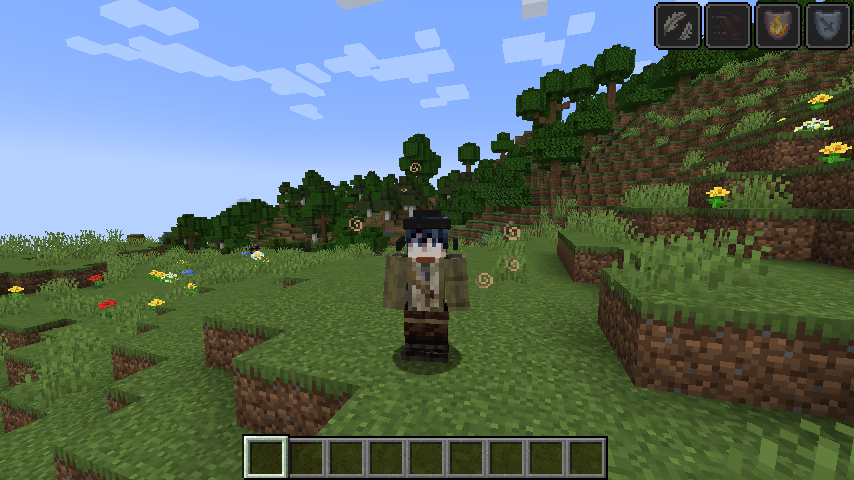
8.保存所有文件 -> 进行测试:
穿上盔甲,如果可以正常显示,That means we were successful!
边栏推荐
猜你喜欢

26. 如何判断一个对象是否存活?(或者GC对象的判定方法)?

ADSP21489工程中LDF文件配置详解

张成分析(spanning test):portfolio_analysis.Spanning_test

Jetson Nano 2GB Developer Kit Installation Instructions

ROS visualization of 3D target detection

直播 | 7.30 ApacheCon Asia 2022 IOT/IIOT专题,IoTDB PMC 乔嘉林担任出品人

多主复制下处理写冲突(1)-同步与异步冲突检测及避免冲突
数学建模学习(76):多目标线性规划模型(理想法、线性加权法、最大最小法),模型敏感性分析

EasyCVR视频广场切换通道,视频播放协议异常的问题修复

吴恩达机器学习系列课程笔记——第七章:正则化(Regularization)
随机推荐
吴恩达机器学习系列课程笔记——第十四章:降维(Dimensionality Reduction)
安装部署 Kubernetes 仪表板(Dashboard)
投资组合分析:portfolio_analysis.Tangenvy_portfolio(切点组合)
开放原子开源峰会落幕,百度超级链牵头成立XuperCore开源工作组
Deep Blue Academy - Visual SLAM Lecture Fourteen - Chapter 5 Homework
高等数学(第七版)同济大学 总习题三(前10题) 个人解答
多主复制的适用场景(1)-多IDC
Research Notes (8) Deep Learning and Its Application in WiFi Human Perception (Part 1)
被大厂强制毕业,两个月空窗期死背八股文,幸好上岸,不然房贷都还不上了
W25Q16 存储器(Flash)
Qt编写物联网管理平台49-设备模拟工具
PDF文件转换格式
8月1日“海豹数藏”将全网首发民族英雄林则徐《四行行书》数字藏品!
从事功能测试1年,裸辞1个月,找不到工作的“我”怎么办?
DOM系列之 click 延时解决方案
C# Thread IsBackground作用
吴恩达机器学习系列课程笔记——第八章:神经网络:表述(Neural Networks: Representation)
无主复制系统(2)-读写quorum
jetracer_pro_2GB AI Kit system installation instructions
Visual SLAM Lecture Fourteen - Lecture 13 Practice: Designing a SLAM system (the most detailed code debugging and running steps)