当前位置:网站首页>MySQL master-slave replication and read-write separation script - pro test available
MySQL master-slave replication and read-write separation script - pro test available
2022-07-31 00:23:00 【IT rat】
集群架构:

The cluster has one master, two slaves and one agent(amoeba).The so-called master-slave replication refers tomysqlThe slave server replicates data from the master server,保持同步.The so-called read-write separation means that the master is responsible for writing,从负责读,This architecture greatly improves the performance of the database.
Master-slave node deployment script:
#!/bin/bash
#function:mysql主从复制与读写分离
#author:tommypeng  20220726
#####root判断#####
if
  [  "$USER"  != "root"   ]
then
   echo "错误:非root用户,权限不足!"
  exit  0
fi
###############防火墙及SElinux############
systemctl stop firewalld && systemctl disable firewalld  && echo "防火墙已经关闭"
sed -i 's/SELINUX=.*/SELINUX=disabled/g'  /etc/selinux/config  && echo "关闭selinux"
###########清理旧版本###########
rpm -qa | grep mariadb >  /root/888.txt
rpm -qa | grep mysql  >>  /root/888.txt
PLIST=$(cat  /root/888.txt)
for  PKGNAME   in    $PLIST
do
      rpm -e --nodeps   $PKGNAME   &&  echo  "老旧包已经清理完毕"
done
rm -rf  /root/888.txt  &&  echo "临时文件已删除"
sleep 8
##############网络测试##############
ping   -c  3  www.baidu.com
if
  [ $? = 0 ]
  then
    echo "外网通讯良好!"
  else
    echo  "丫的你在逗我吗?网都没有安装个毛线!"
   exit  1
fi
###########安装##############
yum -y install mariadb mariadb-server #安装mariadb
#echo "The server is about to restart,Please rerun the script after rebooting"
#sleep 10
#reboot
############配置文件#############
function  master()
{
if [[ "$1" -eq "1" ]];then
cat >> /root/mysql.txt << EOF
server-id=1
log-bin=mysql-bin
binlog_format=MIXED
log-slave-updates=true
EOF
sed  -i '/\[mysqld\]/r   /root/mysql.txt'    /etc/my.cnf
#############删除临时文件##############
rm -rf  mysql.txt    &&  echo "临时文件已经删除"
##########启动数据库################
systemctl start mariadb
mysql  -e "grant all on *.* to [email protected]'%' identified by '123';"
mysql  -e "grant replication slave on *.* to [email protected]'%' identified by '123';"  ####Create an account on the main servertom并授权
mysql  -e   "grant all on *.* to [email protected]'%' identified by '123';"
mysql  -e "flush privileges;"
##mysql -u root  -e "create database wg character set utf8 collate utf8_bin;"  ##创建测试库
echo  "请记住master_log_file及Position的值,部署slave时需要用到"  &&  mysql -u root  -e "show master status;"
exit 0
fi
}
function  slave()
{
if [[ "$1" -eq "2" ]];then
read -p  "Enter the service from the serverID(不能为1,At the same time cannot be the same as other slave servers) "  ppo
cat >> /root/mysql.txt << EOF
server-id=$ppo
relay-log=mysql-relay
relay-log-index=slave-relay-bin.index
EOF
sed  -i '/\[mysqld\]/r   /root/mysql.txt'    /etc/my.cnf
#############删除临时文件##############
rm -rf  mysql.txt    &&  echo "临时文件已经删除"
##########启动数据库################
systemctl start mariadb
systemctl restart mariadb
mysql  -e   "grant all on *.* to [email protected]'%' identified by '123';"
mysql  -e "flush privileges;"
mysql -e "stop slave;"
read -p  "Please enter a primary serverIP地址:  "   ppi
read -p  "Please enter a primary serverPosition编号:  "   pos
read -p  "Please enter a primary servermaster_log_file编号:  "   mlf
mysql  -e  "CHANGE master to master_host='"$ppi"',master_user='tom',master_password='123',master_log_file='"$mlf"',master_log_pos=$pos;"
##echo "change master to master_host='"$ppi"',master_user='tom',master_password='123',master_log_file='"$mlf"',master_log_pos=$pos;"  |mysql
mysql   -e "start slave;"
exit 1
fi
}

PS3="选择改mysql服务器的角色,1为master或者2为slave:  "
select i in  master   slave   exit
do

case $i in
    master)
    master 1
    ;;
    slave)
    slave 2
    ;;
    exit)
    echo "The system exit"
    exit
esac

done
脚本运行中选择1Deployment is the main,选择2Deploy as from,选择3退出.When the script is running, please input relevant values according to the script prompts.
amoeba部署脚本:
Please upload the installation package to /root/下
#!/bin/bash
#function:mysql代理(Amoeba amoeba)
#author:tommypeng  20220727
#####root判断#####
if
  [  "$USER"  != "root"   ]
then
   echo "错误:非root用户,权限不足!"
  exit  0
fi
#####安装文件判断######
MOUNT_File="/root/amoeba-mysql-binary-2.2.0.tar.gz"
if
   [ ! -e  $MOUNT_File ]
   then
   echo "安装文件不存在,请上传安装文件到/root/,上传完成再重新运行该脚本"
exit 1
fi
MOUNT_File1="/root/jdk-8u20-linux-x64.rpm"
if
   [ ! -e  $MOUNT_File1 ]
   then
   echo "安装文件不存在,请上传安装文件到/root/,上传完成再重新运行该脚本"
exit 1
fi
###############防火墙及SElinux############
systemctl stop firewalld && systemctl disable firewalld  && echo "防火墙已经关闭"
sed -i 's/SELINUX=.*/SELINUX=disabled/g'  /etc/selinux/config  && echo "关闭selinux"
sleep 10
##############jdk#############
cd /root   &&  rpm -ivh jdk-8u20-linux-x64.rpm
cat >> /etc/profile << EOF
export  JAVA_HOME=/usr/java/jdk1.8.0_20/
export  CLASSPATH=$CLASSPATH:$JAVA_HOME/lib:$JAVA_HOME/jre/lib
export  PATH=$JAVA_HOME/lib:$JAVA_HOME/jre/bin:$PATH:$HOME/bin
export  AMOEBA_HOME=/usr/local/amoeba
export  PATH=$PATH:$AMOEBA_HOME/bin
EOF
source /etc/profile #重新加载
source /etc/profile #重新加载
#############安装amoeba#############
mkdir /usr/local/amoeba &&  chmod -R 755 /usr/local/amoeba #创建目录amoebaand change permissions
tar xzf amoeba-mysql-binary-2.2.0.tar.gz -C /usr/local/amoeba/ #解包到/usr/local/amoeba目录中
### /usr/local/amoeba/bin/
sed -i "58s/128/256/" /usr/local/amoeba/bin/amoeba
cd /usr/local/amoeba/bin/  &&  ./amoeba  #########Enter the execution directory to install
###################
cp  /usr/local/amoeba/conf/amoeba.xml   /usr/local/amoeba/conf/amoeba.xml.bak
sed -i "30s/root/amoeba/"   /usr/local/amoeba/conf/amoeba.xml
sed -i "32s/"password"></property>/"password">123456</property>/"   /usr/local/amoeba/conf/amoeba.xml
sed -i "115s/server1/master/"   /usr/local/amoeba/conf/amoeba.xml
sed -i "119s/readPool/slave/"   /usr/local/amoeba/conf/amoeba.xml

mv /usr/local/amoeba/conf/dbServers.xml   /usr/local/amoeba/conf/dbServers.xml.bak
read -p "请输入mysql主服务器的IP: "  masterIP
read -p "请输入mysql从服务器1的IP: "  slave1IP
read -p "请输入mysql从服务器2的IP: "  slave2IP
cat >> /usr/local/amoeba/conf/dbServers.xml  << EOF
<?xml version="1.0" encoding="gbk"?>

<!DOCTYPE amoeba:dbServers SYSTEM "dbserver.dtd">
<amoeba:dbServers xmlns:amoeba="http://amoeba.meidusa.com/">

                <!--
                        Each dbServer needs to be configured into a Pool,
                        If you need to configure multiple dbServer with load balancing that can be simplified by the following configuration:
                         add attribute with name virtual = "true" in dbServer, but the configuration does not allow the element with name factoryConfig
                         such as 'multiPool' dbServer
                -->

        <dbServer name="abstractServer" abstractive="true">
                <factoryConfig class="com.meidusa.amoeba.mysql.net.MysqlServerConnectionFactory">
                        <property name="manager">${defaultManager}</property>
                        <property name="sendBufferSize">64</property>
                        <property name="receiveBufferSize">128</property>

                        <!-- mysql port -->
                        <property name="port">3306</property>

                        <!-- mysql schema -->
     <!-- <property name="schema">test</property> -->

                        <!-- mysql user -->
                        <property name="user">test</property>

                       mysql password
                        <property name="password">123456</property>

                </factoryConfig>

                <poolConfig class="com.meidusa.amoeba.net.poolable.PoolableObjectPool">
                        <property name="maxActive">500</property>
                        <property name="maxIdle">500</property>
                        <property name="minIdle">10</property>
                        <property name="minEvictableIdleTimeMillis">600000</property>
                        <property name="timeBetweenEvictionRunsMillis">600000</property>
                        <property name="testOnBorrow">true</property>
                        <property name="testOnReturn">true</property>
                        <property name="testWhileIdle">true</property>
                </poolConfig>
        </dbServer>

        <dbServer name="master"  parent="abstractServer">
                <factoryConfig>
                        <!-- mysql ip -->
                        <property name="ipAddress">$masterIP</property>
                </factoryConfig>
        </dbServer>

        <dbServer name="slave1"  parent="abstractServer">
                <factoryConfig>
                        <!-- mysql ip -->
                        <property name="ipAddress">$slave1IP</property>
                </factoryConfig>
        </dbServer>
        </dbServer>

        <dbServer name="slave1"  parent="abstractServer">
                <factoryConfig>
                        <!-- mysql ip -->
                        <property name="ipAddress">$slave2IP</property>
                </factoryConfig>
        </dbServer>

        <dbServer name="slaves" virtual="true">
                <poolConfig class="com.meidusa.amoeba.server.MultipleServerPool">
                        <!-- Load balancing strategy: 1=ROUNDROBIN , 2=WEIGHTBASED , 3=HA-->
                        <property name="loadbalance">1</property>

                        <!-- Separated by commas,such as: server1,server2,server1 -->
                        <property name="poolNames">slave1, slave2</property>
                </poolConfig>
        </dbServer>
EOF
/usr/local/amoeba/bin/amoeba start&   ###后台启动
yum -y install mariadb mariadb-server  $$  echo  "mariadb安装成功"
echo "请通过命令mysql -utest -p123 -h $masterIP|$slave1IP|$slave2IP 访问测试"
The relevant server needs to be entered during the script runningIP.
Please download the installation package required by the proxy script from the author's personal website:
边栏推荐
- 【愚公系列】2022年07月 Go教学课程 015-运算符之赋值运算符和关系运算符
- Neural Network (ANN)
- DNS解析过程【访问网站】
- Meeting OA project pending meeting, all meeting functions
- ES6中 async 函数、await表达式 的基本用法
- Shell programming conditional statement test command Integer value, string comparison Logical test File test
- Game mall table establishment
- Dry goods | 4 tips for MySQL performance optimization
- 从两个易错的笔试题深入理解自增运算符
- MySQL数据库(基础)
猜你喜欢

如何在WordPress网站上添加导航菜单

Shell programming conditional statement test command Integer value, string comparison Logical test File test
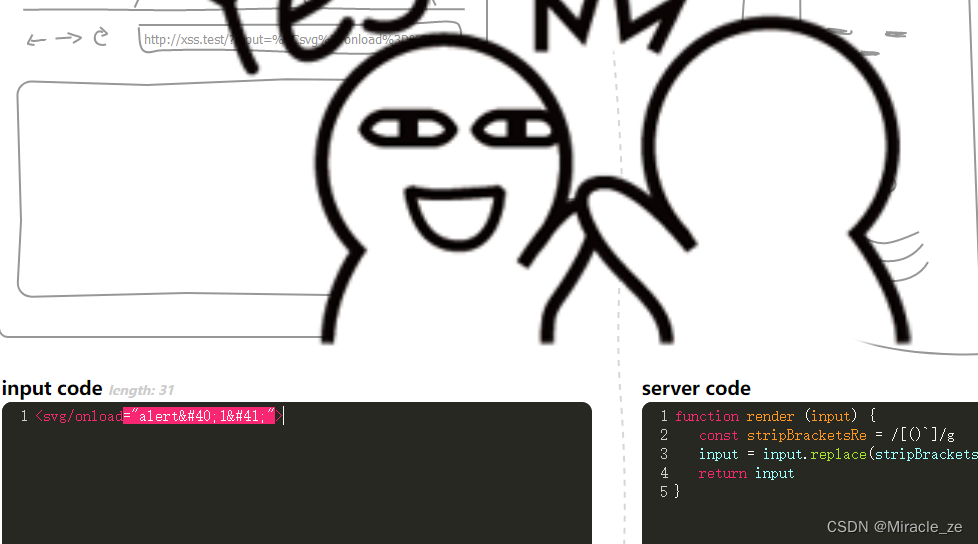
xss的绕过

Strict Mode for Databases
正则表达式密码策略与正则回溯机制绕过

@requestmapping注解的作用及用法

Steven Giesel recently published a 5-part series documenting his first experience building an application with the Uno Platform.
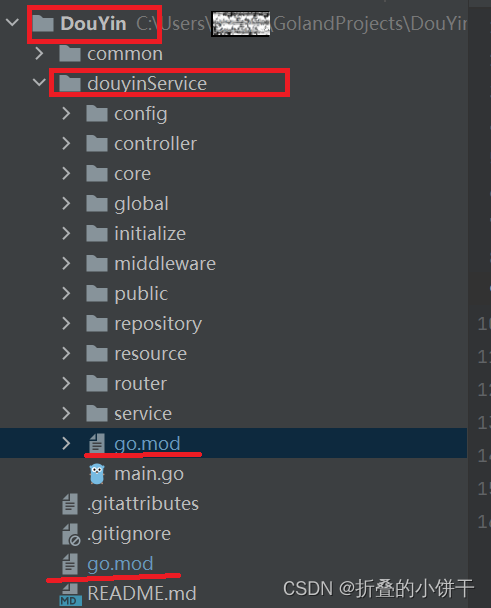
Error in go mode tidy go warning “all” matched no packages

MySQL数据库进阶篇
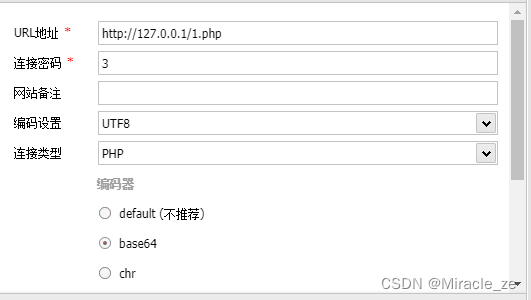
Asser uses ant sword to log in
随机推荐
MySQL table design for message queue to store message data
MySQL数据库的truncate与delete区别
Xss target drone training [success when pop-up window is realized]
Bypass of xss
MySql数据恢复方法个人总结
background对float的子元素无效
Error occurred while trying to proxy request项目突然起不来了
Axure Carousel
Regular expression password policy and regular backtracking mechanism bypass
Dry goods | 4 tips for MySQL performance optimization
What are the efficient open source artifacts of VSCode
joiplay模拟器不支持此游戏类型怎么解决
ES 中时间日期类型 “yyyy-MM-dd HHmmss” 的完全避坑指南
In-depth understanding of the auto-increment operator from two error-prone written test questions
Steven Giesel 最近发布了一个由5部分内容组成的系列,记录了他首次使用 Uno Platform 构建应用程序的经验。
MySQL数据库进阶篇
After writing business code for many years, I found these 11 doorways, which only experts know
[In-depth and easy-to-follow FPGA learning 15---------- Timing analysis basics]
Error in go mode tidy go warning “all” matched no packages
XSS相关知识