当前位置:网站首页>BeautifulSoup的使用
BeautifulSoup的使用
2022-07-27 10:27:00 【W_chuanqi】
[外链图片转存失败,源站可能有防盗链机制,建议将图片保存下来直接上传(img-xEKiUYGL-1658839921769)(data:image/gif;base64,R0lGODlhAQABAPABAP///wAAACH5BAEKAAAALAAAAAABAAEAAAICRAEAOw==)]
个人简介
作者简介:大家好,我是W_chuanqi,一个编程爱好者
个人主页:W_chaunqi
支持我:点赞+收藏️+留言
愿你我共勉:“若身在泥潭,心也在泥潭,则满眼望去均是泥潭;若身在泥潭,而心系鲲鹏,则能见九万里天地。”

文章目录
Beautiful Soup 的使用
今天我们来学习一个强大的解析工具——Beautiful Soup,其借助网页的结构和属性等特性来解析网页。有了它,我们不需要写复杂的正则表达式,只需要简单的几个语句,就可以完成网页中某个元素的提取。
话不多说,接下来就感受一下 Beautiful Soup 的强大之处吧。
1. Beautiful Soup 的简介
简单来说,Beautiful Soup 是 Python 的一个 HTML 或 XML 的解析库,我们用它可以方便地从网页中提取数据,其官方解释如下:
- Beautiful Soup 提供一些简单的、Python 式的函数来处理导航、搜索、修改分析树等功能。它是一个工具箱,通过解析文档为用户提供需要抓取的数据,因为简单,所以无须很多代码就可以写出一个完整的应用程序。
- Beautiful Soup 自动将输入文档转换为 Unicode 编码,将输出文档转换为 utf-8 编码。你不需要考虑编码方式,除非文档没有指定具体的编码方式,这时你仅仅需要说明一下原始编码方式就可以了。
- Beautiful Soup 已成为和 Ixml、htmlSlib 一样出色的 Python 解释器,为用户灵活提供不同的解析策略或强劲的速度。
总而言之,利用 Beautiful Soup 可以省去很多烦琐的提取工作,提高解析网页的效率。
2.解析器
实际上,Beautiful Soup 在解析时是依赖解析器的,它除了支持 Python 标准库中的 HTML解析器,还支持一些第三方解析器(例如 Ixml )。下表列出了 Beautiful Soup 支持的解析器。
| 解析器 | 使用方法 | 优势 | 劣势 |
|---|---|---|---|
| Python 标准库 | BeautifulSoup(markup, ‘html.parser’) | Python 的内置标准库、执行速度适中、文档容错能力强 | Python 2.7.3 或 3.2.2 前的版本中文容错能力差 |
| LXML HTML解析器 | BeautifulSoup(markup,‘1xml’) | 速度快、文档容错能力强 | 需要安装 C 语言库 |
| LXML XML解析器 | BeautifulSoup(markup,‘xml’) | 速度快、唯一支持 XML 的解析器 | 需要安装 C 语言库 |
| htmi5lib | BeautifulSoup(markup,‘htmlslib’) | 提供最好的容错性、以浏览器的方式解析文档、生成HTML格式的文档 | 速度慢、不依赖外部扩展 |
通过上表的对比可以看出,LXML 解析器有解析 HTML 和 XML 的功能,而且速度快、容错能力强,所以推荐使用它。
使用 LXML 解析器,只需在初始化 Beautiful Soup 时,把第二个参数改为 lxml 即可:
from bs4 import BeautifulSoup

soup =BeautifulSoup('<p>Hello</p>','lxml')
print(soup.p.string)
3.准备工作
在开始之前,请确保已经正确安装好 Beautiful Soup 和 lxml这两个库。
Beautiful Soup 直接使用pip 安装即可,命令如下:
pip install beautifulsoup4

另外,我们使用的是 lxml 这个解析器,所以还需要额外安装 lxml这个库,这个库我们在上一节的时侯已经安装好了。
4.基本使用
下面首先通过实例看看 Beautifiul Soup 的基本用法:
from bs4 import BeautifulSoup

html = ''' <html><head><title>The Dormouse's story</title></head> <body> <p class="title" name="dromouse"><b>The Dormouse's story</b></p> <p class="story">Once upon a time there were three little sisters; and their names were <a href="http://example.com/elsie" class="sister" id="Link1"><!-- Elsie --></a>, <a href="http://example.com/lacie" class="sister" id="link2">Lacie</a> and <a href="http://example.com/tillie" class="sister" id="link3">Tillie </a>; and they lived at the bottom of a well.</p> <p class="story">...</p> '''
soup = BeautifulSoup(html, 'lxml')
print(soup.prettify())
print(soup.title.string)
运行结果如下:

这里首先声明一个变量 html,这是一个 HTML 字符串。但是需要注意的是,它并不是一个完整的 HTML 字符串,因为 body 节点和 html 节点都没有闭合。接着,我们将它当作第一个参数传给BeautifulSoup 对象,该对象的第二个参数为解析器的类型(这里使用 lxml),此时就完成了BeautifulSoup 对象的初始化。然后,将这个对象赋值给 soup 变量。
之后就可以调用 soup 的各个方法和属性解析这串 HTML 代码了。
首先,调用 prettify方法。这个方法可以把要解析的字符串以标准的缩进格式输出。这里需要注意的是,输出结果里包含 body 和 html 节点,也就是说对于不标准的 HTML 字符串 BeautifulSoup,可以自动更正格式。这一步不是由 prettify方法完成的,而是在初始化 BeautifulSoup的时候就完成了。
然后调用 soup.title.string,这实际上是输出 HTML 中 title 节点的文本内容。所以,通过soup.title 选出 HTML 中的 title 节点,再调用 string属性就可以得到 title 节点里面的文本了。通过简单调用几个属性就完成了文本提取,非常方便。
5.节点选择器
直接调用节点的名称即可选择节点,然后调用 string属性就可以得到节点内的文本了。这种选择方式速度非常快,当单个节点结构层次非常清晰时,可以选用这种方式来解析。下面再用一个例子详细说明选择节点的方法:
from bs4 import BeautifulSoup

html = ''' <html><head><title>The Dormouse's story</title></head> <body> <p class="title" name="dromouse"><b>The Dormouse's story</b></p> <p class="story">Once upon a time there were three little sisters; and their names were <a href="http://example.com/elsie" class="sister" id="Link1"><!-- Elsie --></a>, <a href="http://example.com/lacie" class="sister" id="link2">Lacie</a> and <a href="http://example.com/tillie" class="sister" id="link3">Tillie </a>; and they lived at the bottom of a well.</p> <p class="story">...</p> '''
soup = BeautifulSoup(html, 'lxml')
print(soup.title)
print(type(soup.title))
print(soup.title.string)
print(soup.head)
print(soup.p)
运行结果:

这里依然使用刚才的 HTML 代码,首先打印出 title 节点的选择结果,输出结果正是 title节点及里面的文字内容。接下来,输出 title 节点的类型,是 bs4.element.Tag,这是 Beautiful Soup 中一个重要的数据结构,经过选择器选择的结果都是这种 Tag 类型。Tag 具有一些属性,例如 string属性,调用该属性可以得到节点的文本内容,所以类型的输出结果正是节点的文本内容。
输出文本内容后,又尝试选择了 head 节点,结果也是节点加其内部的所有内容。最后,选择了p节点。不过这次情况比较特殊,因为结果是第一个p节点的内容,后面的几个p节点并没有选取到。也就是说,当有多个节点时,这种选择方式只会选择到第一个匹配的节点,后面的其他节点都会忽略。
6.提取信息
前面演示了通过调用 sting属性获取文本的值,那么如何获取节点名称?如何获取节点属性的值呢?接下来我们就统一梳理一下信息的提取方式。
获取名称
利用 name 属性可以获取节点的名称。还是以上面的文本为例,先选取 tithe 节点,再调用name属性就可以得到节点名称:
print(soup.title.name)
运行结果:

获取属性
一个节点可能有多个属性,例如 id 和 class 等,选择这个节点元素后,可以调用 attrs 获取站所有属性:
print(soup.p.attrs)
print(soup.p.attrs['name'])
运行结果:

可以看到,调用 attrs 属性的返回结果是字典形式,包括所选择节点的所有属性和属性值。因此要获取 name 属性,相当于从字典中获取某个键值,只需要用中括号加属性名就可以了。例如通过attrs[‘name’]获取 name 属性。
其实这种方式有点烦琐,还有一种更为简单的获取属性值的方式:不用写 attrs,直接在节点元素后面加中括号,然后传入属性名就可以了。样例如下:
print(soup.p['name'])
print(soup.p['class'])
运行结果如下:

这里需要注意,有的返回结果是字符串,有的返回结果是由字符串组成的列表。例如,name 属性的值是唯一的,于是返回结果就是单个字符串。而对于 class 属性,一个节点元素可能包含多个class,所以返回的就是列表。在实际处理过程中,我们要注意判断类型。
获取内容
这点在前面也提到过,可以利用 string 属性获取节点元素包含的文本内容,例如用如下实例获取第一个p节点的文本:
print(soup.p.string)
运行结果如下:

再次注意一下,这里选取的p节点是第一个p节点,获取的文本也是第一个p节点里面的文本。
嵌套选择
在上面的例子中,我们知道所有返回结果都是bs4.element.Tag类型,Tag类型的对象同样可以继续调用节点进行下一步的选择。例如,我们获取了 head 节点,就可以继续调用 head选取其内部的节点:
from bs4 import BeautifulSoup

html = ''' <html><head><title>The Dormouse's story</title></head> <body> '''
soup = BeautifulSoup(html, 'lxml')
print(soup.head.title)
print(type(soup.head.title))
print(soup.head.title.string)
运行结果如下:

运行结果的第一行是调用 head 之后再调用 title,而选择的 title 节点。第二行打印出了它的类型,可以看到,仍然是 bs4.element.Tag 类型。也就是说,我们在 Tag 类型的基础上再次选择,得到的结果依然是 Tag 类型。既然每次返回的结果都相同,那么就可以做嵌套选择了。
最后一行结果输出了 title 节点的 string 属性,也就是节点里的文本内容。
7.关联选择
在做选择的过程中,有时不能一步就选到想要的节点,需要先选中某一个节点,再以它为基准选子节点、父节点、兄弟节点等,下面就介绍一下如何选择这些节点。
子节点和子孙节点
选取节点之后,如果想要获取它的直接子节点,可以调用 contents 属性,实例如下:
from bs4 import BeautifulSoup

html = ''' <html> <head> <title>The Dormouse's story</title> </head> <body> <p class="story">Once upon a time there were three little sisters; and their names were <a href="http://example.com/elsie" class="sister" id="Link1"> <span>Elsie</span> </a> <a href="http://example.com/lacie" class="sister" id="link2">Lacie</a> and <a href="http://example.com/tillie" class="sister" id="link3">Tillie </a> and they lived at the bottom of a well. </p> <p class="story">...</p> '''
soup = BeautifulSoup(html, 'lxml')
print(soup.p.contents)
运行结果如下:

可以看到,返回结果是列表形式。p节点里既包含文本,又包含节点,这些内容会以列表形式统一返回。
需要注意的是,列表中的每个元素都是p节点的直接子节点。像第一个a节点里面包含的 span节点,就相当于孙子节点,但是返回结果并没有把 span 节点单独选出来。所以说,contents 属性得到的结果是直接子节点组成的列表。
同样,我们可以调用 children 属性得到相应的结果:
from bs4 import BeautifulSoup

html = ''' <html> <head> <title>The Dormouse's story</title> </head> <body> <p class="story">Once upon a time there were three little sisters; and their names were <a href="http://example.com/elsie" class="sister" id="Link1"> <span>Elsie</span> </a> <a href="http://example.com/lacie" class="sister" id="link2">Lacie</a> and <a href="http://example.com/tillie" class="sister" id="link3">Tillie </a> and they lived at the bottom of a well. </p> <p class="story">...</p> '''
soup = BeautifulSoup(html, 'lxml')
print(soup.p.children)
for i, child in enumerate(soup.p.children):
    print(i, child)
运行结果如下:

还是同样的 HTML 文本,这里调用 children 属性来选择,返回结果是生成器类型。然后,我们用 for 循环输出了相应的内容。
如果要得到所有的子孙节点,则可以调用 descendants 属性:
from bs4 import BeautifulSoup

html = ''' <html> <head> <title>The Dormouse's story</title> </head> <body> <p class="story">Once upon a time there were three little sisters; and their names were <a href="http://example.com/elsie" class="sister" id="Link1"> <span>Elsie</span> </a> <a href="http://example.com/lacie" class="sister" id="link2">Lacie</a> and <a href="http://example.com/tillie" class="sister" id="link3">Tillie </a> and they lived at the bottom of a well. </p> <p class="story">...</p> '''
soup = BeautifulSoup(html, 'lxml')
print(soup.p.descendants)
for i, child in enumerate(soup.p.descendants):
    print(i, child)
运行结果如下:

你会发现,此时返回结果还是生成器。遍历输出一下可以看到,这次的输出结果中就包含了 span节点,因为descendants 会递归查询所有子节点,得到所有的子孙节点。
父节点和祖先节点
如果要获取某个节点元素的父节点,可以调用 parent 属性:
from bs4 import BeautifulSoup

html = ''' <html> <head> <title>The Dormouse's story</title> </head> <body> <p class="story">Once upon a time there were three little sisters; and their names were <a href="http://example.com/elsie" class="sister" id="Link1"> <span>Elsie</span> </a> </p> <p class="story">...</p> '''
soup = BeautifulSoup(html, 'lxml')
print(soup.a.parent)
运行结果如下:

这里我们选择的是第一个 a 节点的父节点元素。很明显,a 节点的父节点是 p 节点,所以输出结果便是 p 节点及其内部内容。
需要注意,这里输出的仅仅是 a 节点的直接父节点,而没有再向外寻找父节点的祖先节点。如果想获取所有祖先节点,可以调用 parents 属性:
from bs4 import BeautifulSoup

html = ''' <html> <head> <title>The Dormouse's story</title> </head> <body> <p class="story">Once upon a time there were three little sisters; and their names were <a href="http://example.com/elsie" class="sister" id="Link1"> <span>Elsie</span> </a> </p> <p class="story">...</p> '''
soup = BeautifulSoup(html, 'lxml')
print(type(soup.a.parents))
print(list(enumerate(soup.a.parents)))
运行结果如下:

可以发现,返回结果是生成器类型。这里用列表输出了其索引和内容,列表中的元素就是a节点的祖先节点。
兄弟节点
子节点和父节点的获取方式已经介绍完毕,如果要获取同级节点,也就是兄弟节点,又该怎么办呢?实例如下:
from bs4 import BeautifulSoup

html = ''' <html> <head> <title>The Dormouse's story</title> </head> <body> <p class="story">Once upon a time there were three little sisters; and their names were <a href="http://example.com/elsie" class="sister" id="Link1"> <span>Elsie</span> </a> Hello <a href="http://example.com/lacie" class="sister" id="link2">Lacie</a> and <a href="http://example.com/tillie" class="sister" id="link3">Tillie </a> and they lived at the bottom of a well. </p> '''
soup = BeautifulSoup(html, 'lxml')
print('Next Sibling', soup.a.next_sibling)
print('Prev Sibling', soup.a.previous_sibling)
print('Next Siblings', list(enumerate(soup.a.next_siblings)))
print('Prev Siblings', list(enumerate(soup.a.previous_siblings)))
运行结果如下:

可以看到,这里调用了 4 个属性。next_sibling 和 previous_sibling 分别用于获取节点的下一个和上一个兄弟节点,next_siblings 和 previous_siblings则分别返回后面和前面的所有兄弟节点。
提取信息
前面讲过关联元素节点的选择方法,如果想要获取它们的一些信息,例如文本、属性等,也可以用同样的方法,实例如下:
from bs4 import BeautifulSoup

html = ''' <html> <head> <title>The Dormouse's story</title> </head> <body> <p class="story">Once upon a time there were three little sisters; and their names were <a href="http://example.com/elsie" class="sister" id="Link1">Bok</a><a href="http://example.com/lacie" class="sister" id="link2">Lacie</a> </p> '''
soup = BeautifulSoup(html, 'lxml')
print('Next Sibling:')
print(type(soup.a.next_sibling))
print(soup.a.next_sibling)
print(soup.a.next_sibling.string)
print('Parent:')
print(type(soup.a.parents))
print(list(soup.a.parents)[0])
print(list(soup.a.parents)[0].attrs['class'])
运行结果如下:

如果返回结果是单个节点,那么可以直接调用 string、attrs 等属性获得其文本和属性;如果返回结果是包含多个节点的生成器,则可以先将结果转为列表,再从中取出某个元素,之后调用string、attrs 等属性即可获取对应节点的文本和属性。
8.方法选择器
前面讲的选择方法都是基于属性来选择的,这种方法虽然快,但是在进行比较复杂的选择时,会变得比较烦琐,不够灵活。幸好,Beautiful Soup 还为我们提供了一些查询方法,例如 find_all和 find等,调用这些方法,然后传人相应的参数,就可以灵活查询了。
find_all
find_all,顾名思义就是查询所有符合条件的元素,可以给它传入一些属性或文本来得到符合条件的元素,功能十分强大。它的 API如下:
find_all(name, attrs , recursive , text ,**kwargs)
name
我们可以根据 name 参数来查询元素,下面用一个实例来感受一下:
from bs4 import BeautifulSoup
html = ''' <div class="panel"> <div class="panel-heading"> <h4>Hello</h4> </div> <div class="panel-body"> <ul class="list" id="list-1"> <li class="element">Foo</li> <li class="element">Bar</li> <li class="element">Jay</li> </ul> <ul class="list list-small" id="list-2"> <li class="element">Foo</li> <li class="element">Bar</li> </ul> </div> </div> '''
soup = BeautifulSoup(html, 'lxml')
print(soup.find_all(name='ul'))
print(type(soup.find_all(name='ul')[0]))
运行结果如下:

这里我们调用了 find_all 方法,向其中传人 name 参数,其参数值为 u1,意思是查询所有u1节点。返回结果是列表类型,长度为 2,列表中每个元素依然都是 bs4.element.Tag类型。
因为都是 Tag 类型,所以依然可以进行嵌套查询。下面这个实例还是以同样的文本为例,先查询所有 ul节点,查出后再继续查询其内部的 li 节点:
for ul in soup.find_all(name='ul'):
    print(ul.find_all(name='li'))
运行结果如下:

返回结果是列表类型,列表中的每个元素依然是 Tag 类型。
接下来我们就可以遍历每个 li 节点,并获取它的文本内容了。
for ul in soup.find_all(name='ul'):
    print(ul.find_all(name='li'))
    for li in ul.find_all(name='li'):
        print(li.string)
运行结果如下:

attrs
除了根据节点名查询,我们也可以传入一些属性进行查询,下面用一个实例感受一下;
from bs4 import BeautifulSoup
html = ''' <div class="panel"> <div class="panel-heading"> <h4>Hello</h4> </div> <div class="panel-body"> <ul class="list" id="list-1" name="elements"> <li class="element">Foo</li> <li class="element">Bar</li> <li class="element">Jay</li> </ul> <ul class="list list-small" id="list-2"> <li class="element">Foo</li> <li class="element">Bar</li> </ul> </div> </div> '''
soup = BeautifulSoup(html, 'lxml')
print(soup.find_all(attrs={
    'id': 'list-1'}))
print(soup.find_all(attrs={
    'name': 'elements'}))
运行结果如下:
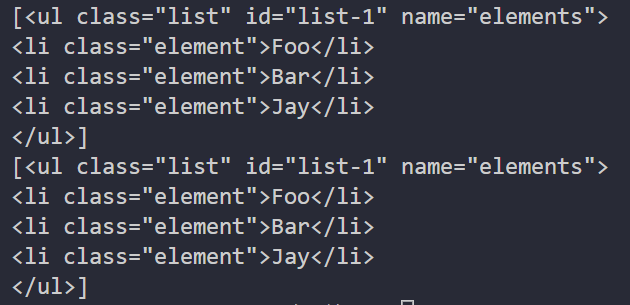
这里查询的时候,传人的是 attrs 参数,其属于字典类型。例如,要查询 id 为 list-1 的节点,就可以传人 attrs={‘id’: ‘list-1’}作为查询条件,得到的结果是列表形式,列表中的内容就是符合id 为list-1 这一条件的所有节点。在上面的实例中,符合条件的元素个数是 1,所以返回结果是长度为1 的列表。
对于一些常用的属性,例如 id 和 class 等,我们可以不用 attrs 传递。例如,要查询id为list-1的节点,可以直接传入 id 这个参数。还是使用上面的文本,只不过换一种方式来查询:
from bs4 import BeautifulSoup
html = ''' <div class="panel"> <div class="panel-heading"> <h4>Hello</h4> </div> <div class="panel-body"> <ul class="list" id="list-1" name="elements"> <li class="element">Foo</li> <li class="element">Bar</li> <li class="element">Jay</li> </ul> <ul class="list list-small" id="list-2"> <li class="element">Foo</li> <li class="element">Bar</li> </ul> </div> </div> '''
soup = BeautifulSoup(html, 'lxml')
print(soup.find_all(id='list-1'))
print(soup.find_all(class_='element'))
运行结果如下:

这里直接传入id=‘list-1’ ,就可以查询 id 为list-1的节点元素了。而对于 class来说,由于 在Python 里是一个关键字,所以后面需要加一个下划线,即class_=‘element’,返回结果依然是Tag对象组成的列表。
text
text参数可以用来匹配节点的文本,其传人形式可以是字符串,也可以是正则表达式对象,实倒如下:
from bs4 import BeautifulSoup
import re
html = ''' <div class="panel"> <div class="panel-body"> <a>Hello,this is a link</a> <a>Hello,this is a link,too</a> </div> </div> '''
soup = BeautifulSoup(html, 'lxml')
print(soup.find_all(text=re.compile('link')))
运行结果如下:

这里有两个a节点。其内部包含文本信息。这里在 find_all 方法中传人 text 参数,该参数为正则表达式对象,返回结果是由所有与正则表达式相匹配的节点文本组成的列表。
find
除了 find_all 方法,还有 find 方法也可以查询符合条件的元素,只不过 find 方法返回的是单个元素,也就是第一个匹配的元素,而 find_all 会返回由所有匹配的元素组成的列表。实例如下:
from bs4 import BeautifulSoup
html = ''' <div class="panel"> <div class="panel-heading"> <h4>Hello</h4> </div> <div class="panel-body"> <ul class="list" id="list-1"> <li class="element">Foo</li> <li class="element">Bar</li> <li class="element">Jay</li> </ul> <ul class="list list-small" id="list-2"> <li class="element">Foo</li> <li class="element">Bar</li> </ul> </div> </div> '''
soup = BeautifulSoup(html, 'lxml')
print(soup.find(name='ul'))
print(type(soup.find(name='ul')))
print(soup.find(class_='list'))
运行结果如下: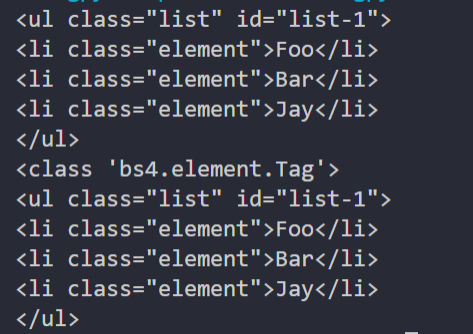
可以看到,返回结果不再是列表形式,而是第一个匹配的节点元素,类型依然是 Tag 类型。
另外还有许多查询方法,用法与介绍过的 find_all、find 完全相同,区别在于查询范围不同,在此做一下简单的说明。
- find_parents 和 find_parent:前者返回所有祖先节点,后者返回直接父节点。
- find_next_siblings 和 find_next_sibling:前者返回后面的所有兄弟节点,后者返回后面第一个兄弟节点。
- find_previous_siblings 和 find_ previous_sibling:前者返回前面的所有兄弟节点,后者返回前面第一个兄弟节点。
- find_all_ next和find_next:前者返回节点后面所有符合条件的节点,后者返回后面第一个符合条件的节点。
- find_ all_previous 和 find _previous:前者返回节点前面所有符合条件的节点,后者返回前面第一个符合条件的节点。
9. CSS 选择器
Beautiful Soup 还提供了另外一种选择器——CSS 选择器。如果你熟悉 Web 开发,那么肯定对 CSS选择器不陌生。
使用 CSS 选择器,只需要调用 select 方法,传人相应的 CSS 选择器即可。我们用一个实例感受一下:
from bs4 import BeautifulSoup
html = ''' <div class="panel"> <div class="panel-heading"> <h4>Hello</h4> </div> <div class="panel-body"> <ul class="list" id="list-1"> <li class="element">Foo</li> <li class="element">Bar</li> <li class="element">Jay</li> </ul> <ul class="list list-small" id="list-2"> <li class="element">Foo</li> <li class="element">Bar</li> </ul> </div> </div> '''
soup = BeautifulSoup(html, 'lxml')
print(soup.select('.panel .panel-heading'))
print(soup.select('ul li'))
print(soup.select('#list-2 .element'))
print(type(soup.select('ul')[0]))
运行结果如下:

这里我们用了 3 次 CSS 选择器,返回结果均是由符合 CSS 选择器的节点组成的列表。例如select(‘ul li’)表示选择所有 u1 节点下面的所有 li 节点,结果便是所有 li 节点组成的列表。
在最后一句中,我们打印输出了列表中元素的类型。可以看到,类型依然是 Tag 类型。
嵌套选择
select 方法同样支持嵌套选择,例如先选择所有 ul节点,再遍历每个ul节点,选择其1i 节点,实例如下:
from bs4 import BeautifulSoup
html = ''' <div class="panel"> <div class="panel-heading"> <h4>Hello</h4> </div> <div class="panel-body"> <ul class="list" id="list-1"> <li class="element">Foo</li> <li class="element">Bar</li> <li class="element">Jay</li> </ul> <ul class="list list-small" id="list-2"> <li class="element">Foo</li> <li class="element">Bar</li> </ul> </div> </div> '''
soup = BeautifulSoup(html, 'lxml')
for ul in soup.select('ul'):
    print(ul.select('li'))
运行结果如下:

可以看到,正常输出了每个 ul节点下所有 li 节点组成的列表。
获取属性
既然知道节点是Tag 类型,于是获取属性依然可以使用原来的方法。还是基于上面的 HTML 文本这里尝试获取每个 ul 节点的 id 属性:
from bs4 import BeautifulSoup
html = ''' <div class="panel"> <div class="panel-heading"> <h4>Hello</h4> </div> <div class="panel-body"> <ul class="list" id="list-1"> <li class="element">Foo</li> <li class="element">Bar</li> <li class="element">Jay</li> </ul> <ul class="list list-small" id="list-2"> <li class="element">Foo</li> <li class="element">Bar</li> </ul> </div> </div> '''
soup = BeautifulSoup(html, 'lxml')
for ul in soup.select('ul'):
    print(ul['id'])
    print(ul.attrs['id'])
运行结果如下:

可以看到,直接将属性名传入中括号和通过 attrs 属性获取属性值,都是可以成功获取属性的。
获取文本
要获取文本,当然也可以用前面所讲的 string属性。除此之外,还有一个方法,就是get_text,实例如下:
from bs4 import BeautifulSoup
html = ''' <div class="panel"> <div class="panel-heading"> <h4>Hello</h4> </div> <div class="panel-body"> <ul class="list" id="list-1"> <li class="element">Foo</li> <li class="element">Bar</li> <li class="element">Jay</li> </ul> <ul class="list list-small" id="list-2"> <li class="element">Foo</li> <li class="element">Bar</li> </ul> </div> </div> '''
soup = BeautifulSoup(html, 'lxml')
for li in soup.select('li'):
    print('Get Text:', li.get_text())
    print('String:', li.string)
运行结果如下:

二者的实现效果完全一致,都可以获取节点的文本值。
10.总结
下面我们来总结一下:
- 推荐使用 LXML 解析库,必要时使用 html.parser。
- 节点选择器筛选功能弱,但是速度快。
- 建议使用 find、find_all 方法查询匹配的单个结果或者多个结果。
- 如果对 CSS 选择器熟悉,则可以使用 select 选择法。
边栏推荐
- Beijing publicized the spot check of 8 batches of children's shoes, and qierte was listed as unqualified
- Tensorflow notes - basic functions and concepts
- A few simple steps to realize the sharing network for industrial raspberry pie
- 学习笔记-uni-app
- Codeforces Round #807 (Div 2.) AB
- Tdengine helps Siemens' lightweight digital solution simicas simplify data processing process
- [Linux] install redis
- Detailed analysis of graphs of echats diagram les miserables (chord diagram)
- ASP. Net core dependency injection journey: 1. Theoretical concepts
- 一起学习C语言:结构体(二)
猜你喜欢

How to build a data index system is the most effective. It will take you a quick start from 0 to 1

Share machine learning notes (PDF version) + practical projects (dataset + code)

深度解析:什么是Diffusion Model?

Compete for the key battle of stock users and help enterprises build a perfect labeling system - 01 live review

家庭琐事问题

MySQL must know and know!!! Reading this article is enough!!!
MySQL log management, backup and recovery

Li Hongyi_ Machine learning_ Assignment 4 (detailed explanation)_ HW4 Classify the speakers

A few simple steps to realize the sharing network for industrial raspberry pie
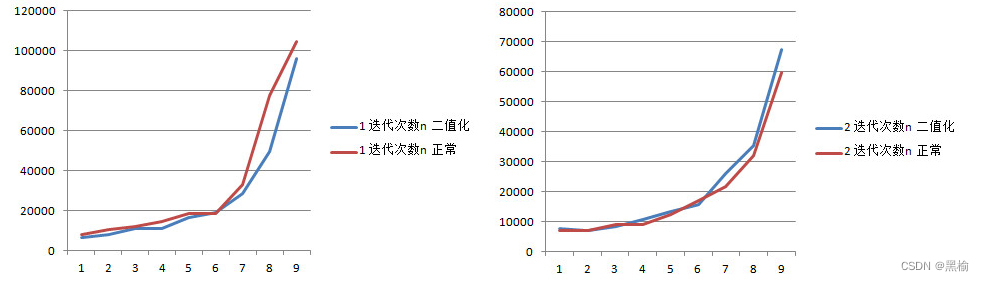
迭代次数和熵之间关系的一个验证试验
随机推荐
Overview of data security in fog computing
异构计算技术分析
YonBuilder赋能创新,用友第四届开发者大赛“金键盘奖”开启竞逐!
学习笔记-微信支付
tf.AUTO_ Function of reuse
TDengine 商业生态合作伙伴招募开启
The core concept and fast practice of shardingsphere
Apache cannot start in phpstudy
JVM -- Analysis of bytecode
学习笔记-uni-app
Tcp/ip protocol
Customized modification based on jira7.9.2
flask_ Output fields in restful (resources, fields, marshal, marshal_with)
Use__ slots__ And__ dict__ To save space (it's simply a qualitative leap, and leetcode's personal test is effective)
No Identifier specified for entity的解决办法
[Linux] install MySQL
荒野觅踪---寻找迭代次数
Analysis of new communication security risks brought by quantum computer and Countermeasures
[shutter] SharedPreferences
MySQL数据表的高级操作