当前位置:网站首页>Fluent rendering Principle & detailed explanation of three trees
Fluent rendering Principle & detailed explanation of three trees
2022-06-22 03:45:00 【One leaf floating boat】
One . Rendering principle
WidgetTree: Store rendered content 、 It's just a configuration data structure , Creation is very lightweight , Rebuild at any time during page refresh
Element It's separation WidgetTree And the middle layer of the real rendered object , WidgetTree Used to describe the corresponding Element attribute , Held at the same time Widget and RenderObject, Store context information , Use it to traverse the view tree , brace UI structure .
RenderObject ( Render tree ) Used for layout and drawing of application interface , Responsible for real rendering , Save the size of the element , Layout and other information , Instantiate a RenderObject It's very energy consuming
When the application starts Flutter Will traverse and create all Widget formation Widget Tree, By calling Widget Upper createElement() Method to create each Element object , formation Element Tree. Last call Element Of createRenderObject() Method to create each render object , To form a Render Tree.
that ,flutter Why is it designed like this ? Why should we make it into a complex three-tier structure ?
The answer is performance optimization . If you completely redraw every tiny operation UI, It will bring great performance overhead .flutter The three tree pattern design of can effectively improve the performance .
widget The reconstruction cost is very small , So it can be rebuilt at will , Because it will soon cause the page to redraw , And it doesn't always change . and renderObject If it is created and destroyed frequently, the cost will be high , It has a big impact on performance , So it caches all page elements , Only when these elements have changed do you redraw the page .
And judging whether the page has changed depends on element 了 , Every time widget When the change element Will compare the two before and after widget, Only when in a certain position Widget New Widget atypism , To recreate Element and widget; At other times, it will only be modified renderObject Configuration without performance consuming RenderObject The instantiation work of .

Subject notes
Widget Rendering principle of
be-all Widget Will create a Element object
Not all Widget Will be rendered independently ! Only inheritance RenderObjectWidget Will create RenderObject object !(Container Will not create RenderObject、column and padding These can be created RenderObject)
stay Flutter In the rendering process , There are three important trees !Flutter The engine is for Render Tree rendering !
Widget Trees 、Element Trees 、Render Trees
every last Widget Will create a Element object
Implicit call createElement Method .Element Join in Element In the tree , It will create RenderElement、ComponentElement( It is divided into StatefulElement and StatelessElement).
RenderElement Mainly to create RenderObject object , Inherit RenderObjectWidget Of Widget Will create RenderElement
- establish RanderElement
- Flutter Would call mount Method , call createRanderObject Method
StatefulElement Inherit ComponentElement,StatefulWidget Will create StatefulElement
- call createState Method , establish State
- take Widget Assign a value to state
- call state Of build Method And put yourself (Element) Spread it out ,build Inside context Namely Widget Of Element !
StatelessElement Inherit ComponentElement,StatelessWidget Will create StatelessElement
- mount Method -> firstBuild -> rebuild -> performBuild -> build -> _widget.build
- The main thing is to call build Method And put yourself (Element) Spread it out
1. widget
Widget functionally , It can be divided into three categories :
- Component Widget
Combination class Widget. This kind of Widget Mainly used to combine other more basic Widget, Get more complex functions Widget. Ordinary business development generally uses this kind of Widget.
- Render Widget
Rendering class Widget, This kind of Widget It's the core of the framework Widget, Will participate in the following layout and rendering process ; Only this type of Widget Will be drawn on the screen .
- Proxy Widget
proxy class Widget, It does not in itself involve Widget Internal logic , Just for the son Widget Provide some additional intermediate functions . for example :InheritedWidget Used to pass some status information to descendants Widget.
2.Element

Element functionally , It can be divided into two categories :
- ComponentElement
Combination class Element. This kind of Element Mainly used to combine other more basic Element, Get more complex functions Element. It's commonly used in development StatelessWidget and StatefulWidget Corresponding Element:StatelessElement and StatefulElement, Belong to ComponentElement.
- RenderObjectElement
Rendering class Element, Corresponding Renderer Widget, It's the core of the framework Element.RenderObjectElement It mainly includes LeafRenderObjectElement,SingleChildRenderObjectElement, and MultiChildRenderObjectElement. among ,LeafRenderObjectElement Corresponding Widget yes LeafRenderObjectWidget, No child node ;SingleChildRenderObjectElement Corresponding Widget yes SingleChildRenderObjectWidget, There is a child node ;MultiChildRenderObjectElement Corresponding Widget yes MultiChildRenderObjecWidget, There are multiple child nodes .
2.1 ComponentElement
2.1.1 Relationship with core elements
As mentioned above ,ComponentElement It is divided into StatelessElement and StatefulElement, These two kinds of Element With the core elements Widget as well as State The relationship between them is shown in the figure below .

Pictured :
- ComponentElement hold Parent Element And Child Element, This constitutes Element Tree.
- ComponentElement Hold its corresponding Widget, about StatefulElement, It also holds the corresponding State, To achieve Element and Widget Binding between .
- State Be being StatefulElement hold , Rather than being StatefulWidget hold , Easy State Reuse of . in fact ,State and StatefulElement It's one-to-one , Only when initializing StatefulElement when , To initialize the corresponding State And bind it to StatefulElement On .
2.1.2 ComponentElement The core processes
One Element The core operation process of is , establish 、 to update 、 Destroy three , These three processes are described below .
- establish
ComponentElement The creation of the origin and father Widget call inflateWidget, And then through mount Will be Element Mount to Element Tree, And recursively create child nodes .

- to update
By father Element Perform the operation of updating the child node (updateChild), Because of the old and the new Widget The type and Key There is no change , So it triggers Element Update operation for , And pass performRebuild Pass the update operation on . Its core function updateChild After that, I will introduce in detail .

- The destruction
By father Element Or a higher level node performs the operation of updating the child node (updateChild), Because of the old and the new Widget The type of or Key change , Or new Widget Removed , So it leads to Element Is turned inactive , And added to the inactive list , And is disabled in the next frame .

2.1.3 ComponentElement Core function
Following pair ComponentElement This paper introduces the core methods of the .
- inflateWidget
Element inflateWidget(Widget newWidget, dynamic newSlot) {
  final Key key = newWidget.key;
// Reuse GlobalKey Corresponding Element
  if (key is GlobalKey) {
    final Element newChild = _retakeInactiveElement(key, newWidget);
    if (newChild != null) {
      newChild._activateWithParent(this, newSlot);
      final Element updatedChild = updateChild(newChild, newWidget, newSlot);
      return updatedChild;
    }
  }
// establish Element, And mount it to Element Tree
  final Element newChild = newWidget.createElement();
  newChild.mount(this, newSlot);
  return newChild;
}
inflateWidget The main responsibilities are as follows :
- Judge new Widget Is there a GlobalKey, If there is GlobalKey, From Inactive Elements Find the corresponding in the list Element And reuse .
- No reusable Element, According to the new Widget Create the corresponding Element, And mount it to Element Tree.
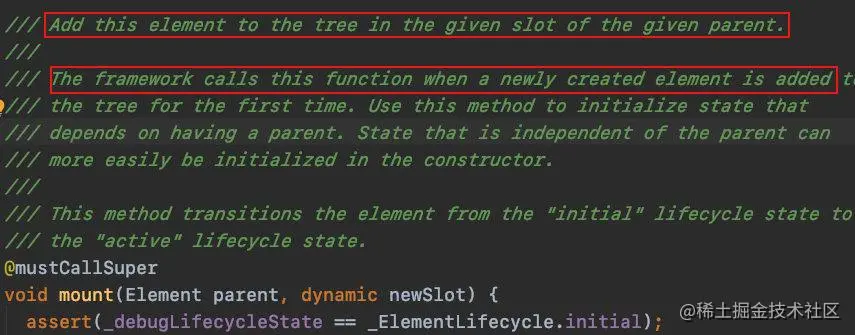
- mount
void mount(Element parent, dynamic newSlot) {
// to update _parent Equal attribute , Add elements to Element Tree
  _parent = parent;
  _slot = newSlot;
  _depth = _parent != null ? _parent.depth + 1 : 1;
  _active = true;
  if (parent != null) // Only assign ownership if the parent is non-null
    _owner = parent.owner;
// register GlobalKey
  final Key key = widget.key;
  if (key is GlobalKey) {
    key._register(this);
  }
  _updateInheritance();
}
When Element It was inserted for the first time Element Tree When , The method is called . Its main responsibilities are as follows :
- Will give Element Join in Element Tree, to update _parent,_slot And so on .
- If new Widget Yes GlobalKey, Will be Element Sign up for GlobalKey in , Its function will be analyzed in detail below .
- ComponentElement Of mount Function will call _firstBuild function , triggers Widget Create and update .
- performRebuild
@override
void performRebuild() {
// call build function , Generator Widget
  Widget built;
  built = build();
// According to the new son Widget Updater Element
  _child = updateChild(_child, built, slot);
}
performRebuild The main responsibilities are as follows :
- call build function , Generator Widget.
- According to the new son Widget Updater Element.
- update
@mustCallSuper
void update(covariant Widget newWidget) {
  _widget = newWidget;
}
The main responsibilities of this function are :
- The corresponding Widget Update to a new Widget.
- stay ComponentElement In various subclasses of , It also calls rebuild Functions trigger pairs Widget Reconstruction of .
- updateChild
@protected
Element updateChild(Element child, Widget newWidget, dynamic newSlot) {
  if (newWidget == null) {
// new Child Widget by null, Then return to null; If it's old Child Widget, Make it inactive
    if (child != null)
      deactivateChild(child);
    return null;
  }
  Element newChild;
  if (child != null) {
// new Child Widget Not for null, old Child Widget Not for null
    bool hasSameSuperclass = true;
    if (hasSameSuperclass && child.widget == newWidget) {
      if (child.slot != newSlot)
        updateSlotForChild(child, newSlot);
      newChild = child;
    } else if (hasSameSuperclass && Widget.canUpdate(child.widget, newWidget)){
//Key and RuntimeType identical , Use update to update
      if (child.slot != newSlot)
        updateSlotForChild(child, newSlot);
      child.update(newWidget);
      newChild = child;
    } else {
//Key or RuntimeType inequality , Make the old Child Widget not active , And for the new Child Widget Use inflateWidget
      deactivateChild(child);
      newChild = inflateWidget(newWidget, newSlot);
    }
  } else {
// new Child Widget Not for null, old Child Widget by null, For the new Child Widget Use inflateWidget
    newChild = inflateWidget(newWidget, newSlot);
  }

  return newChild;
}
The main responsibilities of this method are :
According to the new son Widget, Update the old sub Element, Or get a new one Element. Its core logic can be expressed in tables :
| newWidget == null | newWidget != null | |
|---|---|---|
| Child == null | return null | Return to new Element |
| Child != null | Remove the old ones Element, return null | If Widget Can update , Update the old sub Element, And back to it ; Otherwise, create a new sub Element And back to . |
The logic is summarized as follows :
- If newWidget by null, Then return to null, And if there are old ones Element Then remove it .
- If newWidget Not for null, used Child by null, Then create a new child Element, And back to it .
- If newWidget Not for null, used Child Not for null, Old and new son Widget Of Key and RuntimeType And so on , Call update Method updater Element And back to it .
- If newWidget Not for null, used Child Not for null, Old and new son Widget Of Key and RuntimeType It's not exactly the same , shows Widget Tree There are changes , At this point, remove the old sub Element, And create a new sub Element, And back to it .
2.2 RenderObjectElement
2.2.1 RenderObjectElement Relationship with core elements
RenderObjectElement With the core elements Widget And RenderObject The relationship between them is shown in the figure below :

Pictured :
- RenderObjectElement hold Parent Element, But you don't have to hold Child Element, There may be no Child Element, It's possible to hold a Child Element(Child), It's possible to hold multiple Child Element(Children).
- RenderObjectElement Hold the corresponding Widget and RenderObject, take Widget、RenderObject In series , Realized Widget、Element、RenderObject Binding between .
2.2.2 RenderObjectElement The core processes
Such as ComponentElement equally ,RenderObjectElement The core operation process of is , establish 、 to update 、 Destroy three , Next, we will introduce these three processes in detail .
- establish
RenderObjectElement The creation process and ComponentElement The creation process is basically the same , The biggest difference is ComponentElement stay mount after , Would call build To create a child Widget, and RenderObjectElement It is create and attach Its RenderObject.

- to update
RenderObjectElement Update process and ComponentElement The update process is basically the same , The biggest difference is ComponentElement Of update Function will call build function , Relaunchers Widget The construction of , and RenderObjectElement Call updateRenderObject For binding RenderObject updated .

- The destruction
RenderObjectElement The destruction process and ComponentElement The destruction process is basically the same . Also by the father Element Or a higher level node performs the operation of updating the child node (updateChild), This leads to the Element It's stopped , And added to the inactive list , And is disabled in the next frame . The difference is that unmount Element When , Would call didUnmountRenderObject Failure corresponds to RenderObject.

2.2.3 RenderObjectElement Core function
Following pair RenderObjectElement This paper introduces the core methods of the .
- inflateWidget
This function and ComponentElement Of inflateWidget The functions are exactly the same , I will not repeat it here .
- mount
void mount(Element parent, dynamic newSlot) {
  super.mount(parent, newSlot);
  _renderObject = widget.createRenderObject(this);
  attachRenderObject(newSlot);
  _dirty = false;
}
When and when to call the function ComponentElement The consistency of , When Element It was inserted for the first time Element Tree When , The method is called . Its main responsibilities are also related to ComponentElement The consistency of , Here are just different responsibilities , The responsibilities are as follows :
- call createRenderObject establish RenderObject, And use attachRenderObject take RenderObject Related to Element On .
- SingleChildRenderObjectElement Would call updateChild Update child nodes ,MultiChildRenderObjectElement Will call the inflateWidget Rebuild all the children Widget.
- performRebuild
@override
void performRebuild() {
// to update renderObject
  widget.updateRenderObject(this, renderObject);
  _dirty = false;
}
performRebuild The main responsibilities are as follows :
call updateRenderObject Update the corresponding RenderObject.
- update
@override
void update(covariant RenderObjectWidget newWidget) {
  super.update(newWidget);
  widget.updateRenderObject(this, renderObject);
  _dirty = false;
}
update The main responsibilities are as follows :
- The corresponding Widget Update to a new Widget.
- call updateRenderObject Update the corresponding RenderObject.
- updateChild
This function and ComponentElement Of inflateWidget The functions are exactly the same , I will not repeat it here .
- updateChildren
@protected
List<Element> updateChildren(List<Element> oldChildren, List<Widget> newWidgets, { Set<Element> forgottenChildren }) {
  int newChildrenTop = 0;
  int oldChildrenTop = 0;
  int newChildrenBottom = newWidgets.length - 1;
  int oldChildrenBottom = oldChildren.length - 1;

  final List<Element> newChildren = oldChildren.length == newWidgets.length ?
      oldChildren : List<Element>(newWidgets.length);

  Element previousChild;

//  Update sub from top down Element
  // Update the top of the list.
  while ((oldChildrenTop <= oldChildrenBottom) && (newChildrenTop <= newChildrenBottom)) {
    final Element oldChild = replaceWithNullIfForgotten(oldChildren[oldChildrenTop]);
    final Widget newWidget = newWidgets[newChildrenTop];
    if (oldChild == null || !Widget.canUpdate(oldChild.widget, newWidget))
      break;
    final Element newChild = updateChild(oldChild, newWidget, IndexedSlot<Element>(newChildrenTop, previousChild));
    newChildren[newChildrenTop] = newChild;
    previousChild = newChild;
    newChildrenTop += 1;
    oldChildrenTop += 1;
  }

//  Scan up from the bottom Element
  // Scan the bottom of the list.
  while ((oldChildrenTop <= oldChildrenBottom) && (newChildrenTop <= newChildrenBottom)) {
    final Element oldChild = replaceWithNullIfForgotten(oldChildren[oldChildrenBottom]);
    final Widget newWidget = newWidgets[newChildrenBottom];
    if (oldChild == null || !Widget.canUpdate(oldChild.widget, newWidget))
      break;
    oldChildrenBottom -= 1;
    newChildrenBottom -= 1;
  }

//  Scan the old ones Element In the middle of the list Element, preservation Widget Yes Key Of Element To oldKeyChildren, Other failures
  // Scan the old children in the middle of the list.
  final bool haveOldChildren = oldChildrenTop <= oldChildrenBottom;
  Map<Key, Element> oldKeyedChildren;
  if (haveOldChildren) {
    oldKeyedChildren = <Key, Element>{};
    while (oldChildrenTop <= oldChildrenBottom) {
      final Element oldChild = replaceWithNullIfForgotten(oldChildren[oldChildrenTop]);
      if (oldChild != null) {
        if (oldChild.widget.key != null)
          oldKeyedChildren[oldChild.widget.key] = oldChild;
        else
          deactivateChild(oldChild);
      }
      oldChildrenTop += 1;
    }
  }

//  according to Widget Of Key to update oldKeyChildren Medium Element.
  // Update the middle of the list.
  while (newChildrenTop <= newChildrenBottom) {
    Element oldChild;
    final Widget newWidget = newWidgets[newChildrenTop];
    if (haveOldChildren) {
      final Key key = newWidget.key;
      if (key != null) {
        oldChild = oldKeyedChildren[key];
        if (oldChild != null) {
          if (Widget.canUpdate(oldChild.widget, newWidget)) {
            // we found a match!
            // remove it from oldKeyedChildren so we don't unsync it later
            oldKeyedChildren.remove(key);
          } else {
            // Not a match, let's pretend we didn't see it for now.
            oldChild = null;
          }
        }
      }
    }

    final Element newChild = updateChild(oldChild, newWidget, IndexedSlot<Element>(newChildrenTop, previousChild));
    newChildren[newChildrenTop] = newChild;
    previousChild = newChild;
    newChildrenTop += 1;
  }

  newChildrenBottom = newWidgets.length - 1;
  oldChildrenBottom = oldChildren.length - 1;

  //  Update the bottom... From bottom to top Element..
  while ((oldChildrenTop <= oldChildrenBottom) && (newChildrenTop <= newChildrenBottom)) {
    final Element oldChild = oldChildren[oldChildrenTop];
    final Widget newWidget = newWidgets[newChildrenTop];
    final Element newChild = updateChild(oldChild, newWidget, IndexedSlot<Element>(newChildrenTop, previousChild));
    newChildren[newChildrenTop] = newChild;
    previousChild = newChild;
    newChildrenTop += 1;
    oldChildrenTop += 1;
  }

//  Get rid of the old ones Element All the rest of the list Element
  // Clean up any of the remaining middle nodes from the old list.
  if (haveOldChildren && oldKeyedChildren.isNotEmpty) {
    for (final Element oldChild in oldKeyedChildren.values) {
      if (forgottenChildren == null || !forgottenChildren.contains(oldChild))
        deactivateChild(oldChild);
    }
  }

  return newChildren;
}
The main responsibilities of this function are as follows :
- Reuse the child nodes that can be reused , And call updateChild Update child nodes .
- For child nodes that cannot be updated , call deactivateChild The child node is disabled .
The steps are as follows :
- Update sub from top down Element.
- Scan up from the bottom Element.
- Scan the old ones Element In the middle of the list Element, preservation Widget Yes Key Of Element To oldKeyChildren, Other failures .
- For the new son Element list , If it corresponds to Widget Of Key and oldKeyChildren Medium Key identical , to update oldKeyChildren Medium Element.
- Update the bottom... From bottom to top Element.
- Get rid of the old ones Element All the rest of the list Element.
2.1.3 Element Summary
This paper mainly introduces Element Related knowledge , This paper focuses on its classification , Life cycle , And core functions . The key points are as follows :
- maintain Element Tree, according to Widget Tree To update Element Tree, Include : Insertion of nodes 、 to update 、 Delete 、 Mobile, etc ; And act as a bond , take Widget as well as RenderObject Related to Element Tree On .
- Element It is divided into ComponentElement and RenderObjectElement, The former is responsible for the combination Element, The latter is responsible for rendering .
- Element The main reuse and update logic of is composed of its core functions updateChild Realization , See above for specific logic .
3. RenderObject
Through the last article Element Tree,Flutter Framework It's going to make a tree RenderObject Tree. Its main functions are as follows :
- Layout , from RenderBox Start , Yes RenderObject Tree Layout from top to bottom .
- draw , adopt Canvas object ,RenderObject You can draw yourself and what it is in RenderObject Tree Child nodes in .
- Click test ,RenderObject Pass click events from top to bottom , And through its location and behavior To control whether to respond to click events .
RenderObject Tree Is the underlying layout and rendering system . majority Flutter Developers don't have to deal directly with RenderObject Tree Interaction , But use Widget, then Flutter Framework It will build automatically RenderObject Tree.
3.1 RenderObject classification

As shown in the figure above ,RenderObject There are four main categories :
- RenderView
RenderView As a whole RenderObject Tree The root node , Represents the entire output interface .
- RenderAbstractViewport
RenderAbstractViewport Is a kind of interface , This kind of interface is the interface that only shows part of its contents RenderObject Design .
- RenderSliver
RenderSliver It's all about sliding RenderObject Base class , Its common subclasses are RenderSliverSingleBoxAdapter etc. .
- RenderBox
RenderBox Is an adoption 2D Cartesian coordinates RenderObject Base class of , General RenderOBject It's all inherited RenderBox, for example RenderStack etc. , It is also a general custom RenderObject Base class of .
3.2 RenderObject The core processes
RenderObject Mainly responsible for the layout , draw , And hit test , The following will explain these core processes respectively .
- Layout
The function corresponding to the layout is layout, This function is mainly used to transfer data from the parent node Constraints and parentUsesSize And so on , Layout this node and its child nodes .Constraints Is a constraint on node layout , The principle is ,Constraints Down ,Sizes Up , The parent node sets the location of this node . namely :
- One Widget Get... From its parent node Constraints, And pass it to the child nodes .
- The Widget Layout its child nodes .
- Final , This node tells its parent node its Sizes.
In the following article , We will describe this process in detail , At present, we only need to keep this principle in mind .
When the layout of this node depends on the layout of its child nodes ,parentUsesSize The value of is true, here , When child nodes are marked for layout , This node will also be marked as requiring layout . In this way, this node and child nodes will be rearranged when the next frame is drawn . conversely , If parentUsesSize The value of is false, You do not need to notify this node when child nodes are rearranged .
RenderObject Subclasses of should not directly override RenderObject Of layout function , But rewrite performResize and performLayout function , These two functions are the functions that are really responsible for the specific layout .
RenderObject in layout The source code of the function is as follows :
void layout(Constraints constraints, { bool parentUsesSize = false }) {
//1.  according to relayoutBoundary Determine if you need to rearrange
  RenderObject relayoutBoundary;
  if (!parentUsesSize || sizedByParent || constraints.isTight || parent is! RenderObject) {
    relayoutBoundary = this;
  } else {
    relayoutBoundary = (parent as RenderObject)._relayoutBoundary;
  }
  if (!_needsLayout && constraints == _constraints && relayoutBoundary == _relayoutBoundary) {
    return;
  }
  _constraints = constraints;
//2.  Update the name of the child node relayout boundary
  if (_relayoutBoundary != null && relayoutBoundary != _relayoutBoundary) {
    // The local relayout boundary has changed, must notify children in case
    // they also need updating. Otherwise, they will be confused about what
    // their actual relayout boundary is later.
    visitChildren(_cleanChildRelayoutBoundary);
  }
  _relayoutBoundary = relayoutBoundary;
//3.  Recalculate size , Rearrange
  if (sizedByParent) {
    try {
      performResize();
    } catch (e, stack) {
      _debugReportException('performResize', e, stack);
    }
  }
  try {
    performLayout();
    markNeedsSemanticsUpdate();
  } catch (e, stack) {
    _debugReportException('performLayout', e, stack);
  }
  _needsLayout = false;
  markNeedsPaint();
}
You can see from the source code ,relayoutBoundary yes layout An important parameter in a function . When the size of a component is changed , Its parent The size of may also be affected , Therefore, its parent node needs to be notified . If you iterate like this , Need to inform the whole tree RenderObject Tree Rearrange , It will inevitably affect the layout efficiency . therefore ,Flutter adopt relayoutBoundary take RenderObject Tree piecewise , If relayoutBoundary, Do not notify its parent node to rearrange , Because its size does not affect the size of the parent node . In this way, you only need to RenderObject Tree Rearrange a paragraph in , Improved layout efficiency . About relayoutBoundary It will be explained in detail in a later article , At present, we only need to know relayoutBoundary Will RenderObject Tree piecewise , Improve layout efficiency .
- draw
Draw the corresponding function as paint, Its main function is to make this RenderObject Hezi RenderObject Draw on Canvas On .RenderObject Subclasses of should override this function , Add the drawn logic to this function .
RenderObject Subclasses of RenderFlex Of paint The source of the function is as follows :
void paint(PaintingContext context, Offset offset) {
//1.  No overflow , Draw directly
  if (!_hasOverflow) {
    defaultPaint(context, offset);
    return;
  }

//2.  Empty , No need to draw
  // There's no point in drawing the children if we're empty.
  if (size.isEmpty)
    return;

//3.  according to clipBehavior Determine whether the overflow boundary part needs to be trimmed
  if (clipBehavior == Clip.none) {
    defaultPaint(context, offset);
  } else {
    // We have overflow and the clipBehavior isn't none. Clip it.
    context.pushClipRect(needsCompositing, offset, Offset.zero & size, defaultPaint, clipBehavior: clipBehavior);
  }

//4.  Draw overflow error prompt
  assert(() {
    // Only set this if it's null to save work. It gets reset to null if the
    // _direction changes.
    final List<DiagnosticsNode> debugOverflowHints = <DiagnosticsNode>[
      ErrorDescription(
        'The overflowing $runtimeType has an orientation of $_direction.'
      ),
      ErrorDescription(
        'The edge of the $runtimeType that is overflowing has been marked '
        'in the rendering with a yellow and black striped pattern. This is '
        'usually caused by the contents being too big for the $runtimeType.'
      ),
      ErrorHint(
        'Consider applying a flex factor (e.g. using an Expanded widget) to '
        'force the children of the $runtimeType to fit within the available '
        'space instead of being sized to their natural size.'
      ),
      ErrorHint(
        'This is considered an error condition because it indicates that there '
        'is content that cannot be seen. If the content is legitimately bigger '
        'than the available space, consider clipping it with a ClipRect widget '
        'before putting it in the flex, or using a scrollable container rather '
        'than a Flex, like a ListView.'
      ),
    ];

    // Simulate a child rect that overflows by the right amount. This child
    // rect is never used for drawing, just for determining the overflow
    // location and amount.
    Rect overflowChildRect;
    switch (_direction) {
      case Axis.horizontal:
        overflowChildRect = Rect.fromLTWH(0.0, 0.0, size.width + _overflow, 0.0);
        break;
      case Axis.vertical:
        overflowChildRect = Rect.fromLTWH(0.0, 0.0, 0.0, size.height + _overflow);
        break;
    }
    paintOverflowIndicator(context, offset, Offset.zero & size, overflowChildRect, overflowHints: debugOverflowHints);
    return true;
  }());
}
The logic of this part of the code is , First judge whether it overflows , If there is no overflow, call defaultPaint Finish drawing , See if it is empty ,size If it is empty, it returns directly , Finally, draw the overflow information .
among defaultPaint The source code is as follows :
void defaultPaint(PaintingContext context, Offset offset) {
  ChildType child = firstChild;
  while (child != null) {
    final ParentDataType childParentData = child.parentData as ParentDataType;
    context.paintChild(child, childParentData.offset + offset);
    child = childParentData.nextSibling;
  }
}
so defaultPaint Would call paintChild Draw child nodes , For example, the fruit node has child nodes , be paintChild Finally, it will call its paint And then call to defaultPaint, Thus, a circular recursive call is formed , Draw the whole tree RenderObject Tree.
- Hit test
Hit testing is to determine whether a component needs to respond to a click event , Its entrance is RenderObject Tree The root node RenderView Of hitTest function . The following is the source code of the function :
bool hitTest(HitTestResult result, { Offset position }) {
  if (child != null)
    child.hitTest(BoxHitTestResult.wrap(result), position: position);
  result.add(HitTestEntry(this));
  return true;
}
from RenderView You can see that ,child yes RenderBox class , So let's look at RenderBox Of hitTest function .
bool hitTest(BoxHitTestResult result, { @required Offset position }) {
  if (_size.contains(position)) {
    if (hitTestChildren(result, position: position) || hitTestSelf(position)) {
      result.add(BoxHitTestEntry(this, position));
      return true;
    }
  }
  return false;
}
The code logic is simple , If the click event position is RenderObject within , If in it , also hitTestSelf perhaps hitTestChildren return true, It means that RenderObject Passed the hit test , Need to respond to events , At this point, you need to click RenderObject Join in BoxHitTestResult list , At the same time, the click event is no longer passed down . Otherwise, it will be considered as failing the hit test , Events continue to pass down . among ,hitTestSelf The function indicates whether the node passes the hit test ,hitTestChildren Indicates whether the child node passes the hit test .
3.3 RenderObject Core function
RenderObject There are many core functions of , It's hard to enumerate , It has been explained in detail in the core process RenderObject Three core functions . In order to understand the function of each core function , There will be RenderObject The core functions and Android View Compare the core functions of . Here is a comparison table .
| effect | Flutter RenderObject | Android View |
|---|---|---|
| draw | paint() | draw()/onDraw() |
| Layout | performLayout()/layout() | measure()/onMeasure(), layout()/onLayout() |
| Layout constraints | Constraints | MeasureSpec |
| Layout protocol 1 | performLayout() Of Constraints The parameter indicates the layout restrictions of the parent node on the child node | measure() The two parameters of represent the layout restrictions of the parent node on the child node |
| Layout protocol 2 | performLayout() The of each child node should be called layout() | onLayout() The of each child node should be called layout() |
| Layout parameters | parentData | mLayoutParams |
| Request layout | markNeedsLayout() | requestLayout() |
| Request to draw | markNeedsPaint() | invalidate() |
| add to child | adoptChild() | addView() |
| remove child | dropChild() | removeView() |
| Associated to the window / Trees | attach() | onAttachedToWindow() |
| From the window / Tree disassociation | detach() | onDetachedFromWindow() |
| obtain parent | parent | getParent() |
| Touch event | hitTest() | onTouch() |
| User input events | handleEvent() | onKey() |
| Spin Events | rotate() | onConfigurationChanged() |
so ,RenderObject and Android View There are many corresponding functions ,RenderObject Relative to will Android View The layout rendering and other functions in are separated separately , To simplify the View The logic of .
3.4. Summary
This paper mainly introduces RenderObject Related knowledge , This paper focuses on its classification , The core processes , And core functions . The key points are as follows :
- RenderObject Mainly responsible for drawing , Layout , Hit test, etc .
- RenderObject The principle of layout is ,Constraints Down ,Sizes Up , The parent node sets the location of this node .
- RenderView As a whole RenderObject Tree The root node , Its child It's a RenderBox Type of RenderObject.
Two 、Flutter Drawing process and principle
When the system starts ,runApp Method will be called ,flutter From the outermost widget To traverse and create a widget Trees ; every last widget After creation, it will call createElement() Create the corresponding element, Form a element Trees ;element After creation, it will pass createRenderObject() Create the corresponding renderObject Trees , So three trees are formed .
Finish the layout arrangement and drawing in the rendered tree species . Finally merge levels , adopt Skia The engine renders as GPU data , then GPU Then give the data to the display for display .
And the rendering object tree is Flutter The presentation process is divided into three stages : Layout 、 draw 、 Compositing and rendering .
Layout :
Flutter The depth first mechanism is used to traverse the rendered object tree , Determine the position and size of each render object on the screen in the render object tree . In the process of layout , Each render object in the render object tree receives the layout constraint parameters of the parent object , Decide your own size , Then the parent object decides the position of each child object according to the control logic , Complete the layout process .
draw :
After the layout is finished , Each node in the rendered object tree has a clear size and position .Flutter All rendering objects will be drawn on different layers . Just like the layout process , The drawing process is also depth first traversal , And always draw yourself first , Then draw the child nodes .
Layer Comps :
The page of terminal device is more and more complex , therefore Flutter There are usually many levels of rendering trees , Deliver directly to the rendering engine for multi-layer rendering , There may be a lot of repeated rendering of rendering content , So you need to do a layer composition first , That is to say, all the layers will be changed according to the size 、 Hierarchy 、 Transparency and other rules calculate the final display effect , Merge the same layers , Simplify the rendering tree , Improve rendering efficiency .
After the merger ,Flutter The geometry layer data will be handed over to Skia The engine processes two-dimensional image data , It's up to GPU Rendering , Complete the display of the interface .


3、 ... and . Object creation process 【 Reference Content 】
The above has introduced the operation process of the three trees , This part is for reference ( I learned from the video tutorial )
We are here to Padding For example ,Padding Used to set the inner margin
3.1. Widget
Padding It's a Widget, And inherit from SingleChildRenderObjectWidget
The inheritance relationship is as follows :
Padding -> SingleChildRenderObjectWidget -> RenderObjectWidget -> Widget
We were creating Widget when , Regular use StatelessWidget and StatefulWidget, such Widget Just put the others Widget stay build Method , Is not really a renderable Widget( It was mentioned in the previous course ).
stay Padding In the class , We can't find any rendering related code , This is because Padding Just as a configuration information , The configuration information will vary with the properties we set , Destroy and create frequently .
problem : Will frequent destruction and creation affect Flutter The performance of ?
- It's not , The answer is in another article of mine ;
- mp.weixin.qq.com/s/J4XoXJHJS…
So where does the real rendering related code execute ?
- RenderObject
3.2. RenderObject
Let's see Padding Code inside , There's a very important way :
- This method actually comes from RenderObjectWidget Class , In this class, it is an abstract method ;
- Abstract methods must be implemented by subclasses , But its subclasses SingleChildRenderObjectWidget It's also an abstract class , So you can not implement the abstract method of the parent class
- however Padding Not an abstract class , The corresponding abstract method must be implemented here , And its implementation is the following implementation
@override
RenderPadding createRenderObject(BuildContext context) {
  return RenderPadding(
    padding: padding,
    textDirection: Directionality.of(context),
  );
}
What does the above code create ?RenderPadding
RenderPadding What is the inheritance relationship of ?
RenderPadding -> RenderShiftedBox -> RenderBox -> RenderObject
Let's take a closer look RenderPadding Source code :
- If the incoming _padding And the original value equally , So directly return;
- If it's not consistent , call _markNeedResolution, and _markNeedResolution Internal call markNeedsLayout;
- and markNeedsLayout The purpose of is to mark the next frame when drawing , Need to rearrange performLayout;
- If we are looking for Opacity, that RenderOpacity Is to call markNeedsPaint,RenderOpacity There is one in paint Methodical ;
  set padding(EdgeInsetsGeometry value) {
    assert(value != null);
    assert(value.isNonNegative);
    if (_padding == value)
      return;
    _padding = value;
    _markNeedResolution();
  }
3.3. Element
Let's think about a problem :
- We wrote a lot before Widget There is a reference relationship in the tree structure , however Widget It's going to be destroyed and rebuilt , That means the tree is very unstable ;
- So who will maintain the whole Flutter The stability of the tree structure of the application ?
- The answer is Element.
- Official description :Element It's a Widget Example , Detailed location in the tree .
Element When to create ?
Every time you create Widget When , A corresponding Element, Then insert the element into the tree .
- Element Hold on Widget References to ;
stay SingleChildRenderObjectWidget in , We can find the following code :
- stay Widget in ,Element Be created , And when created , take this(Widget) Into ;
- Element Just keep it right Widget Application ;
  @override
  SingleChildRenderObjectElement createElement() => SingleChildRenderObjectElement(this);
After creating a Element after ,Framework Would call mount Methods to Element Insert into the specific location in the tree :
mount Method
Calling mount When the method is used , Will use at the same time Widget To create RenderObject, And keep it right RenderObject References to :
- _renderObject = widget.createRenderObject(this);
  @override
  void mount(Element parent, dynamic newSlot) {
    super.mount(parent, newSlot);
    _renderObject = widget.createRenderObject(this);
    assert(() {
      _debugUpdateRenderObjectOwner();
      return true;
    }());
    assert(_slot == newSlot);
    attachRenderObject(newSlot);
    _dirty = false;
  }
however , If you go to see something like Text Of this composite class Widget, It will also execute mount Method , however mount Method is not called createRenderObject This way .
- We found that ComponentElement The main purpose is to mount , call _firstBuild Method
  @override
  void mount(Element parent, dynamic newSlot) {
    super.mount(parent, newSlot);
    assert(_child == null);
    assert(_active);
    _firstBuild();
    assert(_child != null);
  }

  void _firstBuild() {
    rebuild();
  }
If it's a StatefulWidget, Then you create a StatefulElement
Let's take a look StatefulElement Constructor :
- call widget Of createState()
- therefore StatefulElement To create State There is a reference
- and _state Right again widget There is a quote
  StatefulElement(StatefulWidget widget)
      : _state = widget.createState(),
  .... Omit code
  _state._widget = widget;
And call build When , What is called essentially is _state Medium build Method :
Widget build() => state.build(this);
3.4. build Of context What is it?
stay StatelessElement in , What we found was that this Pass in , So essentially BuildContext It's the current Element
Widget build() => widget.build(this);
Let's look at the inheritance diagram :
- Element Is to implement the BuildContext class ( Implicit interface )
abstract class Element extends DiagnosticableTree implements BuildContext
stay StatefulElement in ,build The method is similar , call state Of build When the way , What's coming in is this
Widget build() => state.build(this);
3.5. Create process summary
Widget It only describes the configuration information :
- It includes createElement Method to create Element
- Also contains createRenderObject, But I'm not calling
Element Is the object that really holds the tree structure :
- It will be created by framework call mount Method ;
- stay mount Method is called widget Of createRenderObject object ;
- also Element Yes widget and RenderObject All have references ;
RenderObject Is the real rendered object :
- Among them is
markNeedsLayoutperformLayoutmarkNeedsPaintpaintOther methods
边栏推荐
- The future has come: cloud primary Era
- replacement has 2 rows, data has 0, 解决R语言如何动态生成dataframe
- Pointer and pointer of pointer
- Sword finger offer 68 - ii Nearest common ancestor of binary tree
- 3DE robot suction cup grabbing box
- 倍福TwinCAT设置PLC的扫描周期,运行周期方法
- VIM from dislike to dependence (18) -- advanced search mode
- Use yolov5 to train your own data set; Installation and use of yolov5; Interpretation of yolov5 source code
- Shelling of ESP law of reverse crackme
- [qnx hypervisor 2.2 user manual]5.5 starting and using guest
猜你喜欢

3DE recover from design

Blazor University (31)表单 —— 验证

How did we solve the realsense color bias problem?

其实很多人都在学电子

AI自己写代码让智能体进化!OpenAI的大模型有“人类思想”那味了

Dynamic planning - Taking stair climbing with minimum cost as an example

PLC program variable definition and hardware IO Association in Bifu twincat3

我在华为度过的 “两辈子”(学习那些在大厂表现优秀的人)

存算一体芯片离普及还有多远?听听从业者怎么说 | 对撞派 x 后摩智能

告警日志中出现ORA-48132 ORA-48170
随机推荐
docker 安装redis
倍福TwinCAT3 Ads错误查询列表
倍福嵌入式控制器PLC各型号介绍
Fatal NI connect error 12170.报错处理
逆向crackme之ESp定律脱壳
76. 最小覆盖子串-滑动窗口法
所有项目的资源
How to break through the sales dilemma of clothing stores
MySQL 45 lecture learning notes (III) execution of SQL update statements
float浮点数理解
How to read and write files efficiently
Flutter 性能优化
利用jemalloc解决flink的内存溢出问题
未来已来:云原生时代
试用了多款报表工具,终于找到了基于.Net 6开发的一个了
How did we solve the realsense color bias problem?
3DE recover from design
How to randomly assign 1000 to 10 numbers
倍福TwinCAT3控制器和控制器间的Ads通讯
C语言整数取值范围-负数多1的问题