当前位置:网站首页>Avoid asteroids
Avoid asteroids
2022-06-27 05:06:00 【Xia'an】
Asteroid avoidance game
Asteroid avoidance game
This article will use canvas Create an asteroid avoidance game . The other two areas that will be highlighted are : How to use JavaScript To detect keyboard input , And how to use and handle in the game HTML5 Audio . I hope you like it !
1. Game Overview
seeing the name of a thing one thinks of its function , The goal of the asteroid avoidance game is very obvious : When an asteroid comes at you , Let the rocket fly and survive as long as possible ( Pictured 91 Shown ). If you run into an asteroid , The game will be over , The score of the game is calculated by the survival time of the rocket .
The asteroid avoidance game is a “ Horizontal reel type ” game , Or at least it is similar to such a game , Will focus on dynamic scenes .
2. Core functions
Before you create a game , First, we need to build some basic frameworks . In terms of creating an asteroid avoidance game , These frameworks are basic HTML、CSS as well as JavaScript Code ( As the basis for high-level code to be added in the future ).
2.1 structure HTML Code
The advantage of creating games in browsers is that you can use some common techniques for building websites . in other words , have access to HTML Language to create the user interface of the game (UI). The current interface doesn't look very beautiful , This is because we haven't used CSS To design the style of the user interface , But the original structure of the content is the most important .
Create a new directory for the game on your computer , Create a new one index.html file , Add the following code to it :
<!DOCTYPE html>
<html lang="en">
<head>
  <meta charset="UTF-8">
  <meta http-equiv="X-UA-Compatible" content="IE=edge">
  <meta name="viewport" content="width=device-width, initial-scale=1.0">
  <title>Asteroid avoidance</title>
  <link rel="stylesheet" href="style.css">
  <script src="https://cdnjs.cloudflare.com/ajax/libs/jquery/3.6.0/jquery.min.js"></script>
  <script src="./main.js"></script>
</head>
<body>
  <div id="game">
    <div id="game-ui">
      <div id="game-intro">
        <h1>Asteroid avoidance</h1>
        <p>Click play and then press any key to start.</p>
        <p>
          <a id="game-play" class="button" href="#">Play</a>
        </p>
      </div>
      <div id="game-stats">
        <p>Time: <span class="game-score"></span> </p>
        <p> <a class="game-reset" href="#">Reset</a> </p>
      </div>
      <div id="game-complete">
        <h1>Game over!</h1>
        <p>You survived for <span class="game-score"></span> seconds. </p>
        <p><a class="game-reset buyyon" href="#">Play</a></p>
      </div>
    </div>
    <canvas id="game-canvas" width="800" height="600">
      <!--  Insert fallback code here  -->
    </canvas>
  </div>
</body>
</html>
I'm not going to explain this too much HTML Code , Because they are relatively simple , But you just need to know that this is all the tags the game needs .

2.2 Beautification interface
Create a file called style.css The new document of , And put it with HTML The files are placed in the same directory . In the CSS Insert the following code in the file :
* {

  margin: 0;
  padding: 0;
}

html, body {

  height: 100%;
  width: 100%;
}

canvas {

  display: block;
}

body {

  background-color: #000;
  color: #fff;
  font-family: Verdana, Arial, sans-serif;
  font-size: 18px;
  height: 100%;

}

h1 {

  font-size: 30px;
}

p {

  margin: 0 20px;
}

a {

  color: #fff;
  text-decoration: none;
}

a:hover {

  text-decoration: underline;
}

a.button {

  background-color: #185da8;
  border-radius: 5px;
  display: block;
  font-size: 30px;
  margin: 40px 0 0 270px;
  padding: 10px;
  width: 200px;
}

a.button:hover {

  background-color: #2488f5;
  color: #fff;
  text-decoration: none;
}

#game {

  height: 600px;
  left: 50%;
  margin: -300px 0 0 -400px;
  position: relative;
  top: 50%;
  width: 800px;
}

#game-canvas {

  background-color: #001022;
}

#game-ui {

  height: 600px;
  position: absolute;
  width: 800px;
}

#game-intro, #game-complete {

  background-color: rgba(0, 0, 0, .5);
  margin-top: 100px;
  padding: 40px 0;
  text-align: center;
}

#game-stats {

  font-size: 14px;
  margin: 20px 0;
}

#game-stats, .game-reset {

  margin: 20px 20px 0 0;
  position: absolute;
  right: 0;
  top: 0;
}
2.3 To write JavaScript Code
Before adding some interesting game logic , First you need to use JavaScript Implement core functions . Create a file called main.js The new document of , And put it with HTML The files are placed in the same directory . In the js Insert the following code in the file :
$(document).ready(function () {

  const canvas = $('#game-canvas');
  const context = canvas.get(0).getContext("2d");

  //  Canvas Size
  const canvasWidth = canvas.width();
  const canvasHeight = canvas.height();

  //  Game settings
  let playGame;

  //  game UI
  const ui = $("#game-ui");
  const uiIntro = $("#game-intro");
  const uiStats = $("#game-stats");
  const uiComplete = $("#game-complete");
  const uiPlay = $("#game-play");
  const uiReset = $(".game-reset");
  const uiScore = $(".game-score");

  //  Restart and start the game
  function startGame() {

    //  Reset game status
    uiScore.html("0");
    uiStats.show();

    //  Initial game setup
    playGame = false;
    //  Start animating sugar rings
    animate();
  }

  // Initialize the game environment
  function init() {

    uiStats.hide();
    uiComplete.hide();

    uiPlay.click(function (e) {

      e.preventDefault();
      uiIntro.hide();
      startGame();
    });

    uiReset.click(function (e) {

      e.preventDefault();
      uiComplete.hide();
      startGame();
    });
  }

  //  Animation cycle , This is where the dislike of the game is
  function animate() {

    //  eliminate
    context.clearRect(0, 0, canvasWidth, canvasHeight);

    if (playGame) {

      setTimeout(animate, 33);
    }
  }

  init();

});
Run the game in your favorite browser , You should see a more beautiful UI. in addition , You can also click Play Button to display the main window of the game , Although it may seem a little monotonous .


3. Create game objects
The asteroid dodge game uses two main objects : Asteroids and rockets used by players . We will use JavaScript Class to create these objects . You may find it strange , Since there is only one player , Why define it through a class ? In short , If you need to add more players to the game in the future , It will be easier to create players through classes .
3.1 Creating asteroids
Creating game objects through classes means that you can easily reuse and change their use in other games .
The first step is to declare the main variables , We will use these variables to store all asteroids . meanwhile , You also need to declare another variable , Used to calculate the number of asteroids that should exist in the game . stay JavaScript At the top of the code playGame Add the following code under the variable :
let asteroids;
let numAsteroids;
You will assign values to these variables later , But now we only build asteroids . stay startGame Add the following code to the function :
function Asteroid(x, y, radius, vX) {

  this.x = x;
  this.y = y;
  this.radius = radius;
  this.vX = vX;
}
There is a speed attribute here , This is because asteroids only need to move from right to left , The only need x Speed . There is no need for y Speed , So it omits .
Before you start creating all the asteroids , You need to build an array to store these asteroids , And state the actual number of asteroids to be used . stay startGame Function PlayGame Add the following code under the variable :
asteroids = new Array();
numAsteroids = 10;
You might think 10 Asteroids are a small number , But when these asteroids disappear on the screen , You will reuse them , So you can actually see an infinite number of asteroids in the game . You can take the number of asteroids here as the total number of asteroids that may appear on the screen at a certain time .
The process of creating an asteroid is actually a process of creating a cycle , The number of cycles is the number of asteroids you just declared . In what you just assigned numAsteroids Add the following code under the variable :
for (let i = 0; i < numAsteroids; i++) {

  const radius = 5 + (Math.random() * 10);
  const x = canvasWidth + radius + Math.floor(Math.random() * canvasWidth);
  const y = Math.floor(Math.random() * canvasHeight);
  const vx = -5 - (Math.random() * 5);
  asteroids.push(new Asteroid(x, y, radius, vX));
}
To make every asteroid look different , And make the game look more interesting , You can set the radius of the asteroid to a value between 5 To 15 Random number between pixels ( 5 Add a value between 0 To 10 Random number between ). although x The value of speed is between -5 To -10 Between , But you can set it up the same way ( -5 Subtract one 0 To 5 Number between ). Because you need to make the asteroid move from right to left , So I'm using a negative velocity value , This explanation x The position of will decrease over time .
Calculate the... Of each asteroid x The location looks a little complicated , But it's very simple . At the start of the game , If all the asteroids are displayed on the screen , It makes people feel a little too strange . So before the game starts , It's best to put the asteroid on the right side of the screen , When the game starts, let them cross the screen from right to left .
So , First of all, we need to put x The position is set to canvas Width of element , Then add the radius of the asteroid . That means if you draw an asteroid now , Then it should be on the right side of the screen . If you just do this , Then all the asteroids will line up , So next we need to put x Position plus a value between 0 To the width of the canvas . And x Position comparison ,y The location is simpler , It's just an intermediate 0 To the height of the canvas .
This produces a box of the same size as the canvas , Some asteroids are randomly distributed in the box . When the game starts , These asteroids will pass through the visible canvas .
The last step is to push a new asteroid into the array , Be prepared to move and map asteroids .
3.2 Create a rocket for players
First declare the initialization variables used to create the player . stay JavaScript At the top of the numAsteroids Add the following code under the variable :
let player;
This variable will be used to store references to player objects , But we haven't defined the player object yet . stay Asteroid Class :
function Player(x, y) {

  this.x = x;
  this.y = y;
  this.width = 24;
  this.height = 24;
  this.halfWidth = this.width / 2;
  this.halfHeight = this.height / 2;

  this.vX = 0;
  this.vY = 0;
}
You should be familiar with some parts of the above code , For example, position and speed attributes . The remaining attributes are used to describe the size of the rocket used by the player , Including the whole size and half size . When drawing rockets and performing collision detection , You need to use these sizes .
The last step is to create a new player object . So , stay startGame Function numAsteroids Add the following objects under variables :
player = new Player(150, canvasHeight / 2);
Through the above code , The player's position will be vertically centered , And from the left edge of the canvas 150 Pixels .
You can't see any effect yet , Later when you start moving all the game objects , This effect will be seen visually .
4. Detect keyboard input
This game will use the keyboard to control the game . To be more exact , You will use the arrow keys to move the rockets used by players around . How can this control be achieved ? Is this more difficult than controlling mouse input ? No , It's very simple . Let me show you how to do it .
4.1 Key value
When handling keyboard input , First of all, you need to know which button is pressed . stay JavaScript in , Each key on a common keyboard is assigned a specific key value (key code). Through these key values , You can uniquely determine which key is pressed or released . Later you will learn how to use key values , Now we need to know the corresponding value of each key .
for example , key a To z ( In any case ) The corresponding key values are from 65 To 90 . The key value corresponding to the arrow key is from 37 To 40, The key value of the left arrow is 37、 The key value of the up arrow is 38、 The key value of the right arrow is 39、 The key value of the down arrow is 40. The key value of the space bar is 32.
In the asteroid avoidance game , What you need to focus on is the arrow keys , So in JavaScript At the top of the code player Add the following code under the variable :
const arrowUp = 38;
const arrowRight = 39;
const arrowDown = 40;
The above code assigns a variable to the key value corresponding to each arrow . This method is called enumeration (enumeration), It is the process of naming values . This is mainly to facilitate the following work , Because with these names, you can easily determine which arrow key the variable refers to .
Please note that , Why not declare a variable for the left arrow ? Because you don't manually move the player backwards . contrary , When the player doesn't press any buttons , It will behave as a backward moving state . You will see the truth later .
4.2 Keyboard events
Before adding keyboard interactions to the game , First you need to determine when the player presses or releases a key . So , Need to use keydown and keyup Event listener .
stay startGame Function animate Function call above ( Under the cycle of creating all asteroids ) Add the following code :
$(window).keydown(e => {


});

$(window).keyup(e => {


});
Pressing a key triggers the first listener , Releasing a key triggers a second listener . It's simple . We will add some useful code to these event listeners later , But first you need to delete these listeners when you reset the game , This prevents the player from starting the game by accidentally pressing a key . stay uiReset.click In the event listener startGame Add the following code to the call above :
$(window).unbind('keyup');
$(window).unbind('keydown');
Next , You also need to add some attributes that will be used after activating the player . stay Player Add the following code to the end of the class :
this.moveRight = false;
this.moveUp = false;
this.moveDown = false;
Through these properties , You can know the direction the player is moving , The setting of these attribute values depends on which key the player presses . Now you have understood all of them ?
Last , You need to add some logic to the keyboard event listener . First , stay keydown Add the following code to the event listener :
const keyCode = e.keyCode;
if (!playGame) {

  playGame = true;
  animate();
}
if (keyCode == arrowRight) {

  player.moveRight = true;
} else if (keyCode == arrowUp) {

  player.moveUp = true;
} else if (keyCode == arrowDown) {

  player.moveDown = true;
}
And in keyup Add the following code to the event listener :
const keyCode = e.keyCode;
if (keyCode == arrowRight) {

  player.moveRight = false;
} else if (keyCode == arrowUp) {

  player.moveUp = false;
} else if (keyCode == arrowDown) {

  player.moveDown = false;
}
The effect of the above code is very obvious , But I still need to make some explanations . In two listeners , The function of the first line is to assign the key value of the key to a variable . The key value is then used in a set of check statements to determine whether an arrow key has been pressed , If the arrow key is pressed , Determine which arrow key . such , We can start it ( If this key is pressed ) Or disable ( If the key is released ) The corresponding attribute of the player object .
for example , If you press the right arrow key , So the player object's moveRight Property will be set to true. If the direction key is released , be moveRight Property will be set to false.
** Be careful :** If the player keeps holding down a key , Then multiple... Will be triggered keydown event . therefore , The code should have the ability to handle multiple triggered keydown The power of events , this , Point is very important . At every keydown It is not always after an event keyup event , Also note that , stay keydown How to check whether the game is currently in progress through a conditional statement in the event listener . If the player is not ready for the game , This statement will prevent the game from running . Only when the player presses a key on the keyboard , Will start the game . It's easy , But it's very effective .
There is a lot of keyboard input in the game , We can't list them all . In the next section , We will use these inputs to control the player to move in the right direction .
5. Make the object move
Now you are ready to animate the game object . When you actually see the game effect , All this will become more interesting .
The first step is to update the position of all GameObjects . Let's start by updating the position of the asteroid object , stay animate Function
On canvas clearRect Add the following code under the method :
const asteroidsLength = asteroids.length;
for (let i = 0; i < asteroidsLength; i++) {

  const tmpAsteroid = asteroids[i];

  tmpAsteroid.x += tmpAsteroid.vX;

  context.fillStyle = "rgb(255, 255, 255)";
  context.beginPath();
  context.arc(tmpAsteroid.x, tmpAsteroid.y, tmpAsteroid.radius, 0, Math.PI * 2, true);
  context.closePath();
  context.fill();
}
The code is very simple . The main thing is to traverse every asteroid , And update its position according to the speed , Then draw an asteroid on the canvas .
Refresh browser to see the effect ( Remember to press a key to start the game ). You should be able to see the scene of an asteroid belt crossing the screen .

Notice how they disappear on the left side of the screen . The next section will learn how to prevent their movement on a horizontally scrolling screen .
so far , Suppose that these asteroids have achieved our expected results . Next, you need to update and display the players !
stay animate Add the following code below the asteroid code just added in the function :
player.vX = 0;
player.vY = 0;

if (player.moveRight) {

  player.vX = 3;
}

if (player.moveUp) {

  player.vY = -3;
}

if (player.moveDown) {

  player.vY = 3;
}
player.x += player.vX;
player.y += player.vY;
The above code will update the player's speed , And set the speed to a specific value , This value is determined by the direction the player moves . If the player needs to move to the right , Then the speed value is x On axis 3 Pixels . If the player needs to move up , Then the speed value is y On axis -3 Pixels . Again , If the player needs to move down , Then the speed value is y On axis 3 Pixels . It's very simple . in addition , Also notice how to reset the speed value at the beginning of the code . If the player doesn't press any buttons , This statement will prevent the player from moving .
Last , You also need to update the player's... According to the speed x and y Location . Now you can't see any effect , But you are ready to paint the rocket on the screen .
Add the following code directly under the code just added :
context.fillStyle = 'rgb(255, 0, 0)';
context.beginPath();
context.moveTo(player.x + player.halfWidth, player.y);
context.lineTo(player.x - player.halfWidth, player.y - player.halfHeight);
context.lineTo(player.x - player.halfWidth, player.y + player.halfHeight)
context.closePath();
context.fill();
Do you know what the above code does ? Obviously , You are drawing a fill path , But can you tell me what shape the path is drawn ? Yes , It's just a triangle .
If you look closely , You will find the role of the size attribute of the player object . You know half the width and height of the player object , You can build a dynamic triangle , It can increase or decrease with the change of dimension value . It's easy , But the effect is very good .
View the effects of the game in the browser , You should be able to see the rockets that players use .

Try pressing the arrow keys . See the rocket moving ? Now the game effect has been very good .
You can use only motion logic here , But the game will be a little monotonous . We might as well add a flickering flame to the rocket ! stay Player Add the following code to the end of the class :
this.flameLength = 20;
The above code is used to determine the duration of the flame , We need to add more code later . Now first animate Add the following code before the code that draws the rocket in the :
if (player.moveRight) {

  context.save();
  context.translate(player.x - player.halfWidth, player.y);

  if (player.flameLength == 20) {

    player.flameLength = 15;
  } else {

    player.flameLength = 20;
  }
  context.fillStyle = "orange";
  context.beginPath();
  context.moveTo(0, -5);
  context.lineTo(-player.flameLength, 0);
  context.lineTo(0, 5);
  context.closePath();
  context.fill();

  context.restore();
}
Conditional statements are used to ensure that flames are drawn only when the player moves to the right , Because if you can see flames at other times , It doesn't seem to make sense .
We use the canvas translate Method to draw a flame , Because it's called later save Method to save the drawing state of the canvas ,translate Method can save some time . The original state of the drawing context is now stored , Next, you can call translate Method , And put 2D The origin of the drawing context moves to the left of the rocket used by the player .
Now you have moved the origin of the canvas , The next task is very simple . You only need to store in the player object flameLength Property to execute a loop ( Make the rocket twinkle ), And change the fill color to orange , Then draw a length and from the new starting point flameLength Triangles with the same properties . Finally, you need to call restore Method , Restore the original drawing state to the canvas .
Refresh the browser to see the achievements just now . When you press the right arrow key , There should be a flickering flame on the rocket .

Next, you need to be prepared , We will make the game produce a realistic horizontal scroll effect .
6. Fake horizontal scroll effect
Although the game seems to scroll sideways , But you don't actually travel through the game world . contrary , You will recycle all objects that disappear from the screen , And let them reappear on the other side of the screen . This will produce an effect that will always travel through the endless game world . It sounds strange , In fact, it is just a horizontal scrolling effect .
6.1 Recycling asteroids
It is not difficult to make the game produce an endless crossing effect . It's actually pretty simple ! stay animate Function, add the following code to the code that just drew each asteroid :
if (tmpAsteroid.x + tmpAsteroid.radius < 0) {

  tmpAsteroid.radius = 5 + (Math.random() * 10);
  tmpAsteroid.x = canvasWidth + tmpAsteroid.radius;
  tmpAsteroid.y = Math.floor(Math.random() * canvasHeight);
  tmpAsteroid.vX = -5 - (Math.random() * 5);
}
This code is enough . The purpose of this code is to check whether the asteroid has moved beyond the left boundary of the canvas , If it is , Reset the asteroid , And move it back to the right side of the canvas . You have reused the asteroid , But it looks like a brand new asteroid .
6.2 Add borders
Now? , Player rockets may be free to fly through the game , It may also stop ( Trying to fly over the right side of the canvas ). To solve this problem , You need to set some boundaries in the right place . On the code that draws the rocket flame ( Just below the code to set the new player location ) Add the following code :
if (player.x - player.halfWidth < 20) {

  player.x = 20 + player.halfWidth;
} else if (player.x + player.halfWidth > canvasWidth - 20) {

  player.x = canvasWidth - 20 - player.halfWidth;
}

if (player.y - player.halfHeight < 20) {

  player.y = 20 + player.halfHeight;
} else if (player.y + player.halfHeight > canvasHeight - 20) {

  player.y = canvasHeight - 20 - player.halfHeight;
}
You may be able to guess what the above code does . It mainly performs some standard boundary checks . These checks check to see if the player is at the canvas boundary 20 Within pixels , If it is , Prevent them from moving further in that direction . I think there should be reserved at the boundary of the canvas 20 Better visual effect of pixel gap , But you can also reduce this value a little , So that the player can move to the right to the edge of the canvas .
6.3 Keep players moving continuously
at present , If the player doesn't press any buttons , The rocket will stop moving . When all the asteroids are floating , It doesn't make sense for the rocket to suddenly stop moving . So you can add some extra sports to the game , When the player no longer moves forward , You can keep them moving backwards .
stay animate Function to change the player vX The code snippet for the property is replaced with the following code :
if (player.moveRight) {

  player.vX = 3;
} else {

  player.vX = -3;
}
This code just adds an extra piece of code to the conditional statement , That is, when the player does not need to move to the right , Put the player's vX Property set to -3. If you sum it up, you will find , This is the same logic as most games . Run the game in the browser , Now the game looks more realistic !
7. Add sound
This is probably the coolest part of the game . It's fun to add some simple sounds to the game , The game will also become more attractive . You may find it very difficult to add audio to the game , But use HTML5 It's easy to implement audio ! Let's take a look at .
First of all, it needs to be in the game HTML Declare all in the code HTML5 Audio elements . Directly in index.html In the document canvas Add the following code under the element :
<audio id="game-sound-background" loop>
  <source src="sounds/background.ogg">
  <source src="sounds/background.mp3">
</audio>
<audio id="game-sound-thrust" loop>
  <source src="sounds/thrust.ogg">
  <source src="sounds/thrust.mp3">
</audio>
<audio id="game-sound-death">
  <source src="sounds/death.ogg">
  <source src="sounds/death.mp3">
</audio>
If you master HTML5 The content of the audio part , You should be familiar with the above code . If you haven't mastered the content , Don't worry , Because it's very simple . It is stated here that 3 Independent HTML5 audio Elements , And for each audio The element defines a unique id attribute , These will be used later id attribute . A loop sound also needs to be defined loop attribute .
Be careful : Not all browsers support loop attribute . Because it is part of the specification , Therefore, more and more browsers will fully support this attribute . If a flexible solution is needed , You can add an event listener at the end of audio playback , And play it again .
this 3 All the sounds are background music , The sound of thrusters when the rocket starts to move , Finally, the player dies with a deep roar . For compatibility with most browsers , Each sound requires two versions of the file , So you also need to include two source Elements : One is mp3 edition , The other is ogg edition .
stay HTML You only need to complete these tasks in the file , Next we go back to JavaScript In file , And in JavaScript At the top of the file uiScore Add the following code under the variable :
const soundBackground = $("#game-sound-background").get(0);
const soundThrust = $("#game-sound-thrust").get(0);
const soundDeath = $("#game-sound-death").get(0);
These variables use HTML Declared in the document id Property to get each audio Elements , This is similar to getting canvas The elements are very similar . Next, you will use these variables to access HTML5 Audio API And control the sound .
These need not be explained too much , Then we turn to keydown In the event listener , In the playGame Set to true Add the following code after the code of :
soundBackground.currentTime = 0;
soundBackground.play();
Now? , You have added... To the game HTML5 Audio , And it can be easily controlled . Very cool! ? The function of the above code is to access the background music related HTML5 audio Elements , And through HTML5 Audio API Control it directly . therefore , By changing currentTime attribute , You can reset the starting position of audio file playback , in addition , By calling play Method , You can play the audio file . It's really simple !
Load and run the game , Now when you start moving the rocket , You should be able to hear some wonderful background music .
The next step is to control the sound of the propeller ( When a player moves a rocket ). I hope you have guessed how to achieve , In fact, it is as simple as implementing background music .
stay keydown In the event listener player Object's moveRight Add the following code below the property setting code :
if (soundThrust.paused) {

  soundThrust.currentTime = 0;
  soundThrust.play();
}
The first line of code is used to check whether the propeller sound is playing , If it is , It is forbidden to play it again in the game . This can prevent the sound from being cut off during playback , Because it may trigger many times per second keydown event , And you certainly don't want to trigger it every time keydown The propeller sound is played again during the event .
When the player stops moving , You may not want the propeller sound to continue playing , So , stay keyup In the event listener player Object's moveRight Add the following code below the property setting code :
soundThrust.pause();
It's that simple , Audio API It's so convenient , It's very easy to access and manipulate audio .
Before moving on to the next step ( The next section will add the sound of death ), There is one more question we need to consider : If the player resets the game , How do we make sure we stop playing sound . So , stay init Functional uiReset,click In the event handler startGame Add the following code to the call above :
soundThrust.pause();
soundBackground.pause();
When the game is reset , The above two lines of code can ensure that the propeller sound and background music are stopped . Because the sound of death doesn't need to be cycled , And you want to play it at the end of the game , So there is no need to consider the sound of death for the time being .
8. End the game
Now the game has gradually taken shape . actually , It's almost finished . The only thing to do next is to implement some sort of scoring system , And end the game in some way . First, solve the scoring system problem , How to end the game later .
8.1 scoring system
In the game , Given that players are trying to survive as long as possible , So it is obviously a good idea to take the survival time as the scoring standard . isn't it? ?
We need some way to calculate the duration of the game from the beginning to the present . This happens to be JavaScript Timer strengths , But before you build the timer, you need to declare some variables . stay JavaScript At the top of the code player Add the following code under the variable :
let score;
let scoreTimeout;
These variables will be used to store scores ( The number of seconds that have passed ) And references to timer operations , To start or stop the timer as needed .
in addition , You also need to reset the score when the game starts or resets . So , stay startGame At the top of the function numAsteroids Add the following code under the variable :
score = 0;
To facilitate the management of scoring timers , Let's create a name timer Special functions for . stay animate Add the following code to the function :
function timer() {

  if (playGame) {

    scoreTimeout = setTimeout(() => {

      uiScore.html(++score);
      timer();
    }, 1000);
  }
}
The above code will not work yet , But it will check if the game starts , If the game has already started , It sets the timer interval to 1 second , And assign the timer to scoreTimeout Variable . In the timer ,score The value of the variable is increasing , Simultaneous scoring UI It's also being updated . then , The timer itself will call timeout Function to repeat the whole process , This means that the timer will not stop until the game is over .
There is no call yet timer function , So it won't work yet . When the game starts , You need to call this function , So in keydown In the event listener animate Add the following code below the function call :
timer();
As soon as the player starts the game , The above code will trigger the timer . View the effect in the browser , In the upper left corner of the game interface, you can see that the score is increasing .
But unfortunately , There is also a problem here —— If you reset the game , Scores sometimes appear as 1 Second . This is because when you reset the game , The score timer is still running , But it actually doesn't run until you reset the game ( The score will be reset by 0 Change to 1 ). To solve this problem , You need to clear the timer before resetting the game . Fortunately, ,JavaScript There are specific functions that can implement this operation .
stay init Functional uiReset.click Event listener startGame Add the following code to the call above :
clearTimeout(scoreTimeout);
seeing the name of a thing one thinks of its function , The role of the above code is obvious . Through this independent function, you can get scoreTime Fraction timer in variable , And prevent the timer from running . Run the game again , You can find that through this line simple JavaScript The code has successfully solved the above problems .
8.2 Kill the player
If asteroids can't hurt you , So there's no point avoiding asteroids , So we need to add some features to kill players ( When a player encounters an asteroid ).
Have you found any obvious problems here ? When the rocket is a triangle , Can you perform circular collision detection ? In short , You cannot perform circular collision detection , Or at least not so easy . But some details will be ignored here , in other words , Use a small area of the player's rocket as a collision detection area . In practice, if you are lucky , This kind of detection can help avoid asteroids .
To simplify the code , I think it's worth it . After all , This is just a little game for entertainment , Therefore, there is no need to pursue absolute truth .
therefore , Just in animate Function to draw the code of each asteroid. Add the following code to it :
const dx = player.x - tmpAsteroid.x;
const dy = player.y - tmpAsteroid.y;
const distance = Math.sqrt((dx * dx) + (dy * dy));

if (distance < player.halfWidth + tmpAsteroid.radius) {

  soundThrust.pause();

  soundDeath.currentTime = 0;
  soundDeath.play();

  //  Game over
  playGame = false;
  clearTimeout(scoreTimeout);
  uiStats.hide();
  uiComplete.show()

  soundBackground.pause();

  $(window).unbind("keyup");
  $(window).unbind("keydown");
}
You should be able to quickly understand the distance calculation method in the above code . You will use them to calculate the pixel distance between the player rocket and the asteroid in the current cycle .
The next step is to determine whether the rocket collided with an asteroid , You can check whether the pixel distance calculated above is less than the sum of the asteroid radius and the radius of the rocket collision circumference . The radius of the impact circle of the rocket used here is half the width of the rocket , You can change it at will .
If a rocket collides with an asteroid , To kill the player . The process of killing the player and ending the game is very simple , But I still need to explain it line by line .
The first three lines of code stop playing propeller sound , And reset and play the sound of death . When you start playing the sound of death , Need to put playGame Set to false To end the game , And through the previously used clearTimeout Function to stop the scoring timer .
here , All the game logic has stopped , Therefore, the statistics interface can be hidden , And display the game end interface .
When the game end interface is displayed , Need to stop playing background music , And finally release the keyboard event handler , This prevents the player from accidentally pressing a key to start the game .

9. Increase the difficulty of the game
well , In fact, the game we want to create has not been completed yet . Let's add some more features to the game , That is to increase the difficulty of the game , It becomes more difficult for players to survive longer .
Let's get to the point , stay timer Function uiScore.html Add the following code :
if (score % 5 === 0) {

  numAsteroids += 5;
}
Does the above code look like a normal conditional statement ? It's not . Notice the percentage symbol . It is the modulo operator . Modulo can calculate whether a number can be completely divided by another number , It will return the remainder of the division of two numbers .
You can perform periodic operations by modulo calculation , for example , every other 5 Once in a second . Because you can mold 5 An operation applied to a number , If it returns 0, Then the number must be able to be 5 to be divisible by .
In this game , We use the mold 5 Operation to ensure that a code segment is generated every 5 Once per second . The purpose of this code segment is , every other 5 Seconds to add... To the game 5 An asteroid . actually , There are no asteroids added here , Only the number of asteroids has increased .
Adding asteroids is simple , stay animate Function, add the following code below the code that draws the player rocket :
while (asteroids.length < numAsteroids) {

  const radius = 5 + (Math.random() * 10);
  const x = Math.floor(Math.random() * canvasWidth) + canvasWidth + radius;
  const y = Math.floor(Math.random() * canvasHeight);
  const vX = -5 - (Math.random() * 5);
  asteroids.push(new Asteroid(x, y, radius, vX));
}
The above code checks the number of asteroids in each cycle , If the number does not meet the requirements , It will continue to add new asteroids to the game , Until the number of asteroids meets the requirements .
Start the game in the browser again , You'll find that , As you live longer and longer , There will be more and more asteroids in the game . Now? , You've really finished the game .
10. Complete source code
Here is the complete source code of the game :
- index.html
<!DOCTYPE html>
<html lang="en">

<head>
  <meta charset="UTF-8">
  <meta http-equiv="X-UA-Compatible" content="IE=edge">
  <meta name="viewport" content="width=device-width, initial-scale=1.0">
  <title>Asteroid avoidance</title>
  <link rel="stylesheet" href="style.css">
  <script src="https://cdnjs.cloudflare.com/ajax/libs/jquery/3.6.0/jquery.min.js"></script>
  <script src="./main.js"></script>
</head>

<body>
  <div id="game">
    <div id="game-ui">
      <div id="game-intro">
        <h1>Asteroid avoidance</h1>
        <p>Click play and then press any key to start.</p>
        <p>
          <a id="game-play" class="button" href="#">Play</a>
        </p>
      </div>
      <div id="game-stats">
        <p>Time:<span class="game-score"></span> </p>
        <p> <a class="game-reset" href="#">Reset</a> </p>
      </div>
      <div id="game-complete">
        <h1>Game over!</h1>
        <p>You survived for <span class="game-score"></span> seconds. </p>
        <p><a class="game-reset button" href="#">Play</a></p>
      </div>
    </div>
    <canvas id="game-canvas" width="800" height="600">
      <!--  Insert fallback code here  -->
    </canvas>
    <audio id="game-sound-background" loop>
      <source src="sounds/background.ogg">
      <source src="sounds/background.mp3">
    </audio>
    <audio id="game-sound-thrust" loop>
      <source src="sounds/thrust.ogg">
      <source src="sounds/thrust.mp3">
    </audio>
    <audio id="game-sound-death">
      <source src="sounds/death.ogg">
      <source src="sounds/death.mp3">
    </audio>
  </div>
</body>

</html>
- style.css
* {

  margin: 0;
  padding: 0;
}

html, body {

  height: 100%;
  width: 100%;
}

canvas {

  display: block;
}

body {

  background-color: #000;
  color: #fff;
  font-family: Verdana, Arial, sans-serif;
  font-size: 18px;
  height: 100%;

}

h1 {

  font-size: 30px;
}

p {

  margin: 0 20px;
}

a {

  color: #fff;
  text-decoration: none;
}

a:hover {

  text-decoration: underline;
}

a.button {

  background-color: #185da8;
  border-radius: 5px;
  display: block;
  font-size: 30px;
  margin: 40px 0 0 270px;
  padding: 10px;
  width: 200px;
}

a.button:hover {

  background-color: #2488f5;
  color: #fff;
  text-decoration: none;
}

#game {

  height: 600px;
  left: 50%;
  margin: -300px 0 0 -400px;
  position: relative;
  top: 50%;
  width: 800px;
}

#game-canvas {

  background-color: #001022;
}

#game-ui {

  height: 600px;
  position: absolute;
  width: 800px;
}

#game-intro, #game-complete {

  background-color: rgba(0, 0, 0, .5);
  margin-top: 100px;
  padding: 40px 0;
  text-align: center;
}

#game-stats {

  font-size: 14px;
  margin: 20px 0;
}

#game-stats, .game-reset {

  margin: 20px 20px 0 0;
  position: absolute;
  right: 0;
  top: 0;
}
- main.js
$(document).ready(function () {

  const canvas = $('#game-canvas');
  const context = canvas.get(0).getContext("2d");

  //  Canvas Size
  const canvasWidth = canvas.width();
  const canvasHeight = canvas.height();

  //  Game settings
  let playGame;
  let asteroids;
  let numAsteroids;
  let player;

  let score;
  let scoreTimeout;

  const arrowUp = 38;
  const arrowRight = 39;
  const arrowDown = 40;

  //  game UI
  const ui = $("#game-ui");
  const uiIntro = $("#game-intro");
  const uiStats = $("#game-stats");
  const uiComplete = $("#game-complete");
  const uiPlay = $("#game-play");
  const uiReset = $(".game-reset");
  const uiScore = $(".game-score");
  const soundBackground = $("#game-sound-background").get(0);
  const soundThrust = $("#game-sound-thrust").get(0);
  const soundDeath = $("#game-sound-death").get(0);

  function Asteroid(x, y, radius, vX) {

    this.x = x;
    this.y = y;
    this.radius = radius;
    this.vX = vX;
  }

  function Player(x, y) {

    this.x = x;
    this.y = y;
    this.width = 24;
    this.height = 24;
    this.halfWidth = this.width / 2;
    this.halfHeight = this.height / 2;

    this.vX = 0;
    this.vY = 0;

    this.moveRight = false;
    this.moveUp = false;
    this.moveDown = false;

    this.flameLength = 20;
  }

  //  Restart and start the game
  function startGame() {

    //  Reset game status
    uiScore.html("0");
    uiStats.show();

    //  Initial game setup
    playGame = false;

    asteroids = new Array();
    numAsteroids = 10;

    score = 0;

    player = new Player(150, canvasHeight / 2);

    for (let i = 0; i < numAsteroids; i++) {

      const radius = 5 + (Math.random() * 10);
      const x = canvasWidth + radius + Math.floor(Math.random() * canvasWidth);
      const y = Math.floor(Math.random() * canvasHeight);
      const vX = -5 - (Math.random() * 5);
      asteroids.push(new Asteroid(x, y, radius, vX));
    }

    $(window).keydown(e => {

      const keyCode = e.keyCode;
      if (!playGame) {

        playGame = true;
        soundBackground.currentTime = 0;
        soundBackground.play();
        animate();
        timer();
      }
      if (keyCode == arrowRight) {

        player.moveRight = true;
        if (soundThrust.paused) {

          soundThrust.currentTime = 0;
          soundThrust.play();
        }
      } else if (keyCode == arrowUp) {

        player.moveUp = true;
      } else if (keyCode == arrowDown) {

        player.moveDown = true;
      }
    });

    $(window).keyup(e => {

      const keyCode = e.keyCode;
      if (keyCode == arrowRight) {

        player.moveRight = false;
        soundThrust.pause();
      } else if (keyCode == arrowUp) {

        player.moveUp = false;
      } else if (keyCode == arrowDown) {

        player.moveDown = false;
      }
    });

    //  Start animating sugar rings
    animate();
  }

  // Initialize the game environment
  function init() {

    uiStats.hide();
    uiComplete.hide();

    uiPlay.click(function (e) {

      e.preventDefault();
      uiIntro.hide();
      startGame();
    });

    uiReset.click(function (e) {

      e.preventDefault();
      uiComplete.hide();

      $(window).unbind('keyup');
      $(window).unbind('keydown');

      soundThrust.pause();
      soundBackground.pause();

      clearTimeout(scoreTimeout);
      startGame();
    });
  }

  function timer() {

    if (playGame) {

      scoreTimeout = setTimeout(() => {

        uiScore.html(++score);
        if (score % 5 === 0) {

          numAsteroids += 5;
        }
        timer();
      }, 1000);
    }
  }

  //  Animation cycle , This is where the dislike of the game is
  function animate() {


    //  eliminate
    context.clearRect(0, 0, canvasWidth, canvasHeight);


    const asteroidsLength = asteroids.length;
    for (let i = 0; i < asteroidsLength; i++) {

      const tmpAsteroid = asteroids[i];

      tmpAsteroid.x += tmpAsteroid.vX;

      if (tmpAsteroid.x + tmpAsteroid.radius < 0) {

        tmpAsteroid.radius = 5 + (Math.random() * 10);
        tmpAsteroid.x = canvasWidth + tmpAsteroid.radius;
        tmpAsteroid.y = Math.floor(Math.random() * canvasHeight);
        tmpAsteroid.vX = -5 - (Math.random() * 5);
      }

      const dx = player.x - tmpAsteroid.x;
      const dy = player.y - tmpAsteroid.y;
      const distance = Math.sqrt((dx * dx) + (dy * dy));

      if (distance < player.halfWidth + tmpAsteroid.radius) {

        soundThrust.pause();

        soundDeath.currentTime = 0;
        soundDeath.play();

        //  Game over
        playGame = false;
        clearTimeout(scoreTimeout);
        uiStats.hide();
        uiComplete.show()

        soundBackground.pause();

        $(window).unbind("keyup");
        $(window).unbind("keydown");
      }

      context.fillStyle = "rgb(255, 255, 255)";
      context.beginPath();
      context.arc(tmpAsteroid.x, tmpAsteroid.y, tmpAsteroid.radius, 0, Math.PI * 2, true);
      context.closePath();
      context.fill();
    }

    while (asteroids.length < numAsteroids) {

      const radius = 5 + (Math.random() * 10);
      const x = Math.floor(Math.random() * canvasWidth) + canvasWidth + radius;
      const y = Math.floor(Math.random() * canvasHeight);
      const vX = -5 - (Math.random() * 5);
      asteroids.push(new Asteroid(x, y, radius, vX));
    }


    if (player.moveRight) {

      player.vX = 3;
    } else {

      player.vX = -3;
    }

    player.vY = 0;

    if (player.moveRight) {

      player.vX = 3;
      context.save();
      context.translate(player.x - player.halfWidth, player.y);

      if (player.flameLength == 20) {

        player.flameLength = 15;
      } else {

        player.flameLength = 20;
      }
      context.fillStyle = "orange";
      context.beginPath();
      context.moveTo(0, -5);
      context.lineTo(-player.flameLength, 0);
      context.lineTo(0, 5);
      context.closePath();
      context.fill();

      context.restore();
    }

    if (player.moveUp) {

      player.vY = -3;
    }

    if (player.moveDown) {

      player.vY = 3;
    }
    player.x += player.vX;
    player.y += player.vY;

    if (player.x - player.halfWidth < 20) {

      player.x = 20 + player.halfWidth;
    } else if (player.x + player.halfWidth > canvasWidth - 20) {

      player.x = canvasWidth - 20 - player.halfWidth;
    }

    if (player.y - player.halfHeight < 20) {

      player.y = 20 + player.halfHeight;
    } else if (player.y + player.halfHeight > canvasHeight - 20) {

      player.y = canvasHeight - 20 - player.halfHeight;
    }


    context.fillStyle = 'rgb(255, 0, 0)';
    context.beginPath();
    context.moveTo(player.x + player.halfWidth, player.y);
    context.lineTo(player.x - player.halfWidth, player.y - player.halfHeight);
    context.lineTo(player.x - player.halfWidth, player.y + player.halfHeight)
    context.closePath();
    context.fill();

    if (playGame) {

      setTimeout(animate, 33);
    }
  }

  init();

});
边栏推荐
- Flink production problems (1.10)
- The most detailed download tutorial of MySQL
- Deep dive kotlin synergy (XV): Test kotlin synergy
- 007 C语言基础:C运算符
- 流媒体协议初探(MPEG2-TS、RTSP、RTP、RTCP、SDP、RTMP、HLS、HDS、HSS、MPEG-DASH)
- 从某种意义来讲,互联网业已成为了一个孵化器,一个母体
- 013 C语言基础:C指针
- Nignx configuring single IP current limiting
- 微服务系统设计——API 网关服务设计
- 011 C语言基础:C作用域规则
猜你喜欢

1.5 conda的使用

系统架构设计——互联网金融的架构设计

Log collection system

Terminal in pychar cannot enter the venv environment

深潜Kotlin协程(十五):测试 Kotlin 协程
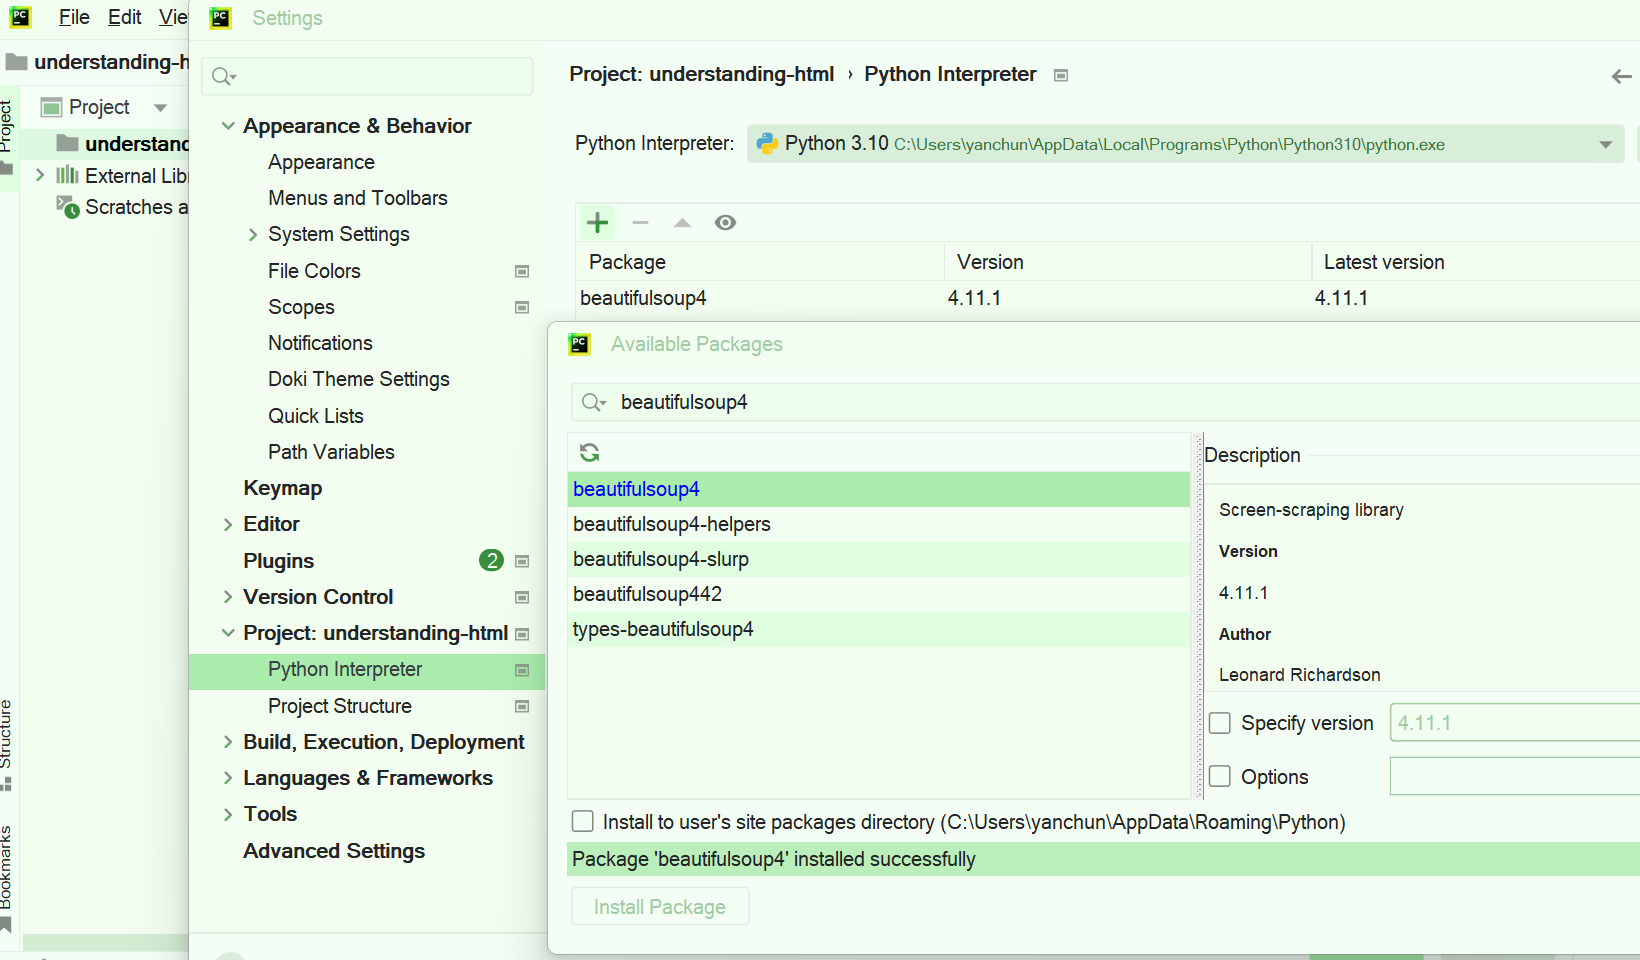
pycharm 如何安装 package
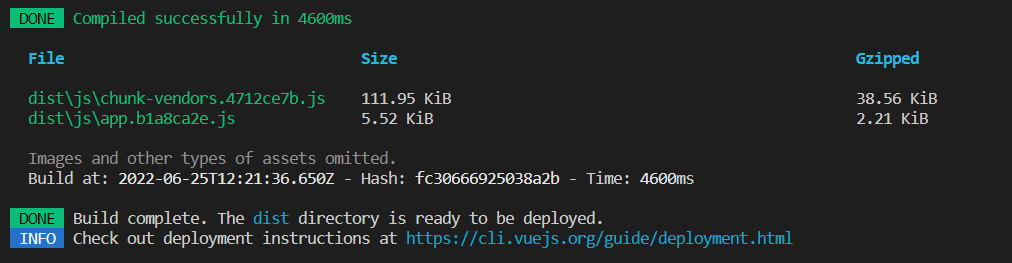
Vue学习笔记(五)Vue2页面跳转问题 | vue-router路由概念、分类与使用 | 编程式路由导航 | 路由组件的缓存 | 5种路由导航守卫 | 嵌套路由 | Vue2项目的打包与部署

2022-06-26: what does the following golang code output? A:true; B:false; C: Compilation error. package main import “fmt“ func main() { type

重映像(STM32)

体验 win10 下 oceanbase 数据库
随机推荐
Deep dive kotlin synergy (XV): Test kotlin synergy
009 C语言基础:C循环
019 C语言基础:C预处理
ES6 0622 III
006 C language foundation: C storage class
DAST black box vulnerability scanner part 6: operation (final)
面试:Selenium 中有哪几种定位方式?你最常用的是哪一种?
Halon common affine transformation operators
How pychart installs packages
《数据库原理与应用》第一版 马春梅……编著 期末复习笔记
微服务系统设计——统一鉴权服务设计
Edge loads web pages in IE mode - edge sets ie compatibility
In a sense, the Internet has become an incubator and a parent
Microservice system design -- distributed cache service design
Installing MySQL on Windows
Qchart note 2: add rollover display
halcon常用仿射变换算子
快速排序(非遞歸)和歸並排序
Ad22 Gerber files Click to open the Gerber step interface. Official solutions to problems
【B站UP DR_CAN学习笔记】Kalman滤波2