当前位置:网站首页>手把手教学OneOS FOTA升级
手把手教学OneOS FOTA升级
2022-07-30 06:45:00 【酱酱酱子】
之前已经跟各位小伙伴介绍过FOTA安全升级的升级步骤及流程,具体可查看博文:《远程升级怕截胡?详解FOTA安全升级》。接下来我将带领大家手把手使用OneOS FOTA升级功能,看完不会来找我。
一、OneOS FOTA概述
OneOS FOTA服务主要由OTA云平台、OTA组件两部分构成。
OTA云平台提供新建OTA项目、制作差分包、差分包测试及发布、查询升级日志等功能。
OTA组件包括BootLoader和APP,BootLoader负责保存引导、差分还原,APP负责制作差分包压缩文件(前置版本压缩包、目标版本压缩包)、版本监测、固件差分包下载、版本校验、日志上报。
1. OTA云平台
OTA平台地址:https://os.iot.10086.cn/otaplatform/ProjectHome。
OTA云平台免费开放,使用通过企业认证的OneOS账号,就能免费使用OTA云平台功能。(OneOS账号注册地址为:https://os.iot.10086.cn/。登录OneOS平台,进入账户中心,可选择企业认证)
2. BootLoader
BootLoader的代码仓库不开源,获取BootLoader时,需要联系OneOS官方由技术支持来提供。
3. OneOS
OneOS的代码仓库目前已开源,码云下载地址:https://gitee.com/cmcc-oneos/OneOS,官网下载地址:https://os.iot.10086.cn/download/。

二、升级流程示例
硬件:本次基于Pandora 开发板,不同开发板配置会有差异
软件:OneOS
配置工具:OneOS Cube
烧录工具:STM32 ST-LINK Utility
Step 1开发板烧录BootLoader
Pandora 支持Lunsun算法,直接烧录BootLoader。
烧录工具:STM32 ST-LINK Utility
A.Connect to the target成功以后,先做 Full chip erase擦除操作。

- Target -> Program & Verify

选择BootLoader真实路径,执行start

烧录成功后,观察开发板启动日志如下:(jump to app failed 是正常的,当前只烧录了Bootloader,没有烧录APP)
OneOS> Flash device | onchip_flash | len: 0x00080000 | erase_size: 0x00000800 ==================== FAL partition table ====================| name | flash_dev | offset | length |-------------------------------------------------------------| bootloader | onchip_flash | 0x00000000 | 0x00018000 || cfg | onchip_flash | 0x00018000 | 0x00000000 || app | onchip_flash | 0x00018000 | 0x00050000 || download | onchip_flash | 0x00068000 | 0x00018000 |=============================================================NO PACKAGENot find user application. Will stop at bootloader.Jump to app failed, run to command modeOneOS> 从这个启动表,可以看出app的启动地址为0x00018000,app的size为0x00050000。
注意:
- BootLoader只需要烧录一次,烧录BootLoader时建议全部擦除。
- BootLoader的代码仓库不开源,需要获取BootLoader时,可以私信官方账号。
Step 2 APP Board boot configure配置
OTA组件需要bootloader支持,烧录bootloader文件后,app的起始地址和app的大小需要配置以后才能跳转成功。配置参数如下:
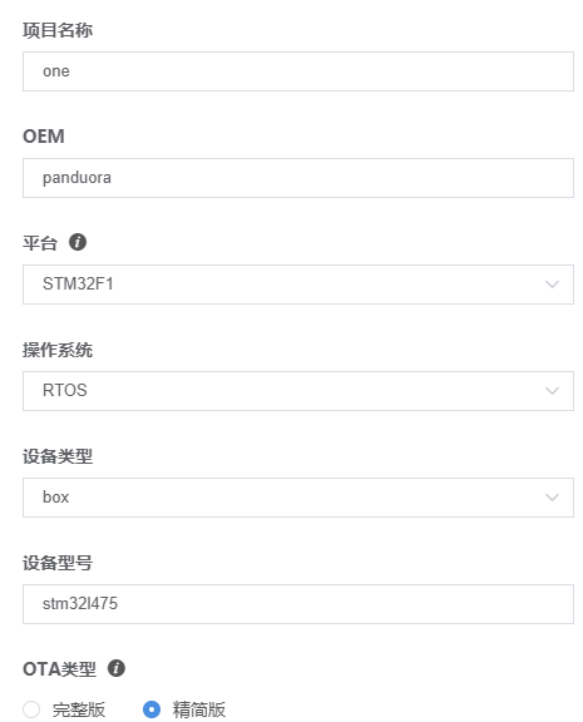
创建成功后,生成关键参数:
OEM、设备型号、Product ID、Product Secret、设备类型、平台

Step 4 APP 开启OTA配置参数,编译生成前置版本 oneos.bin,并制作前置版本压缩包
APP menuconfig 开启OTA ,OTA配置参数和平台参数保持一致。配置如下:
(Top) → Components→ OTA→ Fota by CMIOT OneOS Configuration[*] Enable fota by cmiot The supported download solution (general) ---> The supported network protocol (Http) ---> The supported algorithm (Lusun) --->(3) Segment size index(panduora) Oem(stm32l475) Model(1635694904) Product id(3a812df6a04b4c87a06d68b64a50aeac) Product secret(box) Device type(STM32F1) Platform(3.0) Firmware versionAPP menuconfig 配置完成后,需要使用命令 scons --ide=mdk5 重新生成工程。使用keil编译工程会在工程目录下生成oneos.bin文件。也可以直接使用oneos-cube工具,进入工程目录,直接执行scons编译。
使用oneos-cube制作前置版本压缩包,在工程路径下,执行以下命令:(根据真实的工程路径、压缩软件路径替换打包软件路径)
E:\Code\oneos-2.0\projects\stm32l475-atk-pandora-fota > ..\..\components\ota\cmiot\cmiot_bin.bat "C:\Program Files (x86)\360\360zip\360zip.exe" oneos_config.h oneos.binThe file cannot be copied onto itself. 0 file(s) copied.ONEOS_V1.0cmiot fota used size=0cmiot fota delta size=-2sec_cnt = 0lusunDeleted file - E:\Code\oneos-2.0\projects\stm32l475-atk-pandora-fota\cmiot_info.txtDeleted file - E:\Code\oneos-2.0\projects\stm32l475-atk-pandora-fota\fota-bootlaoder-3.0\cmiot_info.txtComplete制作出了的前置版本压缩包,包含2个文件,其中oneos.bin为APP文件,cmiot_info.txt就是版本信息、差分算法的信息文件。

Step 5 APP 修改其他配置、修改OTA参数 Firmware version,编译生成目标版本 oneos.bin,并制作目标版本压缩包
该部分操作可参考步骤4。
注意:OTA配置里面的Firmware version参数必须修改,其他配置可改可不改。
Step 6 OTA云平台制作差分包,测试通过,并发布
差分包平台地址:https://os.iot.10086.cn/otadiff/#/dashboard
项目、差分对比块大小、目前版本、前置版本需要替换为真实数据。

参数配置完成后,点击下一步、解析成功,再点击下一步制作差分包,制作完成后点击立即部署。


在OTA云平台对应的项目管理里面,可查看版本管理。

点击配置差分、操作状态项执行测试通过,执行成功后,操作状态项再执行发布。


发布成功后,目前版本的状态会变更为已发布

Step 7开发板烧录前置版本oneos.bin文件,启动并连接互联网
烧录工具:STM32 ST-LINK Utility
直接烧录前置版本oneos.bin。
注意:Start address变更为APP的起始地址,File path变更为oneos.bin文件的真实路径。

烧录成功后,观察开发板启动日志如下:
sh />Flash device | onchip_flash | len: 0x00080000 | erase_size: 0x00000800 ==================== FAL partition table ====================| name | flash_dev | offset | length |-------------------------------------------------------------| bootloader | onchip_flash | 0x00000000 | 0x00018000 || cfg | onchip_flash | 0x00018000 | 0x00000000 || app | onchip_flash | 0x00018000 | 0x00050000 || download | onchip_flash | 0x00068000 | 0x00018000 |=============================================================NO PACKAGEFind user application success.The Bootloader will go to user application now.[33m[0] W/STARTUP: OneOS kernel start, version: Kernel-V2.0.1-20210118 [_k_startup][251]cs:cortexm_systick, mult:3355443200, shift:28, mult_t:343597384, shift_t:32ce:lptim1, mult:1074, shift:32, mult_t:4096000000, shift_t:10e:tim2, mult:171798692, shift:31, mult_t:3355443200, shift_t:28ce:tim15, mult:171798692, shift:31, mult_t:3355443200, shift_t:28ce:tim16, mult:171798692, shift:31, mult_t:3355443200, shift_t:28ce:tim17, mult:171798692, shift:31, mult_t:3355443200, shift_t:28[SFUD] Warning: The OS tick(100) is less than 1000. So the flash write will take more time.[SFUD] Find a Winbond flash chip. Size is 16777216 bytes.[SFUD] W25Q128 flash device is initialize success.==================== FAL partition table ====================| name | flash_dev | offset | length |-------------------------------------------------------------| bootloader | onchip_flash | 0x00000000 | 0x00018000 || cfg | onchip_flash | 0x00018000 | 0x00000000 || app | onchip_flash | 0x00018000 | 0x00050000 || download | onchip_flash | 0x00068000 | 0x00018000 || diff_patch | nor_flash | 0x00000000 | 0x00100000 || backup | nor_flash | 0x00100000 | 0x00100000 || easyflash | nor_flash | 0x00200000 | 0x00080000 || wifi_image | nor_flash | 0x00280000 | 0x00080000 || font | nor_flash | 0x00300000 | 0x00700000 || filesystem | nor_flash | 0x00a00000 | 0x00600000 |=============================================================[311] I/esp8266: AT version:1.7.0.0(Aug 16 2018 00:57:04) [module_esp8266_create][216][311] I/esp8266: SDK version:3.0.0(e27cf60) [module_esp8266_create][216][311] I/esp8266: compile time:Oct 30 2018 18:18:34 [module_esp8266_create][216]sh />sh />[817] I/esp8266.wifi: ESP8266 WIFI has get ip [urc_ip_func][829][817] I/esp8266: Auto create esp8266 module object success! [esp8266_auto_create][343]sh />本次测试使用的molink基于模组esp8266连接。
使用ifconfig/ping 查看网络、判断网络连通性。
sh />ifconfigLIST AT MODULE INFORMATION--------------------------------------------------------------------------------Module Name : esp8266WiFi Mode : SoftAP+StationWiFi Status : ConnectedSTA IPv4 Address : 192.168.59.104--------------------------------------------------------------------------------sh />sh />sh />sh />ping www.baidu.com[0] 32 bytes from 39.156.66.14 icmp_seq=0 time=45 ms[1] 32 bytes from 39.156.66.18 icmp_seq=1 time=39 ms[2] 32 bytes from 39.156.66.14 icmp_seq=2 time=40 ms[3] 32 bytes from 39.156.66.18 icmp_seq=3 time=66 msPing statistics for 39.156.66.18 :Packets: Sent = 4, Received = 4, Lost = 0, Mintime = 39 ms, Maxtime = 66 ms, Avgtime = 47 mssh />Step 8 开发板发起版本检测
检测版本是调用cmiot_upgrade接口,可以直接在shell调试界面直接执行cmiot_cv命令。
sh />cmiot_cv[39592] I/esp8266.netconn: Module esp8266 receive close urc data of connect 0 [urc_close_func][667][39592] I/esp8266.netconn: Module esp8266 netconn id 0 destroyed [esp8266_netconn_destroy][209][39740] I/esp8266.netconn: Module esp8266 receive close urc data of connect 0 [urc_close_func][667][39740] I/esp8266.netconn: Module esp8266 netconn id 0 destroyed [esp8266_netconn_destroy][209][39821] I/esp8266.netconn: Module esp8266 receive close urc data of connect 0 [urc_close_func][667][39821] I/esp8266.netconn: Module esp8266 netconn id 0 destroyed [esp8266_netconn_destroy][209]start upgrade rst:0sh />
返回状态为0,说明有升级包且下载成功。
Step 9 开发板差分还原
APP下载新版本差分包完成后,本地md5校验通过。重启设备,进入BootLoader后,读取到download中记录的状态信息,就能判断有差分包,就会进行差分还原,完成差分还原后,就会跳转到APP起始位置,这时运行的APP就已经是升级后的版本了。
差分还原过程及启动如下:
sh />sh />rebootFlash device | onchip_flash | len: 0x00080000 | erase_size: 0x00000800 ==================== FAL partition table ====================| name | flash_dev | offset | length |-------------------------------------------------------------| bootloader | onchip_flash | 0x00000000 | 0x00018000 || cfg | onchip_flash | 0x00018000 | 0x00000000 || app | onchip_flash | 0x00018000 | 0x00050000 || download | onchip_flash | 0x00068000 | 0x00018000 |=============================================================0%1%2%2%3%...... (省略过程)97%97%98%99%100%Update succFind user application success.The Bootloader will go to user application now.[33m[0] W/STARTUP: OneOS kernel start, version: Kernel-V2.0.1-20210118 [_k_startup][251]cs:cortexm_systick, mult:3355443200, shift:28, mult_t:343597384, shift_t:32ce:lptim1, mult:1074, shift:32, mult_t:4096000000, shift_t:10e:tim2, mult:171798692, shift:31, mult_t:3355443200, shift_t:28ce:tim15, mult:171798692, shift:31, mult_t:3355443200, shift_t:28ce:tim16, mult:171798692, shift:31, mult_t:3355443200, shift_t:28ce:tim17, mult:171798692, shift:31, mult_t:3355443200, shift_t:28[SFUD] Warning: The OS tick(100) is less than 1000. So the flash write will take more time.[SFUD] Find a Winbond flash chip. Size is 16777216 bytes.[SFUD] W25Q128 flash device is initialize success.==================== FAL partition table ====================| name | flash_dev | offset | length |-------------------------------------------------------------| bootloader | onchip_flash | 0x00000000 | 0x00018000 || cfg | onchip_flash | 0x00018000 | 0x00000000 || app | onchip_flash | 0x00018000 | 0x00050000 || download | onchip_flash | 0x00068000 | 0x00018000 || diff_patch | nor_flash | 0x00000000 | 0x00100000 || backup | nor_flash | 0x00100000 | 0x00100000 || easyflash | nor_flash | 0x00200000 | 0x00080000 || wifi_image | nor_flash | 0x00280000 | 0x00080000 || font | nor_flash | 0x00300000 | 0x00700000 || filesystem | nor_flash | 0x00a00000 | 0x00600000 |=============================================================[311] I/esp8266: AT version:1.7.0.0(Aug 16 2018 00:57:04) [module_esp8266_create][216][311] I/esp8266: SDK version:3.0.0(e27cf60) [module_esp8266_create][216][311] I/esp8266: compile time:Oct 30 2018 18:18:34 [module_esp8266_create][216]sh />[1115] I/esp8266.wifi: ESP8266 WIFI has get ip [urc_ip_func][829][1115]I/esp8266: Auto create esp8266 module object success! [esp8266_auto_create][343][1116]sh /> Step 10 开发板上报升级结果
完成差分还原后,开发板会正常启动,BootLoader会在Download状态信息中记录升级信息。
开发板连接到互联网,联网成功后,调用cmiot_report_upgrade()接口就可以调用升级日志上报功能,可以直接在shell中输入cmiot_ru调用。
升级日志上报如下:
sh />cmiot_ru[20754] I/esp8266.netconn: Module esp8266 receive close urc data of connect 0 [urc_close_func][667][20754] I/esp8266.netconn: Module esp8266 netconn id 0 destroyed [esp8266_netconn_destroy][209]start report upgrade rst:0sh />返回状态为0,说明有升级结果且上报成功。
在OTA云平台->OTA升级->设备升级详情 也可以查看具体详情:

好啦,以上就是对OneOS FOTA功能的手把手教学,小伙伴若还有相关的问题或疑虑欢迎私信交流。
边栏推荐
猜你喜欢

2020 ACM | MoFlow: An Invertible Flow Model for Generating Molecular Graphs

IDEA search plug-in has no results and the solution has been spinning in circles

Go combines Gin to export Mysql data to Excel table
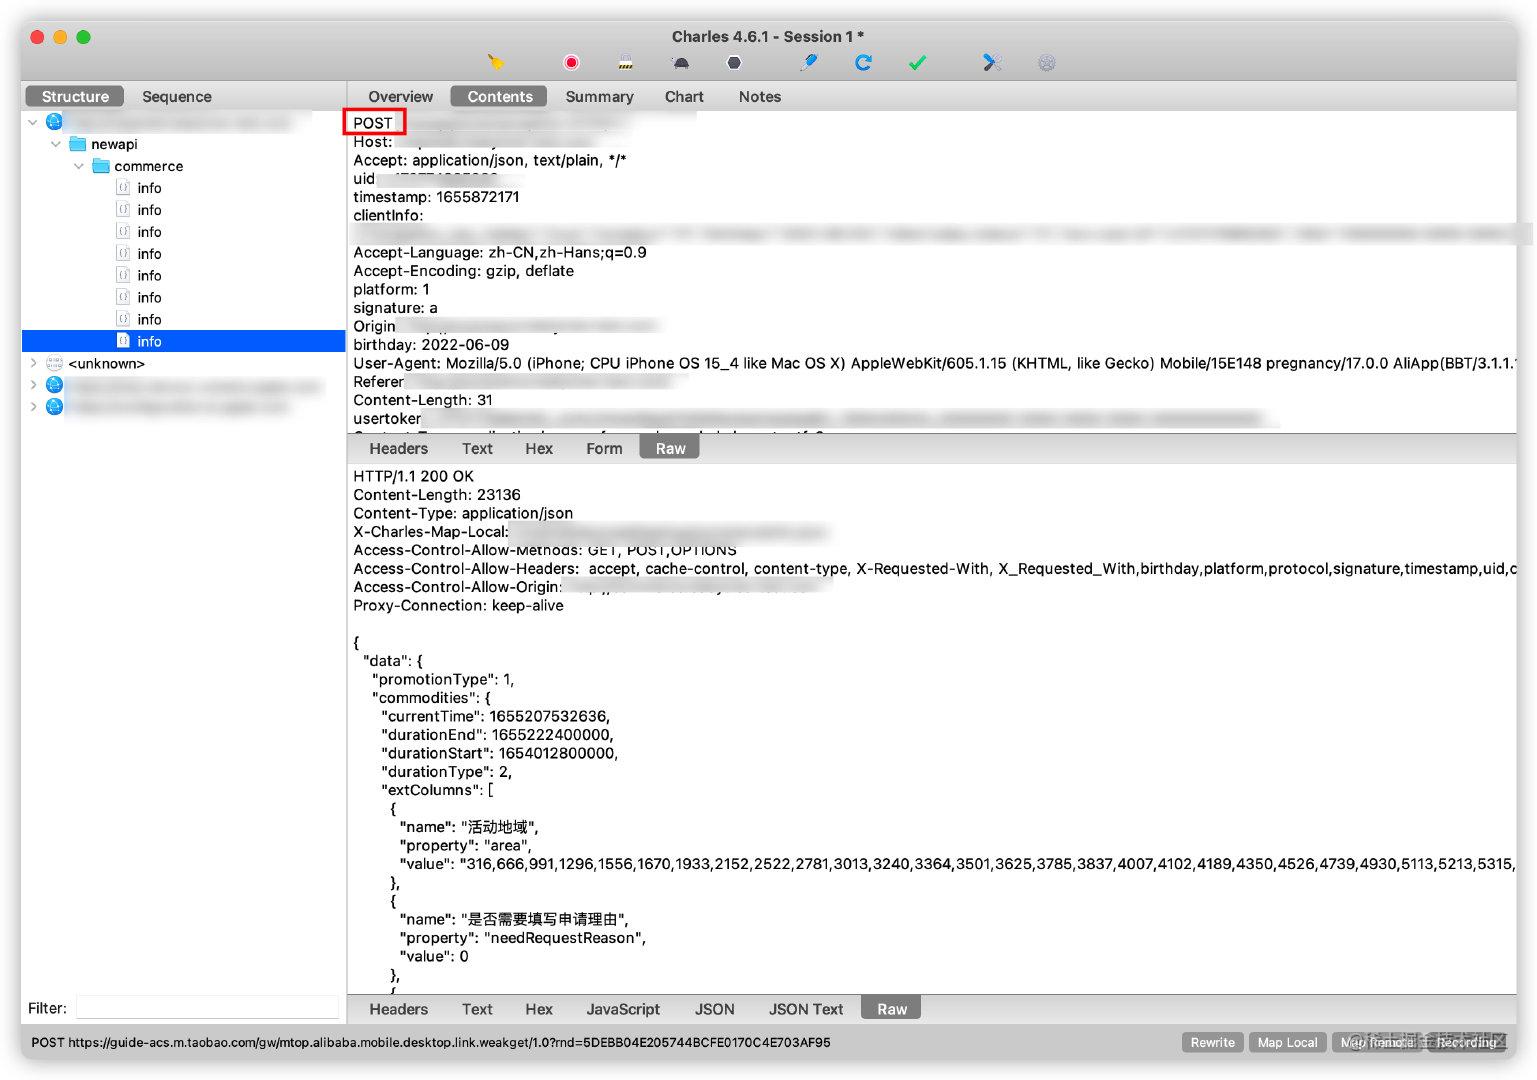
Charles通过Rewrite越过OPTIONS请求拦截

树状数组的基本用法

MySql Detailed Basics

Burpsuite几种爆破方式

01 多线程与高并发 - 基础概念
![[GO Language Basics] 1. Why do I want to learn Golang and get started with GO language](/img/ac/80ab67505f7df52d92a206bc3dd50e.png)
[GO Language Basics] 1. Why do I want to learn Golang and get started with GO language

C# uses RestSharp to implement Get, Post requests (2)
随机推荐
Keil编译大小和存储说明
「活动推荐」探索未来:数字科技
Go uses freecache for caching
【BERT-多标签文本分类实战】之二——BERT的地位与名词术语解释
Input method for programmers
go : go-redis list operation
MySql详解基础
Portable small fan PD power chip
[GAN]老照片修复Bringing Old Photos Back to Life论文总结
AutoSAR EcuM系列02- Fixed EcuM的状态管理
ES:class 的基本使用
Go: use gorm query record
DP5340国产替代CM5340立体声音频A/D转换器芯片
go : go-redis set operations
树状数组的基本用法
this and super
IDEA search plug-in has no results and the solution has been spinning in circles
File类
SQL行列转换
Fix datagrip connection sqlserver error: [08S01] The driver could not establish a secure connection to SQL Server by using Secure Sockets Layer (SSL) encryption.