当前位置:网站首页>Use of OLED screen
Use of OLED screen
2022-07-06 20:22:00 【Kshine2017】
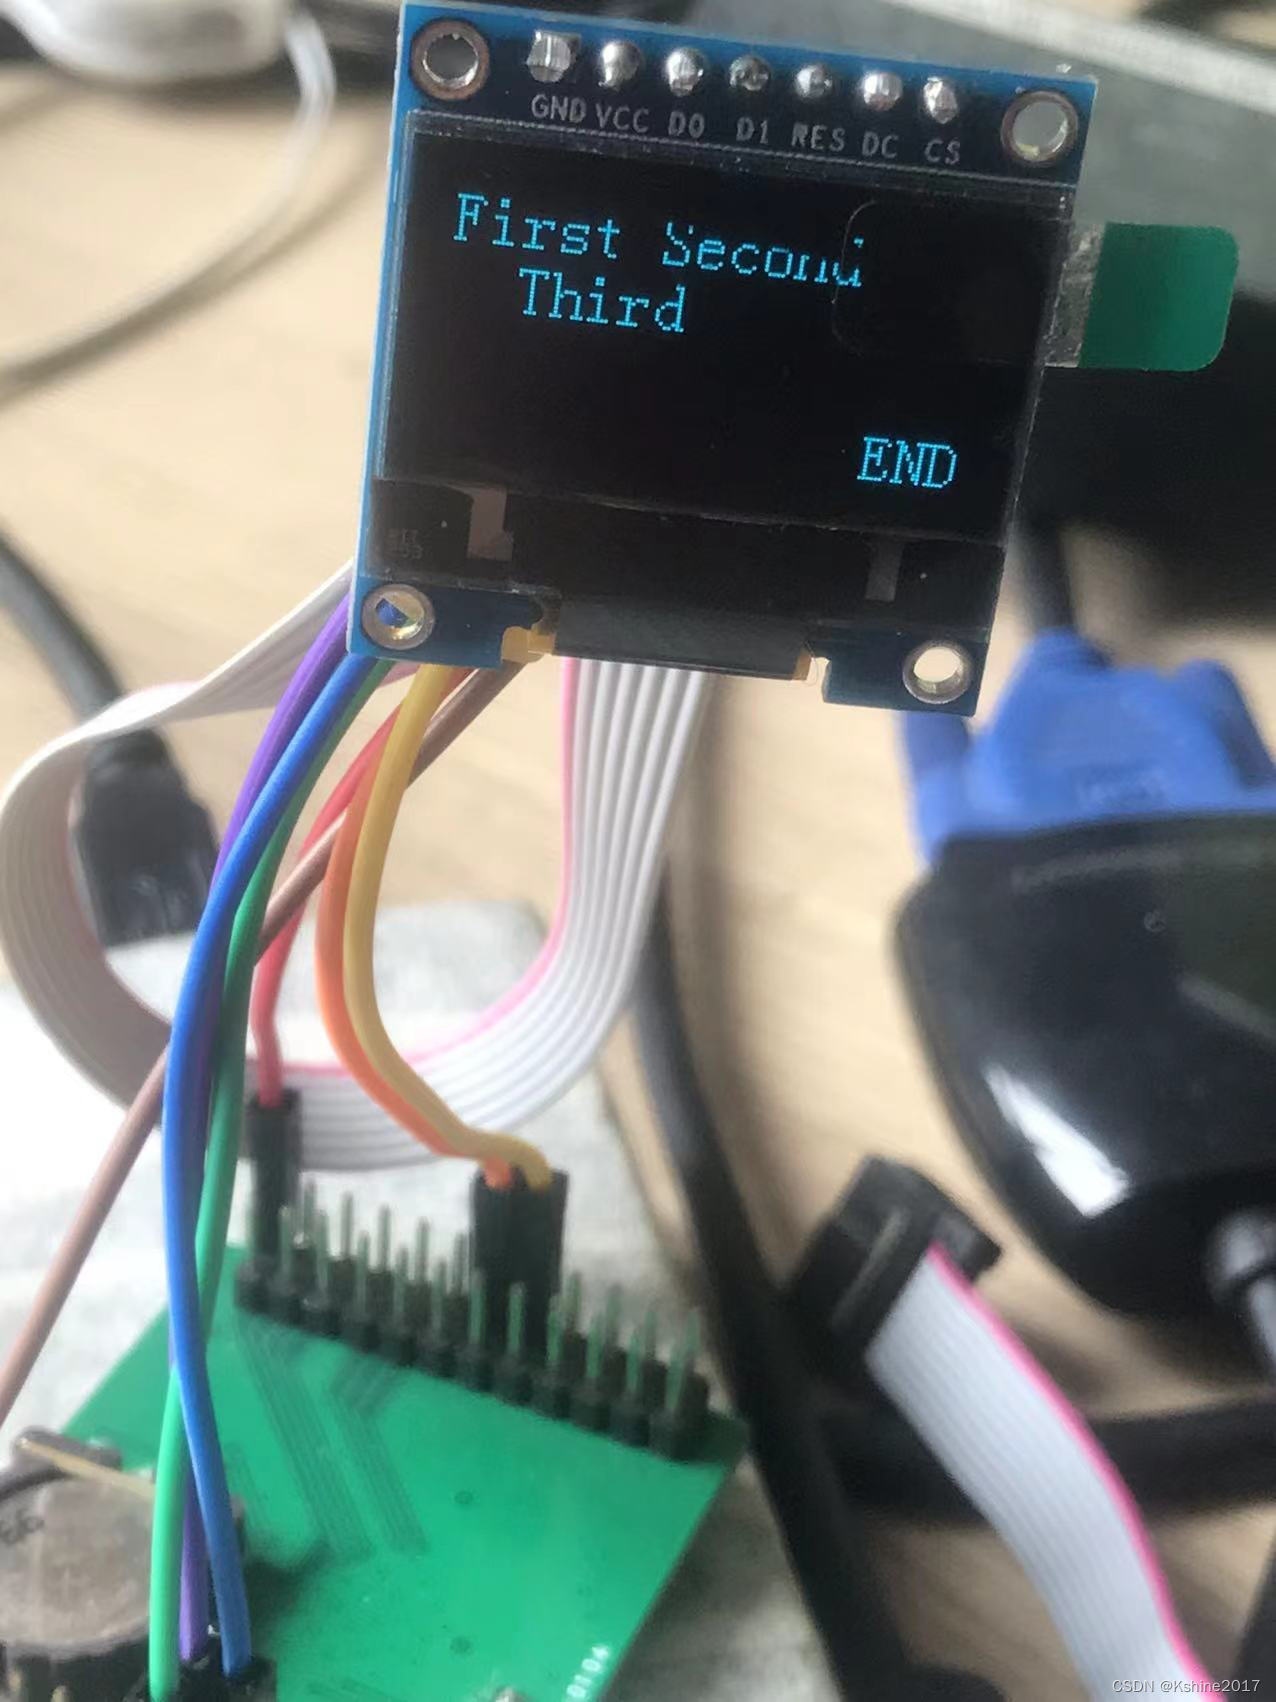
1. 0.96 " 7 Pin OLED The screen
- The missing part of the text in the picture is caused by the mobile phone taking pictures , It's actually a complete text .
- Reference link :
https://wenku.baidu.com/view/eb67b928b91aa8114431b90d6c85ec3a87c28b86.html
https://wenku.baidu.com/view/11e968518d9951e79b89680203d8ce2f00666590.html - Pin interpretation :
GND  GND
VDD  VCC    3.3V~5V
PE5    D0     CLK Clock information (SCL)      SPI_CLK
PE6    D1      Data port (SDA)         SPI_MOSI
PE7    RES     Reset                      Ordinary IO
PE8    DC      data / Command to choose (D/C)       Ordinary IO
PE9    CS      Chip selection , Low level active         SPI_CS
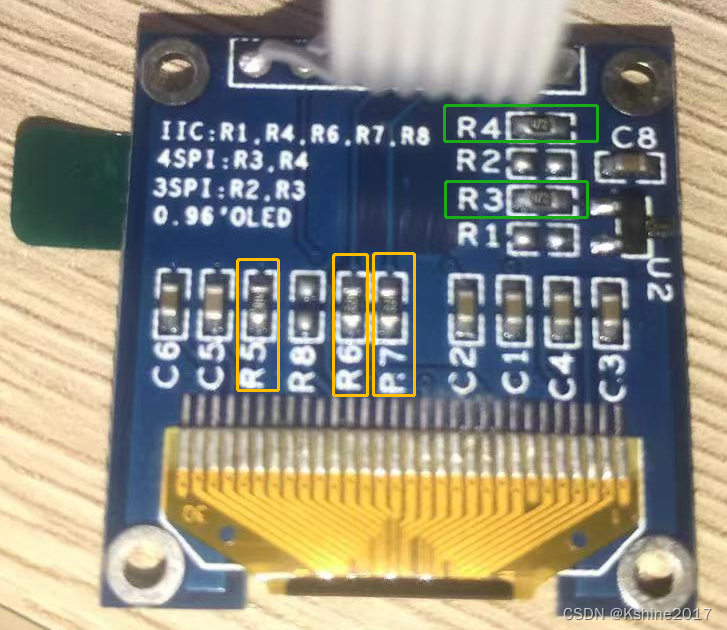
- The connection mode of resistance is shown in the following figure , Corresponding 4 Line SPI.
- IO simulation 4 Line SPI, drive OLED
void MX_GPIO_Init(void)
{


  GPIO_InitTypeDef GPIO_InitStruct = {
    0};

  /* GPIO Ports Clock Enable */
  __HAL_RCC_GPIOD_CLK_ENABLE();
  __HAL_RCC_GPIOA_CLK_ENABLE();

  GPIOA->BSRR = OLED_DC_Pin;
	GPIOA->BSRR = OLED_RES_Pin;
	GPIOA->BSRR = GPIO_PIN_5;//SCK pull up
	GPIOA->BSRR = GPIO_PIN_7;// pull up
	//CS The pin is directly connected GND


	GPIO_InitStruct.Mode = GPIO_MODE_OUTPUT_PP;
  GPIO_InitStruct.Pull = GPIO_NOPULL;

  GPIO_InitStruct.Pin = OLED_DC_Pin|OLED_RES_Pin;
  GPIO_InitStruct.Speed = GPIO_SPEED_FREQ_LOW;
  HAL_GPIO_Init(GPIOA, &GPIO_InitStruct);

	GPIO_InitStruct.Pin = GPIO_PIN_5|GPIO_PIN_7;
	GPIO_InitStruct.Speed = GPIO_SPEED_FREQ_HIGH;
	HAL_GPIO_Init(GPIOA, &GPIO_InitStruct);
}

#define MOSI_H GPIOA->BSRR = GPIO_PIN_7 //HAL_GPIO_WritePin(GPIOA, GPIO_PIN_7, GPIO_PIN_SET) //
#define MOSI_L GPIOA->BRR = GPIO_PIN_7 //HAL_GPIO_WritePin(GPIOA, GPIO_PIN_7, GPIO_PIN_RESET) //
#define SCK_H GPIOA->BSRR = GPIO_PIN_5 //HAL_GPIO_WritePin(GPIOA, GPIO_PIN_5, GPIO_PIN_SET) //
#define SCK_L GPIOA->BRR = GPIO_PIN_5 //HAL_GPIO_WritePin(GPIOA, GPIO_PIN_5, GPIO_PIN_RESET) //

//#define MISO
#define NSS_H
#define NSS_L

void delayUS(uint32_t nus)
{

  uint16_t i;
	for(i=0;i<nus;i++)
	{

	}
}


// have access to SPI The way  HAL_SPI_Transmit(&hspi1,&data,1,1);
void My_SPI_Transmit(unsigned char data)
{


	unsigned char i;	        // Defining variables
	for(i = 0; i < 8; i++)	        // loop 8 Time
	{

		SCK_L;
        delayUS(1);
	    if(data&0x80)
		    MOSI_H;
		else
			  MOSI_L;
		data<<=1;
		delayUS(1);
		SCK_H;
		delayUS(1);
		}

}
Actually measured , MCU works in 72MHz Under the circumstances , Above My_SPI_Transmit The time of function is about 76.4 Microsecond .

Driver file
https://download.csdn.net/download/Kshine2017/85519013
边栏推荐
- 某东短信登录复活 安装部署教程
- Le lancement du jupyter ne répond pas après l'installation d'Anaconda
- How to select several hard coded SQL rows- How to select several hardcoded SQL rows?
- 【计网】第三章 数据链路层(3)信道划分介质访问控制
- Rhcsa Road
- Tencent T4 architect, Android interview Foundation
- 【Yann LeCun点赞B站UP主使用Minecraft制作的红石神经网络】
- Zoom with unity mouse wheel: zoom the camera closer or farther
- Tencent byte Alibaba Xiaomi jd.com offer got a soft hand, and the teacher said it was great
- Poj3617 best cow line
猜你喜欢
枚举根据参数获取值
Tencent byte and other big companies interview real questions summary, Netease architects in-depth explanation of Android Development
BUUCTF---Reverse---easyre
![[cloud native and 5g] micro services support 5g core network](/img/c9/4ccacd1e70285c2ceb50c324e5018c.png)
[cloud native and 5g] micro services support 5g core network
某东短信登录复活 安装部署教程

数字三角形模型 AcWing 1018. 最低通行费
5. 無線體內納米網:十大“可行嗎?”問題

BUUCTF---Reverse---easyre

【每周一坑】信息加密 +【解答】正整数分解质因数
Tencent T2 Daniel explained in person and doubled his job hopping salary
随机推荐
Enumeration gets values based on parameters
[network planning] Chapter 3 data link layer (3) channel division medium access control
电子游戏的核心原理
Trends of "software" in robotics Engineering
What programming do children learn?
Tencent cloud database public cloud market ranks top 2!
How to handle the timeout of golang
8086指令码汇总表(表格)
Cesium 两点之间的直线距离
【云原生与5G】微服务加持5G核心网
Tencent byte Alibaba Xiaomi jd.com offer got a soft hand, and the teacher said it was great
Tips for web development: skillfully use ThreadLocal to avoid layer by layer value transmission
AsyncHandler
使用ssh连接被拒
爬虫(14) - Scrapy-Redis分布式爬虫(1) | 详解
5. Wireless in vivo nano network: top ten "feasible?" problem
系统与应用监控的思路和方法
设计你的安全架构OKR
How to select several hard coded SQL rows- How to select several hardcoded SQL rows?
【GET-4】

