「本文正在参加星光计划3.0--夏日挑战赛」
前言
in the previous sharing,The author describes in detail how to use code layout to create grid areasUI.And in this issue of sharing,The author will add corresponding game functions around the grid area.
上期的内容回顾——>> https://ost.51cto.com/posts/14446
正文
本期,The author will detail an important feature of the game——数字填入的制作方法.
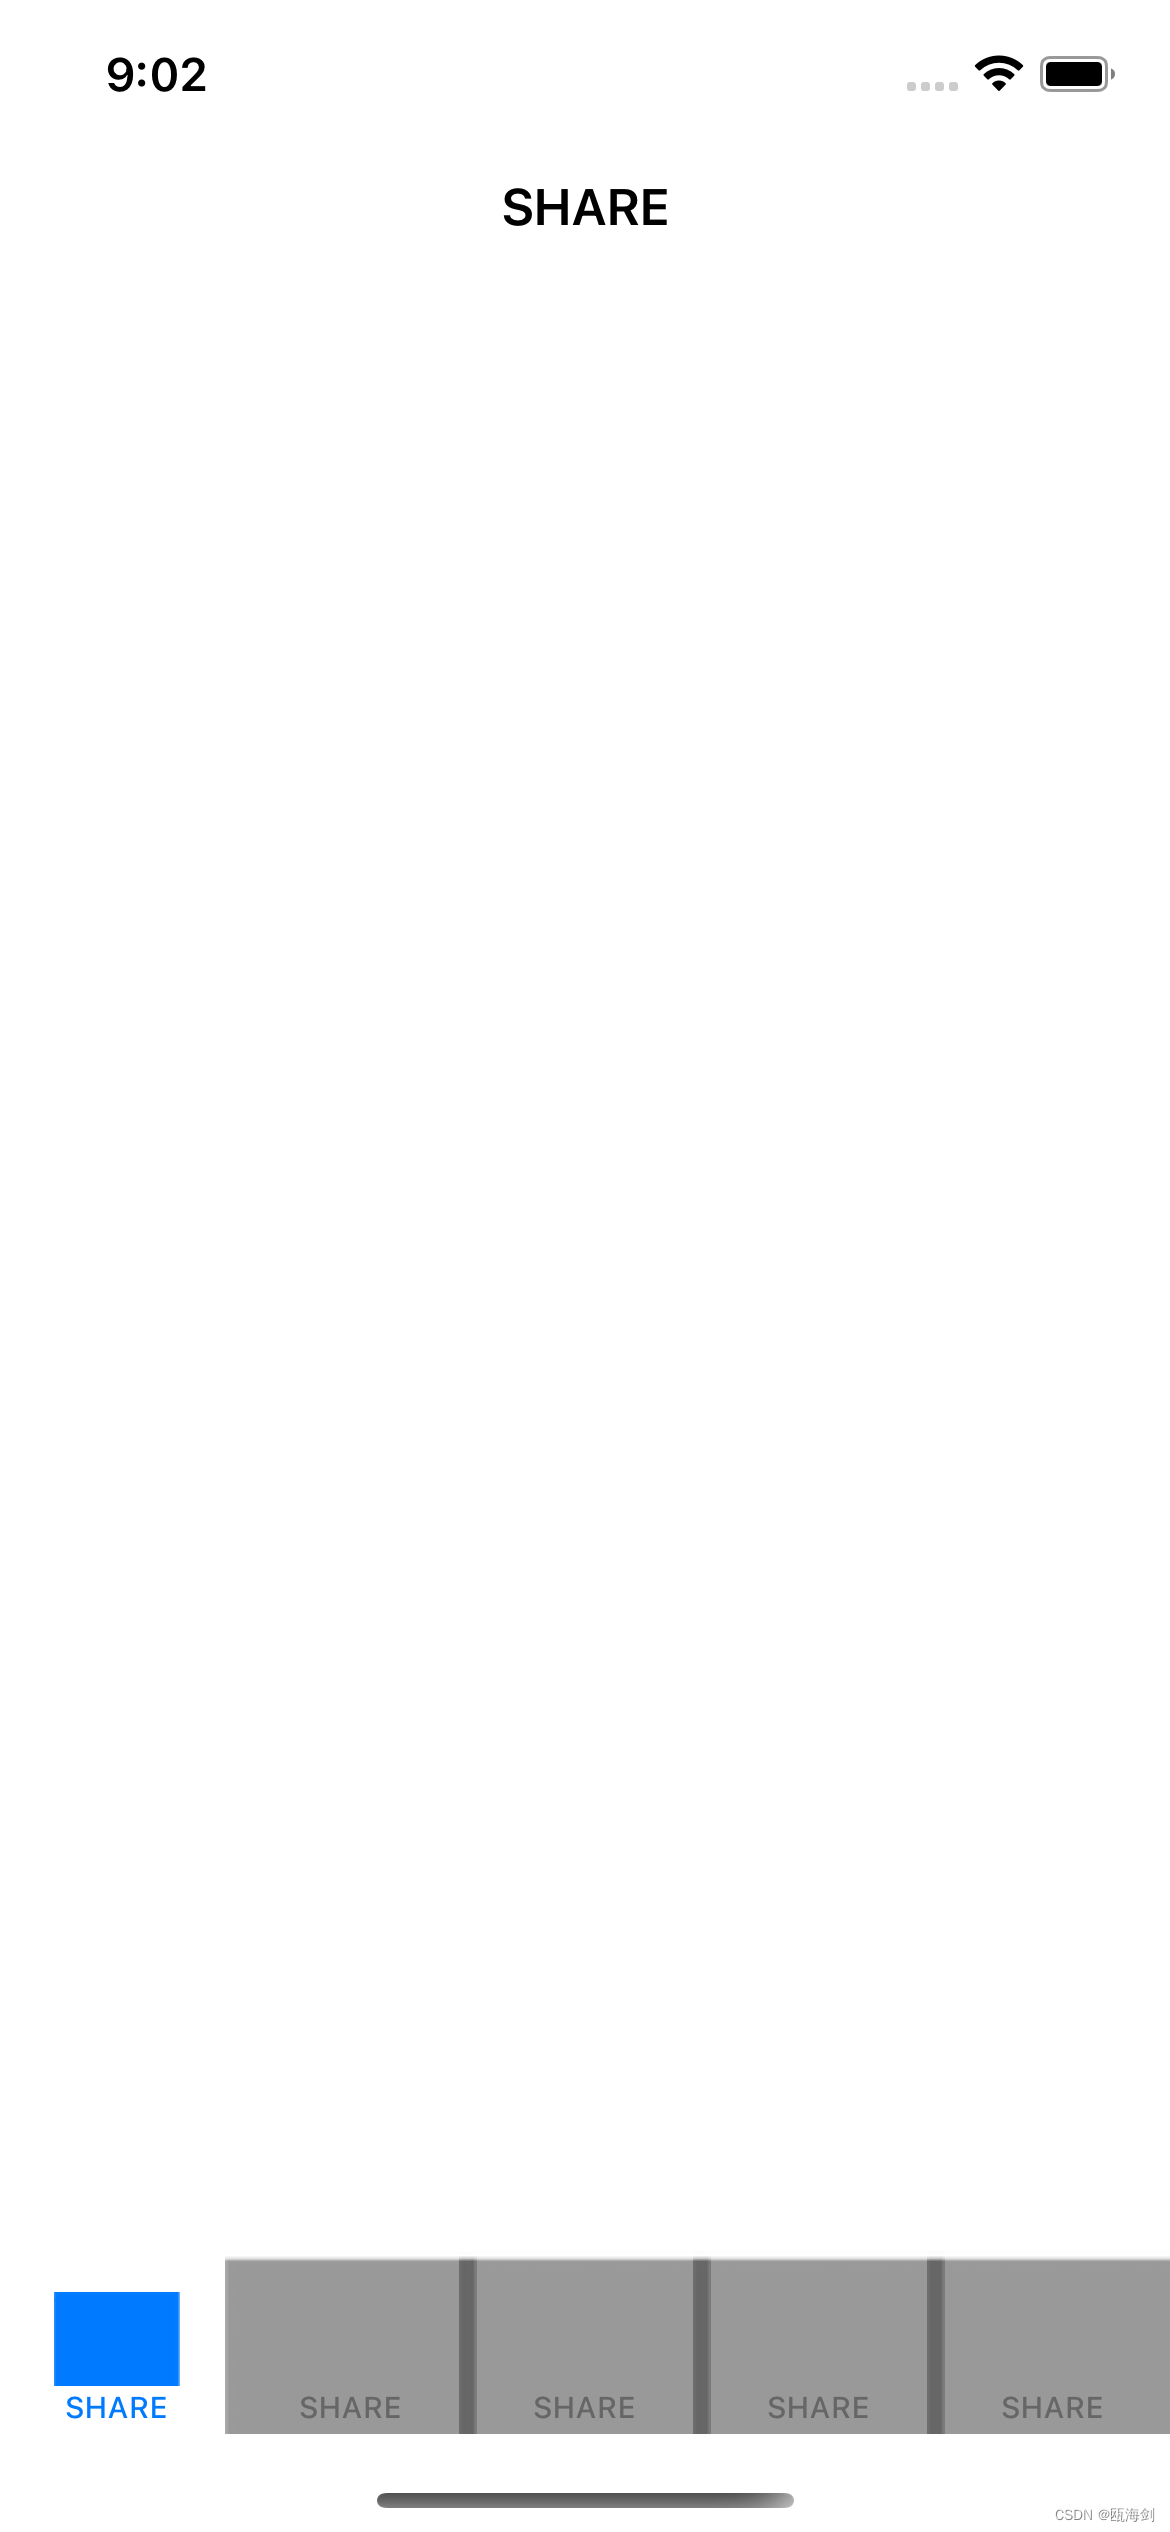
The production of this function is divided into two parts.The first part is to make it whiteButton组件(That is, the white squares in the grid area)Gain focus when clicked by the user,效果图如下:
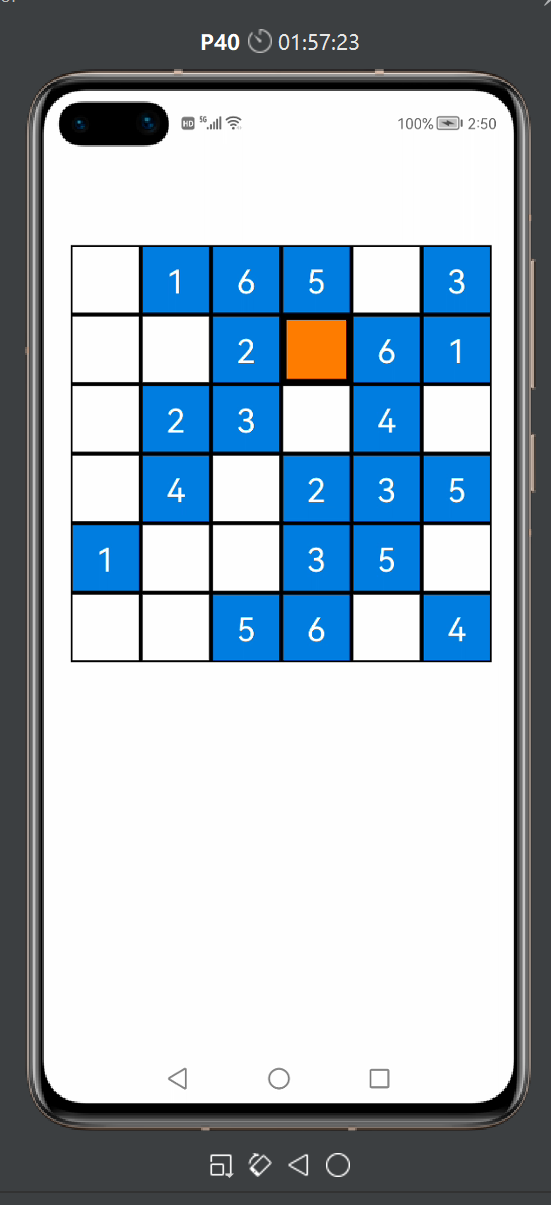
The orange grid in the figure represents thisButtonThe component is in focus(This square is the last one clicked by the userButton组件),Allows the user to enter numbers.显然,The benefit of this is to locate the grid the user wants to interact with,In order to facilitate the user to perform the operation of filling in the numbers.
The second part provides buttons for filling in numbers and logic codes for adding numbers,效果图如下:

图中,The author first clicked on the white grid in the second row and first column of the grid area,Then click the number marked with it5的圆形按钮,So numbers are generated in the grids of the second row and the first column5.If other circular buttons are clicked,Then other numbers will be generated in the square.
The following author will introduce the specific steps.
Make the white square get focus by clicking
首先,Let's define a new one firstShapeElement对象,Something white in the grid areaButtonAfter the component gets focus,这个ButtonComponents will use thisShapeElementObject defines the background element(It turns orange):
       ShapeElement

       element1

       =

       new

       ShapeElement();


       element1.

       setRgbColor(

       new

       RgbColor(

       255,

       125,

       0));

       //将RGBcolor is set to orange


       element1.

       setStroke(

       12,

       new

       RgbColor(

       0,

       0,

       0));
接着,我们先在GameAbilitySlice中找到上期写入的二重for循环的代码:
       for (

       y

       =

       0;

       y

       <

       6;

       y

       ++){


       for (

       x

       =

       0;

       x

       <

       6;

       x

       ++) {


       Button

       button

       =

       new

       Button(

       this);


       number

       =

       grid_c0[

       x][

       y];


       string0

       =

       String.

       valueOf(

       number);


       button.

       setText(

       string0);


       button.

       setTextColor(

       Color.

       WHITE);


       button.

       setTextSize(

       75);


       button.

       setComponentSize(

       160,

       160);


       button.

       setContentPosition(

       65

       +

       160

       *

       x,

       230

       +

       160

       *

       y);


       if (

       number

       ==

       0) {


       button.

       setText(

       "");


       button.

       setBackground(

       element0);


       button.

       setTextColor(

       Color.

       BLACK);


                }

       else{


       button.

       setBackground(

       element3);


                }


       layout1.

       addComponent(

       button);


            }


        }
- 1.
- 2.
- 3.
- 4.
- 5.
- 6.
- 7.
- 8.
- 9.
- 10.
- 11.
- 12.
- 13.
- 14.
- 15.
- 16.
- 17.
- 18.
- 19.
- 20.
- 21.
- 22.
- 23.
- 24.
- 25.
- 26.
- 27.
- 28.
- 29.
- 30.
- 31.
- 32.
- 33.
This code is very important code in this project,He is equivalent to the basic framework of the entire game.in post-production,The author will be based on this二重for循环The framework adds a lot of logic code.
这里,Let's add some code to this code:
       for (

       y

       =

       0;

       y

       <

       6;

       y

       ++){


       for (

       x

       =

       0;

       x

       <

       6;

       x

       ++) {


       Button

       button

       =

       new

       Button(

       this);


       //Make the component touchable to get focus


       button.

       setTouchFocusable(

       true);


       button.

       setTextColor(

       Color.

       WHITE);


       button.

       setTextSize(

       75);


       button.

       setComponentSize(

       160,

       160);


       button.

       setContentPosition(

       65

       +

       160

       *

       x,

       230

       +

       160

       *

       y);


       if (

       number

       ==

       0) {


       button.

       setText(

       "");


       button.

       setBackground(

       element0);


       button.

       setTextColor(

       Color.

       BLACK);


       //Set focus-aware listeners


       button.

       setComponentStateChangedListener(

       new

       Component.

       ComponentStateChangedListener() {


       @Override


       public

       void

       onComponentStateChanged(

       Component

       component,

       int

       i) {


       if (

       ComponentState.

       isStateMatched(

       ComponentState.

       COMPONENT_STATE_FOCUSED,

       i)){


       button.

       setBackground(

       element1);


                            }

       else{


       button.

       setBackground(

       element0);


                            }


                        }


                    });


                }

       else{


       button.

       setBackground(

       element3);


                }


       layout1.

       addComponent(

       button);


            }


        }
- 1.
- 2.
- 3.
- 4.
- 5.
- 6.
- 7.
- 8.
- 9.
- 10.
- 11.
- 12.
- 13.
- 14.
- 15.
- 16.
- 17.
- 18.
- 19.
- 20.
- 21.
- 22.
- 23.
- 24.
- 25.
- 26.
- 27.
- 28.
- 29.
- 30.
- 31.
- 32.
- 33.
- 34.
- 35.
- 36.
- 37.
- 38.
- 39.
- 40.
- 41.
- 42.
- 43.
- 44.
- 45.
- 46.
- 47.
在上述代码中,笔者首先将for循环中的ButtonThe object is set to be focusable by touch,接着在ifa judgment branch(number==0)中加入Component state aware listener:when something is satisfiednumber=0的Button组件(That is, the white squares in the grid area)获得焦点时,它将改用element1作为背景元素;when it loses focus,它重新将element0as its background element.
打开模拟机,You can see the corresponding effect:
Provide buttons to fill in numbers and add logic codes to fill in numbers
首先,我们先创建两个Button对象:
       button_temp

       =

       new

       Button(

       this);

       //for digital input


       button_empty

       =

       new

       Button(

       this);

       //Used to cancel focus


       for (

       y

       =

       0;

       y

       <

       6;

       y

       ++){


       for (

       x

       =

       0;

       x

       <

       6;

       x

       ++) {


               ...


         }


    }
- 1.
- 2.
- 3.
- 4.
- 5.
- 6.
- 7.
- 8.
- 9.
- 10.
- 11.
之后,我们还需要在二重for循环The corresponding code is written inside:
       for (

       y

       =

       0;

       y

       <

       6;

       y

       ++){


       for (

       x

       =

       0;

       x

       <

       6;

       x

       ++) {


       Button

       button

       =

       new

       Button(

       this);


       button.

       setTouchFocusable(

       true);


       button.

       setTextColor(

       Color.

       WHITE);


       button.

       setTextSize(

       75);


       button.

       setComponentSize(

       160,

       160);


       button.

       setContentPosition(

       65

       +

       160

       *

       x,

       230

       +

       160

       *

       y);


       if (

       number

       ==

       0) {


       button.

       setText(

       "");


       button.

       setBackground(

       element0);


       button.

       setTextColor(

       Color.

       BLACK);


       //设置button的点击监听器


       button.

       setClickedListener(

       new

       Component.

       ClickedListener() {


       @Override


       public

       void

       onClick(

       Component

       component) {


       //当某个Buttonwhen the object is clicked,这个Buttonobject will be assigned tobutton_temp


       button_temp

       =

       button;


                        }


                    });


       button.

       setComponentStateChangedListener(

       new

       Component.

       ComponentStateChangedListener() {


       @Override


       public

       void

       onComponentStateChanged(

       Component

       component,

       int

       i) {


       if (

       ComponentState.

       isStateMatched(

       ComponentState.

       COMPONENT_STATE_FOCUSED,

       i)){


       button.

       setBackground(

       element1);


                            }

       else{


       button.

       setBackground(

       element0);


                            }


                        }


                    });


                }

       else{


       button.

       setBackground(

       element3);


       //设置ButtonThe object's click listener


       button.

       setClickedListener(

       new

       Component.

       ClickedListener() {


       @Override


       public

       void

       onClick(

       Component

       component) {


       //当某个Buttonwhen the object is clicked,这个Buttonobject will be assigned tobutton_empty


       button_temp

       =

       button_empty;


                        }


                    });


                }


       layout1.

       addComponent(

       button);


            }


        }
- 1.
- 2.
- 3.
- 4.
- 5.
- 6.
- 7.
- 8.
- 9.
- 10.
- 11.
- 12.
- 13.
- 14.
- 15.
- 16.
- 17.
- 18.
- 19.
- 20.
- 21.
- 22.
- 23.
- 24.
- 25.
- 26.
- 27.
- 28.
- 29.
- 30.
- 31.
- 32.
- 33.
- 34.
- 35.
- 36.
- 37.
- 38.
- 39.
- 40.
- 41.
- 42.
- 43.
- 44.
- 45.
- 46.
- 47.
- 48.
- 49.
- 50.
- 51.
- 52.
- 53.
- 54.
- 55.
- 56.
- 57.
- 58.
- 59.
- 60.
- 61.
- 62.
in this revision,We added two listeners for the white grid and the blue grid in the grid area,Makes both types of grids when clicked,button_temp或者button_emptyis assigned what was clickedButton对象.
接着,我们需要在GameAbilitySlice的UI界面加入6round buttons:
先创建这6button background element:
       ShapeElement

       element2

       =

       new

       ShapeElement();


       element2.

       setRgbColor(

       new

       RgbColor(

       255,

       255,

       255));


       element2.

       setShape(

       ShapeElement.

       OVAL);

       //Set the component shape to circle


       element2.

       setStroke(

       10,

       new

       RgbColor(

       0,

       125,

       225));
然后,We use code layout to create6个button对象,代码如下:
       Button

       button_input1

       =

       new

       Button(

       this);


       button_input1.

       setText(

       "1");


       button_input1.

       setTextColor(

       Color.

       BLACK);


       button_input1.

       setTextSize(

       75);


       button_input1.

       setBackground(

       element2);


       button_input1.

       setComponentSize(

       150,

       150);


       button_input1.

       setPosition(

       70,

       1600);


       button_input1.

       setClickedListener(

       new

       Component.

       ClickedListener() {


       @Override


       public

       void

       onClick(

       Component

       component) {


       button_temp.

       setTextColor(

       Color.

       BLACK);


       button_temp.

       setText(

       "1");


            }


        });


       layout1.

       addComponent(

       button_input1);


       Button

       button_input2

       =

       new

       Button(

       this);


       button_input2.

       setText(

       "2");


       button_input2.

       setTextColor(

       Color.

       BLACK);


       button_input2.

       setTextSize(

       75);


       button_input2.

       setBackground(

       element2);


       button_input2.

       setComponentSize(

       150,

       150);


       button_input2.

       setPosition(

       70

       +

       160

       *

       1,

       1600);


       button_input2.

       setClickedListener(

       new

       Component.

       ClickedListener() {


       @Override


       public

       void

       onClick(

       Component

       component) {


       button_temp.

       setTextColor(

       Color.

       BLACK);


       button_temp.

       setText(

       "2");


            }


        });


       layout1.

       addComponent(

       button_input2);


       Button

       button_input3

       =

       new

       Button(

       this);


       button_input3.

       setText(

       "3");


       button_input3.

       setTextColor(

       Color.

       BLACK);


       button_input3.

       setTextSize(

       75);


       button_input3.

       setBackground(

       element2);


       button_input3.

       setComponentSize(

       150,

       150);


       button_input3.

       setPosition(

       70

       +

       160

       *

       2,

       1600);


       button_input3.

       setClickedListener(

       new

       Component.

       ClickedListener() {


       @Override


       public

       void

       onClick(

       Component

       component) {


       button_temp.

       setTextColor(

       Color.

       BLACK);


       button_temp.

       setText(

       "3");


            }


        });


       layout1.

       addComponent(

       button_input3);


       Button

       button_input4

       =

       new

       Button(

       this);


       button_input4.

       setText(

       "4");


       button_input4.

       setTextColor(

       Color.

       BLACK);


       button_input4.

       setTextSize(

       75);


       button_input4.

       setBackground(

       element2);


       button_input4.

       setComponentSize(

       150,

       150);


       button_input4.

       setPosition(

       70

       +

       160

       *

       3,

       1600);


       button_input4.

       setClickedListener(

       new

       Component.

       ClickedListener() {


       @Override


       public

       void

       onClick(

       Component

       component) {


       button_temp.

       setText(

       "4");


            }


        });


       layout1.

       addComponent(

       button_input4);


       Button

       button_input5

       =

       new

       Button(

       this);


       button_input5.

       setText(

       "5");


       button_input5.

       setTextColor(

       Color.

       BLACK);


       button_input5.

       setTextSize(

       75);


       button_input5.

       setBackground(

       element2);


       button_input5.

       setComponentSize(

       150,

       150);


       button_input5.

       setPosition(

       70

       +

       160

       *

       4,

       1600);


       button_input5.

       setClickedListener(

       new

       Component.

       ClickedListener() {


       @Override


       public

       void

       onClick(

       Component

       component) {


       button_temp.

       setText(

       "5");


                  }


        });


       layout1.

       addComponent(

       button_input5);


       Button

       button_input6

       =

       new

       Button(

       this);


       button_input6.

       setText(

       "6");


       button_input6.

       setTextColor(

       Color.

       BLACK);


       button_input6.

       setTextSize(

       75);


       button_input6.

       setBackground(

       element2);


       button_input6.

       setComponentSize(

       150,

       150);


       button_input6.

       setPosition(

       70

       +

       160

       *

       5,

       1600);


       button_input6.

       setClickedListener(

       new

       Component.

       ClickedListener() {


       @Override


       public

       void

       onClick(

       Component

       component) {


       button_temp.

       setText(

       "6");


            }


        });


       layout1.

       addComponent(

       button_input6);
- 1.
- 2.
- 3.
- 4.
- 5.
- 6.
- 7.
- 8.
- 9.
- 10.
- 11.
- 12.
- 13.
- 14.
- 15.
- 16.
- 17.
- 18.
- 19.
- 20.
- 21.
- 22.
- 23.
- 24.
- 25.
- 26.
- 27.
- 28.
- 29.
- 30.
- 31.
- 32.
- 33.
- 34.
- 35.
- 36.
- 37.
- 38.
- 39.
- 40.
- 41.
- 42.
- 43.
- 44.
- 45.
- 46.
- 47.
- 48.
- 49.
- 50.
- 51.
- 52.
- 53.
- 54.
- 55.
- 56.
- 57.
- 58.
- 59.
- 60.
- 61.
- 62.
- 63.
- 64.
- 65.
- 66.
- 67.
- 68.
- 69.
- 70.
- 71.
- 72.
- 73.
- 74.
- 75.
- 76.
- 77.
- 78.
- 79.
- 80.
- 81.
- 82.
- 83.
- 84.
- 85.
- 86.
- 87.
- 88.
- 89.
- 90.
- 91.
- 92.
- 93.
- 94.
- 95.
- 96.
- 97.
Although this code looks long,但实际上每个ButtonThe code templates for objects are all the same.在这段代码中,每个Button对象都定义了6properties and a listener,这6properties include——组件显示的文本(Text),The color of the displayed text of the component(TextColor),The size of the displayed text of the component(TextSize),The component's background element(Background),组件的尺寸(ComponentSize),组件的坐标(Position),And the listener is set执行事件则是为button_temp定义文本内容(i.e. generate numbers on white squares).可以看出,The instructions in the click listener for each circular button are orientedbutton_temp的,而button_tempAgain, it depends on which grid area the user clicks onbutton组件.So the author is creatingbutton_temp与button_empty时,Their properties are not defined,button_tempThe role is as a bridge for digital input,而button_emptyThe role is to preventWhen the user clicks on the blue grid in the grid area,The previous focused white grid can still be entered这么一个BUG.
Let's re-evaluate the logic of digital input:
首先,We randomly click on a white one in the grid areaButton对象(That is, the white square),this whiteButtonThe object gains focus and turns orange,And this whiteButtonobject is assignedbutton_temp(即button_temp=button);之后,We click on the numbers marked with them5的圆形按钮,则button_tempThe display text content of is set to “5”,又因为:button_temp=button,So the previous operation is equivalent to will获得焦点的Button对象(That is the orange square)The display text content is set to “5”,So we can see it on the simulator,Orange grids generate numbers5.When we click on other white squares or blue squares,The orange square that was in focus has lost focus,Color returns to white.
结尾
本期的内容就先分享到这里,更多关于数独小游戏项目精彩的内容我将在下期继续为大家揭晓.
想了解更多关于开源的内容,请访问:
51CTO 开源基础软件社区
https://ost.51cto.com/#bkwz