当前位置:网站首页>小程序经典案例
小程序经典案例
2022-08-04 17:18:00 【小叶_01】
1.上拉触底事件
data: {

    colorList: [],
    isloding: false
  },

  getColors() {

    this.setData({

      isloding: true
    })
    // 需要展示 loading 效果
    wx.showLoading({

      title: '数据加载中...'
    })
    wx.request({

      url: 'https://www.escook.cn/api/color',
      method: 'get',
      success: ({
      data: res }) => {

        this.setData({

          colorList: [...this.data.colorList, ...res.data]
        })
      },
      complete: () => {

        wx.hideLoading()
        this.setData({

          isloding: false
        })
      }
    })
  },
  onReachBottom: function () {

  	//isloading 节流阀
    if (this.data.isloding) return
    this.getColors()
  },
2.分页判断是否还有 数据
页码值 * 每页显示多少条数据 >= 总数据条数
page * pageSize >= total 代表没数据了
3.自定义tabber
4.封装request
config.js
// 配置服务器相关信息
export default {

  host: 'http://localhost:3000',
  mobileHost: 'https://zhiyongzaixian123123.utools.club'
}
request.js
// 发送ajax请求
/* * 1. 封装功能函数 * 1. 功能点明确 * 2. 函数内部应该保留固定代码(静态的) * 3. 将动态的数据抽取成形参,由使用者根据自身的情况动态的传入实参 * 4. 一个良好的功能函数应该设置形参的默认值(ES6的形参默认值) * 2. 封装功能组件 * 1. 功能点明确 * 2. 组件内部保留静态的代码 * 3. 将动态的数据抽取成props参数,由使用者根据自身的情况以标签属性的形式动态传入props数据 * 4. 一个良好的组件应该设置组件的必要性及数据类型 * props: { * msg: { * required: true, * default: 默认值, * type: String * } * } * * */
import config from './config'
export default  (url, data={
    }, method='GET') => {

  return new Promise((resolve, reject) => {

    // 1. new Promise初始化promise实例的状态为pending
    wx.request({

      url: config.host + url,
      data,
      method,
      header: {

        cookie: wx.getStorageSync('cookies')?wx.getStorageSync('cookies').find(item => item.indexOf('MUSIC_U') !== -1):''
      },
      success: (res) => {

        // console.log('请求成功: ', res);
        if(data.isLogin){
    // 登录请求
          // 将用户的cookie存入至本地
          wx.setStorage({

            key: 'cookies',
            data: res.cookies
          })
        }
        resolve(res.data); // resolve修改promise的状态为成功状态resolved
      },
      fail: (err) => {

        // console.log('请求失败: ', err);
        reject(err); // reject修改promise的状态为失败状态 rejected
      }
    })
  })

}
5.配置网络请求
由于平台的限制,小程序项目中不支持 axios,而且原生的 wx.request() API 功能较为简单,不支持拦截器等全局定制的功能。因此,建议在 uni-app 项目中使用 @escook/request-miniprogram 第
三方包发起网络数据请求
官方文档
//main.js
	import {
     $http } from '@escook/request-miniprogram'
	uni.$http = $http
	// 配置请求根路径
	$http.baseUrl = 'https://www.uinav.com'
// 请求开始之前做一些事情
	$http.beforeRequest = function (options) {

	    uni.showLoading({
     title: '数据加载中...', })
	}
// 请求完成之后做一些事情
	$http.afterRequest = function () {

		uni.hideLoading()
	}
}
6.滚动条切换左侧tab,上下滚动条回到顶部
:scroll-top="scrollTop
点击tab的时候加上
this.scrollTop = this.scrollTop === 0 ? 1 : 0
7.输入框防抖
input(e) {
// 清除 timer 对应的延时器
clearTimeout(this.timer)
// 重新启动一个延时器,并把 timerId 赋值给 this.timer
this.timer = setTimeout(() => {
// 如果 500 毫秒内,没有触发新的输入事件,则为搜索关键词赋值
this.kw = e.value console.log(this.kw)
}, 500)
}
8.数组实操的简单方案
转为set增删
// 1. 将 Array 数组转化为 Set 对象
const set = new Set(this.historyList)
// 2. 调用 Set 对象的 delete 方法,移除对应的元素
set.delete(this.kw)
// 3. 调用 Set 对象的 add 方法,向 Set 中添加元素
set.add(this.kw)
// 4. 将 Set 对象转化为 Array 数组
this.historyList = Array.from(set)
9.下拉刷新结合回调的经典案例
// 下拉刷新的事件
onPullDownRefresh() {

	// 1. 重置关键数据
	this.queryObj.pagenum = 1
	this.total = 0
	this.isloading = false
	this.goodsList = []
	// 2. 重新发起请求
	this.getGoodsList(() => uni.stopPullDownRefresh())
}

// 获取商品列表数据的方法
async getGoodsList(cb) {

	this.isloading = true
	const {
     data: res } = await uni.$http.get('/api/public/v1/goods/search', this.queryObj)
	this.isloading = false
	// 只要数据请求完毕,就立即按需调用 cb 回调函数
	cb && cb()
	if (res.meta.status !== 200) return uni.$showMsg()
	this.goodsList =[...this.goodsList,...res.message.goods]
	this.total = res.message.total
}
10.登录、需要登录的页面跳转后返回
1.为登录的 button 按钮绑定 open-type=“getUserInfo” 属性,表示点击按钮时,希望获取用户的基本信息
2.调用uni.login()获取code
3.利用code和用户信息调用登录接口获取token
4.把token和用户信息存在vuex和缓存中
代码
<template>
  <view class="login-container">
    <uni-icons type="contact-filled" size="100" color="#AFAFAF"></uni-icons>
    <button type="primary" class="btn-login" open-type="getUserInfo" @getuserinfo="getUserInfo">一键登录</button>
    <text class="tips-text">登录后尽享更多权益</text>
  </view>
</template>

<script>
  import {
     mapMutations, mapState } from 'vuex'

  export default {

    data() {

      return {


      };
    },
    computed: {

      ...mapState('m_user', ['redirectInfo'])
    },
    methods: {

      ...mapMutations('m_user', ['updateUserInfo', 'updateToken', 'updateRedirectInfo']),
      // 用户授权之后,获取用户的基本信息
      getUserInfo(e) {

        console.log(e)

        if (e.detail.errMsg === 'getUserInfo:fail auth deny') return uni.$showMsg('您取消了登录授权!')

        console.log(e.detail.userInfo)
        this.updateUserInfo(e.detail.userInfo)

        this.getToken(e.detail)
      },
      async getToken(info) {

        // 获取 code 对应的值
        const [err, res] = await uni.login().catch(err => err)

        if (err || res.errMsg !== 'login:ok') return uni.$showMsg('登录失败!')

        // 准备参数
        const query = {

          code: res.code,
          encryptedData: info.encryptedData,
          iv: info.iv,
          rawData: info.rawData,
          signature: info.signature
        }

        const {
     data: loginResult } = await uni.$http.post('/api/public/v1/users/wxlogin', query)
        if (loginResult.meta.status !== 200) return uni.$showMsg('登录失败!')

        // 直接把 token 保存到 vuex 中
        this.updateToken(loginResult.message.token)
        this.navigateBack()
      },
      navigateBack() {

        if (this.redirectInfo && this.redirectInfo.openType === 'switchTab') {

          uni.switchTab({

            url: this.redirectInfo.from,
            complete: () => {

              this.updateRedirectInfo(null)
            }
          })
        }
      }
    }
  }
</script>

vuex
store.js
import Vue from 'vue'
import Vuex from 'vuex'
import moduleCart from '@/store/cart.js'
import moduleUser from '@/store/user.js'
Vue.use(Vuex)
const store = new Vuex.Store({

  modules: {

    'm_user': moduleUser
  }
})
export default store
user.js
export default {

  // 开启命名空间
  namespaced: true,

    token: uni.getStorageSync('token') || '',
    // 用户的信息对象
    userinfo: JSON.parse(uni.getStorageSync('userinfo') || '{}'),
    // 重定向的 Object 对象
    redirectInfo: null
  }),

  // 方法
  mutations: {

    updateUserInfo(state, userinfo) {

      state.userinfo = userinfo
      this.commit('m_user/saveUserInfoToStorage')
    },
    saveUserInfoToStorage(state) {

      uni.setStorageSync('userinfo', JSON.stringify(state.userinfo))
    },
    updateToken(state, token) {

      state.token = token
      this.commit('m_user/saveTokenToStorage')
    },
    saveTokenToStorage(state) {

      uni.setStorageSync('token', state.token)
    },
    updateRedirectInfo(state, info) {

      state.redirectInfo = info
      console.log(state.redirectInfo)
    }
  },

  getters: {

    // 收货地址
    addstr(state) {

      if (!state.address.provinceName) return ''
      return state.address.provinceName + state.address.cityName + state.address.countyName + state.address.detailInfo
    }
  }
}
退出登录
清空token和用户信息
this.updateUserInfo({
    })
this.updateToken('')
11.延迟3秒跳转登录界面
export default {

    data() {

      return {

        // 倒计时的秒数
        seconds: 3,
        // 定时器的 Id
        timer: null
      };
    },
    methods: {

      // 延时导航到 my 页面
      delayNavigate() {

        this.seconds = 3
        this.showTips(this.seconds)
        this.timer = setInterval(() => {

          this.seconds--
          if (this.seconds <= 0) {

            clearInterval(this.timer)
            uni.switchTab({

              url: '/pages/my/my',
              success: () => {

                this.updateRedirectInfo({

                  openType: 'switchTab',
                  from: '/pages/cart/cart'
                })
              }
            })
            return
          }
          this.showTips(this.seconds)
        }, 1000)
      },
      // 展示倒计时的提示消息
      showTips(n) {

        uni.showToast({

          icon: 'none',
          title: '请登录后再结算!' + n + '秒之后自动跳转到登录页',
          mask: true,
          duration: 1500
        })
      }
    }
  }
</script>
12.微信支付
前提
在请求头中添加 Token 身份认证的字段
原因说明:只有在登录之后才允许调用支付相关的接口,所以必须为有权限的接口添加身份认证的请求头字段
实现:
main.js拦截器处理
import Vue from 'vue'
import App from './App'
import store from '@/store/store.js'
// 导入网络请求的包
import {
     $http } from '@escook/request-miniprogram'
uni.$http = $http
// 请求拦截器
$http.beforeRequest = function(options) {

  uni.showLoading({

    title: '数据加载中...'
  })
  // 判断当前请求的是否为有权限的接口
  if (options.url.indexOf('/my/') !== -1) {

    options.header = {

      Authorization: store.state.m_user.token
    }
  }
}
流程
- 创建订单
请求创建订单的 API 接口:把(订单金额、收货地址、订单中包含的商品信息)发送到服务器;
服务器响应的结果:订单编号
2.订单预支付
请求订单预支付的 API 接口:把(订单编号)发送到服务器
服务器响应的结果:订单预支付的参数对象 ,里面包含了订单支付相关的必要参数
3.发起微信支付
调用 uni.requestPayment() 这个 API,发起微信支付;把步骤 2 得到的 “订单预支付对象” 作为参数传递给 uni.requestPayment() 方法
监听 uni.requestPayment() 这个 API 的 success , fail ,complete 回调函数
4.调接口查看订单支付状态,来确认支付是否成功。
代码:
// 用户点击了结算按钮
      settlement() {

        if (!this.checkedCount) return uni.$showMsg('请选择要结算的商品!')
        if (!this.addstr) return uni.$showMsg('请选择收货地址!')
        // if (!this.token) return uni.$showMsg('请先登录!')
        if (!this.token) return this.delayNavigate()
        this.payOrder()
      },
      async payOrder() {

        // 1. 创建订单
        // 1.1 组织订单的信息对象
        const orderInfo = {

          // order_price: this.checkedGoodsAmount,
          order_price: 0.01,
          consignee_addr: this.addstr,
          goods: this.cart.filter(x => x.goods_state).map(x => ({

            goods_id: x.goods_id,
            goods_number: x.goods_count,
            goods_price: x.goods_price
          }))
        }

        // 1.2 发起请求创建订单
        const {
     data: res } = await uni.$http.post('/api/public/v1/my/orders/create', orderInfo)
        if (res.meta.status !== 200) return uni.$showMsg('创建订单失败!')

        // 1.3 得到服务器响应的“订单编号”
        const orderNumber = res.message.order_number

        // 2. 订单预支付
        // 2.1 发起请求获取订单的支付信息
        const {
     data: res2 } = await uni.$http.post('/api/public/v1/my/orders/req_unifiedorder', {
     order_number: orderNumber })
        // 2.2 预付订单生成失败
        if (res2.meta.status !== 200) return uni.$showMsg('预付订单生成失败!')
        // 2.3 得到订单支付相关的必要参数
        const payInfo = res2.message.pay

        // 3. 发起微信支付
        // 3.1 调用 uni.requestPayment() 发起微信支付
        const [err, succ] = await uni.requestPayment(payInfo)
        // 3.2 未完成支付
        if (err) return uni.$showMsg('订单未支付!')
        // 3.3 完成了支付,进一步查询支付的结果
        const {
     data: res3 } = await uni.$http.post('/api/public/v1/my/orders/chkOrder', {
     order_number: orderNumber })
        // 3.4 检测到订单未支付
        if (res3.meta.status !== 200) return uni.$showMsg('订单未支付!')
        // 3.5 检测到订单支付完成
        uni.showToast({

          title: '订单支付完成!',
          icon: 'success'
        })
      },
14.滑动
主要uniapp官网使用uni-swipe-action 滑动事件
//滑动删除,
<uni-swipe-action>
      <block v-for="(goods, i) in cart" :key="i">
        <uni-swipe-action-item :options="options" @click="swipeItemClickHandler(goods)">
          <my-goods :goods="goods" :show-radio="true" :show-num="true" @radio-change="radioChangeHandler" @num-change="numberChangeHandler"></my-goods>
        </uni-swipe-action-item>
      </block>
    </uni-swipe-action>
边栏推荐
猜你喜欢
一张图片怎么旋转90度。利用ps

Cesium快速上手0-Cesium安装与基本介绍
Clearance sword refers to Offer——The sword refers to Offer II 010. and the sub-array of k

荣耀互联对外开放,赋能智能硬件合作伙伴,促进全场景生态产品融合

租房小程序登顶码云热门

88.(cesium之家)cesium聚合图
浅谈运用低代码技术如何实现物流企业的降本增效
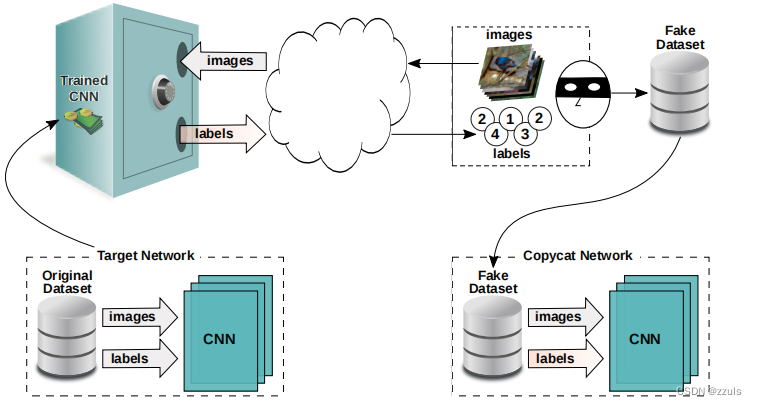
Copycat CNN: Stealing Knowledge by Persuading Confession with Random Non-Labeled Data阅读心得
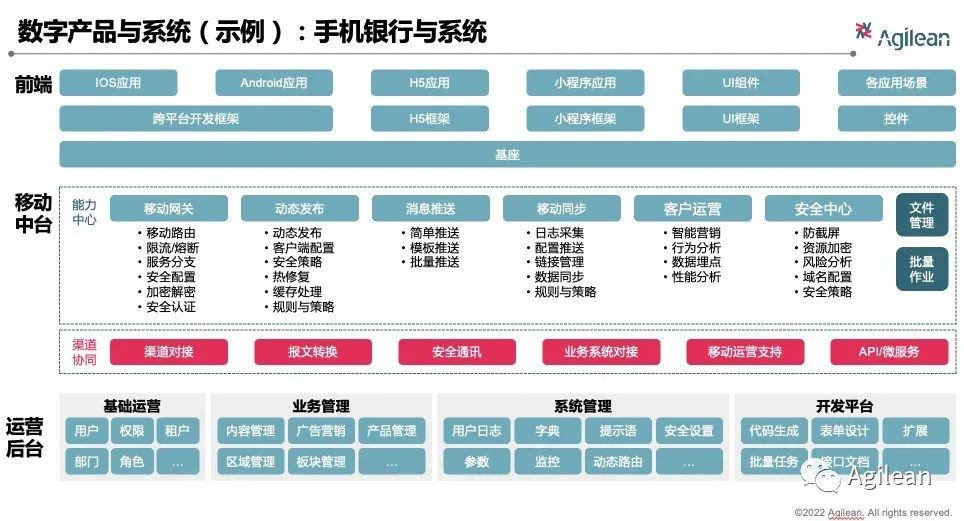
数字化金融企业的产品体系长啥样?
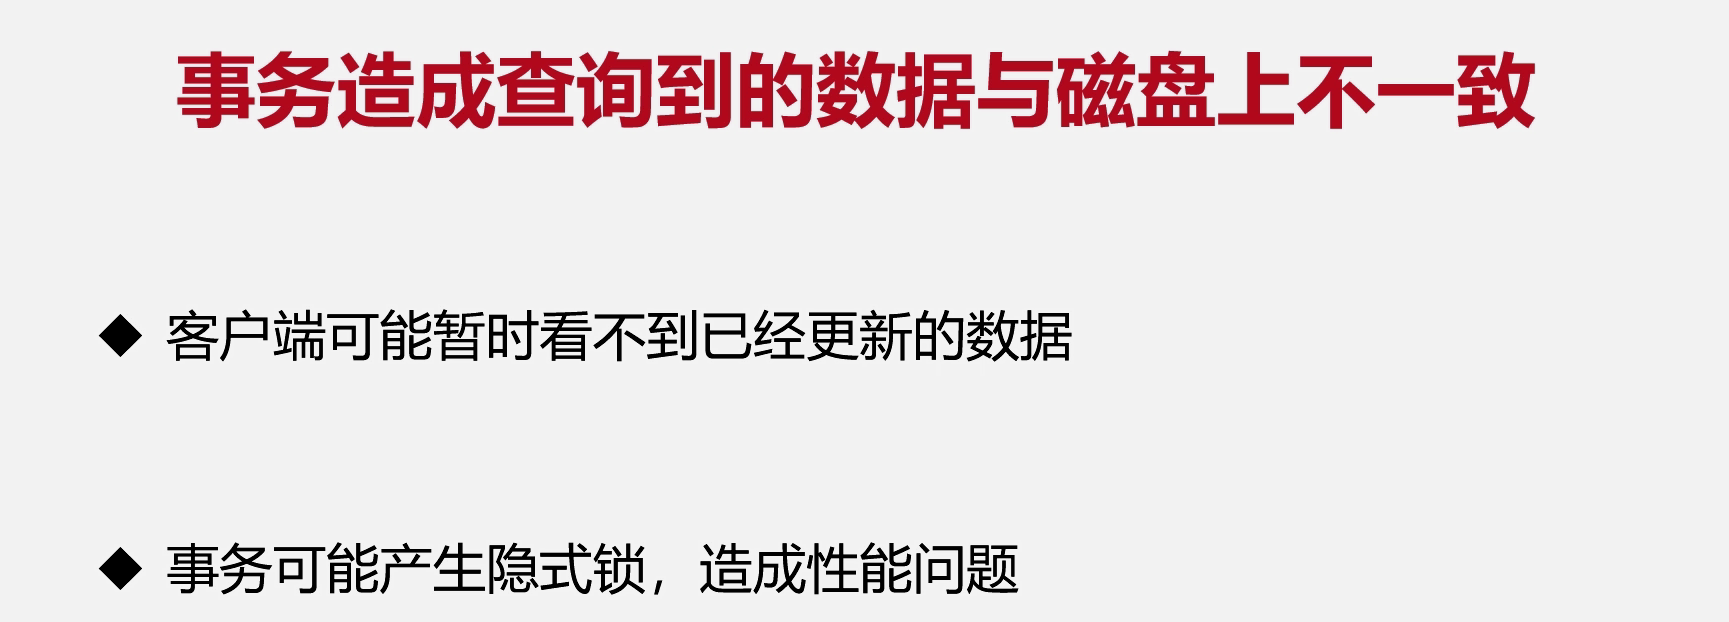
MySQL学习笔记-4.数据更新时的性能问题
随机推荐
What does the product system of a digital financial enterprise look like?
R语言ggplot2可视化:使用patchwork包的plot_layout函数将多个可视化图像组合起来,nrow参数指定行的个数、byrow参数指定按照列顺序排布图
机器学习(十):朴素贝叶斯
php如何查询字符串以什么开头
【Gazebo入门教程】第二讲 模型库导入与可视化机器人建模(模型编辑器)
字节二面被问到mysql事务与锁问题,我蚌埠住了
移动平台助力推进智慧型科研院所信息化建设
icu是哪个国家的域名?icu是什么域名?
安装失败怎么办
LeetCode Question of the Day - 1403. Minimum Subsequence in Non-Increasing Order
nyist 301 递推求值(矩阵快速幂)
R语言glm函数使用频数数据构建二分类logistic回归模型,分析的输入数据为频数数据(多个分类指标对应的阴性样本和阳性样本的频数数据)、weights参数指定频数值
Cron表达式
树莓派连接蓝牙音箱
面试官:可以谈谈乐观锁和悲观锁吗
在VMD上可视化hdf5格式的分子轨迹文件
SRM供应商协同管理系统功能介绍
WEB 渗透之SSTI 模板注入
最小区间覆盖
通关剑指 Offer——剑指 Offer II 010. 和为 k 的子数组