当前位置:网站首页>Template engine - thymeleaf
Template engine - thymeleaf
2022-06-11 11:31:00 【Java rookie ~】
template engine - Thymeleaf
1. Introduction to template engine
template engine ? You may have heard about template engines for the first time , I guess you can't help asking : What is a template engine ?
template engine ( This is especially for
WebDeveloped template engine ), For user interface and business data ( Content ) The result of separation , It can generate documents in a specific format , The template engine for the site will generate a standardhtmlfile ;
- Literally : The most important thing about the template engine is Templates Two words , It is equivalent to making a template and inserting the data in the corresponding position , With a final
htmlShow it in the format of ; - After the template is designed, you can directly fill in the data , Without having to redesign the entire page , This improves the reusability of pages and code ;
2. Template engine and Thymeleaf Relationship
Java There are many template engines in , Template engine is the product of the development and progress of dynamic web pages , At the beginning and most popular jsp It's a template engine , But because of jsp There are many shortcomings , So many people abandon jsp Choose a third-party template engine , There are also many open source third-party template engines on the market , Yes Thymeleaf、FreeMaker、Velocity The template engine has a wide audience .
Use Thymeleaf advantage :
- Dynamic and static separation :
ThymeleafUsehtmlIts meaning is represented by some specific tag syntax , And did not destroyhtmlstructure , Even without the Internet 、 It can be opened successfully in the browser without back-end rendering , It greatly facilitates the testing and modification of the interface ;
Relationship :
ThymeleafIs one of the products of template engine !!!
3. Template engine principle
- First : The client browser initiates
HTTPAsk toservletin ; servletCall template engine organization Templates ( Static resources )+ data ( Dynamic resources ), Splice the two together into oneHTMLcharacter string ;- Will be
HTMLThe string is returned to the server ;
4. Usage flow
Process 1 : adopt maven Introduce dependencies
- stay
mavenCentral warehouse searchThymeleafAnd select a version ;
maven Central warehouse website :https://mvnrepository.com/
After entering , Search for Thymeleaf:
- choice
3.0.12edition ;

- Copy dependent code to
pox.xmlAnd refresh ;

At the same time, we need to use servlet, Therefore, we should also introduce servlet Dependency package ;
 <dependency>
            <groupId>javax.servlet</groupId>
            <artifactId>javax.servlet-api</artifactId>
            <version>3.1.0</version>
            <scope>provided</scope>
        </dependency>
Process 2 : establish HTML Template file
establish hello.html , Put it in webapp/WEB-INF/templates Directory ;
<!doctype html>
<html lang="en">
<head>
    <meta charset="UTF-8">
    <meta name="viewport" content="width=device-width, user-scalable=no, initial-scale=1.0, maximum-scale=1.0, minimum-scale=1.0">
    <meta http-equiv="X-UA-Compatible" content="ie=edge">
    <title>Document</title>
</head>
<body>
   <h3> Web template technology learning </h3>
   <p th:text="${message}"></p>
</body>
</html>
Process 3 : To write servlet Code
Operation steps :
- Create a template engine ;
- Create a web page template parser ;
- Set the encoding at render time ;
- Set the prefix and suffix of the web page template file path ;
- Bind the template parser to the template engine ;
- Create a
webContext ( Semantics of environment , Inside is map structure , Store key value pair data ); - Set the data of key value pair ;
- Returns the rendered web page string ;
package org.example;

import org.thymeleaf.TemplateEngine;
import org.thymeleaf.context.WebContext;
import org.thymeleaf.templateresolver.ServletContextTemplateResolver;

import javax.servlet.ServletException;
import javax.servlet.annotation.WebServlet;
import javax.servlet.http.HttpServlet;
import javax.servlet.http.HttpServletRequest;
import javax.servlet.http.HttpServletResponse;
import java.io.IOException;

@WebServlet("/hello")

public class HelloServlet extends HttpServlet {

    // Template engines return HTML, So rewrite HTML
    @Override
    protected void doGet(HttpServletRequest req, HttpServletResponse resp) throws ServletException, IOException {

       // Set up body Format and coding format
        resp.setContentType("text/html; charset = utf-8");

        //1. Create a template engine
        TemplateEngine engine = new TemplateEngine();

        //2. Create a web page template parser
        ServletContextTemplateResolver resolver = new ServletContextTemplateResolver(getServletContext());

        //3. Set the encoding at render time
        resolver.setCharacterEncoding("utf-8");

        //4. Set the prefix and suffix of the web page template file path
        resolver.setPrefix("/WEB-INF/templates/");
        resolver.setSuffix(".html");

        //5. Bind the template parser to the template engine
        engine.setTemplateResolver(resolver);

        //6. Create a web Context ( Semantics of environment , Inside is map structure , Can store key value pair data )
        WebContext webContext =new WebContext(req,resp,getServletContext());
        //7. Set the data of key value pair : It can be understood as : Defines a variable for the web page template ( A variable called message, The value is hello template engine )
        webContext.setVariable("message","hello template engine ");

        // The template engine renders web page templates : The first parameter is the template name , The second parameter is web Context ( It holds data )
        // According to the prefix set by the template parser + Template name + suffix , For template path , Found template , Then organize the template content + data
        //8. The return value is the rendered web page string
        String html =engine.process("hello",webContext);
        resp.getWriter().write(html);

    }
}
Process 4 : The deployment process
adopt URL
http://127.0.0.1:8080/Thymeleaf-study/hello
Access server , You can see the page display :
here , The page still looks static , Make the following changes :
 // Here is the fixed page display
  //webContext.setVariable("message","hello template engine ");
   // Set dynamically changing  msg=xxx
   webContext.setVariable("message", req.getParameter("msg"));
In this way, you can use the browser address bar URL Different input contents will produce different effects !
The code analysis :
But above servlet Code , Execution efficiency is not high , And there is redundancy !
reason : Just send... Each time URL request : Will create a template engine and interpreter ;
Optimize the code :
Place the created template engine and interpreter in init() In the method , This method is called only once !
package org.example;


import org.thymeleaf.TemplateEngine;
import org.thymeleaf.context.WebContext;
import org.thymeleaf.templateresolver.ServletContextTemplateResolver;

import javax.servlet.ServletException;
import javax.servlet.annotation.WebServlet;
import javax.servlet.http.HttpServlet;
import javax.servlet.http.HttpServletRequest;
import javax.servlet.http.HttpServletResponse;
import java.io.IOException;

@WebServlet("/hello")


public class HelloServlet extends HttpServlet {


    //1. Create a template engine
    TemplateEngine engine = new TemplateEngine();
    @Override
    public void init() throws ServletException {


        //2. Create a web page template parser
        ServletContextTemplateResolver resolver = new ServletContextTemplateResolver(getServletContext());

        //3. Set the encoding at render time
        resolver.setCharacterEncoding("utf-8");

        //4. Set the prefix and suffix of the web page template file path
        resolver.setPrefix("/WEB-INF/templates/");
        resolver.setSuffix(".html");

        //5. Bind the template parser to the template engine
        engine.setTemplateResolver(resolver);

    }

    // Template engines return HTML, So rewrite HTML
    @Override
    protected void doGet(HttpServletRequest req, HttpServletResponse resp) throws ServletException, IOException {

       // Set up body Format and coding format
        resp.setContentType("text/html; charset = utf-8");

        // Create a web Context ( Semantics of environment , Inside is map structure , Can store key value pair data )
        WebContext webContext =new WebContext(req,resp,getServletContext());
        // Set the data of key value pair : It can be understood as : Defines a variable for the web page template ( A variable called message, The value is hello template engine )
        // Here is the fixed page display
        //webContext.setVariable("message","hello template engine ");
        // Set dynamically changing  msg=xxx
        webContext.setVariable("message", req.getParameter("msg"));

        // The template engine renders web page templates : The first parameter is the template name , The second parameter is web Context ( It holds data )
        // According to the prefix set by the template parser + Template name + suffix , For template path , Found template , Then organize the template content + data
        // The return value is the rendered web page string
        String html =engine.process("hello",webContext);
        resp.getWriter().write(html);

    }
}
5. Understand that only one engine instance is created ?
After the above optimization , There's another problem ?
When creating another Servlet when , You still need to create a TemplateEngine Instance and initialize , therefore , There are still multiple template engine objects and parser objects , But it is absolutely unnecessary !!!
In a complete project , Just create one TemplateEngine, And only initialize once ~
In order to achieve such a goal , You need to use
ServletMediumServletContextand “Monitor”;
(1) ServletContext
ServletContext It's a Servlet The space in a program where information is stored globally , The server was there from the beginning , The server is down before it is destroyed ;
TomcatWhen it starts , It willWeb appCreate a correspondingServletContext;- One
WebAll in the applicationServletShare the sameServletContextobject ; - Can pass
HttpServlet.getServletContext()perhapsHttpServletRequest.getServletContext()Get to the currentwebappOfServletContextobject ;
The relationship shown below :

ServletContext An important method of object :
| Method | function |
|---|---|
void setAttribute(String name,Object obj) | Set properties ( The form of key-value pairs ) |
| Object getAttribute(String name) | Get the property value according to the property name , If name non-existent , return null |
| void removeAttribute(String name) | Delete the corresponding attribute |
Code example : Multiple servlet Shared data
(1) Create a writeServlet class ;
package org.example;

import javax.servlet.ServletContext;
import javax.servlet.ServletException;
import javax.servlet.annotation.WebServlet;
import javax.servlet.http.HttpServlet;
import javax.servlet.http.HttpServletRequest;
import javax.servlet.http.HttpServletResponse;
import java.io.IOException;

@WebServlet("/write")
public class writeServlet extends HttpServlet {

    // write?data=xxx
    @Override
    protected void doGet(HttpServletRequest req, HttpServletResponse resp) throws ServletException, IOException {


        String data = req.getParameter("data");
        // Write data to servlet Shared context
        // Get current servletContext object
        ServletContext sc = getServletContext();
        // Set properties
        sc.setAttribute("d",data);

        resp.setContentType("text/html;charset=utf-8");
        resp.getWriter().write(" write in context success ");
    }
}
(2) Create a readServlet class ;
package org.example;
import javax.servlet.ServletContext;
import javax.servlet.ServletException;
import javax.servlet.annotation.WebServlet;
import javax.servlet.http.HttpServlet;
import javax.servlet.http.HttpServletRequest;
import javax.servlet.http.HttpServletResponse;
import java.io.IOException;
@WebServlet("/read")
public class readServlet extends HttpServlet {
// write?data=xxx
@Override
protected void doGet(HttpServletRequest req, HttpServletResponse resp) throws ServletException, IOException {
// Get current servletContext object
ServletContext sc = getServletContext();
// According to the property name , Get attribute value
Object data = sc.getAttribute("d");
resp.setContentType("text/html;charset=utf-8");
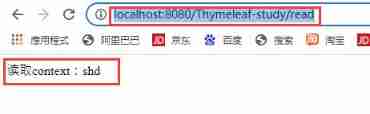
resp.getWriter().write(" Read context:"+data);
}
}
(3) adopt ServletContext Data sharing ;
Access... Through the address bar URL:http://localhost:8080/Thymeleaf-study/write?data=shd, You can see the write success flag , stay http://localhost:8080/Thymeleaf-study/read Access the data that can be read and written ;
As shown below :

(2) Monitor
Monitor : It belongs to a design pattern ;
Advantages of using a listener :
- Decouple the event and the code to be executed after the event ;
- Register a function or method to the listener in advance , After an event , Automatic execution ;
Use steps :
- Create a class ;
- add to
@WebListenerannotation , otherwiseTomcatCan't identify ; - Realization
ServletContextListenerInterface , And implement two methodscontextInitializedandcontextDestroyed;
The code is as follows :
package org.example;


import javax.servlet.ServletContextEvent;
import javax.servlet.ServletContextListener;
import javax.servlet.annotation.WebListener;

@WebListener

public class MyListener implements ServletContextListener {

    @Override
    public void contextInitialized(ServletContextEvent sce) {


  }

    @Override
    public void contextDestroyed(ServletContextEvent sce) {


    }
}
(3) modify Thymeleaf Engine initialization code
package org.example;


import org.thymeleaf.TemplateEngine;
import org.thymeleaf.templateresolver.ServletContextTemplateResolver;

import javax.servlet.ServletContext;
import javax.servlet.ServletContextEvent;
import javax.servlet.ServletContextListener;
import javax.servlet.annotation.WebListener;

@WebListener

public class MyListener implements ServletContextListener {

    @Override
    public void contextInitialized(ServletContextEvent sce) {

        //1.  First get context object
        ServletContext context = sce.getServletContext();
        //2.  establish Templateengine object
        TemplateEngine engine = new TemplateEngine();
        //3. Create parser object
        ServletContextTemplateResolver resolver = new ServletContextTemplateResolver(context);

        //4. Set up resolver Some properties of
        resolver.setCharacterEncoding("utf-8");
        resolver.setPrefix("/WEB-INF/templates/");
        resolver.setSuffix(".html");

        //5. binding  resolver  and  engine
        engine.setTemplateResolver(resolver);

        //6. take  engine  Put it in  ServletContext in , For others servlet Use
        context.setAttribute("engine",engine);
  }

    @Override
    public void contextDestroyed(ServletContextEvent sce) {


    }
}
Follow up Servlet Directly from ServletContext Get to the engine Object can ;
6. Thymeleaf Template syntax
(1) Common commands and functions
| command | function |
|---|---|
th:text | Display the text content of the expression evaluation result in the label body |
| th:[HTML Tag attributes ] | Set up any HTML The value of the tag property |
| th:if | When the result of the expression is true, the content is displayed , Otherwise it doesn't show |
| th:each | Loop through elements |
(2) Text labels
<p th:text="${message}"></p>
The final results : take webContext Set key value pair data , The key is message Set the value of to the label content ;
(3) Set tag properties
Common properties :
- href
- src
- class
- style…
If setting link a Labeled href attribute :
The front-end code :
 <a th:href="${a1}"> Baidu </a>
 <a th:href="${a2}"> sogou </a>
servlet Code :
 package org.example;

import org.thymeleaf.TemplateEngine;
import org.thymeleaf.context.WebContext;
import org.thymeleaf.templateresolver.ServletContextTemplateResolver;

import javax.servlet.ServletException;
import javax.servlet.annotation.WebServlet;
import javax.servlet.http.HttpServlet;
import javax.servlet.http.HttpServletRequest;
import javax.servlet.http.HttpServletResponse;
import java.io.IOException;

@WebServlet("/hello")


public class HelloServlet extends HttpServlet {


    //1. Create a template engine
    TemplateEngine engine = new TemplateEngine();
    @Override
    public void init() throws ServletException {


        //2. Create a web page template parser
        ServletContextTemplateResolver resolver = new ServletContextTemplateResolver(getServletContext());

        //3. Set the encoding at render time
        resolver.setCharacterEncoding("utf-8");

        //4. Set the prefix and suffix of the web page template file path
        resolver.setPrefix("/WEB-INF/templates/");
        resolver.setSuffix(".html");

        //5. Bind the template parser to the template engine
        engine.setTemplateResolver(resolver);

    }

    // Template engines return HTML, So rewrite HTML
    @Override
    protected void doGet(HttpServletRequest req, HttpServletResponse resp) throws ServletException, IOException {

       // Set up body Format and coding format
        resp.setContentType("text/html; charset = utf-8");

        // Create a web Context ( Semantics of environment , Inside is map structure , Can store key value pair data )
        WebContext webContext =new WebContext(req,resp,getServletContext());
        // Set the data of key value pair :

        webContext.setVariable("a1","http://www.baidu.com");
        webContext.setVariable("a2","http://www.sogou.com");

        // The template engine renders web page templates : The first parameter is the template name , The second parameter is web Context ( It holds data )
        // According to the prefix set by the template parser + Template name + suffix , For template path , Found template , Then organize the template content + data
        // The return value is the rendered web page string
        String html =engine.process("hello",webContext);
        resp.getWriter().write(html);

    }
}
(4) conditional
conditional th:if : The condition determines whether the label displays ;
<p th:if="${islogin}"> Already logged in </p>
When webContext.setVariable("islogin",true); The value passed in is true when , It is displayed as : Already logged in , Otherwise it doesn't show ;
Web page shows :
(5) loop
th:each Loop constructs multiple elements ;
 <ul>
       <li th:each="name : ${names}">
            <span th:text="${name}"></span>
      </li>
  </ul>
webContext.setVariable("names", Arrays.asList(" Zhang San "," Li Si "," Wang Wu "));
The web page shows the results :
边栏推荐
- JS prototype. The find () method has no effect on the object array. It is urgent...
- js合并两个对象(面试题)
- Introduction to database system - Chapter 2 - relational database (2.1~2.3) (important knowledge points)
- 数据库系统概论 ---- 第二章 -- 关系数据库(2.4 关系代数)
- 小白在同花顺上直接开户是安全的吗?
- Learn 02 - slice, morphological change and dimension exchange of numpy multidimensional array
- Command mode - attack, secret weapon
- 没有财富就不能自由吗?
- AI security and Privacy Forum issue 11 - stable learning: finding common ground between causal reasoning and machine learning
- Xiao P weekly Vol.08
猜你喜欢

设置默认收货地址【项目 商城】

Use yolov5 to train your own data set and get started quickly
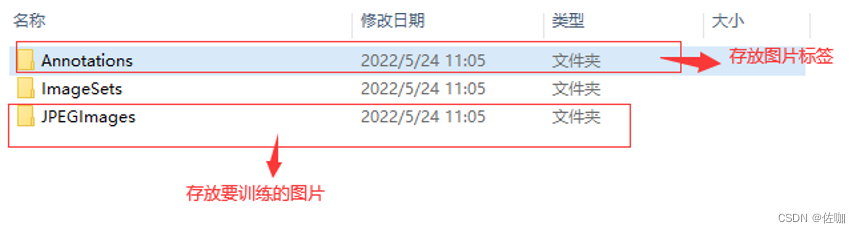
使用Yolov3训练自己制作数据集,快速上手

CAP理论听起来很高大上,其实很简单

使用pydub修改wav文件的比特率,报错:C:\ProgramData\Anaconda3\lib\site-packages\pydub\utils.py:170: RuntimeWarning:

收货地址列表展示【项目 商城】

Liufan, CFO of papaya mobile, unleashes women's innovative power in the digital age

数据库系统概论 ---- 第二章 -- 关系数据库(2.4 关系代数)

MSF CS OpenSSL traffic encryption

Characteristics and classification of creation mode (single case, factory)
随机推荐
实用WordPress插件收集(更新中)
File excel export
Problems encountered when using nailing intranet to penetrate and upload PHP projects
Is the securities account opened by qiniu Gang safe and reliable?
MWC 2022 lights up the future, and everything serves
找到自己的优势,才能干活不累,事半功倍!
修改 WordPress 管理账号名称插件:Admin renamer extended
Tu ne peux pas être libre sans richesse?
Using domestic MCU (national technology n32g031f8s7) to realize pwm+dma control ws2812
数字藏品系统源码搭建
mongoDB 使用
WordPress登录页面美化插件:Login Designer推荐
Display of receiving address list 【 project mall 】
2022 | framework for Android interview -- Analysis of the core principles of binder, handler, WMS and AMS!
收货地址列表展示【项目 商城】
Digital collection system app source code
The no category parents plug-in helps you remove the category prefix from the category link
js中Array.prototype.find() 方法在对象数组上无效果,捉急。。。
NFT digital collection system development and construction process
Processing of uci-har datasets