当前位置:网站首页>搭建LNMT架构
搭建LNMT架构
2022-08-01 12:48:00 【51CTO】
LNMT:
操作系统 :CentOS Linux release 7.4.1708 (Core)
Nginx服务器:nginx/1.22.0
Tomcat服务器: Apache Tomcat/8.5.60
数据库服务器:mysql Ver 15.1 Distrib 5.5.68-MariaDB


一、部署Nginx服务器
       # hostnamectl set-hostname nginx-200


       # vi /etc/sysconfig/network-scripts/ifcfg-ens33


       TYPE

       =Ethernet


       BOOTPROTO

       =static


       NAME

       =ens33


       DEVICE

       =ens33


       ONBOOT

       =

       yes


       IPADDR

       =

       192.168.10.200


       NETMASK

       =

       255.255.255.0


       GATEWAY

       =

       192.168.10.2


       DNS1

       =

       114.114.114.114


       DNS2

       =

       8.8.8.8


       # yum install gcc zlib zlib-devel pcre pcre-devel openssl openssl-devel


       # useradd -g nginx -M -u 888 -s /sbin/nologin nginx


       # tar xf nginx-1.22.0.tar.gz


       # cd nginx-1.22.0/


[[email protected] /usr/local/src/nginx-1.22.0]

       # ./configure --user=nginx --group=nginx --prefix=/usr/local/nginx --with-http_stub_status_module --with-http_sub_module --with-http_ssl_module --with-pcre


[[email protected] /usr/local/src/nginx-1.22.0]

       # make && make install


[[email protected] /usr/local]

       # netstat -lant


Active Internet connections (servers and established)


Proto Recv-Q Send-Q Local Address           Foreign Address         State


tcp

       0

       0

       0.0.0.0:22

       0.0.0.0:*               LISTEN


tcp

       0

       36

       192.168.10.200:22

       192.168.10.1:1452       ESTABLISHED


tcp6

       0

       0 :::22                   :::*                    LISTEN


[[email protected] /usr/local/nginx/sbin]

       # ./nginx


[[email protected] /usr/local/nginx/sbin]

       # netstat -lant


Active Internet connections (servers and established)


Proto Recv-Q Send-Q Local Address           Foreign Address         State


tcp

       0

       0

       0.0.0.0:80

       0.0.0.0:*               LISTEN


tcp

       0

       0

       0.0.0.0:22

       0.0.0.0:*               LISTEN


tcp

       0

       36

       192.168.10.200:22

       192.168.10.1:1452       ESTABLISHED


tcp6

       0

       0 :::22                   :::*                    LISTEN


[[email protected] /usr/local/nginx/conf]

       # cat nginx.conf


user nginx nginx;


worker_processes

       1;


error_log  logs/error.log;


pid    logs/nginx.pid;


events {


    worker_connections

       1024;


}


http {


    include       mime.types;


    default_type  application/octet-stream;


    log_format  main

       '$remote_addr - $remote_user [$time_local] "$request" '


       '$status $body_bytes_sent "$http_referer" '


       '"$http_user_agent" "$http_x_forwarded_for"';


    sendfile  on;


    keepalive_timeout

       65;


    charset utf-8;


  upstream tomcat-apps {


     server

       192.168.10.202:8080

       weight

       =

       1

       max_fails

       =

       3

       fail_timeout

       =10s;


     server

       192.168.10.203:8080

       weight

       =

       3

       max_fails

       =

       3

       fail_timeout

       =10s;


     server

       192.168.10.204:8080

       weight

       =

       1

       max_fails

       =

       3

       fail_timeout

       =10s;


    }


    server {


    listen

       80;


    server_name  www.class1.com;


    access_log  /usr/local/nginx/logs/class1.com.access.log  main;


        location / {


        proxy_pass http://tomcat-apps;


          index index.html;


        }


    }


     server {


    listen

       80;


    server_name  www.class2.com;


    access_log  /usr/local/nginx/logs/class2.com.access.log  main;


        location / {


          root  /data/web-data/class2.com;


          index index.html;


        }


    }


    server {


      listen

       82;


      access_log off;


      location / {


           root /data/web-data/test.com;


     }


  }


}


[[email protected] ~]

       # /usr/local/nginx/sbin/nginx -t


nginx: the configuration file /usr/local/nginx/conf/nginx.conf syntax is ok


nginx: configuration file /usr/local/nginx/conf/nginx.conf test is successful


[[email protected] ~]

       # curl localhost


<html>


<head><title>502 Bad Gateway</title></head>


<body>


<center><h1>502 Bad Gateway</h1></center>


<hr><center>nginx/1.22.0</center>


</body>


</html>
- 1.
- 2.
- 3.
- 4.
- 5.
- 6.
- 7.
- 8.
- 9.
- 10.
- 11.
- 12.
- 13.
- 14.
- 15.
- 16.
- 17.
- 18.
- 19.
- 20.
- 21.
- 22.
- 23.
- 24.
- 25.
- 26.
- 27.
- 28.
- 29.
- 30.
- 31.
- 32.
- 33.
- 34.
- 35.
- 36.
- 37.
- 38.
- 39.
- 40.
- 41.
- 42.
- 43.
- 44.
- 45.
- 46.
- 47.
- 48.
- 49.
- 50.
- 51.
- 52.
- 53.
- 54.
- 55.
- 56.
- 57.
- 58.
- 59.
- 60.
- 61.
- 62.
- 63.
- 64.
- 65.
- 66.
- 67.
- 68.
- 69.
- 70.
- 71.
- 72.
- 73.
- 74.
- 75.
- 76.
- 77.
- 78.
- 79.
- 80.
- 81.
- 82.
- 83.
- 84.
- 85.
- 86.
- 87.
- 88.
- 89.
- 90.
- 91.
- 92.
- 93.
- 94.
- 95.
- 96.
- 97.
- 98.
- 99.
二、部署Tomcat服务器并Tomcat集群

       ## 解压jdk :


[[email protected] /usr/local]

       # tar xf jdk-8u201-linux-x64.tar.gz


[[email protected] /usr/local]

       # ls


       ## 创建 jdk 软连接


[[email protected] /usr/local]

       # ln -s /usr/local/jdk1.8.0_201 /usr/local/jdk


       ## 解压 Tomcat


[[email protected] /usr/local]

       # tar xf apache-tomcat-8.5.60.tar.gz


       ## 创建tomcat软连接


[[email protected] /usr/local]

       # ln -s /usr/local/apache-tomcat-8.5.60 /usr/local/tomcat


[[email protected] /usr/local]

       # ls


       ########### 修改环境变量配置文件


[[email protected] ~]

       # vim /etc/profile


按G跳转至最后一行


按o 新起一行进入模式


粘贴以下内容


       export

       JAVA_HOME

       =/usr/local/jdk


       export

       CLASSPATH

       =

       $JAVA_HOME/lib/tools.jar:

       $JAVA_HOME/lib/dt.jar:

       $JAVA_HOME/lib:/test


       export

       PATH

       =

       $JAVA_HOME/bin:

       $PATH


       export

       TOMCAT_HOME

       =/usr/local/tomcat


       #按ESC退出插入模式,输入 :wq 退出


       ## 当前shell进程重新读取 /etc/profile 配置文件


[[email protected] ~]

       # source /etc/profile


[[email protected] /]

       # java -version


java version

       "1.8.0_201"


Java(TM) SE Runtime Environment (build

       1.8.0_201-b09)


Java HotSpot(TM)

       64

       -Bit Server VM (build

       25.201-b09, mixed mode)


[[email protected] /]

       # /usr/local/tomcat/bin/startup.sh


Using CATALINA_BASE:   /usr/local/tomcat


Using CATALINA_HOME:   /usr/local/tomcat


Using CATALINA_TMPDIR: /usr/local/tomcat/temp


Using JRE_HOME:        /usr/local/jdk


Using CLASSPATH:       /usr/local/tomcat/bin/bootstrap.jar:/usr/local/tomcat/bin/tomcat-juli.jar


Using CATALINA_OPTS:


Tomcat started.


[email protected] /]

       # netstat -ntl


Active Internet connections (only servers)


Proto Recv-Q Send-Q Local Address           Foreign Address         State


tcp

       0

       0

       0.0.0.0:22

       0.0.0.0:*               LISTEN


tcp6

       0

       0 :::8080                 :::*                    LISTEN


tcp6

       0

       0 :::22                   :::*                    LISTEN


tcp6

       0

       0

       127.0.0.1:8005          :::*                    LISTEN


[[email protected] /usr/local/nginx]

       # vim /usr/local/nginx/conf/nginx.conf


user nginx nginx;


worker_processes

       1;


error_log  logs/error.log;


pid    logs/nginx.pid;


events {


    worker_connections

       1024;


}


http {


    include       mime.types;


    default_type  application/octet-stream;


    log_format  main

       '$remote_addr - $remote_user [$time_local] "$request" '


       '$status $body_bytes_sent "$http_referer" '


       '"$http_user_agent" "$http_x_forwarded_for"';


    sendfile  on;


    keepalive_timeout

       65;


    charset utf-8;


    upstream  tomcat-apps {


      server

       192.168.10.202:8080

       weight

       =

       1

       max_fails

       =

       3

       fail_timeout

       =10s;


      server

       192.168.10.203:8080

       weight

       =

       1

       max_fails

       =

       3

       fail_timeout

       =10s;


      server

       192.168.10.204:8080

       weight

       =

       1

       max_fails

       =

       3

       fail_timeout

       =10s;


    }


    server {


    listen

       80;


    server_name  www.class1.com;


    access_log  /usr/local/nginx/logs/class1.com.access.log  main;


    location / {


          proxy_pass  http://tomcat-apps;


          index index.html;


         }


    }


    server {


    listen

       80;


    server_name  www.class2.com;


    access_log  /usr/local/nginx/logs/class2.com.access.log  main;


        location / {


          root  /data/web-data/class2.com;


          index index.html;


        }


    }


}


       ## 保存退出,重载nginx 服务器


[[email protected] /usr/local/nginx]

       # /usr/local/nginx/sbin/nginx -s reload
- 1.
- 2.
- 3.
- 4.
- 5.
- 6.
- 7.
- 8.
- 9.
- 10.
- 11.
- 12.
- 13.
- 14.
- 15.
- 16.
- 17.
- 18.
- 19.
- 20.
- 21.
- 22.
- 23.
- 24.
- 25.
- 26.
- 27.
- 28.
- 29.
- 30.
- 31.
- 32.
- 33.
- 34.
- 35.
- 36.
- 37.
- 38.
- 39.
- 40.
- 41.
- 42.
- 43.
- 44.
- 45.
- 46.
- 47.
- 48.
- 49.
- 50.
- 51.
- 52.
- 53.
- 54.
- 55.
- 56.
- 57.
- 58.
- 59.
- 60.
- 61.
- 62.
- 63.
- 64.
- 65.
- 66.
- 67.
- 68.
- 69.
- 70.
- 71.
- 72.
- 73.
- 74.
- 75.
- 76.
- 77.
- 78.
- 79.
- 80.
- 81.
- 82.
- 83.
- 84.
- 85.
- 86.
- 87.
- 88.
- 89.
- 90.
- 91.
- 92.
- 93.
- 94.
- 95.
- 96.
- 97.
三、admin跳板机:配置Ansible自动化运维
       [[email protected] ~]

       # ssh-keygen -t rsa


[[email protected] ~]

       # ssh-copy-id 192.168.10.200


[[email protected] ~]

       # ssh-copy-id 192.168.10.202


[[email protected] ~]

       # ssh-copy-id 192.168.10.203


[[email protected] ~]

       # ssh-copy-id 192.168.10.204


[[email protected] ~]

       # ssh 192.168.10.200 hostname


nginx-200


[[email protected] ~]

       # ssh 192.168.10.202 hostname


tomcat-202


[[email protected] ~]

       # ssh 192.168.10.203 hostname


tomcat-203


[[email protected] ~]

       # ssh 192.168.10.204 hostname


tomcat-204


[[email protected] ~]

       # yum install ansible -y


[[email protected] ~]

       # ansible --version


ansible

       2.9.27


       ## 创建主机清单


[[email protected] ~]

       # vim /etc/ansible/hosts


[nginx]


       192.168.10.200


[tomcat]


       192.168.10.202


       192.168.10.203


       192.168.10.204


[[email protected] ~]

       # ansible tomcat -m command -a "hostname"


       192.168.10.204 | CHANGED |

       rc

       =

       0 >>


tomcat-204


       192.168.10.203 | CHANGED |

       rc

       =

       0 >>


tomcat-203


       192.168.10.202 | CHANGED |

       rc

       =

       0 >>


tomcat-202


[[email protected] /data/ansible-file]

       # ansible tomcat -m shell -a "ls /usr/local/tomcat/webapps"


       192.168.10.204 | CHANGED |

       rc

       =

       0 >>


app1


docs


examples


host-manager


manager


Pro1


Pro1.war


ROOT


       192.168.10.203 | CHANGED |

       rc

       =

       0 >>


app1


docs


examples


host-manager


manager


Pro1


Pro1.war


ROOT


       192.168.10.202 | CHANGED |

       rc

       =

       0 >>


app1


docs


examples


host-manager


manager


Pro1


Pro1.war


ROOT


ansible db,tomcat,nginx

       -m shell

       -a

       "shutdown -h now"
- 1.
- 2.
- 3.
- 4.
- 5.
- 6.
- 7.
- 8.
- 9.
- 10.
- 11.
- 12.
- 13.
- 14.
- 15.
- 16.
- 17.
- 18.
- 19.
- 20.
- 21.
- 22.
- 23.
- 24.
- 25.
- 26.
- 27.
- 28.
- 29.
- 30.
- 31.
- 32.
- 33.
- 34.
- 35.
- 36.
- 37.
- 38.
- 39.
- 40.
- 41.
- 42.
- 43.
- 44.
- 45.
- 46.
- 47.
- 48.
- 49.
- 50.
- 51.
- 52.
- 53.
- 54.
- 55.
- 56.
- 57.
- 58.
- 59.
- 60.
- 61.
四、安装部署mysql数据库服务器
       ## 安装 mariadb工具包,和服务器包


[[email protected] ~]

       # yum install mariadb mariadb-server


.... .... ...


作为依赖被升级:


  mariadb-libs.x86_64

       1:5.5.68-1.el7


完毕!


       ####### 初始化数据库


[[email protected] ~]

       # cd /var/lib/mysql/


[[email protected] /var/lib/mysql]

       # mysql_install_db --datadir=/var/lib/mysql --user=mysql


[[email protected] /var/lib/mysql]

       # ls


aria_log.00000001  aria_log_control  mysql  performance_schema  test


       ### 启动mysql服务,监听3306 端口


[[email protected] /var/lib/mysql]

       # systemctl start mariadb


[[email protected] ~]

       # netstat -lntat


Active Internet connections (servers and established)


Proto Recv-Q Send-Q Local Address           Foreign Address         State


tcp

       0

       0

       0.0.0.0:22

       0.0.0.0:*               LISTEN


tcp

       0

       0

       0.0.0.0:3306

       0.0.0.0:*               LISTEN


tcp

       0

       0

       192.168.10.225:3306

       192.168.10.226:49370    ESTABLISHED


tcp

       0

       36

       192.168.10.225:22

       192.168.10.1:1211       ESTABLISHED


tcp6

       0

       0 :::22                   :::*                    LISTEN
- 1.
- 2.
- 3.
- 4.
- 5.
- 6.
- 7.
- 8.
- 9.
- 10.
- 11.
- 12.
- 13.
- 14.
- 15.
- 16.
- 17.
- 18.
- 19.
- 20.
- 21.
- 22.
- 23.
- 24.
五、部署主从数据库
       #主数据库:


[[email protected] ~]

       # vim /etc/my.cnf


log_bin

       = mysql-bin


binlog_ignore_db

       = mysql


server_id

       =

       225


MariaDB [(none)]> grant all privileges on *.* to [email protected]

       '%' identified by

       "000000";


Query OK,

       0 rows affected (0.00 sec)


MariaDB [(none)]> grant replication slave on *.* to

       'user'@

       '192.168.10.226' identified by

       '000000';


Query OK,

       0 rows affected (0.00 sec)


       #从数据库


[[email protected] ~]

       # vim /etc/my.cnf


log_bin

       = mysql-bin


binlog_ignore_db

       = mysql


server_id

       =

       226


MariaDB [(none)]> change master to

       master_host

       =

       'mysql-225'

       ,master_user

       =

       'user'

       ,master_password

       =

       '000000';


MariaDB [(none)]>

       start slave;


MariaDB [(none)]> show slave status\G;


***************************

       1. row ***************************


               Slave_IO_State: Waiting

       for master to send event


                  Master_Host:

       192.168.10.225


                  Master_User: user


                  Master_Port:

       3306


                Connect_Retry:

       60


              Master_Log_File: mysql-bin.000003


          Read_Master_Log_Pos:

       245


               Relay_Log_File: mariadb-relay-bin.000006


                Relay_Log_Pos:

       529


        Relay_Master_Log_File: mysql-bin.000003


             Slave_IO_Running: Yes


            Slave_SQL_Running: Yes


              Replicate_Do_DB:


          Replicate_Ignore_DB:


           Replicate_Do_Table:


       Replicate_Ignore_Table:


      Replicate_Wild_Do_Table:


  Replicate_Wild_Ignore_Table:


                   Last_Errno:

       0


                   Last_Error:


                 Skip_Counter:

       0


          Exec_Master_Log_Pos:

       245


              Relay_Log_Space:

       1109


              Until_Condition: None


               Until_Log_File:


                Until_Log_Pos:

       0


           Master_SSL_Allowed: No


           Master_SSL_CA_File:


           Master_SSL_CA_Path:


              Master_SSL_Cert:


            Master_SSL_Cipher:


               Master_SSL_Key:


        Seconds_Behind_Master:

       0


Master_SSL_Verify_Server_Cert: No


                Last_IO_Errno:

       0


                Last_IO_Error:


               Last_SQL_Errno:

       0


               Last_SQL_Error:


  Replicate_Ignore_Server_Ids:


             Master_Server_Id:

       225


       1 row

       in

       set (0.01 sec)


ERROR: No query specified
- 1.
- 2.
- 3.
- 4.
- 5.
- 6.
- 7.
- 8.
- 9.
- 10.
- 11.
- 12.
- 13.
- 14.
- 15.
- 16.
- 17.
- 18.
- 19.
- 20.
- 21.
- 22.
- 23.
- 24.
- 25.
- 26.
- 27.
- 28.
- 29.
- 30.
- 31.
- 32.
- 33.
- 34.
- 35.
- 36.
- 37.
- 38.
- 39.
- 40.
- 41.
- 42.
- 43.
- 44.
- 45.
- 46.
- 47.
- 48.
- 49.
- 50.
- 51.
- 52.
- 53.
- 54.
- 55.
- 56.
- 57.
- 58.
- 59.
- 60.
- 61.
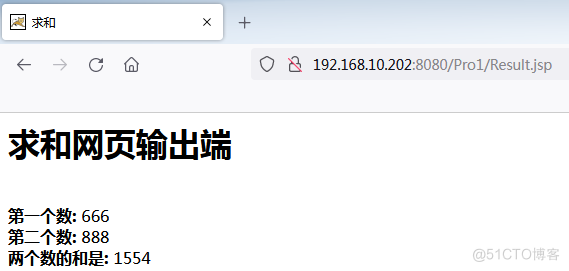
六、测试结果如下:


边栏推荐
猜你喜欢

CloudCompare&PCL ICP配准(点到面)

安装apex报错

库函数的模拟实现(strlen)(strcpy)(strcat)(strcmp)(strstr)(memcpy)(memmove)(C语言)(VS)

MarkDown公式指导手册

程序员的自我修养

英特尔全方位打造算力基础,助推“算”赋百业

如何使用 Authing 单点登录,集成 Discourse 论坛?

Based on 10 years of experience in stability assurance, what are the three key questions to be answered in failure recovery?|TakinTalks big coffee sharing

Feign 从注册到调用原理分析
Programmer's self-cultivation
随机推荐
如何使用 Authing 单点登录,集成 Discourse 论坛?
重磅消息 | Authing 实现与西门子低代码平台的集成
postgresql之page分配管理(一)
态路小课堂丨浅谈优质光模块需要具备的条件!
formatdatetime函数 mysql(date sub函数)
[Cloud Enjoying Freshness] Community Weekly Vol.73- DTSE Tech Talk: 1 hour in-depth interpretation of SaaS application system design
34、树莓派进行人体姿态检测并进行语音播报
易周金融分析 | 银行ATM机智能化改造提速;互联网贷款新规带来挑战
Grafana 9.0 released, Prometheus and Loki query builders, new navigation, heatmap panels and more!
批量替换Word中的表格为图片并保存
Istio投入生产的障碍以及如何解决这些问题
Feign 从注册到调用原理分析
[Community Star Selection] Issue 24 August Update Plan | Keep writing, refuse to lie down!More original incentive packages, as well as Huawei WATCH FIT watches!
Aeraki Mesh Joins CNCF Cloud Native Panorama
uniapp读取和写入文件
Dameng replaces the officially authorized dm.key
Windows 安装PostgreSQL
【StoneDB Class】入门第二课:StoneDB 整体架构解析
MVVM响应式
Js手写函数之new的模拟实现