当前位置:网站首页>02 [Development Server Resource Module]
02 [Development Server Resource Module]
2022-08-05 02:18:00 【DSelegent】
4.开发服务器&自动化
webpack-dev-server 可用于快速开发应用程序.请查阅 开发指南 开始使用.
The current page documents the impact webpack-dev-server (简写: dev-server) version >= 4.0.0 配置的选项.
Warning
webpack-dev-server v4.0.0+要求node >= v12.13.0、webpack >= v4.37.0(但是我们推荐使用webpack >= v5.0.0)和webpack-cli >= v4.7.0.
devServer:开发服务器,用来自动化(自动编译,自动打开浏览器,自动刷新浏览器)
特点:只会在内存中编译打包,不会有任何输出(不会在项目中新建一个文件夹)
4.1 下载包
pnpm i webpack-dev-server -D
4.2 配置
基础配置
在 webpack.config.js 文件中进行配置
module.exports = {

  ...
  // 热更新
  devServer: {

    static: path.resolve(__dirname, './dist'), // 默认是把/distdirectory asweb服务的根目录
    host: "localhost", // 启动服务器域名
    port: "3000", // 启动服务器端口号
    open: true, // 是否自动打开浏览器
    compress: true, //可选择开启gzips压缩功能,In the response header of the corresponding static resource requestContent-Encoding: gzip
    hot:true,  // Enable hot module function
    liveReload: true,  // Enable hot reloading
  },
}
为了方便,Let's configure the script command of the project,在package.json的scripts里.
{

    //...
    "scripts": {

    //...
    "dev": "webpack serve --mode development"
    }
}
注意!If you need to specify the path to the configuration file,Please add it after the command --config [path], 比如:
webpack serve --mode development --config webpack.config.js
The above is a basic example,We can customize according to our needsdevServer的参数对象,比 Such as adding response headers,Enable proxies to resolve cross-domain issues, http2, https等功能.
添加响应头
Some scenarios require it,We need to add for all responsesheaders,to enter the request and response to the resource 标志,for some safety precautions,Or it is convenient to trace the requested link after an exception occurs.比如:
// webpack-config
module.exports = {

//...
    devServer: {

            // 在所有响应中添加首部内容
        headers: {

        	'X-Fast-Id': 'p3fdg42njghm34gi9ukj',
        },
    },
};
这时,Right click in the browser to inspect(或者使用f12快捷键),在NetworkView any resource access in one column 问,We found that the response header successfully entered oneFastId.
开启代理
We packed it out js bundle Sometimes there will be some network requests to specific interfaces(ajax/fetch). 要注意,At this point the client address is in http://localhost:3000/ 下,Suppose our interface comes from http://localhost:4001/ ,那么毫无疑问,At this point, an error will be reported in the console and you will be prompted to cross-domain. 如何解决这个问题? 在开发环境下,我们可以使用devServer自带的proxy功 能:
module.exports = {

//...
    devServer: {

        proxy: {

        '/api': 'http://localhost:4001',
        },
    },
};
现在,对 /api/users 的请求会将请求代理到 http://localhost:4001/api/users . 如 If you don't want to pass/api,则需要重写路径:
module.exports = {

//...
    devServer: {

            proxy: {

                '/api': {

                target: 'http://localhost:4001',
                pathRewrite: {
     '^/api': '' },
            },
        },
    },
};
默认情况下,将不接受在 HTTPS 上运行且证书无效的后端服务器. 如果需要,可以 Modify the configuration like this:
module.exports = {

//...
    devServer: {

        proxy: {

            '/api': {

                target: 'https://other-server.example.com',
                secure: false,
            },
        },
    },
}
http
If you want our localhttpservice becomeshttps服务,We just need to configure it like this:
module.exports = {

//...
    devServer: {

    	https: true, // https//localhost...
    },
}
注意,此时我们访问http://localhost:port cannot access our services,We need to be on the ground Add a prefix to the address bar:https: 注意:Since the default configuration uses a self-signed certificate,So there are browsers that will It's not safe to tell you,But we can still continue to access it. Of course we can also provide our own certificates ——如果有的话:
module.exports = {

    devServer: {

        https: {

            cacert: './server.pem',
            pfx: './server.pfx',
            key: './server.key',
            cert: './server.crt',
            passphrase: 'webpack-dev-server',
            requestCert: true,
        },
    },
};
http2
如果想要配置http2,那么直接设置:
devServer: {

	http2: true, // https//localhost...
},
即可,http2默认自带https自签名证书,Of course we can still passhttps配置项来使用 自己的证书.
historyApiFallback
If our application is a SPA(单页面应用),当路由到/some时(directly in the address bar 输入),会发现此时刷新页面后,控制台会报错.
GET http://localhost:3000/some 404 (Not Found)
此时打开network,刷新并查看,就会发现问题所在———The browser treats this route as Static resource address to request,However, we didn't pack it out/some这样的资源,So this visit is no doubt 是404的. 如何解决它? 这种时候,We can serve pages in place of any by configuration404的静 dynamic resource response:
module.exports = {

//...
    devServer: {

        // 任意的 404 响应都被替代为 index.html
    // 基于node connect-history-api-fallback包实现,主要应用于history路由刷新页面404的场景
    	historyApiFallback: true,
    },
}
At this point, after restarting the service refresh, the request has becomeindex.html. 当然,in most business scenarios,我们 Alternative pages need to be customized according to different access paths,这种情况下,我们可以使用rewrites这个 配置项. 类似这样:
module.exports = {

//...
    devServer: {

        historyApiFallback: {

            rewrites: [
                {
     from: /^\/$/, to: '/views/landing.html' },
                {
     from: /^\/subpage/, to: '/views/subpage.html' },
                {
     from: /./, to: '/views/404.html' },
            ],
        },
    },
};
Development server host
If you start one in the development environmentdevserve服务,And expect your colleagues to have access to it,你只 需要配置:
module.exports = {

//...
    devServer: {

    	host: '0.0.0.0',
    },
};
这时候,If your colleagues are in the same local area network as you,through the local area networkipto access your service.
There is one when the service is startedipv4的网络地址,can be accessed through that
4.4 模块热替换与热加载
模块热替换(HMR - hot module replacement)功能会在应用程序运行过程中,替换、添加或删除 模块,而无需重新加载整个页面.主要是通过以下几种方式,来显著加快开发速度:
- 保留在完全重新加载页面期间丢失的应用程序状态.
- 只更新变更内容,以节省宝贵的开发时间.
- 在源代码中 CSS/JS 产生修改时,会立刻在浏览器中进行更新,这几乎相当于在浏览器 devtools 直接更改样式.
启用 webpack 的 热模块替换 特性,需要配置devServer.hot参数:
module.exports = {

//...
    devServer: {

    	hot: true,
    },
};
At this point, we have implemented the basic module hot-replacement function.
HMR 加载样式 如果你配置了style-loader,Well, style files are now also supported Hot swap function now.
module.exports={

 module: {

     rules: [
         {

             test: /\.css$/,
             use: ['style-loader', 'css-loader'],
         },
     ],
 },
}
如果已经通过 HotModuleReplacementPlugin 启用了模块热替换(Hot Module Replacement),则它的接口将被暴露在 module.hot 属性下面.通常,用户先要检查这个接口是否可访问,然后再开始使用它.举个例子,你可以这样 accept 一个更新的模块:
if (module.hot) {

  // Need to use hot replacementjs模块
  module.hot.accept('./input.js', function() {

    // 使用更新过的 library 模块执行某些操作...
  })
}
热加载(文件更新时,Automatically refresh our Services and pages)
新版的webpack-dev-server The hot reload function is enabled by default. 它对应的参数是devServer.liveReload,默认为 true. 注意,如果想要关掉它,要将liveReload设置为false的同时,Also turn off hot
module.exports = {

//...
    devServer: {

    	liveReload: false, //默认为true,即开启热更新功能.
    },
};
4.3 启动
npx webpack serve(webpack-cli: 4.x);npx webpack-dev-server(webpack-cli 3.x);
5.资源模块Asset Modules
官方说明:https://webpack.docschina.org/guides/asset-modules
This method needs to put the resource in JS 中通过 import to import orcss中进行导入
// js 文件导入
import 命名 from '资源路径'

// css 文件引用
.box {

  background-image: url('资源路径');
}
资源模块类型
- asset/resource:发送一个单独的文件并导出 URL
- asset/inline:导出一个资源的 Data URI ( base64 )
- asset/source:导出资源的源代码
- asset:exporting a resource Data URI 和发送一个单独的文件之间自动进行选择
5.1 resource
module.exports = {

  output: {

    path: path.resolve(__dirname, "dist"),
    filename: "js/bundle.js",
    assetModuleFilename: '[contenthash][ext][query]'
  },
  ...
  module: {

    rules: [
      {

        // Monitor resource files
        test: /\.png$/i,
        // 设置资源类型
        type: 'asset/resource',
        generator: {

          // 将图片文件输出到 static/imgs 目录中
          // 将图片文件命名 [hash:8][ext][query]
          // contenthash: 根据内容生成hash值 或者 [hash:8]: hash值取8位
          // [ext]: 使用之前的文件扩展名
          // [query]: 添加之前的query参数
          filename: "[hash:8][ext][query]",
        }
      }
    ]
  }
}
generatorThe custom output file name in the priority is greater thanoutput中的assetModuleFilename.
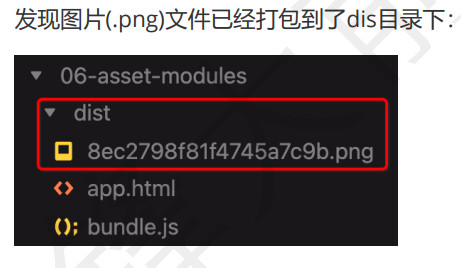
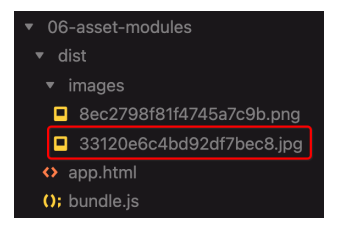
运行指令
npx webpack
此时输出文件目录:
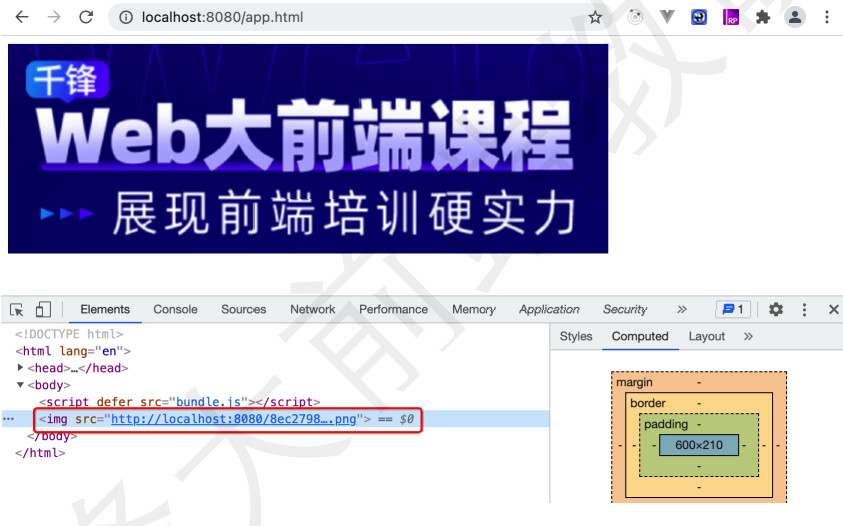
展示在页面
index.js
import imgsrc from './assets/img-1.png'

const img = document.createElement('img')
img.src = imgsrc
document.body.appendChild(img)
打开浏览器
5.2 inline
module.exports = {

  ...
  module: {

    rules: [
      {

        // Monitor resource files
        test: /\.svg$/i,
        // 设置资源类型
        type: 'asset/inline'
      }
    ]
  }
}
展示在页面
index.js
import logoSvg from './assets/webpack-logo.svg'

const img2 = document.createElement('img')
img2.style.cssText = 'width: 600px; height: 200px'
img2.src = logoSvg
document.body.appendChild(img2)
打开浏览器:
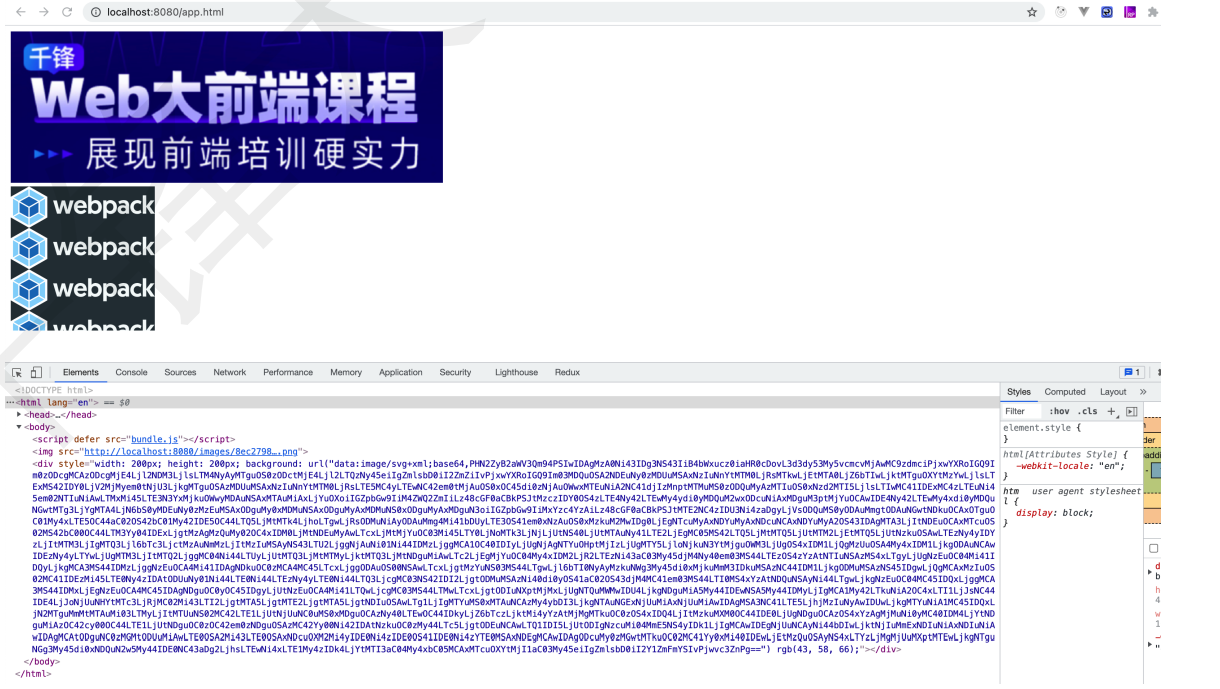
可见, .svg 文件都将作为 data URI 注入到 bundle 中.
5.3 source
module.exports = {

  ...
  module: {

    rules: [
      {

        // Monitor resource files
        test: /\.txt$/i,
        // 设置资源类型
        type: 'source'
      }
    ]
  }
}
展示在页面
index.js
import exampleTxt from './assets/example.txt'

const block = document.createElement('div')
block.style.cssText = 'width: 200px; height: 200px; background: aliceblue'
block.textContent = exampleTxt
document.body.appendChild(block)
打开浏览器:
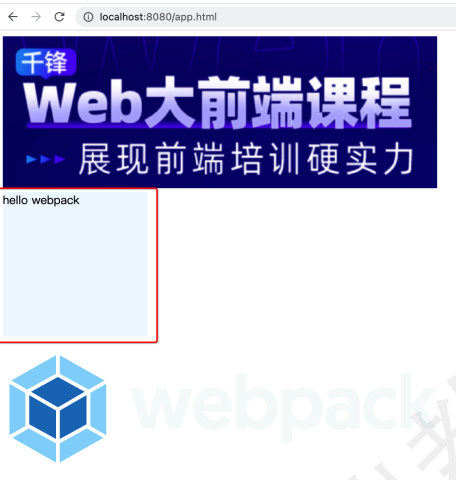
所有 .txt 文件将原样注入到 bundle.js 中.
5.4 asset
module.exports = {

  ...
  module: {

    rules: [
      {

        // Monitor resource files
        test: /\.jpg$/i,
        // 设置资源类型
        type: 'asset',
        // 默认为4kb
        // If it is smaller than the set size, it will be converted to 64 位图,否则转 URL
        parser: {

          dataUrlCondition: {

            maxSize: 4 * 1024, // 4kb
            maxSize: 4 * 1024 * 1024// 4mb
          }
        },
        generator: {

          // Generate resource names
          filename: 'assets/images/[name][ext]'
        }
      }
    ]
  }
}
展示在页面
index.js
import jpgMap from './assets/qianfeng-sem.jpg'

const img3 = document.createElement('img')
img3.style.cssText = 'width: 600px; height: 240px; display: block'
img3.src = jpgMap
document.body.appendChild(img3)
打开浏览器:
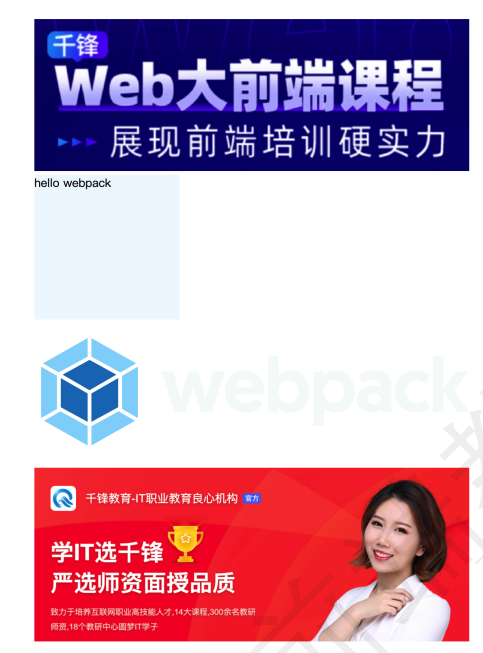
发现当前的.jpg文件被打包成了单独的文件,因为此文件大小超过了 4kb .
边栏推荐
- 高数_复习_第1章:函数、极限、连续
- Chapter 09 Use of Performance Analysis Tools [2. Index and Tuning] [MySQL Advanced]
- 进程在用户态和内核态的区别[独家解析]
- LPQ (local phase quantization) study notes
- 直播回放含 PPT 下载|基于 Flink & DeepRec 构建 Online Deep Learning
- Fragment visibility judgment
- Greenplum Database Fault Analysis - Can a Soft Connection Be Made to the Database Base Folder?
- 力扣-相同的树
- RAID磁盘阵列
- 如何看待自己的羞愧感
猜你喜欢
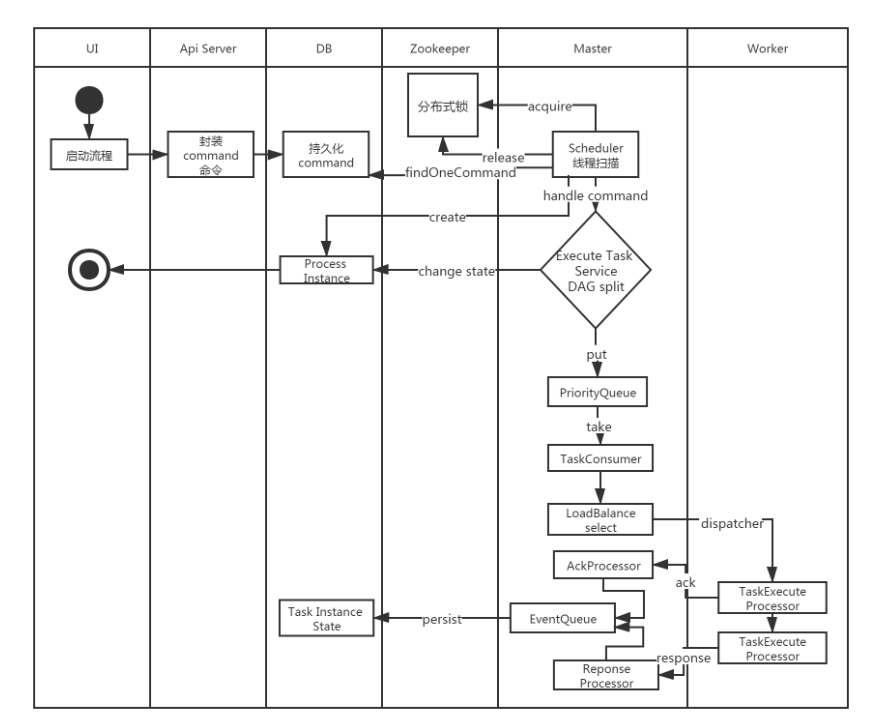
Apache DolphinScheduler新一代分布式工作流任务调度平台实战-中

Matlab map with color representation module value size arrow
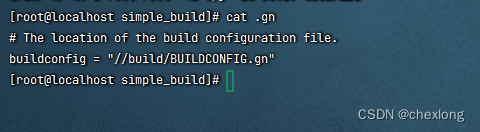
记录谷歌gn编译时碰到的一个错误“I could not find a “.gn“ file ...”
使用SuperMap iDesktopX数据迁移工具迁移地图文档和符号

The 2022 EdgeX China Challenge will be grandly opened on August 3

1349. 参加考试的最大学生数 状态压缩

Pisanix v0.2.0 发布|新增动态读写分离支持

释放技术创新引擎,英特尔携手生态合作伙伴推动智慧零售蓬勃发展
01 【前言 基础使用 核心概念】
编译预处理等细节
随机推荐
RAID disk array
回顾51单片机
oracle将restful接口封装到视图中
继承关系下构造方法的访问特点
C学生管理系统 头添加学生节点
树形查找(二叉查找树)
01 [Foreword Basic Use Core Concepts]
Exploding the circle of friends, Alibaba produced billion-level concurrent design quick notes are too fragrant
编译预处理等细节
Tree search (bintree)
Apache DolphinScheduler新一代分布式工作流任务调度平台实战-中
[parameters of PyQT5 binding functions]
DAY22:sqli-labs 靶场通关wp(Less01~~Less20)
How to deal with your own shame
J9数字货币论:web3的创作者经济是什么?
PHP Skills Assessment
汇编语言之源程序
Using OpenVINO to implement the flying paddle version of the PGNet inference program
使用SuperMap iDesktopX数据迁移工具迁移地图文档和符号
".NET IoT from scratch" series