当前位置:网站首页>Installing and configuring wmware esxi 6.5.0 in VMware Workstation
Installing and configuring wmware esxi 6.5.0 in VMware Workstation
2022-06-29 10:21:00 【Chinese Cabbage】
stay VMware workstation Install in WMware ESXi 6.5.0 And configure
One 、 The purpose of the experiment requires
【 The experimental requirements 】
1. Install... On the host VMware ESXi
2. Create two systems in the Explorer .
3. stay vsphere-client Install two systems on the .
【 The experiment purpose 】
1. Through to VMware ESXi Installation and configuration , Yes VMware ESXi Learn and master the use and functions of the software .
2. The operating system needs to be installed through the browser configuration , Learn to use in vsphere-client Install the system on the computer .
Two 、 Test environment
- Vmware Workstation 15.5
- VMware vSphere Client
- VMware ESXi
3、 ... and 、 Test content
Task a install WMware ESXi6.5.0
1. function WMware, Click create virtual machine .
2. Choose Custom , Click next .
3. Hardware compatibility selection Workstation 12.x, Click next .

4. Choose to install the operating system later , Click next .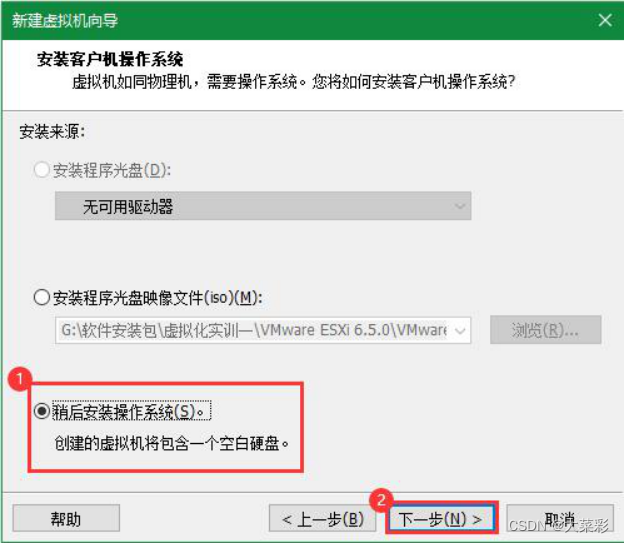
5. Customer operating system selection VMware ESX(X), Version selection VMware ESXi 6.0, Click next .
6. Enter the virtual machine name ”VMware ESXi 6.0”, Enter the installation directory of the virtual machine , Click next .
7. Selection of the number of processors 2, Select the number of cores per processor 1, Click next .
8. Assign... To the virtual machine 8GB Of memory , Click next .
9. Network type select use network address translation (NAT), Click next .
10.SCSI Controller type selection LSI Logic(L), Click next .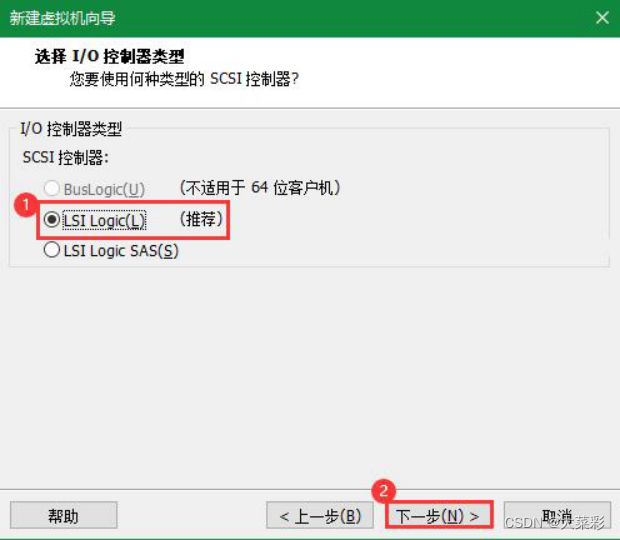
11. Virtual disk type selection SCSI(S), Click next .
12. Use the disk selection to create a new virtual disk , Click next .
13. Disk capacity allocation 40G, Choose to store the virtual disk as a single file , Click next .
14. Select Default for disk file name VMware ESXi 6.0.vmdk, Click next .
15. View the information about the virtual machine to be created , Click finish .
16. Right click VMware ESXi, Click Settings .
17. In the hardware device , single click CD/DVD(IDE), Select use... In the connection ISO Image file , Select the file location where the image is located , Click ok .

18. Select... On my computer VMware ESXi 6.0, Click to open this virtual machine .

19. Go to the Startup menu , Check the first , press return .
20. Enter the welcome screen , Press enter to continue .

21. Press F11 Accept the license agreement .
22. Select installation location ,ESXi The installer automatically detects the local hard disk , Press enter to continue installing on the hard disk .
23. Choose keyboard layout , Here you choose the default “US Default”, Press enter to continue .
24. Set up root Password of the account , press return .
25. Press F11 Start installation .
26. installation is complete , Display its console .
Task 2 Yes ESXi6.5 Simple configuration .
1. Enter the formal interface after installation , Press F2 Configure the host mode 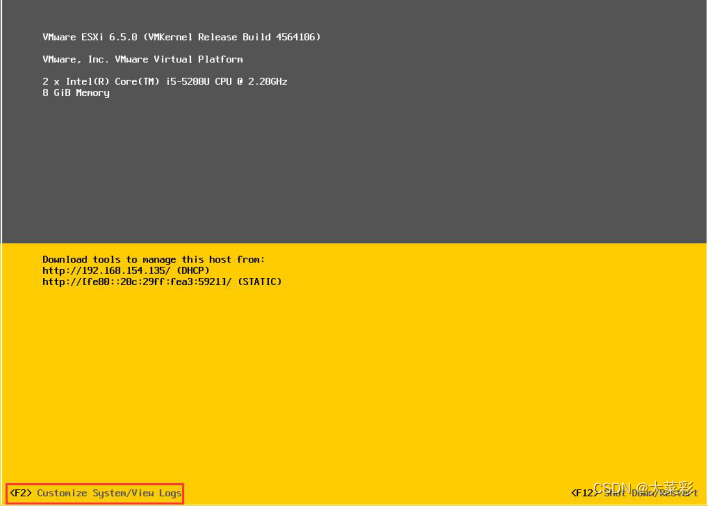
2. The system prompts you to enter ROOT User password , Enter the user password just configured , Press Enter Key continuation .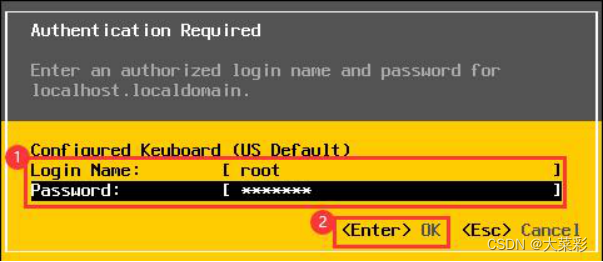
3. choice Configure Management Network( Configure network management ), Press Enter Key continuation .

4. choice Network Adapters, Confirm to select a network card for setting , Press Enter Key continuation .
5. By default, it is generally vmnci0, Select default to configure , Press Enter Key continuation .
6. Select the network card and return to the 4 The interface shown in step , choice "IPv4 Configuration”, Yes IP To configure , Press "Enter” Key to enter the configuration interface .
7. choice "Set static IPv4 address and network configuration”, Configure static IP Address 、 Subnet mask 、 The default gateway . Press "Enter” Key to complete configuration .

8. Select... In the configuration interface “DNS Configuration”, Press enter to continue .
9. take “Hostname” Change to esxi-a,DNS Server to be changed later , Press enter to continue .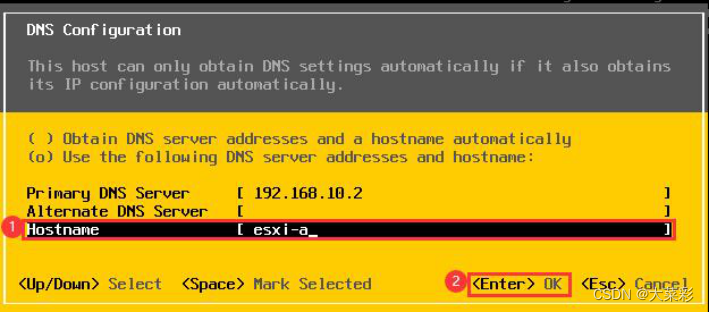
10. Select... In the configuration interface Custom DNS Suffixes, Press enter to continue .

11. stay “Suffixes” add abc.com, Press enter to complete the modification .
12. choice “Troubleshooting Mode Options”, Press enter to enter .

13. Respectively enable ESXi Shell and SSH, Press ESC sign out .
边栏推荐
- 任务调度器之Azkaban的使用
- 弧形 View 和弧形 ViewPager
- Serpentine filling number
- L2-031 go deep into the tiger's den (25 points)
- Ce projet Open source est super wow, des photos manuscrites sont générées en ligne
- 51nod1277 字符串中的最大值【KMP】
- Shanke's C language 2018 exercise (Telecom)
- 51nod1277 maximum value in string [KMP]
- 1146 Topological Order (25 分)
- 2021 team programming ladder competition - Simulation Competition
猜你喜欢

六度空间 bfs

Dynamic linking of virtual machine stack of JVM
Codeforces Round #659 (Div. 2)

两个栈的模拟题

Ce projet Open source est super wow, des photos manuscrites sont générées en ligne

Download control 1 of custom control (downloadview1)

Recyclerview sticky (suspended) head
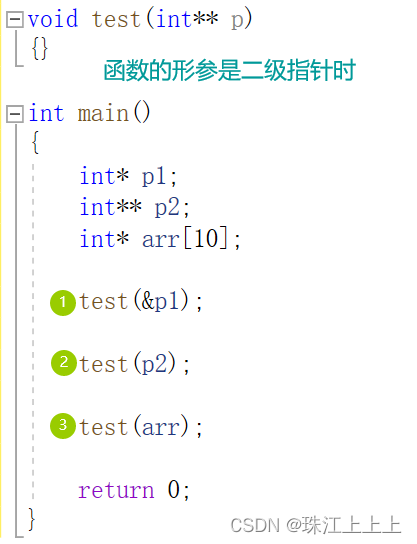
Related problems of pointer array, array pointer and parameter passing

Function pointer, function pointer array, calculator + transfer table, etc

2021 team programming ladder competition - Simulation Competition
随机推荐
520 diamond Championship 2021
2021年团体程序设计天梯赛-模拟赛
Reverse thinking - short story
2019.10.23 training summary
HDU 6778 car (group enumeration -- > shape pressure DP)
GridView of basic component of shutter
Talk about threads and concurrency
CodeForces - 1151B 思维
Dynamic linking of virtual machine stack of JVM
MySQL中innodb_page_cleaners详解
We can't tell the difference between distributed and cluster. Let's tell the story of two cooks cooking
2019.10.23训练总结
Text of the basic component of the shutter
1147 heaps (30 points)
Arc view and arc viewpager
图片验证码控件
2019.11.20训练总结
Power Strings【KMP循环节】
F5 big IP Icontrol rest command execution (cve-2022-1388)
信号作品:时变和时不变