当前位置:网站首页>[the second day of actual combat of smart lock project based on stm32f401ret6 in 10 days] (lighting with library function and register respectively)
[the second day of actual combat of smart lock project based on stm32f401ret6 in 10 days] (lighting with library function and register respectively)
2022-06-13 01:50:00 【It's Beichen bupiacra】
Use library functions and registers to light up the lights respectively
One 、 Use register to light up
Hardware analysis : First of all, we have to look at the schematic diagram to find the corresponding GPIO mouth 

Then go to the register used
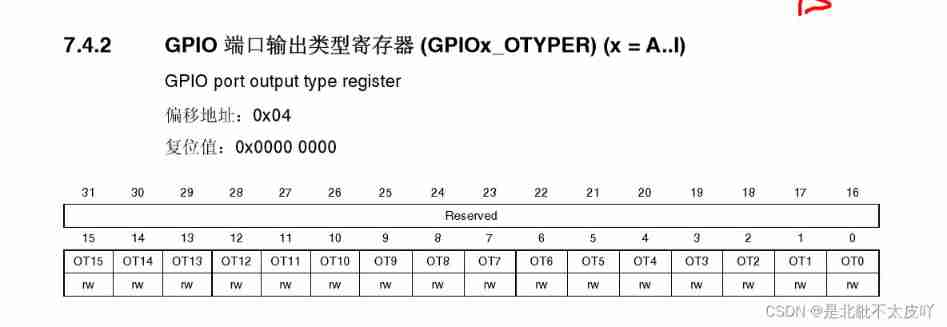
First of all, let's take a look at GPIO Port is attached to AHB1 above , First enable GPIOB The clock of 
Here is RCC AHB1 The register of 
Then take a look at the configuration GPIO Port register 


Let's use the above schematic diagram and register to write our lighting LED Code for , If the establishment of the project is not possible, you can take a look at the previous blog
Build one first led.h and led.c Don't put the papers in user The folder inc and src
led.h The code in
#ifndef _LED_H
#define _LED_H


#include "stm32f4xx.h"
void Led_Config(void);


#endif
led.c The code in
Mainly the configuration register
#include "led.h"

/*  The functionality :LED initialization   Shape parameter :void  Return value :void  explain : 1、 open GPIOB The clock  2、PB8 -----  Universal push-pull mode  PB9 -----  Universal push-pull mode  */

void Led_Config(void)
{

	RCC->AHB1ENR |= 1 << 1;			// open GPIOB The clock of

	GPIOB->MODER &=~ (3 << 16);
	GPIOB->MODER |= (1 << 16);
	GPIOB->OTYPER &=~ (1 << 8);
	GPIOB->OSPEEDR |= 2 << 16;
	GPIOB->PUPDR &=~ (3 << 16);
	GPIOB->ODR |= 1 << 8;// Default off

	GPIOB->MODER &=~ (3 << 18);
	GPIOB->MODER |= (1 << 18);
	GPIOB->OTYPER &=~ (1 << 9);
	GPIOB->OSPEEDR |= 2 << 18;
	GPIOB->PUPDR &=~ (3 << 18);
	GPIOB->ODR |= 1 << 9;// Default off
}
main.c The code in
#include "main.h"
int main()
{

	Led_Config();//LED initialization
	while(1)
	{

		/* * The register is lit LED(PB8、PB9) */
		GPIOB->ODR &=~ (1 << 8);//LED1 bright
		GPIOB->ODR &=~ (1 << 9);//LED2 bright
		GPIOB->ODR &=(1 << 8);//LED1 destroy
		GPIOB->ODR &=(1 << 9);//LED2 destroy
	}
}
main.h The code in
#ifndef _MAIN_H
#define _MAIN_H

#include "stm32f4xx.h"
#include "led.h"


#endif
The two blue ones are the lights on 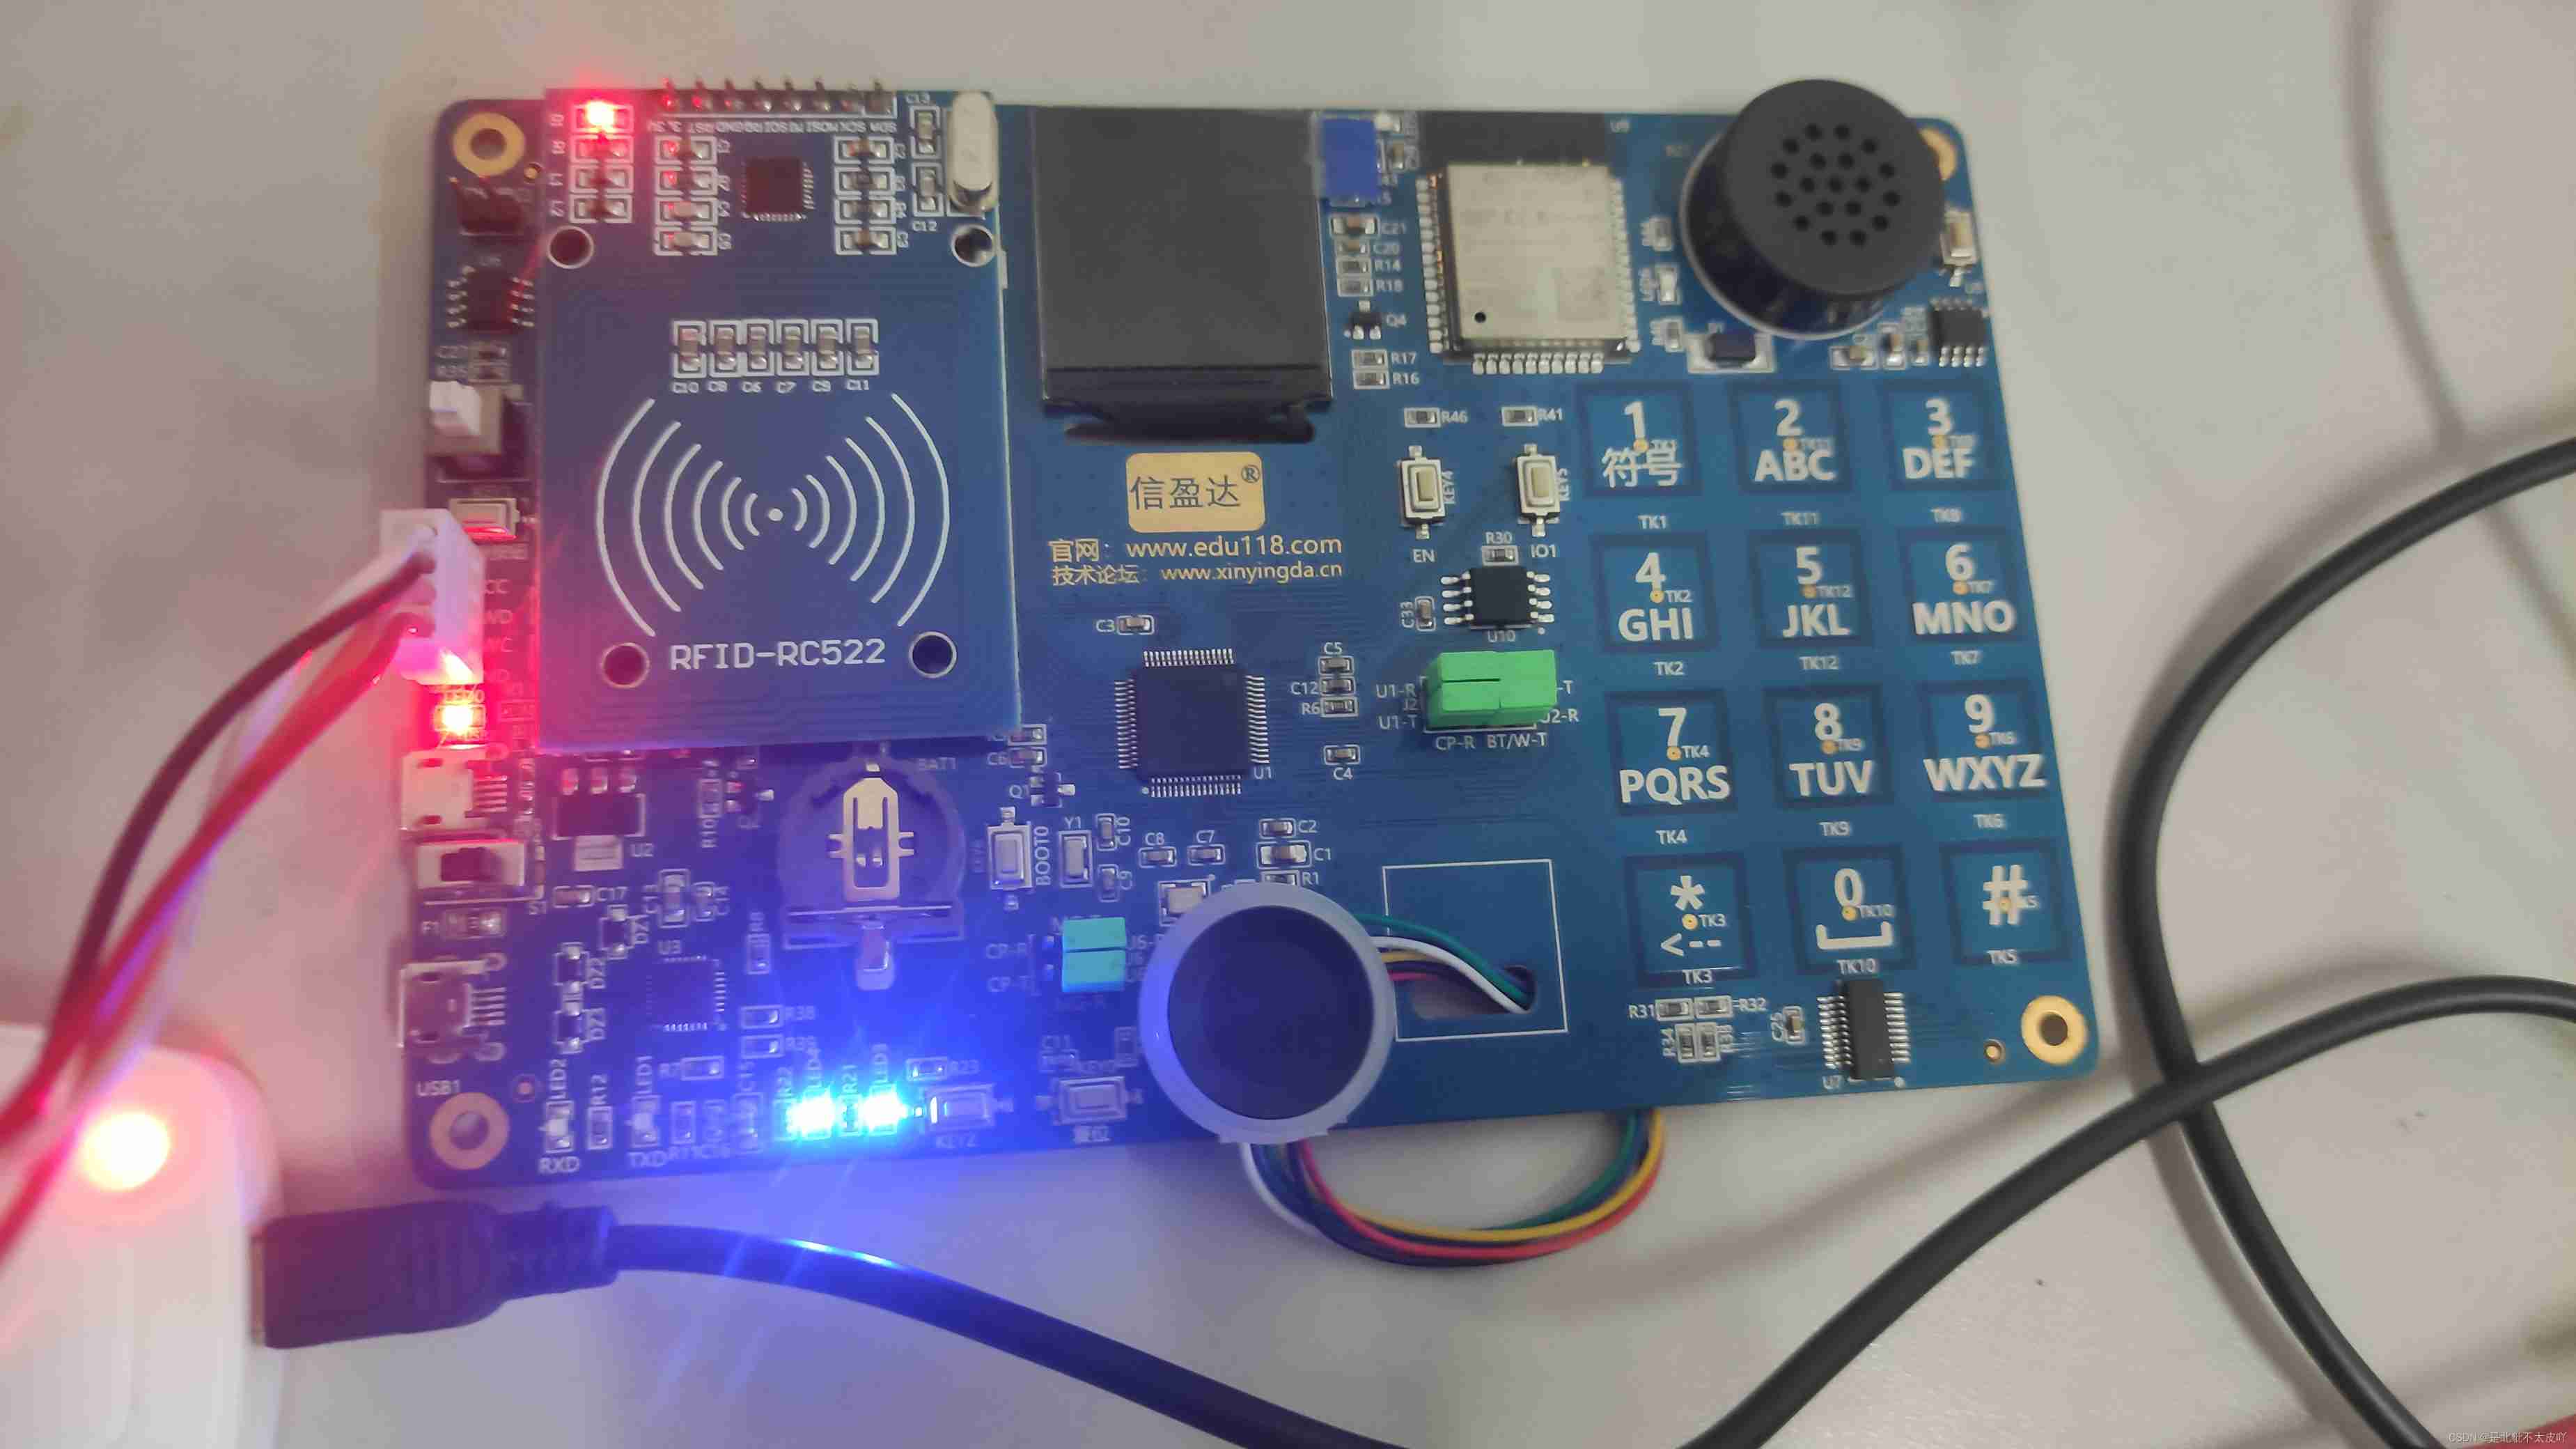
Two 、 Use library functions to light up
The project is the same as the above except that the code has changed , Instead, call the library function
led.h The code in
#ifndef _LED_H
#define _LED_H


#include "stm32f4xx.h"
void Led_Config(void);


#endif
led.c The code in
#include "led.h"

/*  The functionality :LED initialization   Shape parameter :void  Return value :void  explain : 1、 open GPIOB The clock  2、PB8 -----  Universal push-pull mode  PB9 -----  Universal push-pull mode  */

void Led_Config(void)
{

		/* * Library function version  */
	GPIO_InitTypeDef GPIO_InitStruct;// Declare struct variables
	RCC_AHB1PeriphClockCmd(RCC_AHB1Periph_GPIOB, ENABLE);// open GPIOB The clock of
	// initialization PB8 and PB9
	GPIO_InitStruct.GPIO_Mode = GPIO_Mode_OUT;// General output
	GPIO_InitStruct.GPIO_OType = GPIO_OType_PP;// Push pull output
	GPIO_InitStruct.GPIO_Pin = GPIO_Pin_8 | GPIO_Pin_9;// Pin 8
	GPIO_InitStruct.GPIO_PuPd = GPIO_PuPd_NOPULL;// No up and down
	GPIO_InitStruct.GPIO_Speed = GPIO_Fast_Speed;// Speed 50Mhz

	GPIO_Init(GPIOB, &GPIO_InitStruct);

	GPIO_SetBits(GPIOB, GPIO_Pin_8);// Default off
	GPIO_SetBits(GPIOB, GPIO_Pin_9);// Default off
}
main.h The code in
#ifndef _MAIN_H
#define _MAIN_H

#include "stm32f4xx.h"
#include "led.h"


#endif
main.c The code in
#include "main.h"
int main()
{

	Led_Config();//LED initialization
	while(1)
	{

		/* * Library functions are lit LED(PB8、PB9) */
		// Method 1 does not use macro definitions
		GPIO_ResetBits(GPIOB, GPIO_Pin_8);
		GPIO_ResetBits(GPIOB, GPIO_Pin_9);
		GPIO_SetBits(GPIOB, GPIO_Pin_8);
		GPIO_SetBits(GPIOB, GPIO_Pin_9);
	}
}
The two blue ones are the lights on 
The blog will be written here first , Next, let's write about the operation of keys , If this blog post is helpful to you, please pay attention to it 、 give the thumbs-up 、 Collect it , Thank you for your support !
边栏推荐
- Combining strings and numbers using ssstream
- Super complete regular expressions
- 六、出库管理功能的实现
- 四、入库管理功能的完善
- Detailed explanation of maxpooling corresponding to conv1d, conv2d and conv3d machines of tensorflow2
- 5、 Improvement of inventory query function
- Getting started with phaser 3
- leetcode743. Network latency (medium, Dijkstra)
- Calculation of accuracy, recall rate, F1 value and accuracy rate of pytorch prediction results (simple implementation)
- [wsl2] restrict wsl2 accessible hardware resources (cpu/ memory)
猜你喜欢

Server installation jupyterab and remote login configuration
![[WSL2]WSL2迁移虚拟磁盘文件ext4.vhdx](/img/e9/4e08e07c2de2f99c2938e79f7f1c44.png)
[WSL2]WSL2迁移虚拟磁盘文件ext4.vhdx

Workspace for ROS

Calculation of accuracy, recall rate, F1 value and accuracy rate of pytorch prediction results (simple implementation)

About tkinter Canvas does not display pictures

csdn涨薪技术之Jmeter接口测试数据库断言的实现与设计

Detailed understanding of white noise
[wsl2]wsl2 migrate virtual disk file ext4 vhdx

numpy多维数组转置transpose
![[MathType] use MathType to output latex style formula](/img/46/ac2041fbc2eb90474e2e2d7d1b0a40.png)
[MathType] use MathType to output latex style formula
随机推荐
指针链表的实现
VI keyboard diagram
Crypto JS reports uglifyjs error
csdn涨薪技术之Jmeter接口测试数据库断言的实现与设计
Spit bubbles (stack)
Qt实现思维导图功能(二)
General IP address, account and password of mobile IPv6 optical cat login, and mobile optical cat is in bridging mode
谷歌加大型文字广告是什么?怎么用?
D template instance does not match declaration
Topic creation and running example of ROS
Run Presto under docker to access redis and Bi presentation
Torch. Distributions. Normal
Can't use typedef yet? C language typedef detailed usage summary, a solution to your confusion. (learning note 2 -- typedef setting alias)
About the proposed signature file migration to industry standard format pkcs12
[arithmetic, relation, logic, bit, compound assignment, self increasing, self decreasing and other] operators (learning note 4 -- C language operators)
leetcode743. 网络延迟时间(中等, dijkstra)
Record the VMware installation process of VMware Tools and some problems encountered
开发者来稿|AMD赛灵思中文论坛分享 - 提问的智慧
受众群体应该选择观察模式还是定位模式?
Pytoch freeze pre training weights (feature extraction and BN layer)