当前位置:网站首页>Virtual machines use host graphics cards (Hyper-V and wsl2)
Virtual machines use host graphics cards (Hyper-V and wsl2)
2022-07-29 09:28:00 【Qwertyuiop2016】
My system version
I have updated to the latest version , This can avoid a lot of unnecessary trouble .
WSL2+Ubuntu20.04+CUDA
Enable WSL2+ install Ubuntu20.04
This is very simple , Please have a look at :https://blog.csdn.net/RenLJ1895/article/details/122741040
Host installation WSL Cuda Driver.
The latest graphics card drivers have included WSL Cuda drive , So the graphics card driver has been updated to the latest version , You don't have to reinstall . in addition :WSL2 Of Ubuntu There is no need to install any driver related to the graphics card in the system
My graphics card driver version 
WSL2 Ubuntu install cuda and cudnn
cuda
This and then Ubuntu Installation doesn't make much difference ,CUDA Installed command view address :https://developer.nvidia.com/cuda-toolkit-archive
The version I chose was 11.6.0, And then Ubuntu Inside, click the following commands one by one and wait for the installation to complete .

to update ~/.bashrc file
# Copy these three lines to the bottom of the file
export CUDA_HOME=/usr/local/cuda
export PATH=$PATH:$CUDA_HOME/bin
export LD_LIBRARY_PATH=/usr/local/cuda-11.6/lib64${LD_LIBRARY_PATH:+:${LD_LIBRARY_PATH}}
# Update bashrc file
source ~/.bashrc

# Update the dependencies you may need
sudo apt-get install freeglut3-dev build-essential libx11-dev libxmu-dev libxi-dev libgl1-mesa-glx libglu1-mesa libglu1-mesa-dev

# Check with the following code cuda Is the check successful , Pay attention to cuda The version is that you are toolkit Download what was decided there , This version may be similar to nvidia-smi The version number displayed is different , It can be high or low , This is because nvidia to cuda Opened two api, these two items. api As long as the difference is not too far , Basically, normal operation can be guaranteed cuda
nvcc -V

ubuntu Medium nvidia-smi Catalog re /usr/lib/wsl/lib/nvidia-smi, You can build a soft link to /usr/local/bin Next , You can also add this directory to the environment variable , Any implementation nvidia-smi( It is recognized here that cuda The version is 11.7 It should be the version of the host , It doesn't matter )
cudnn
Download address :https://developer.nvidia.com/rdp/cudnn-archive ( Need to log in , Download the latest 11.x, In fact, that is 11.6)
Unzip to cuda The installation directory
# Here are the installation commands
tar -zxvf cudnn- Complete the version number by yourself .tgz
sudo cp -P cuda/lib64/* /usr/local/cuda-11.6/lib64/
sudo cp cuda/include/cudnn.h /usr/local/cuda-11.6/include/

# To change the read permission :
sudo chmod a+r /usr/local/cuda-11.6/include/cudnn.h
sudo chmod a+r /usr/local/cuda-11.6/lib64/*
install TensorFlow
I chose tensorflow-gpu==2.8.1, because 2.0 After the TensorFlow Bring it with you keras, direct import tensorflow.keras that will do . So there is no need to install additional .
Use the built-in test program
cat /usr/local/cuda/samples/README_CUDA_Samples.txt
There's a... In this file GitHub Link to :https://github.com/NVIDIA/cuda-samples
Copy the document ( If it's slow , You need some means , Don't say that )cd /usr/local/cuda/samplesgit clone https://github.com/NVIDIA/cuda-samples.git
Then compile the executable cd cuda-samplessudo make
You need to wait for more than ten minutes , The generated executable is in cuda-samples/bin/x86_64/linux/release Catalog 
The test passed , It means that there is no problem with the environment
test keras Training models
stay vscode Download Remote-WSl plug-in unit , There will be another button on the left . Open and create a directory to write code 
effect ( You can see that the video memory is full , Training also ran normally )
But there are a lot of warning messages , Google searched and found no reason , Forget it , Just run 
Reference link
1、https://blog.csdn.net/iwanvan/article/details/122119595
hyper-v+win10
Get ready iso Mirror image
You need to download the same image as the host system ( Mainly for the same graphics card driver , Ensure that there is no problem in copying the host graphics card driver file directly to the virtual machine )
Use hyper-v install win10 System
There is no difference in the steps
Use script configuration GPU-Pv
Download script :https://github.com/Sam-Chai/gpu-pv-ps1
Modify the two positions in the figure , The first is the name of the virtual machine , The second is the maximum video memory used by virtual machines . I set the same as the host graphics card 
Then right-click to use powershell function , It is not easy to see the output information . The window flashed by
have access to Powershell ISE To run the , The opening position is as follows 
take gpu.ps1 Drag the file directly to this window , Click the green execute button to see the output , If there is no error, the output will be ok 
Driver.
Now open the virtual machine directly , Although you can see the information of the graphics card in the device manager , But the display code 43, Because there are drivers , But you can't directly use the driver software to download the driver .
Shut down the virtual machine , And attach the disk of the virtual machine to the host , double-click .vhdx Files can be seen in disk management ( You can also right-click disk management and select attach VHD), There may be an error , You can ignore , Because the drive letter has not been assigned . Right click to assign the drive letter
I have assigned , Once opened, it is mounted , In the figure 500G the 
Then copy the host C:\Windows\System32\DriverStore\FileRepository Under the table of contents nv First folder to virtual machine hard disk F:\Windows\System32\HostDriverStore\FileRepository Next ( The directory needs to be built by yourself )
Then right click on the part of the disk management red circle and select detach VHD, The disk is unmounted 
Then when the virtual machine is powered on, you should be able to see that the graphics card is working properly 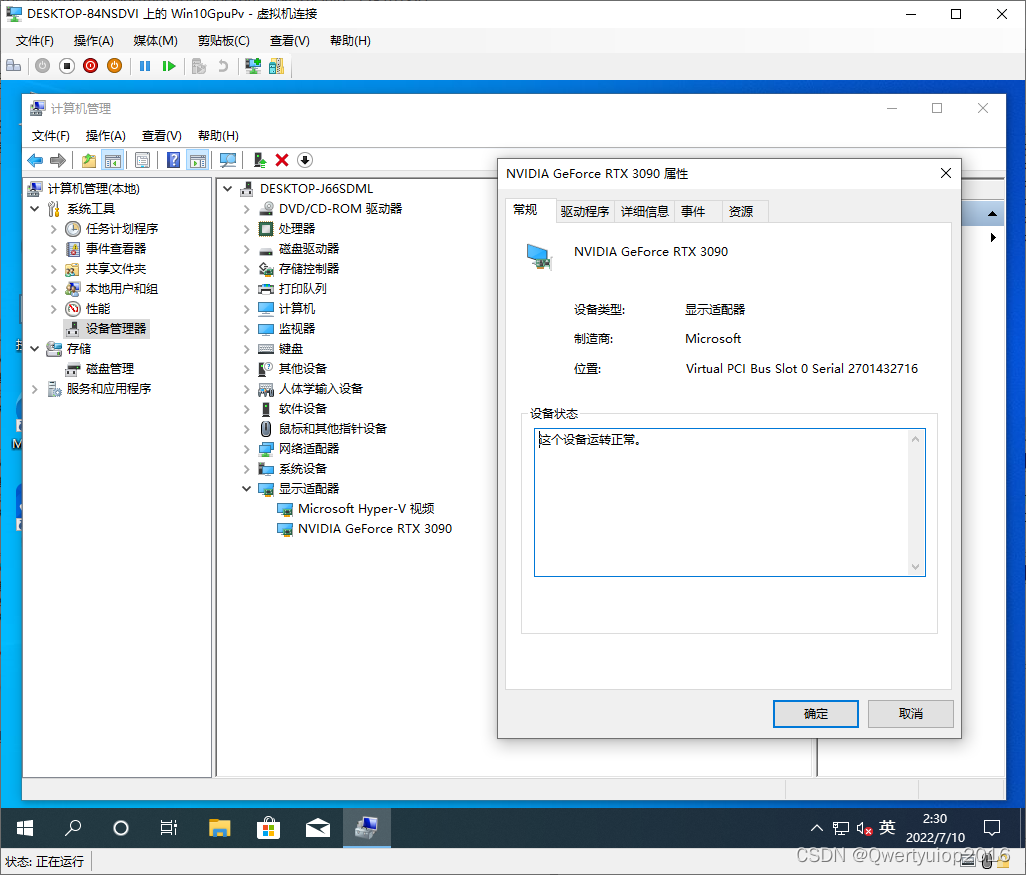
Is it really working properly , This is really not clear , Try Master Lu first
virtual machine :
host :
There is still a big difference , And Master Lu got stuck directly in the virtual machine , You can't connect to... Until he finishes the test , embarrassed , virtual machine CPU Only for 1 nucleus , I said why is it so stuck .
Later, I'll look at the performance of playing the game , There is no need to run a model , use WSL Or it's more convenient to run directly in the host .
hyper-v install ghost Backup file
At first I didn't want to install the system , Want to back up the host system directly to ghost In the document . And then again hyper-v Restore to virtual machine , But the restored virtual machine is too laggy , It's basically inoperable , It is estimated that many drivers are incompatible , Share if installed ghost
Create a virtual machine
The other steps are the same , It's the time to choose an image , Need to choose PE Systematic ISO Mirror image , I chose micro PE Mirror image ( Download micro PE, There is generation ISO File options )
Create a new hard disk
Hard disk size ratio ghost Just make the file bigger , For example, the size of the system file I backed up is 62G, Choose a virtual hard disk 63G That's it , Choose a fixed size ( Because I see the following written better performance )
After the virtual hard disk file is generated , Is to mount this hard disk , Then copy ghost File to virtual hard disk , The purpose of this is to restore the system in the virtual machine ,ghost Files cannot be placed on the system disk , So create a disk to hold . After installing the system disk, you can uninstall
Then add the hard disk to the virtual machine
Add the content just now ghost Virtual hard disk of file 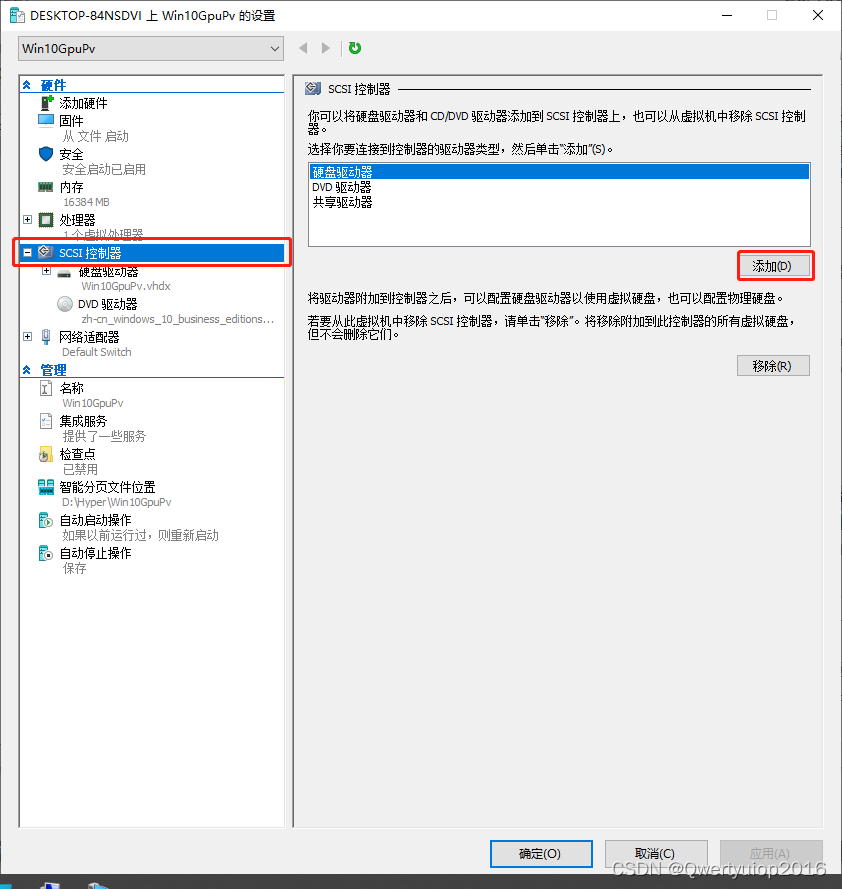
Then turn on , Normal should enter pe System
Partition and restore the system

Because I chose the second generation , The format of the partition must be GPT, Can't choose MBR, The second generation of guidance is UEFI. After the restore is successful , It needs to be repaired UEFI guide ( It may be unnecessary )
This is not a screenshot demonstration
take DVD Drive removal
Just choose a pointless Application , contain ghost The virtual hard disk of the file can also be removed 
If you also fix UEFI guide , Then a file will be added to the location of the firmware , Don't worry about this 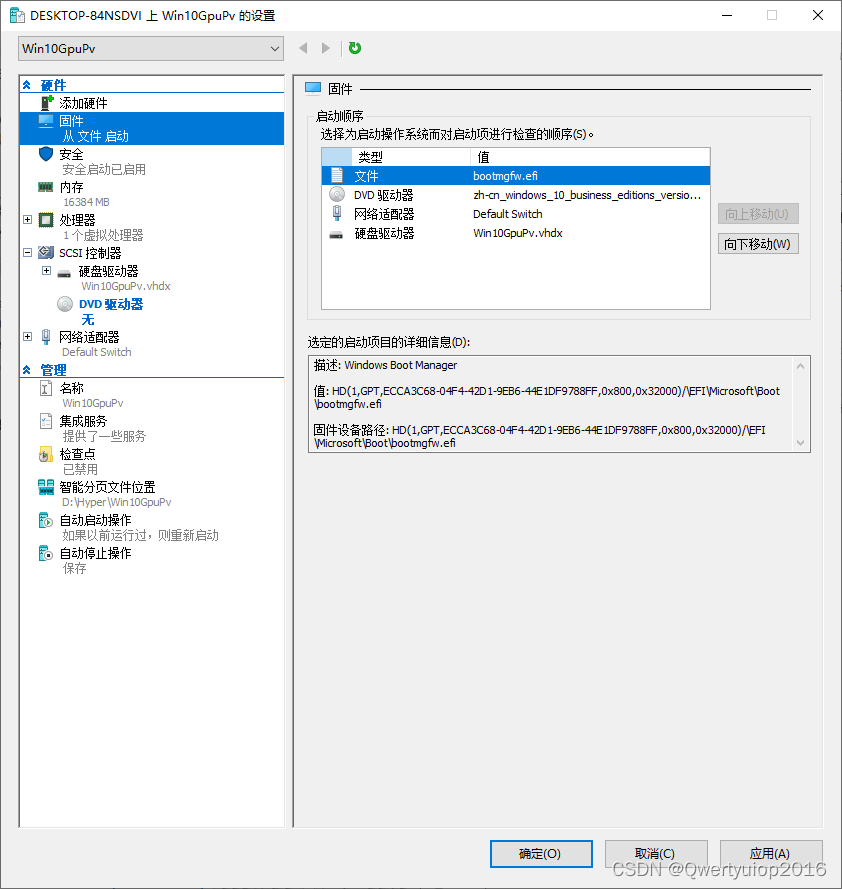
Click the boot button and then you should be able to enter the system normally ,
Reference link
1、https://www.bilibili.com/read/cv15539810
2、https://www.bilibili.com/video/BV11u411U7KJ
边栏推荐
- 【Unity入门计划】C#与Unity-了解类和对象
- Data representation and calculation (base)
- OpenCV入门基础学习
- How to realize the isolation level between MySQL transactions and mvcc
- Configuration file settings for remote connection to Windows version server redis
- Briefly describe the difference between heap and stack
- redis可视化工具读取数据乱码问题解决
- 不用Swagger,那我用啥?
- 云原生管理实践:业务引领的DevOps持续交付体系
- 机器学习之分类模型评估指标及sklearn代码实现
猜你喜欢

23考研人撑住!考研第一波弃考高峰期已经到来!

Sublime text create page

Retinal Vessel Segmentation via a Semantics and Multi-Scale Aggregation Network
Notes on network principles (five layer network)

使用cpolar发布树莓派网页(cpolar隧道的完善)

Pyqt5 rapid development and practice 6.5 qgridlayout (grid layout)

Parameter initialization

I don't know how lucky the boy who randomly typed logs is. There must be a lot of overtime

Random number setting and reference between parameters

Floweable foundation Chapter 1

随机推荐
Implementation of DFA string recognition based on C language simulation
A structured random inactivation UNET for retinal vascular segmentation
Vs2015 uses loadlibrary to call DLL library
先序遍历/后序遍历确定树的大致形态
Evaluation index of machine learning classification model and implementation of sklearn code
Summary of research on endogenous information security technology of industrial measurement and control equipment
Retinal Vessel Segmentation via a Semantics and Multi-Scale Aggregation Network
网络安全(6)
高智伟:数据管理赋能交通行业数字化转型
Will the modified data be updated when it is the same as the original data?
OpenCV图像处理基础操作
Qmainwindow details
Handwritten character recognition
【云驻共创】【HCSD大咖直播】亲授大厂面试秘诀
Random number setting and reference between parameters
Explanation of trie tree (dictionary tree)
Unity Xchart3.0基本用法快速上手
redis命令[逐渐完善]
Summary of introduction to unityshader (2): Beginner Level
Notes on network principles (five layer network)