当前位置:网站首页>Lightweight toss plan 3, develop in the browser - build your own development bucket (Part 2)
Lightweight toss plan 3, develop in the browser - build your own development bucket (Part 2)
2022-06-24 05:12:00 【NNT】
Series of previous articles :
- Lightweight toss program 1, Build a domain name mailbox to play
- Lightweight toss program 2, The whole free and easy-to-use online office Document preview
- Lightweight toss program 3, Develop in the browser —— Build your own development bucket ( Part 1 )
Preface
stay Last article in , We used Tencent cloud lightweight application server to build codeserver On-line IDE、gogs Light weight GIT platform , In this article , I will continue to bring you :
- build by oneself docker Mirror warehouse ;
- be based on web Of ssh Management platform ;
- nps Port mapping panel
The above three functions are services that are needed or can be used in actual development , May be helpful to you .
Text
build by oneself docker Mirror warehouse
Say docker Mirror warehouse , It is estimated that the first thing that comes to mind is dockerhub Is that right , although dockerhub It has the function of private image , But in our daily work , In consideration of enterprise data security ( At the same time, it may also be related to the collision between the two global economies ), Basically, it will not be uploaded to dockerhub in , At this time, build a simple image warehouse , It is necessary to deploy in some complex network environments .
Some of my friends may think :Harbor, Say undeniably ,Harbor It is indeed a very mature product , With this perfect function and beautiful UI, But the key is that he is not light enough ! In the above , We have built two easy-to-use applications , The total occupancy is less than 500MB Memory , Can this Harbor The minimum configuration requirements are 2 nucleus 4G, The display is not enough for all applications , So what I'm going to use here is docker An official image that provides users with the ability to quickly build private images :https://hub.docker.com/_/registry.
The same as before , Let's create a new directory to store the image :
mkdir /registry
After the creation, we are creating a container application configuration file (/root/config.yml), The contents are as follows :
version: 0.1
log:
  fields:
    service: registry
storage:
  delete:
    enabled: true
  cache:
    blobdescriptor: inmemory
  filesystem:
    rootdirectory: /var/lib/registry
http:
  addr: :5000
  headers:
    X-Content-Type-Options: [nosniff]
health:
  storagedriver:
    enabled: true
    interval: 10s
    threshold: 3
The purpose is to delete the image online , This operation is not supported in the default configuration .
Then run the command :
docker run -d -p 5000:5000 -v /registry:/var/lib/registry -v /root/config.yml:/etc/docker/registry/config.yml --name registry registry:2
use docker Make one registry application , And put /registry and /root/config.yml File mount , At the same time, map the 5000 port .
At this time, open our pagoda , Create a new website ( Because it needs to be applied here SSL certificate , I will code out some of the domain names in the following pictures , Of course not, you can , But a few more steps , If you don't want to go SSL Please search the query method by yourself ), Add... To the website SSL certificate :
Then add the reverse proxy :
And then to git Add one basic_auth( The account and password here are behind us docker login Account and password entered at ):
Then click on Profile :
Copy the path in the red box :/www/server/panel/vhost/nginx/dir_auth/docker.xxxxx.com( Optional replacement )
Go to this folder , Open the only conf file :
Copy the two lines in the frame :
    auth_basic "Authorization";
    auth_basic_user_file /www/server/pass/docker.xxxxxx.com/123.pass;
Go back to the configuration file , hold include Comment out that line ( Anti substitution sum basic_auth Of location There are overlaps ):
Then go to the reverse agency , Click edit :
Add the following lines :
    auth_basic "Authorization";
    auth_basic_user_file /www/server/pass/docker.xxxx.com/123.pass; //  Replace with the two lines you copied
    add_header 'Docker-Distribution-Api-Version' 'registry/latest' always;
    proxy_set_header X-Forwarded-Proto $scheme;
    proxy_read_timeout 900;
Click save after adding . Now the configuration is complete , Open browser access :https://docker.xxxxxx.com/v2/_catelog, Enter the account and password in the pop-up window , As shown in the following figure, the deployment is successful :
Try uploading an image on the client , First, log in to our private image warehouse :
docker login docker.xxxxxx.com
Then we try to pass on the gogs/gogs Mirror image :
REPOSITORY                    TAG       IMAGE ID       CREATED        SIZE
gogs/gogs                     latest    8ec7cc11f4a3   3 months ago   93.9MB
Use docker tag The command adds a new label to the image :
docker tag gogs/gogs:latest docker.xxxxxx.com/gogs/gogs:latest
Then upload the image :
docker push docker.xxxxxx.com/gogs/gogs:latest
Then we revisit :https://docker.xxxxxx.com/v2/_catelog
You can see that it has been uploaded successfully , The corresponding folder also appears in the local directory where the image is stored :
There is no problem uploading , Then let's try to pull the image , Here we use another server to demonstrate :
No problem , Finally, delete the image , First, get the of the image to be deleted sha256 Signature :
curl --user admin:admin -v --silent "docker.xxxxxx.com/v2/gogs/gogs/manifests/latest" 2>&1 | grep Docker-Content-Digest | awk '{print ($3)}'Then there is the splicing deletion statement , Send delete request :
curl -I --user admin:admin -X DELETE docker.xxxxxx.com/v2/gogs/gogs/manifests/sha256:3b0c0c685e16f2b8bdd0289e7eb8812a188b014919464f0c6f6ce5d77dac2ad9
At this time, only the metadata is deleted , The specific image file has not been deleted , If readers want to delete to make room , You also need to enter the container , Execute garbage collection command :
docker exec -it registry sh
After entering the container, execute :
registry garbage-collect /etc/docker/registry/config.yml
thus , The deployment and use of the private image warehouse are basically clear ~
be based on web Of ssh Management platform
The next step is ssh Management tools , Sometimes I don't take advantage of the manual tools when I am outside , The function of this thing is reflected , We just need to open the browser , Enter the address of our platform :ssh.test.com, You can directly connect to the corresponding server , Efficiency is a piece of cake .
Here we are using webssh This python library , The installation process is very simple and convenient , But here we still want to facilitate management , Choose to use docker.
The official didn't provide docker Version or command , Here I write a simple according to the installation command Dockerfile, The next step is the installation process :
First, let's create a new one Dockerfile file :
vim Dockerfile
The contents are as follows :
FROM python:3

RUN pip install webssh -i https://pypi.tuna.tsinghua.edu.cn/simple

CMD ["wssh"]
After saving, execute the command to build the image :
docker build --tag webssh .
Wait a while for the build to complete before running the container :
docker run -d -p 8082:8888 webssh
As usual , Carry on the reverse generation . Create a new website ssh.test.com, Click reverse proxy :
Because the website needs to use websocket, So we also need to edit our configuration file :
Add three lines in the box :
    proxy_http_version 1.1;
    proxy_set_header Upgrade $http_upgrade;
    proxy_set_header Connection upgrade;
After clicking save , Open the browser to access our platform :
Try connecting to a server :
Click to connect :
thus , our SSH The management platform has also been set up .
nps Port mapping panel
The last is nps The port mapping panel is set up , It can be said that its application process is very extensive , For example, I have a local service that I want other friends to access , However, generally speaking, the bandwidth of non cloud services is rarely provided with the public network IP, It's all based on NAT Network situation of , At this time, we can use our ECs to map ports , Forward our local port to our development server , In this way, everyone can access our local non public network through the development of the family bucket server IP The port forwarded by the machine .
For me personally , I often use it to forward my local Mysql The port of , For project commissioning , Of course, there are many ways to play , For example, for Kali system , We can map a port for us to bounce Shell Wait for the operation , For game purposes, you can connect to the local area network , Usage varies from person to person .
Project address :https://github.com/ehang-io/nps
Here is the installation process , First, go to the official git Warehouse pull items :
git clone https://github.com/ehang-io/nps.git
The domestic servers can use the image without speed :
git clone https://github.com.cnpmjs.org/ehang-io/nps.git
After pulling, enter :
cd nps
Enter project directory :
Enter the command , Copy and rename one Dockerfile file :
cp Dockerfile.nps Dockerfile
edit Dockerfile file :
Take the second line :
ARG GOPROXY=direct
Change it to , Prevent domestic machines from being unable to build images due to network problems :
ARG GOPROXY=https://goproxy.cn,direct
Then follow the above steps , Build a mirror image :
docker build --tag nps .
After building , Create a new directory and a configuration file :
mkdir /conf
vim /conf/nps.conf
Fill in the following ( The account and password are #web It's about , For online deployment, please modify it by yourself ):
appname = nps
#Boot mode(dev|pro)
runmode = dev

#HTTP(S) proxy port, no startup if empty
http_proxy_ip=0.0.0.0
http_proxy_port=80
https_proxy_port=443
https_just_proxy=true
#default https certificate setting
https_default_cert_file=conf/server.pem
https_default_key_file=conf/server.key

##bridge
bridge_type=tcp
bridge_port=8024
bridge_ip=0.0.0.0

# Public password, which clients can use to connect to the server
# After the connection, the server will be able to open relevant ports and parse related domain names according to its own configuration file.
public_vkey=123

#Traffic data persistence interval(minute)
#Ignorance means no persistence
#flow_store_interval=1

# log level LevelEmergency->0  LevelAlert->1 LevelCritical->2 LevelError->3 LevelWarning->4 LevelNotice->5 LevelInformational->6 LevelDebug->7
log_level=7
#log_path=nps.log

#Whether to restrict IP access, true or false or ignore
#ip_limit=true

#p2p
#p2p_ip=127.0.0.1
#p2p_port=6000

#web
web_host=a.o.com
web_username=admin
web_password=123
web_port = 8080
web_ip=0.0.0.0
web_base_url=
web_open_ssl=false
web_cert_file=conf/server.pem
web_key_file=conf/server.key
# if web under proxy use sub path. like http://host/nps need this.
#web_base_url=/nps

#Web API unauthenticated IP address(the len of auth_crypt_key must be 16)
#Remove comments if needed
#auth_key=test
auth_crypt_key =1234567812345678

#allow_ports=9001-9009,10001,11000-12000

#Web management multi-user login
allow_user_login=false
allow_user_register=false
allow_user_change_username=false


#extension
allow_flow_limit=false
allow_rate_limit=false
allow_tunnel_num_limit=false
allow_local_proxy=false
allow_connection_num_limit=false
allow_multi_ip=false
system_info_display=false

#cache
http_cache=false
http_cache_length=100

#get origin ip
http_add_origin_header=false

#pprof debug options
#pprof_ip=0.0.0.0
#pprof_port=9999

#client disconnect timeout
disconnect_timeout=60
The corresponding meanings of configuration items :
name | meaning |
|---|---|
web_port | web Management port |
web_password | web Interface management password |
web_username | web Interface management account |
web_base_url | web Manage the main path , Is used to web Management is behind the agent subpath |
bridge_port | Server client communication port |
https_proxy_port | Domain name agent https Agent listening port |
http_proxy_port | Domain name agent http Agent listening port |
auth_key | web api secret key |
bridge_type | The connection between the client and the server kcp or tcp |
public_vkey | The key when the client starts in profile mode , If it is set to null, the client profile connection mode will be closed |
ip_limit | Whether to limit ip visit ,true or false Or neglect |
flow_store_interval | Server traffic data persistence interval , Units of minutes , Ignore means no persistence |
log_level | Log output level |
auth_crypt_key | Get the server authKey At the time of the aes Encryption key ,16 position |
p2p_ip | Server side Ip, Use p2p Mode required |
p2p_port | p2p Mode on udp port |
pprof_ip | debug pprof Server side ip |
pprof_port | debug pprof port |
disconnect_timeout | Client connection timeout , Company 5s, The default value is 60, namely 300s = 5mins |
And then in /conf The directory continues to create three empty files ( There is no content ):
vim /conf/hosts.json
vim /conf/clients.json
vim /conf/hosts.json
Run container :
docker run -d -p 10080:80 -p 10443:443 -p 18080:8080 -p 18024:8024 -v /conf:/conf --name nps nps
among :
80 And 443 The port is the default port in the domain name resolution mode
8080 by web Manage access ports
8024 Is the bridge port , Used for communication between client and server
In the end, the old rules , Use nginx Carry on the reverse generation :
Visit our website after anti generation :
thus , our nps The panel has been built , Due to space limitations, the specific methods of use will not be repeated , There are already very comprehensive tutorials on the Internet , You can also refer to official documents :https://ehang-io.github.io/nps/#/example
The latter
thus , Our development team has been deployed , All in all :
- CodeServer On-line IDE
- gogs private GIT platform
- registry private docker Mirror warehouse
- webssh On-line SSH Management platform
- nps Port mapping panel
Now? , Let's take a look at the load on the server :
Five applications , It doesn't add up to 1.2G Memory usage ,1 nucleus 2G All student computers can be built and used smoothly , It is cheap and easy to use ~
Finally, let me introduce the server platform used this time : Tencent cloud lightweight application server .
In the long-term activities of Tencent cloud, new users can ¥74 You can buy one ,1 nucleus 2G Memory 60G SSD disc 6Mbps In terms of cost performance, the configuration of the is very tight , Interested readers may consider starting with :https://cloud.tencent.com/act/new.
边栏推荐
- What is the experience of developing an ice 3D music player in 3 minutes?
- System design: index
- Functional advantages of industrial wireless router
- What domain names do not need to be filed? Is there any process for domain name registration
- How to clone virtual machines on vspere client
- Detailed explanation of the process after the browser enters the domain name and web address
- Locating memory leaks with poolmon
- What is cloud server? How to access the ECS Homepage
- Shutter - how to copy certain elements from a map to a new map in dart/shutter?
- Understanding OAuth 2.0
猜你喜欢
少儿编程教育在特定场景中的普及作用

少儿编程课程改革后的培养方式

What are the disadvantages of the free IP address replacement tool?

『渗透基础』Cobalt Strike基础使用入门_Cobalt Strike联动msfconsole
让孩子们学习Steam 教育的应用精髓

Leetcode (question 2) - adding two numbers

"Emergency response practice" logparser log analysis practice
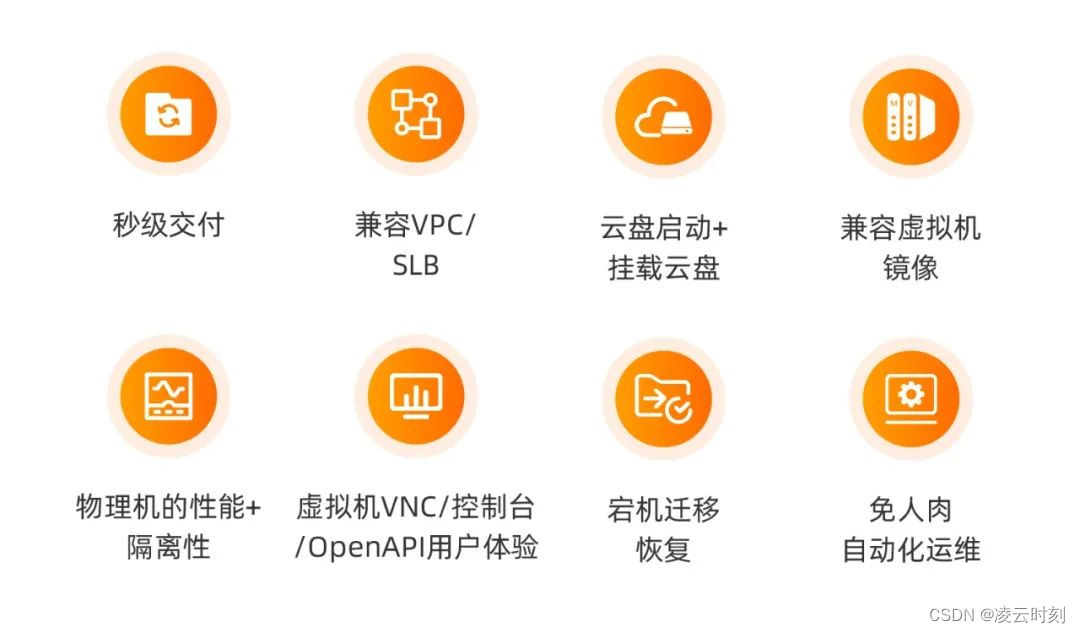
What is the new generation cloud computing architecture cipu of Alibaba cloud?

解析后人类时代类人机器人的优越性

解析90后创客教育的主观积极性
随机推荐
What is the experience of developing an ice 3D music player in 3 minutes?
[Tencent cloud] new enterprise users go to the cloud & the latest discount 2022!
4G industrial VPN router
让孩子们学习Steam 教育的应用精髓
MySQL cases MySQL find out who holds the row lock (RC)
Redis pipeline technology speed and efficiency increased by 5 times
What kind of domain name is better? What should enterprises pay attention to when choosing a domain name?
There are many ways to confirm and modify the remote port number
LeetCode 1791. Find the central node of the star chart
TDP members have made their debut!
The function of nearby people in the applet is realized, and the cloud development database is used to realize nearby people and friends within a distance of the neighborhood
"Emergency response practice" logparser log analysis practice
Pg-pool-ii read / write separation experience
What is the secondary domain name of the website? What is the relationship between the secondary domain name and the primary domain name?
How does the mobile phone remotely connect to the ECS? What should be paid attention to during the operation
Shuttle global levitation button
What domain name does not need to be filed? What should be done for domain name filing
When remote, your resolution is lower than a × B. Some items may not be displayed on the screen
What is required for domain name filing and how to select an enterprise domain name
How unity runs code every few frames