当前位置:网站首页>并发高的情况下,试试用ThreadLocalRandom来生成随机数
并发高的情况下,试试用ThreadLocalRandom来生成随机数
2022-08-03 16:51:00 【Java进阶之路】
一:简述
如果我们想要生成一个随机数,通常会使用Random类。但是在并发情况下Random生成随机数的性能并不是很理想,今天给大家介绍一下JUC包中的用于生成随机数的类--ThreadLocalRandom.(本文基于JDK1.8)
二:Random的性能差在哪里
Random随机数生成是和种子seed有关,而为了保证线程安全性,Random通过CAS机制来保证线程安全性。从next()方法中我们可以看到seed是通过不断的CAS来进行修改值的。如果在高并发的场景下,那么可能会导致CAS失败,从而导致不断的自旋,这样可能会导致服务器CPU过高。
protected int next(int bits) {
        long oldseed, nextseed;
        AtomicLong seed = this.seed;
        do {
            oldseed = seed.get();
            nextseed = (oldseed * multiplier + addend) & mask;
        } while (!seed.compareAndSet(oldseed, nextseed));
        return (int)(nextseed >>> (48 - bits));
}三:ThreadLocalRandom的简单使用
使用的方法很简单,通过ThreadLocalRandom.current()获取到ThreadLocalRandom实例,然后通过nextInt(),nextLong()等方法获取一个随机数。
代码:
@Test
void test() throws InterruptedException{
        new Thread(()->{
            ThreadLocalRandom random = ThreadLocalRandom.current();
            System.out.println(random.nextInt(100));
        }).start();
        new Thread(()->{
            ThreadLocalRandom random = ThreadLocalRandom.current();
            System.out.println(random.nextInt(100));
        }).start();
        Thread.sleep(100);
}运行结果:
四:为什么ThreadLocalRandom能在保证线程安全的情况下还能有不错的性能
我们可以看一下ThreadLocalRandom的代码实现。
首先我们很容易看出这是一个饿汉式的单例
    /** Constructor used only for static singleton */
    private ThreadLocalRandom() {
        initialized = true; // false during super() call
    }
    /** The common ThreadLocalRandom */
static final ThreadLocalRandom instance = new ThreadLocalRandom();我们可以看到PROBE成员变量代表的是Thread类的threadLocalRandomProbe属性的内存偏移量,SEED成员变量代表的是Thread类的threadLocalRandomSeed属性的内存偏移量,SECONDARY成员变量代表的是Thread类的threadLocalRandomSecondarySeed属性的内存偏移量。
private static final sun.misc.Unsafe UNSAFE;
private static final long SEED;
private static final long PROBE;
private static final long SECONDARY;
static {
    try {
        UNSAFE = sun.misc.Unsafe.getUnsafe();
        Class<?> tk = Thread.class;
        SEED = UNSAFE.objectFieldOffset
            (tk.getDeclaredField("threadLocalRandomSeed"));
        PROBE = UNSAFE.objectFieldOffset
            (tk.getDeclaredField("threadLocalRandomProbe"));
        SECONDARY = UNSAFE.objectFieldOffset
            (tk.getDeclaredField("threadLocalRandomSecondarySeed"));
    } catch (Exception e) {
        throw new Error(e);
    }
}可以看到Thread类中确实有这三个属性
Thread类:
@sun.misc.Contended("tlr")
    //当前Thread的随机种子 默认值是0
    long threadLocalRandomSeed;

    /** Probe hash value; nonzero if threadLocalRandomSeed initialized */
    @sun.misc.Contended("tlr")
    //用来标志当前Thread的threadLocalRandomSeed是否进行了初始化 0代表没有,非0代表已经初始化 默认值是0
    int threadLocalRandomProbe;

    /** Secondary seed isolated from public ThreadLocalRandom sequence */
    @sun.misc.Contended("tlr")
    //当前Thread的二级随机种子 默认值是0
int threadLocalRandomSecondarySeed;接下来我们看ThreadLocalRandom.current()方法。
ThreadLocalRandom.current()
ThreadLocalRandom.current()的作用是初始化随机种子,并且返回ThreadLocalRandom的实例。首先通过UNSAFE类获取当前线程的Thread对象的threadLocalRandomProbe属性,看随机种子是否已经初始化。没有初始化,那么调用localInit()方法进行初始化。
public static ThreadLocalRandom current() {
        // 获取当前线程的
        if (UNSAFE.getInt(Thread.currentThread(), PROBE) == 0)
            localInit();
        return instance;
}localInit()
localInit()方法的作用就是初始化随机种子,可以看到代码很简单,就是通过UNSAFE类对当前Thread的threadLocalRandomProbe属性和threadLocalRandomSeed属性进行一个赋值。
static final void localInit() {
        int p = probeGenerator.addAndGet(PROBE_INCREMENT);
        int probe = (p == 0) ? 1 : p; // skip 0
        long seed = mix64(seeder.getAndAdd(SEEDER_INCREMENT));
        Thread t = Thread.currentThread();
        UNSAFE.putLong(t, SEED, seed);
        UNSAFE.putInt(t, PROBE, probe);
}接下来以nextInt()方法为例,看ThreadLocalRandom是如何生成到随机数的。我们可以看出随机数正是通过nextSeed()方法获取到随机种子,然后通过随机种子而生成。所以重点看nextSeed()方法是如何获取到随机种子的。
public int nextInt(int bound) {
        if (bound <= 0)
            throw new IllegalArgumentException(BadBound);
        int r = mix32(nextSeed());
        int m = bound - 1;
        if ((bound & m) == 0) // power of two
            r &= m;
        else { // reject over-represented candidates
            for (int u = r >>> 1;
                 u + m - (r = u % bound) < 0;
                 u = mix32(nextSeed()) >>> 1)
                ;
        }
        return r;
}nextSeed()
nextSeed()方法的作用是获取随机种子,代码很简单,就是通过UNSAFE类获取当前线程的threadLocalRandomSeed属性,并且将原来的threadLocalRandomSeed加上GAMMA设置成新的threadLocalRandomSeed。
final long nextSeed() {
        Thread t; long r; // read and update per-thread seed
        UNSAFE.putLong(t = Thread.currentThread(), SEED,
                       r = UNSAFE.getLong(t, SEED) + GAMMA);
        return r;
}小结:
ThreadLocalRandom为什么线程安全?是因为它将随机种子保存在当前Thread对象的threadLocalRandomSeed变量中,这样每个线程都有自己的随机种子,实现了线程级别的隔离,所以ThreadLocalRandom也并不需要像Random通过自旋锁和cas来保证随机种子的线程安全性。在高并发的场景下,效率也会相对较高。
注:各位有没有发现ThreadLocalRandom保证线程安全的方式和ThreadLocal有点像呢
需要注意的点:
1.ThreadLocalRandom是单例的。
2.我们每个线程在获取随机数之前都需要调用一下ThreadLocalRandom.current()来初始化当前线程的随机种子。
3.理解ThreadLocalRandom需要对UnSafe类有所了解,它是Java提供的一个可以直接通过内存对变量进行获取和修改的一个工具类。java的CAS也是通过这个工具类来实现的。
边栏推荐
猜你喜欢
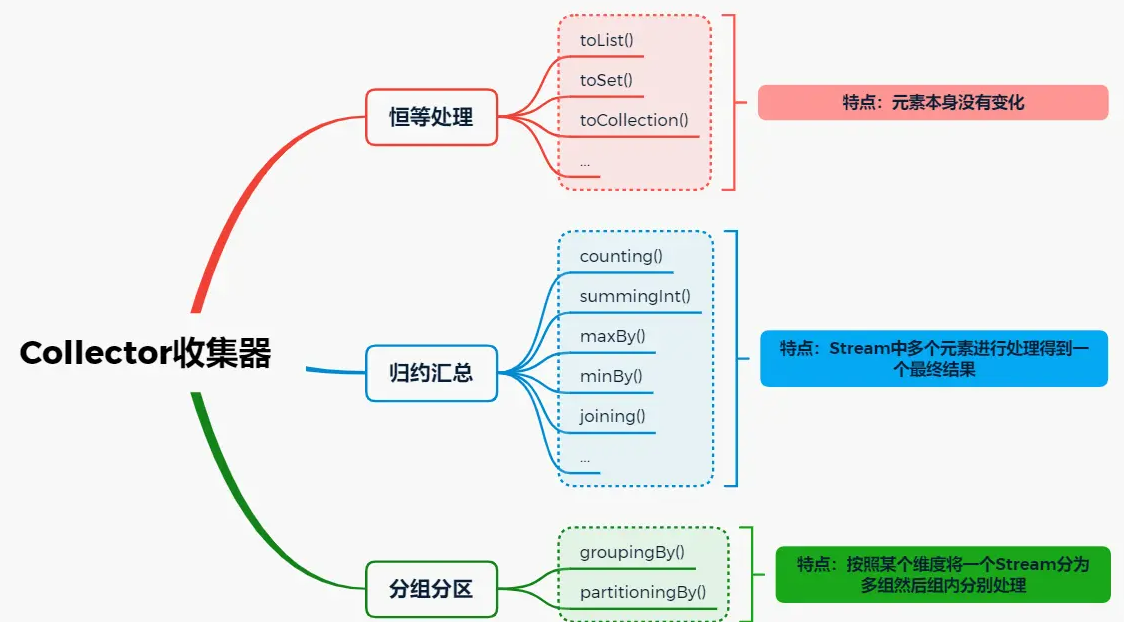
After using Stream for many years, does collect still have these "saucy operations"?
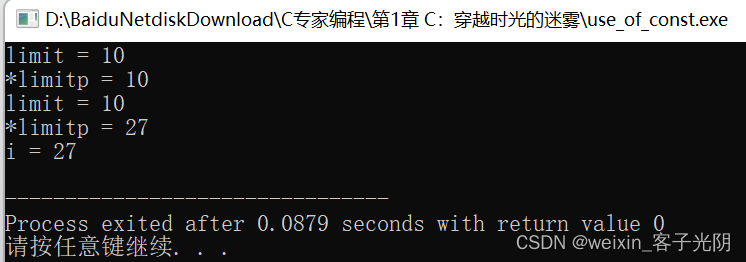
C专家编程 第1章 C:穿越时空的迷雾 1.9 阅读ANSI C标准,寻找乐趣和裨益

黄致绮 荣获第六季完美童模全球总决赛 全国总冠军
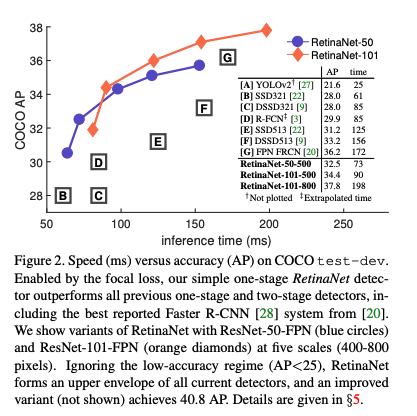
【目标检测】Focal Loss for Dense Object Detection
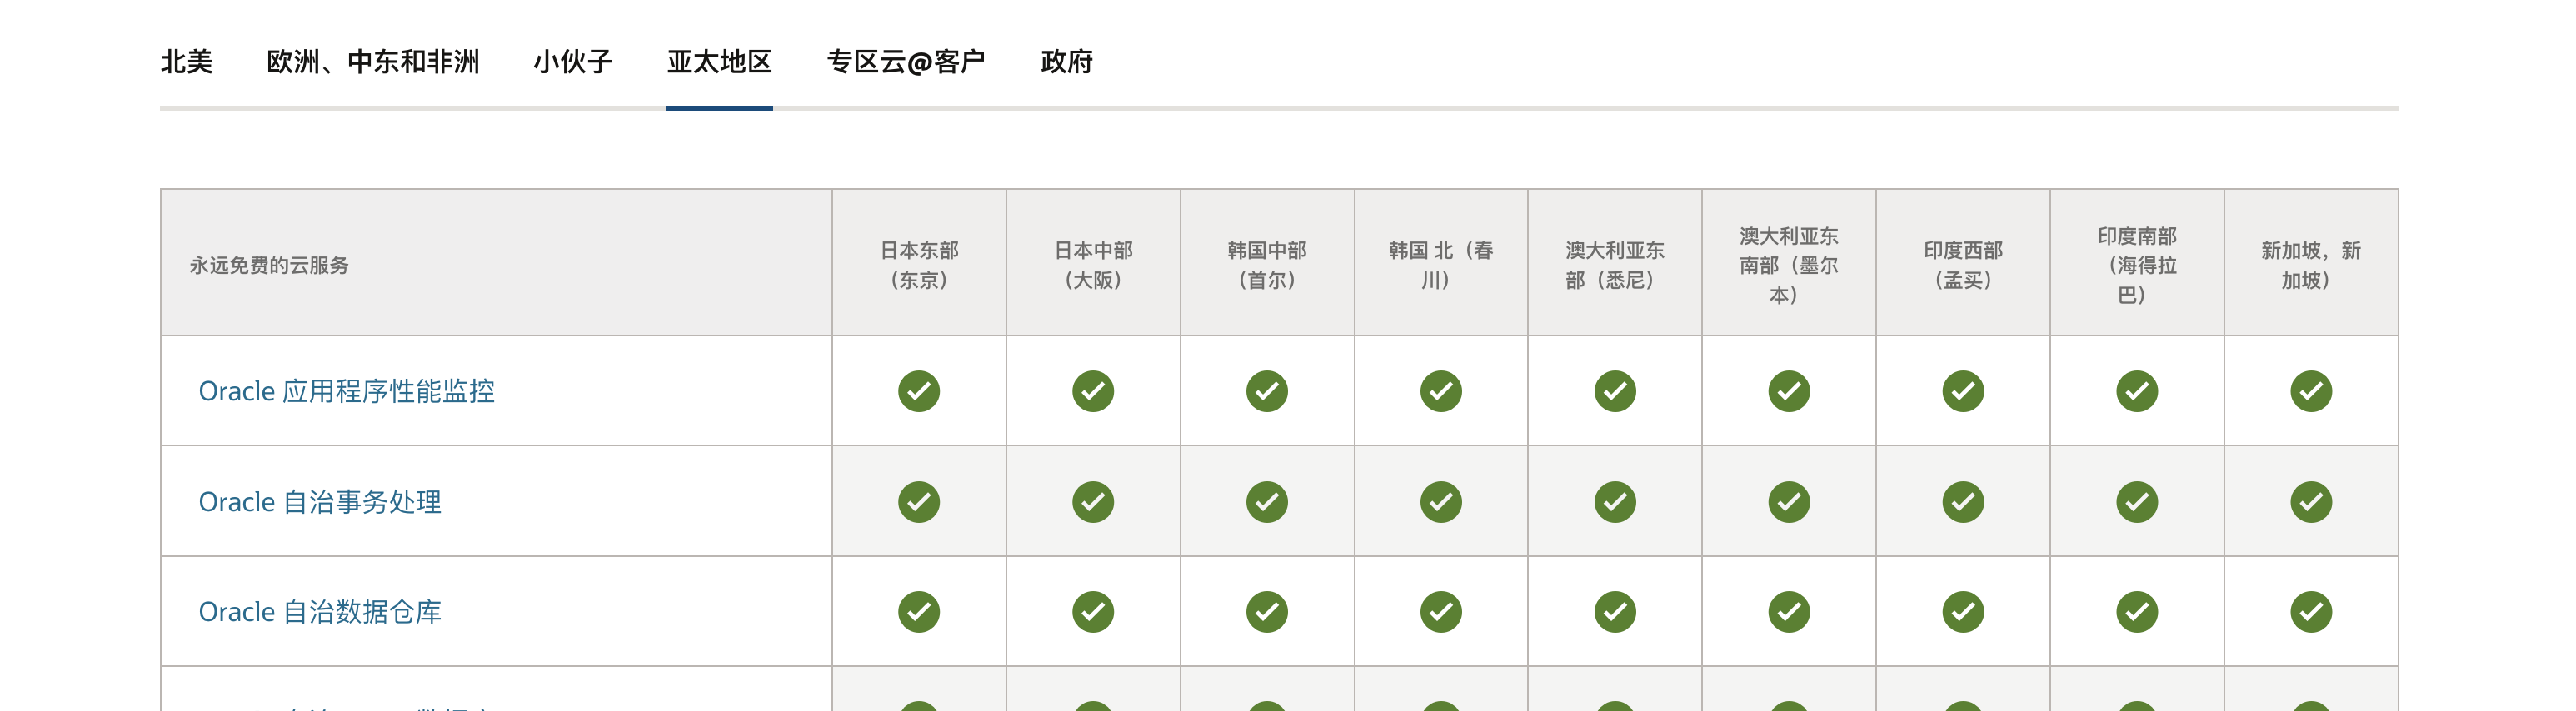
ORACLE CLOUD 在国内有数据中心吗?
EMQX Newsletter 2022-07|EMQX 5.0 正式发布、EMQX Cloud 新增 2 个数据库集成

J9数字虚拟论:元宇宙的潜力:一股推动社会进步的力量
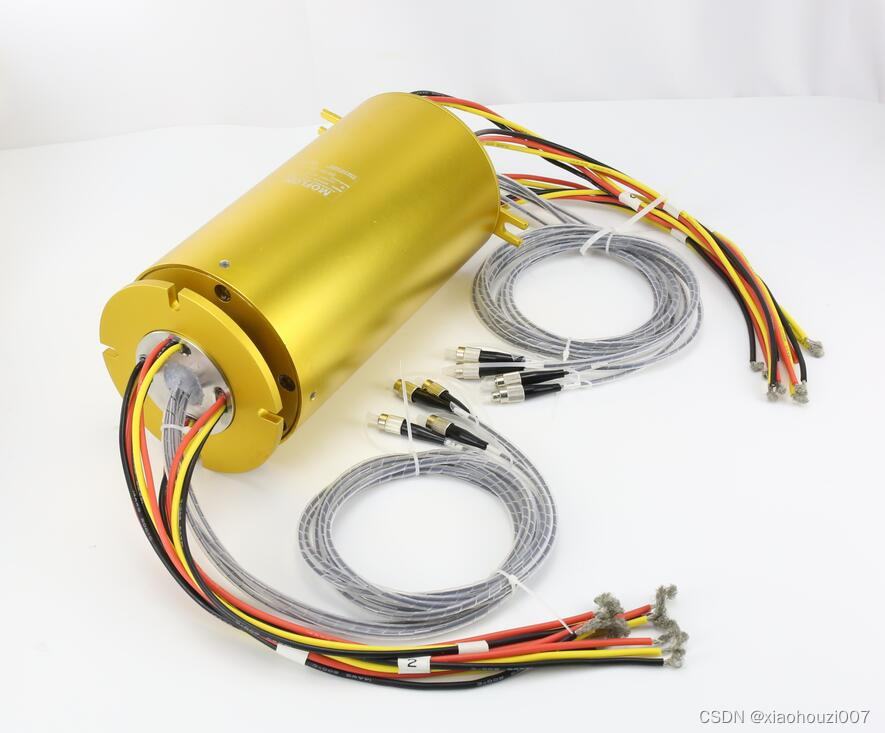
如何选择合适的导电滑环型号

高效的组织信息共享知识库是一种宝贵的资源
TiKV & TiFlash 加速复杂业务查询丨TiFlash 应用实践
随机推荐
数据中台“集存通用治”功能场景说明
C专家编程 第1章 C:穿越时空的迷雾 1.8 ANSI C标准的结构
MySQL查询语法
sphinx coreseek的安装和php下使用
我想请问下,我们的数据库是在亚马逊,Dataworks 连不通,怎么办?
TiKV & TiFlash accelerate complex business queries丨TiFlash application practice
沃尔沃:这是会“种草”的“安全感”!
从零开始搭建MySQL主从复制架构
2年开发经验去面试,吊打面试官,即将面试的程序员这些笔记建议复习
leetcode:187. 重复的DNA序列
C专家编程 第3章 分析C语言的声明 3.7 typedef struct foo{... foo;}的含义
生产环境如何删除表呢?只能在SQL脚本里执行 drop table 吗
《社会企业开展应聘文职人员培训规范》团体标准在新华书店上架
大型企业数据治理的现状和解决方案有哪些参考?_光点科技
Looking at the ecological potential of Hongmeng OS from the evolution of MatePad Pro
从MatePad Pro进化看鸿蒙OS的生态势能
关于oracle表空间在线碎片整理
【AppCube】零代码小课堂开课啦
C专家编程 第1章 C:穿越时空的迷雾 1.10 “安静的改变”究竟有多少安静
Detailed explanation of setting HiSilicon MMZ memory and OS memory