当前位置:网站首页>Godson 2nd generation burn PMON and reload system
Godson 2nd generation burn PMON and reload system
2022-07-05 13:27:00 【Orange civet cat】
Problem description
Originally, I just turned on and couldn't enter the operating system , It was not clear at that time PMON What's the function , Think with Ubuntu Under the tty0 almost , Accidentally deleted during the process of entering the command line PMON, From then on, the development board becomes brick .
At that time, I said this question to the technicians in despair , The kind Mr. long sent me his EJTAG, So there is the next burning PMON And the process of reinstalling the system .
burning PMON
Environmental Science
| Environmental Science | explain |
|---|---|
| operating system | Ubuntu 20.04 |
Burning process
according to 《 Godson Ejtag Brief introduction 》 Burn :
download ejtag Software
Because the official website provided in the document has expired , So I really csdn I found one on the Internet ejtag-debug-v3.25.19.tar.gz Download address :https://download.csdn.net/download/xiaolong1126626497/18927988
I will download
ejtag-debug-v3.25.19.tar.gzIt's decompressed Ubuntud Of~/Downloadtar zxvf ejtag-debug-v3.25.19.tar.gzThen go to
cd /ejtag_debugThen download pmon, Will download pmon It's all in
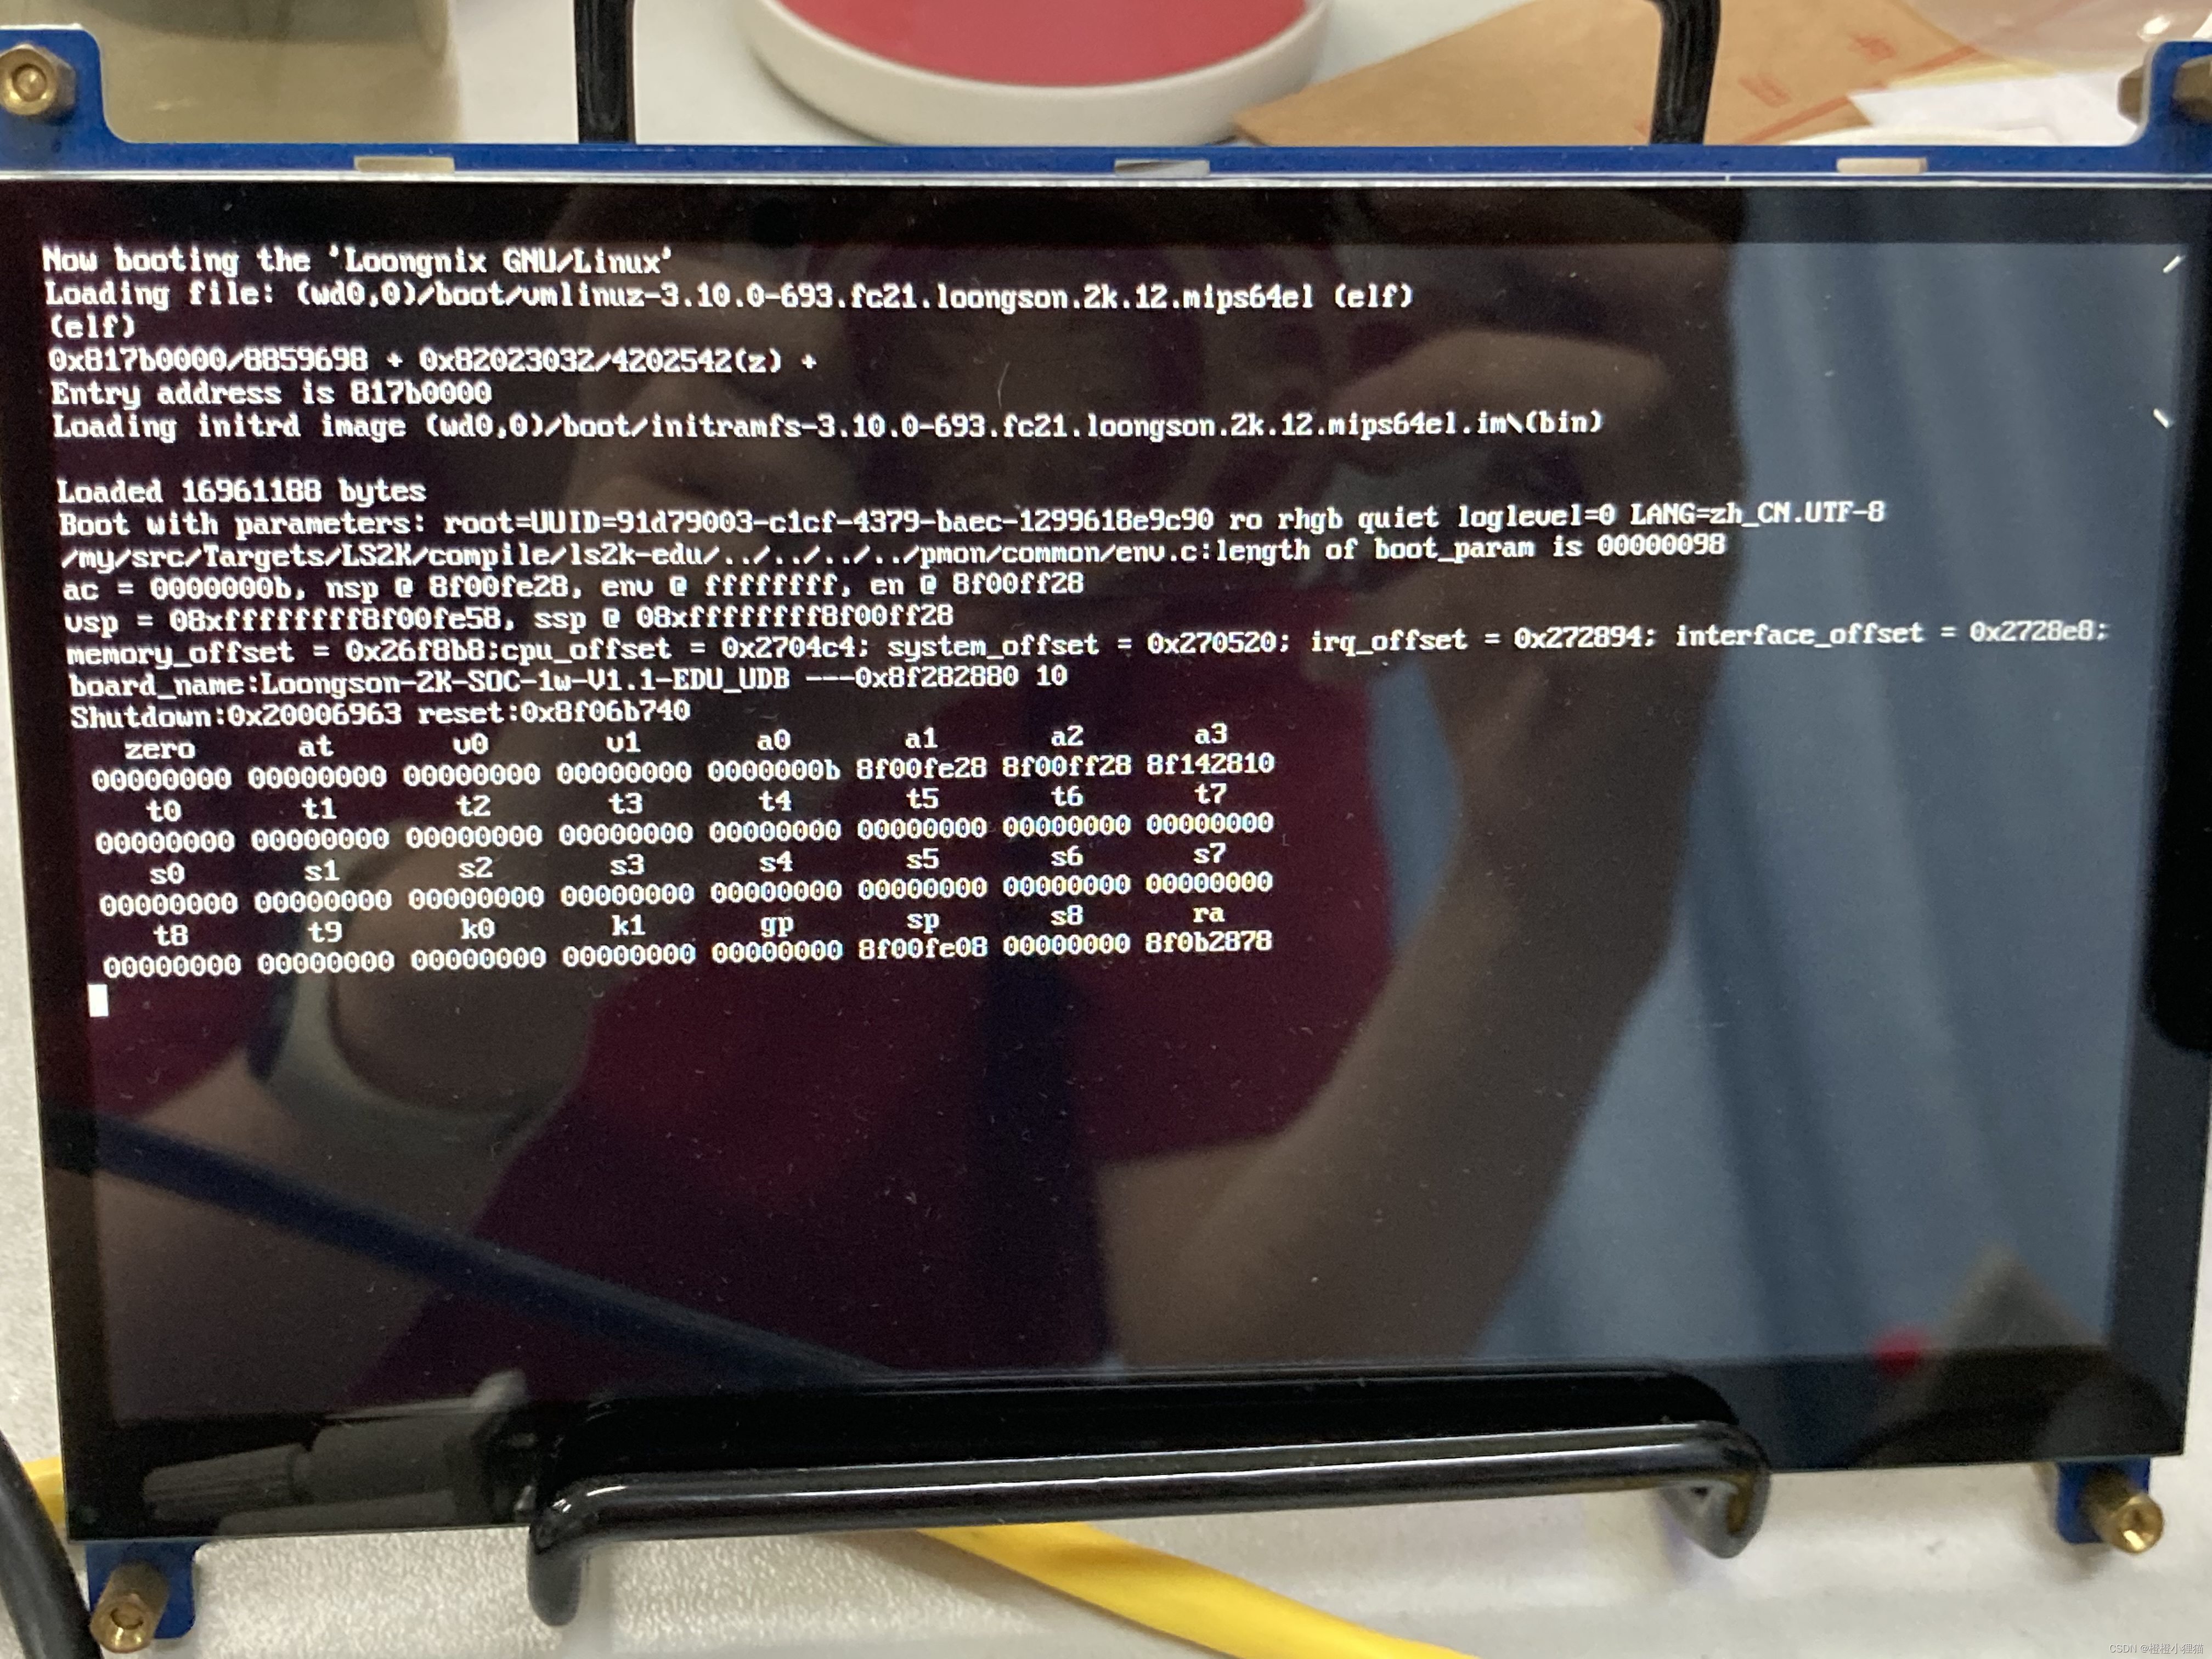
/tmp/Under the folderPMON link Failure / Success shows gzrom.bin http://ftp.loongnix.cn/embedd/ls2k/ After downloading this, you can't boot , Feeling is ls1b model gzrom4g.bin http://ftp.loongnix.cn/embedd/ls2k/ After downloading this, you can't boot gzrom-2h3a300m.bin http://ftp.loongnix.cn/embedd/others/zd/ ditto ️gzrom-dtb.bin http://ftp.loongnix.cn/loongsonpi/pi_2/source/ Longxin school 2 Generation exclusive PMON pmon-ls2k.bin It can be turned on , But the system cannot be reinstalled , I feel it is suitable for education The following is the picture of unable to reinstall the system , Will be stuck here all the time :
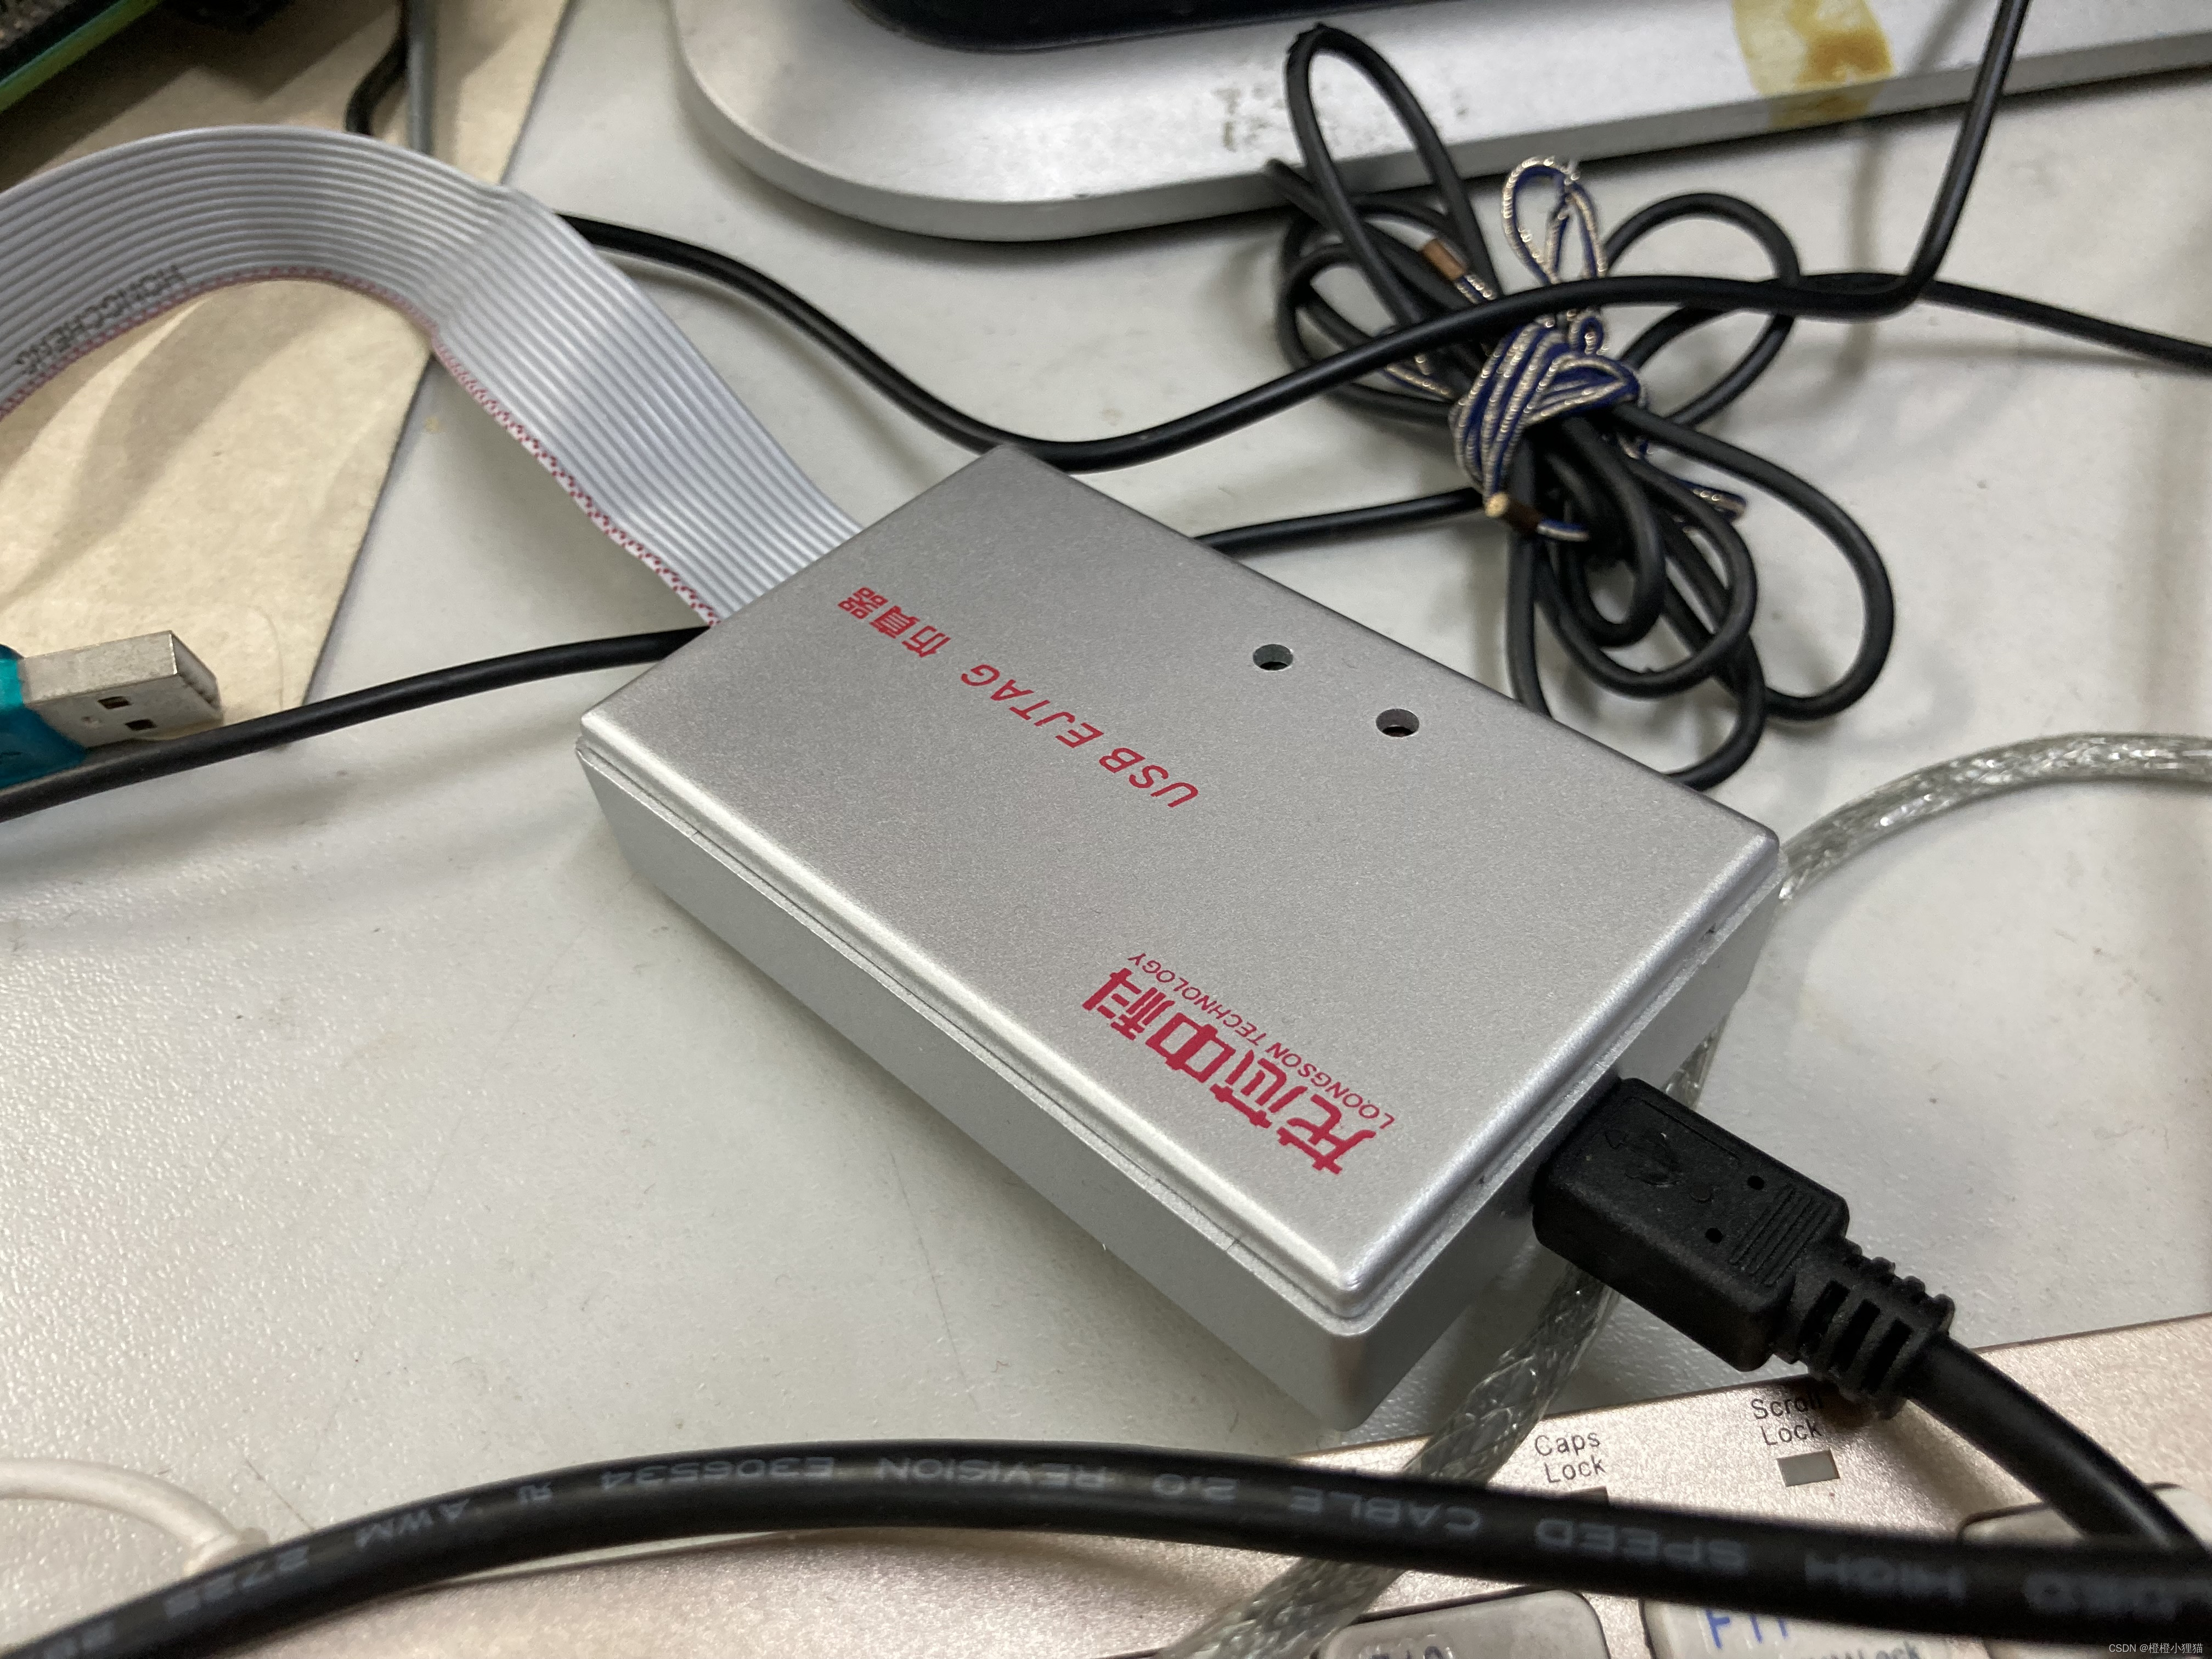
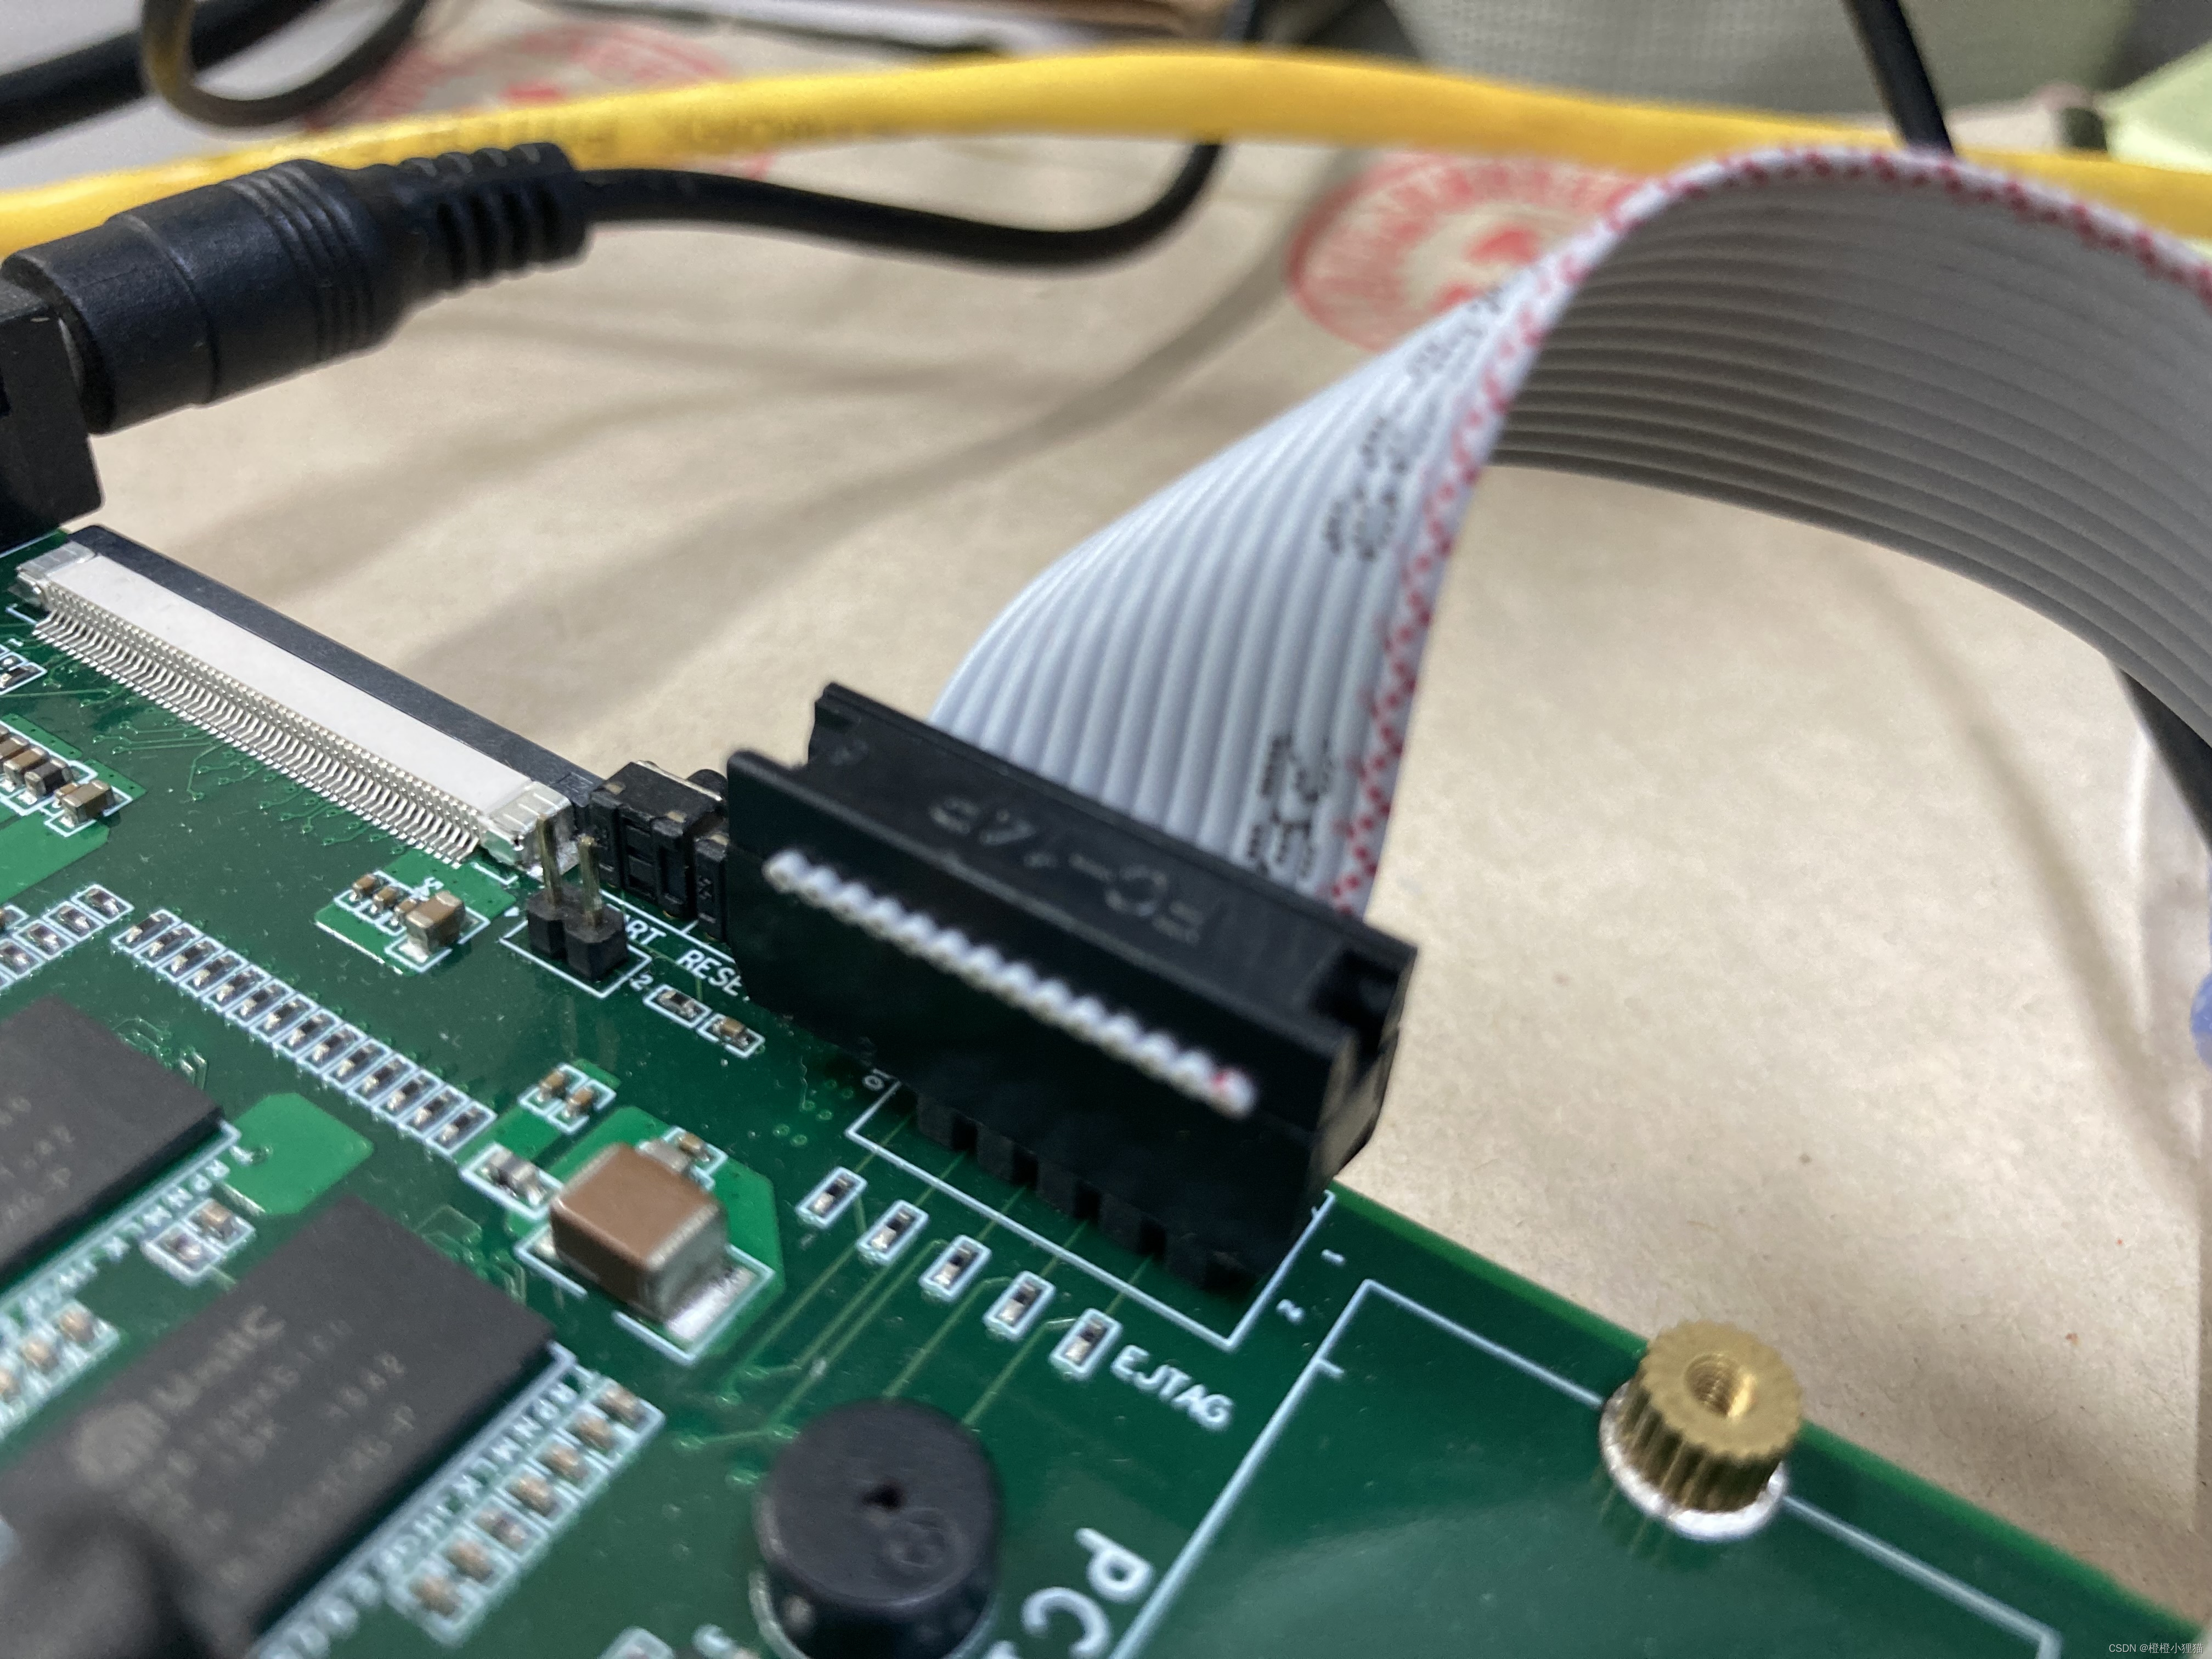
The simulator USB End to Ubuntu On , The other section connects the development board in the way shown in the figure , Connect the development board to the power supply
Burn
sudo ./ejtag_debug_usb -t
source configs/config.ls2k
program_cachelock /tmp/gzrom-dtb.bin  # pmon The path of
After writing the command , Press the start key or restart key on the development board , Start burning , Wait until the terminal stops , Press the restart key on the development board .
Reshipment system
Download mirroring
| Downloaded image | link | explain |
|---|---|---|
| loongnix-20180531.iso | http://ftp.loongnix.cn/embedd/os/ | |
| ️loongnix-1.0-2005-livecd.iso | http://ftp.loongnix.cn/loongsonpi/pi_2/OS/Loongnix/ | This image is installed |
| loongbian_buster_ls2k_base_20201220.iso | loongbian_buster_ls2k_base_20201220.iso |
Make the startup disk
According to this blog Godson education school started from scratch ( One )—— Production starts U disc 、 Turn on SSH service 、 download Loongpio library use UltraISO Failed to create startup disk ,U After disc insertion PMON I can't recognize , So only in Ubuntu Next, make a startup disk .
Download the image to Ubuntu In a directory of , such as
~/loongson, The first thing to do is to create loongson The catalog ofSwitch to the directory
cd ~/loongsonInsert a greater than 4G Of U Disk as a startup disk ,U The contents of the disk will be formatted , So it's better to be empty U disc
Input... At the terminal
sudo fdisk -lfind U The device symbol corresponding to the disk , For example, if the system comes with a hard disk , It's usually/dev/sda, Insert a U disc , The corresponding is/dev/sdb了 , This must not be mistaken .Enter the following command at the terminal to start making the startup disk :
sudo dd if=xxx.ios of=dev/sdy    # xxx Represents the installation disk ios Image file path ,y On behalf of U Device symbol of disk
 Such as :sudo dd if=loongnix-1.0-2005-livecd.iso   of=dev/sdb
#  After entering the above command , The terminal will react nothing , It will take about ten to twenty minutes , There will be a prompt that the burning is complete or something wrong happens
sync  #  Better input sync
Then insert the startup disk into the development board
There could be catons , Just wait patiently , For specific installation operations, please refer to 《Loongnix-1.0.2003 Installation manual 》
Or reference video Godson TechLive The first phase : install Loongnix System
ps: I partition according to the method in the video , As soon as I start up, I say I don't have enough disk space ; Another problem is that I have insufficient authority , Therefore, it is still installed according to the way in the document .
Reference link
The embedded Linux Development : Godson 2K1000 Use EJTAG burning POPM: Burned PMON There is a problem , But the steps are not wrong
Godson education school started from scratch ( One )—— Production starts U disc 、 Turn on SSH service 、 download Loongpio library : This blogger uses the education school , I don't know PMON Dissimilarity , The system disk burned according to his method cannot be read
Godson TechLive The first phase : install Loongnix System : amusing up Lord , But there is a problem with the system at the end of the operation according to his steps .
in addition
I packed the tools and files mentioned in the article into my resources .
边栏推荐
猜你喜欢

DataPipeline双料入选中国信通院2022数智化图谱、数据库发展报告

Shu tianmeng map × Weiyan technology - Dream map database circle of friends + 1

What are the private addresses

Can and can FD
Binder通信过程及ServiceManager创建过程

私有地址有那些

go 数组与切片

Pandora IOT development board learning (HAL Library) - Experiment 7 window watchdog experiment (learning notes)
Write macro with word

UnicodeDecodeError: ‘utf-8‘ codec can‘t decode byte 0xe6 in position 76131: invalid continuation byt
随机推荐
Reflection and imagination on the notation like tool
Although the volume and price fall, why are the structural deposits of commercial banks favored by listed companies?
Get you started with Apache pseudo static configuration
Simple page request and parsing cases
Write macro with word
Cloudcompare - point cloud slice
Win10 - lightweight gadget
峰会回顾|保旺达-合规和安全双驱动的数据安全整体防护体系
Put functions in modules
华为推送服务内容,阅读笔记
蜀天梦图×微言科技丨达梦图数据库朋友圈+1
【MySQL 使用秘籍】一网打尽 MySQL 时间和日期类型与相关操作函数(三)
山东大学暑期实训一20220620
Navigation property and entityset usage in SAP segw transaction code
Difference between avc1 and H264
TortoiseSVN使用情形、安装与使用
Could not set property ‘id‘ of ‘class XX‘ with value ‘XX‘ argument type mismatch 解决办法
Talking about fake demand from takeout order
Operational research 68 | the latest impact factors in 2022 were officially released. Changes in journals in the field of rapid care
Reverse Polish notation