The following introduction is based on ubuntu18.04, Use apt stay ubuntu install zabbix 4.0.x edition . Planning in 10.0.0.101 Host installation zabbix server, stay 10.0.0.104 Installation and supply msyql Service support zabbix server.
Official document
One 、 install zabbix server
1.1 download deb package
# wget https://repo.zabbix.com/zabbix/4.0/ubuntu/pool/main/z/zabbix-release/zabbix-release_4.0-3+bionic_all.deb
# sudo dpkg -i zabbix-release_4.0-3+bionic_all.deb
# sudo apt update
1.2 install Zabbix server,Web front end ,agent
# sudo apt install zabbix-server-mysql zabbix-frontend-php zabbix-agent -y
Two 、 Preparing the database
2.1 install mysql
# apt update
# sudo apt -y install mysql-server mysql-client # Or install mariadb-server,mariadb-client
# vim /etc/mysql/mysql.conf.d/mysqld.cnf
	bind-address	=0.0.0.0		# Modify the listening address
# systemctl enable --now mysql
2.2 Create the initial database
# mysql -uroot
mysql> create database zabbix character set utf8 collate utf8_bin;
mysql> create user [email protected]'10.0.0.%' identified by 'magedu.zabbix';
mysql> grant all privileges on zabbix.* to [email protected]'10.0.0.%';
mysql> quit;
# systemctl restart mysql
2.3 Test database
# apt -y install mysql-client
# mysql -uzabbix -pmagedu.zabbix -h 10.0.0.104
mysql> show databases;
+--------------------+
| Database           |
+--------------------+
| information_schema |
| zabbix	         |
+--------------------+
2 rows in set (0.01 sec)
2.4 Initialize database
## Import basic database
# zcat /usr/share/doc/zabbix-server-mysql*/create.sql.gz | mysql -uzabbix -pmagedu.zabbix -h 10.0.0.104 zabbix

## stay mysql Host inspection found that many databases were generated
mysql> use zabbix;
Database changed
mysql> show tables;
+----------------------------+
| Tables_in_zabbix           |
+----------------------------+
| acknowledges               |
| actions                    |
| alerts                     |
| application_discovery      |
| application_prototype      |
| application_template       |
| applications               |
| auditlog                   |
	.....# Successful initialization
3、 ... and 、 edit zabbix server The configuration file
Edit profile , Appoint zabbix Relevant database account password
# vim /etc/zabbix/zabbix_server.conf
# grep -v  "^#" /etc/zabbix/zabbix_server.conf|grep DB
DBHost=10.0.0.104
DBName=zabbix
DBUser=zabbix
DBPassword=magedu.zabbix
DBPort=3306
Four 、 Solve the time zone problem
# vim /etc/zabbix/apache.conf
 <IfModule mod_php7.c>
 	....
	php_value date.timezone Asia/shanghai
5、 ... and 、 Start the service and visit web Interface
5.1 Start the service
# systemctl restart zabbix-server zabbix-agent apache2
# systemctl enable zabbix-server zabbix-agent apache2
# ss -ntl |grep "10050"
LISTEN   0         128                 0.0.0.0:10050            0.0.0.0:*
LISTEN   0         128                    [::]:10050               [::]:*
  .... Omit .....
5.2 visit web Interface
Open the browser template 10.0.0.101/zabbix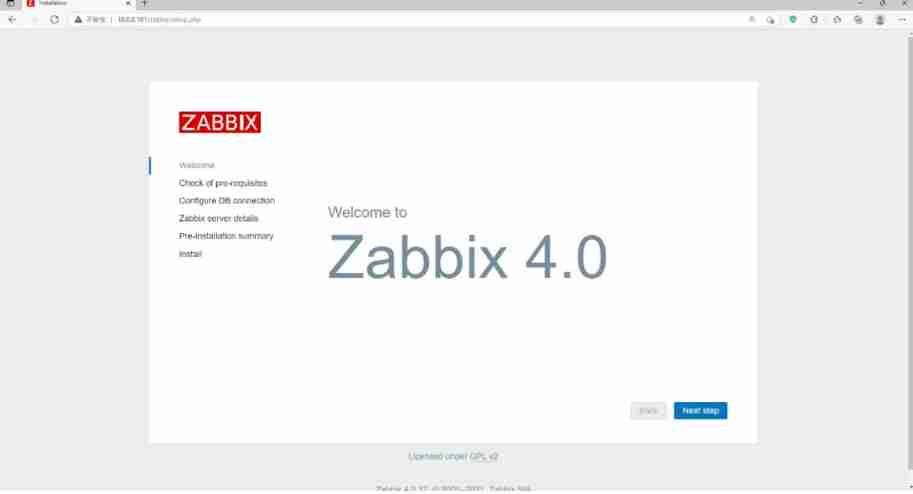
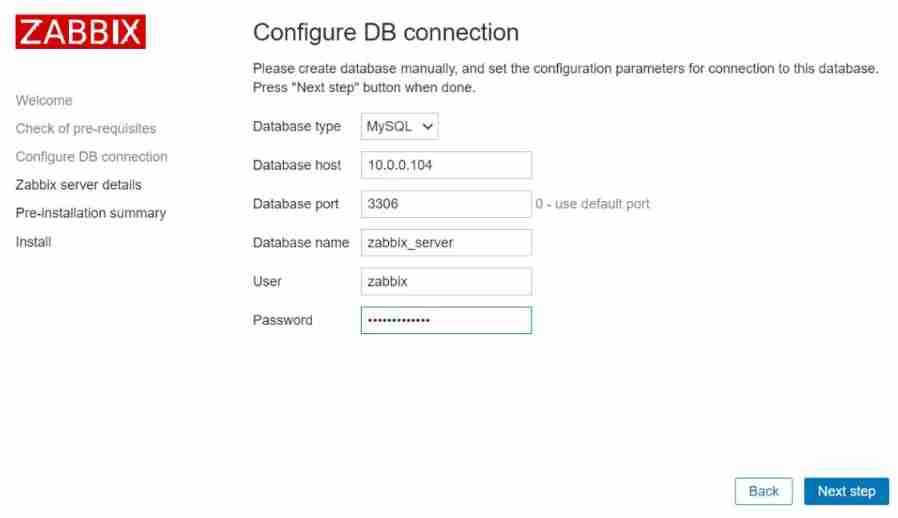
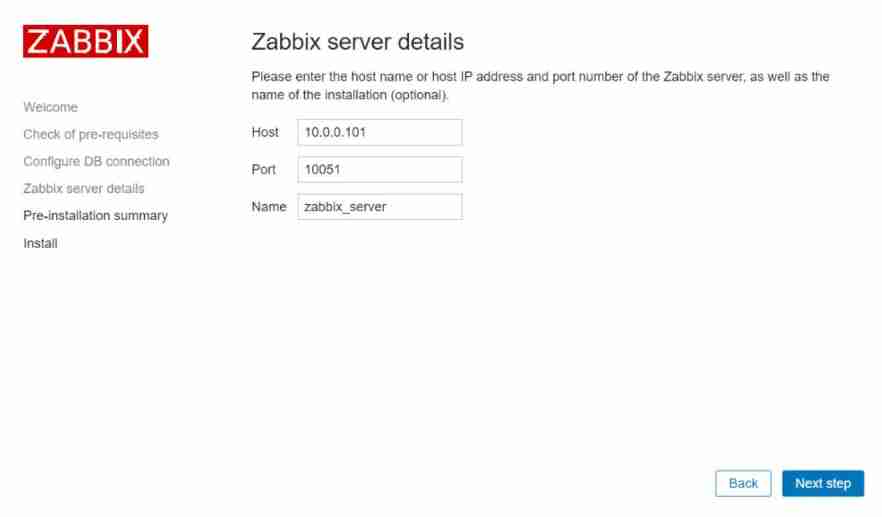
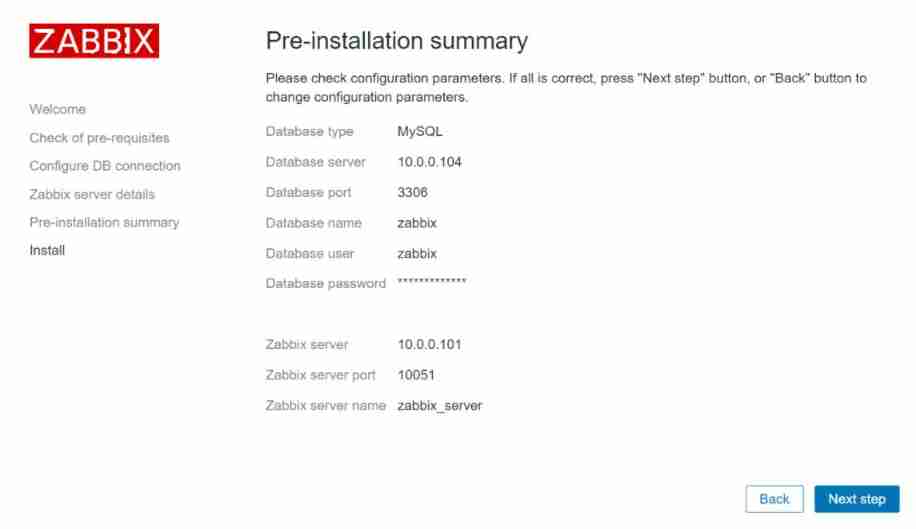
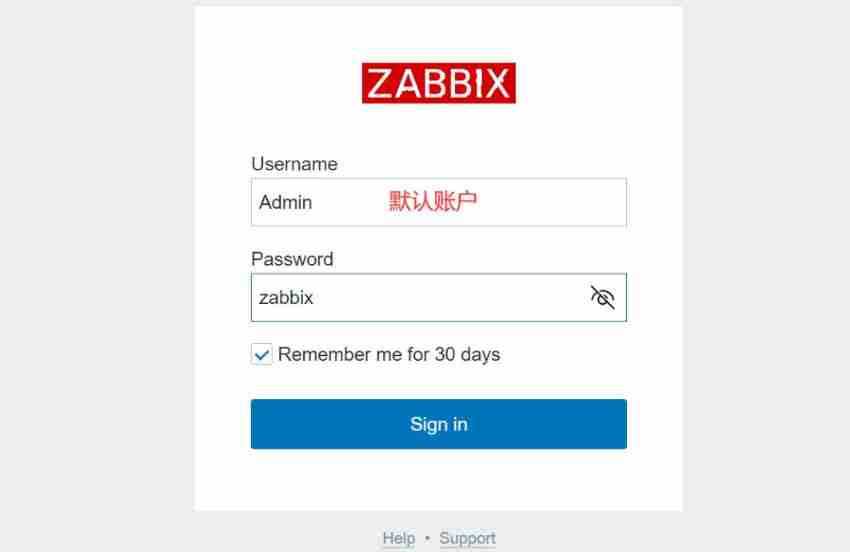
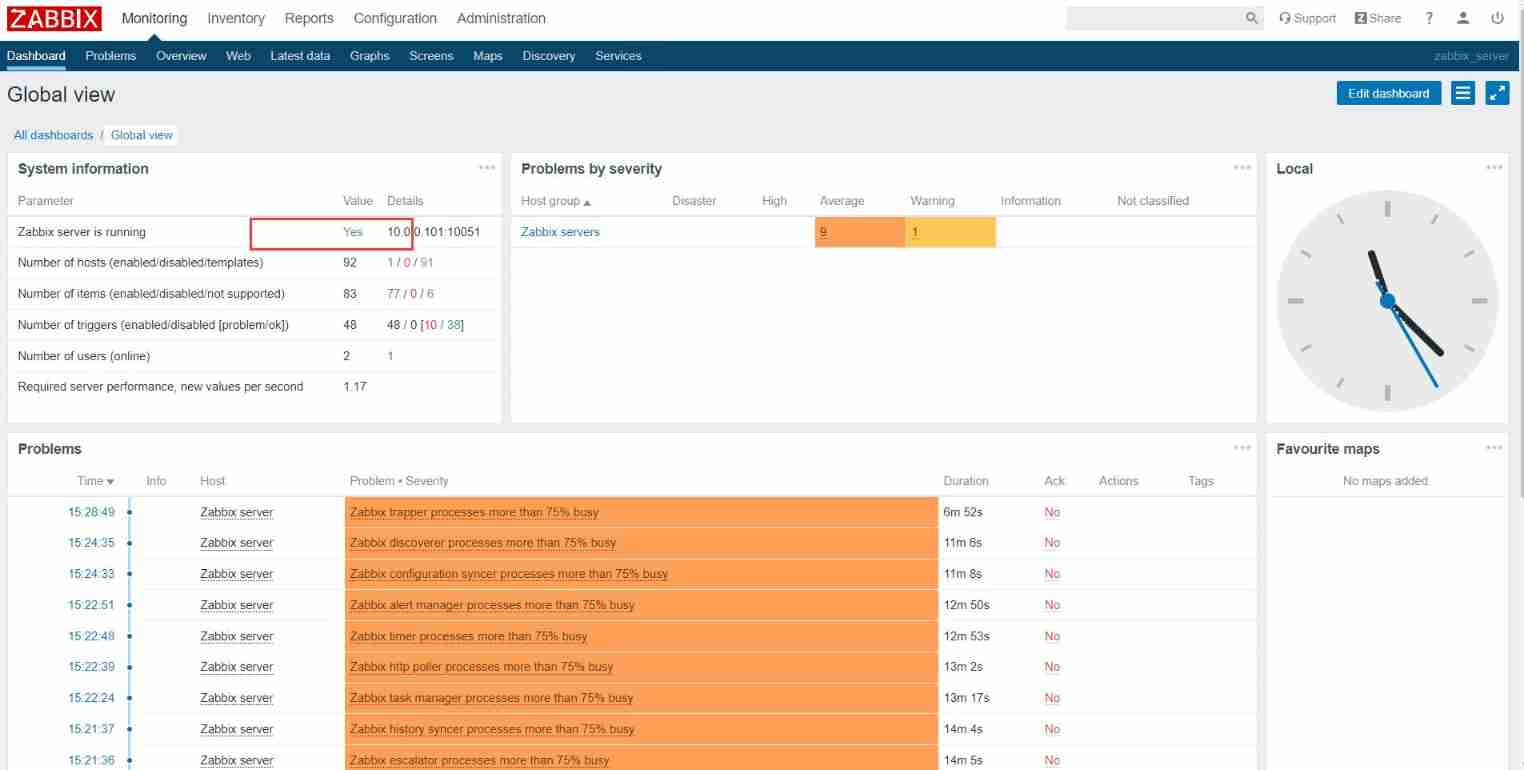
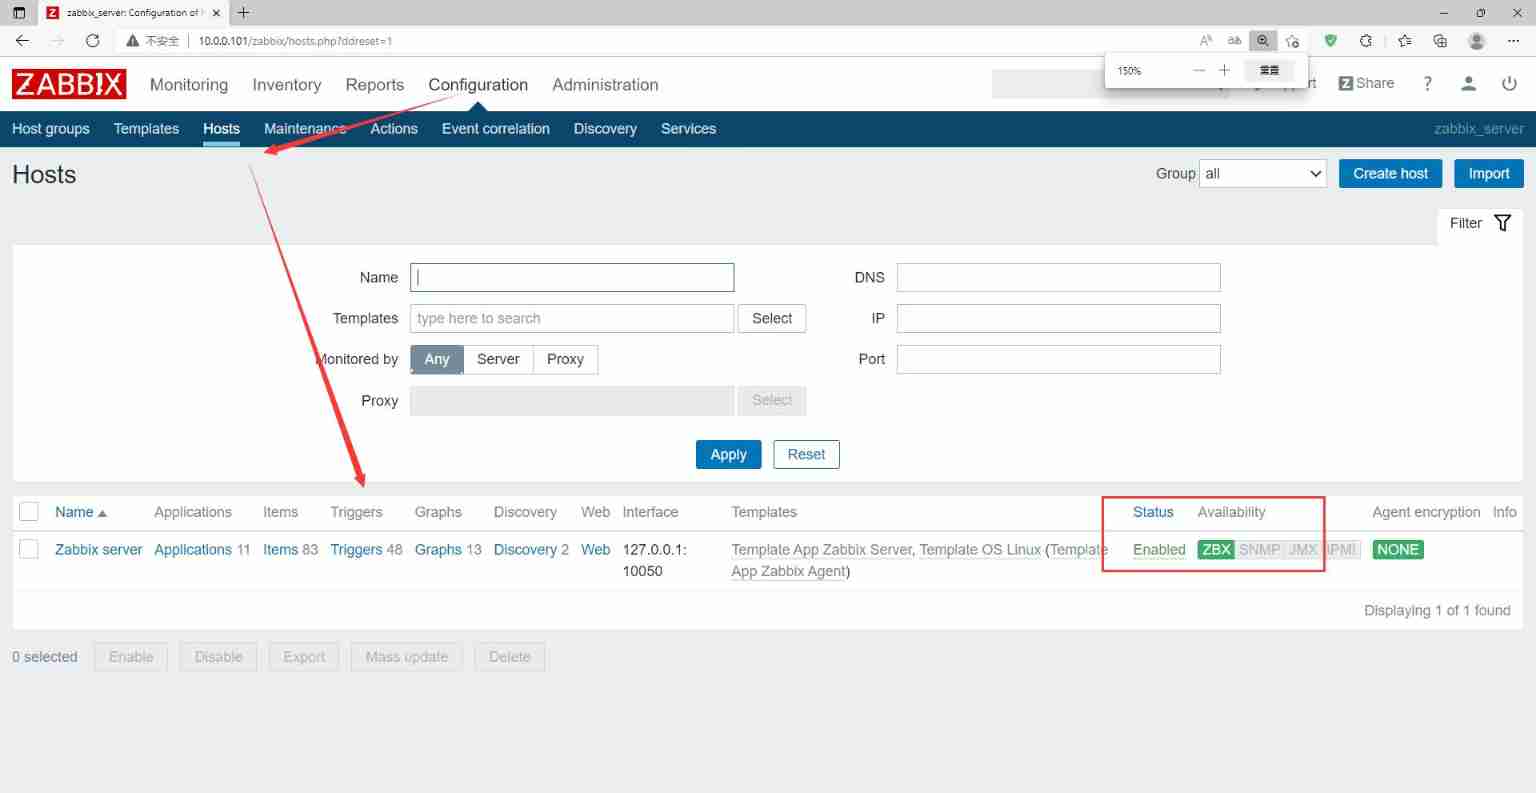
thus ,zabbix serve installation is complete


![[Yunju entrepreneurial foundation notes] Chapter II entrepreneur test 21](/img/73/4050a592fdd99bf06e8fd853b157b6.jpg)


![[Yunju entrepreneurial foundation notes] Chapter II entrepreneur test 15](/img/72/0fe9cb032339d5f1ccf6f6c24edc57.jpg)
