当前位置:网站首页>Pytorch learning record
Pytorch learning record
2022-07-01 23:45:00 【OPTree412】
Here's the catalog title
- 1.TENSORS
- 2. Tensor Usage mode
- 1. Tensor Use GPU`tensor.to('cuda')`
- 2. Change the element
- 3. Splicing `torch.cat()`
- 4. Tensors Multiplication
- 5. Tensors Add `add_(n)`
- 6. Shaping `reshape(input, (row,colmn))`
- 7. Tensor contraction `squeeze()`
- 8. Tensor expansion `unsqueeze(input, dim)`
- 9. Dimension exchange `transpose()`
- 10. Find non-zero element `nonzero()`
- 11. Sum up , The average , square
- 2.Autograd
1.TENSORS
1.1 What is? tensors( tensor )
stay PyTorch in , Use tensors To encode the input and output of the model , And the parameters of the model .tensors Equivalent to numpy.array(), Can be in GPU Or other hardware .
1.2 Tensor initialization
1. torch.tensor
torch.tensor(data, *, dtype=None, device=None, requires_grad=False, pin_memory=False)
take data Convert to Tensor.data It can be list, tuple, NumPy ndarray, scalar And other data in the form of arrays .
import torch

# list type
data = [[1, 2], [3, 4]]
x_data = torch.tensor(data)
print(x_data)

# np.array type
score = np.array([[0,1],[2,3]])
y_data = torch.tensor(data)
print(y_data)

2. from_numpy(ndarray)
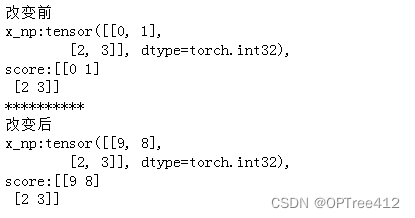
torch.from_numpy(ndarray) Will a numpy.ndarray Convert to Tensor, But to Note that this conversion is a shallow copy .( For deep copy tensor.copy_())
score = np.array([[0,1],[2,3]])
x_np = torch.from_numpy(score) #  Shallow copy score object
print(f" Before change \nx_np:{
      x_np},\nscore:{
      score} ")

#  After change
score[0][0] = 9
x_np[0][1] = 8
print(f"**********\n After change \nx_np:{
      x_np},\nscore:{
      score} ")
3. torch.ones()、torch.rand() And torch.zeros()
torch.zeros(*size, *, out=None, dtype=None, layout=torch.strided, device=None, requires_grad=False) Building a system where all elements are 0 Tensor .
torch.ones()、torch.rand() And torch.zeros() Empathy , But all elements are different .
rand = torch.rand((3,4))
zero = torch.zeros((3,4))
ones = torch.ones((3,4))

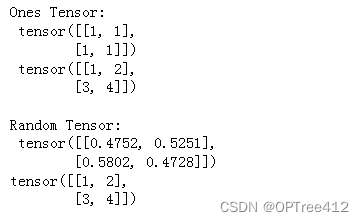
4. torch.ones_like() And torch.rand_like()
torch.ones_like() And torch.rand_like() The new tensor preserves the properties of the parameter tensor ( shape 、 data type )
x_ones = torch.ones_like(x_data) #  Retain  x_data  Properties of
print(f"Ones Tensor: \n {
      x_ones} \n {
      x_data} \n")

x_rand = torch.rand_like(x_data, dtype=torch.float)
print(f"Random Tensor: \n {
      x_rand} \n{
      x_data} \n")
5. arange()
arange(start=0, end, step=1, *, out=None, dtype=None, layout=torch.strided, device=None, requires_grad=False)
rr = torch.arange(6,13)
rrr = torch.arange(13)
rrrr = torch.arange(6, 13, 0.5)
rr,rrr,rrrr

1.3 Tensor attribute
tensor = torch.rand(3, 4)

print(f"Shape of tensor: {
      tensor.shape}")
print(f"Datatype of tensor: {
      tensor.dtype}")
print(f"Device tensor is stored on: {
      tensor.device}")

2. Tensor Usage mode
1. Tensor Use GPUtensor.to('cuda')
if torch.cuda.is_available():
  tensor = tensor.to('cuda')
  print(f"Device tensor is stored on: {
      tensor.device}")

2. Change the element
tensor = torch.ones(4, 4)
tensor[:,1] = 0
print(tensor)

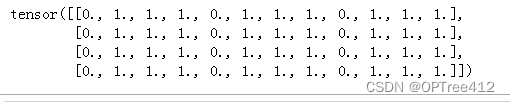
3. Splicing torch.cat()
torch.cat(tensors, dim=0, *, out=None) concatenated tensors( A pile of non empty Tensor Splicing , In Africa dim Dimensions must be the same shape ), Return results .
Be careful : Splicing is the splicing of a specific dimension , Other dimensions are ignored
tensor = torch.ones(4, 4)
tensor[:,0] = 0
t1 = torch.cat([tensor, tensor, tensor], dim=1)
print(t1)
4. Tensors Multiplication
Multiplication at the element level Tensor1.mul(Tensors2) or *, Matrix multiplication Tensor1.matmul(Tensors2) or @
temp = torch.ones(4,4)

print(f"\ntemp.mul(nn) {
      temp.mul(temp)} \n")
print(f"temp * temp \n {
      temp * temp}")

print(f"temp @ temp \n {
      temp @ temp}")
print(f"temp.matmul(temp) \n {
      temp.matmul(temp)}")

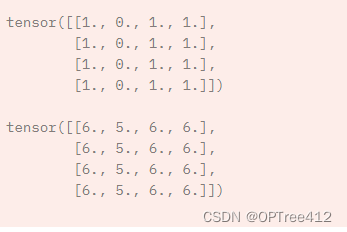
5. Tensors Add add_(n)
All elements add n
print(tensor, "\n")
tensor.add_(5)
print(tensor)
6. Shaping reshape(input, (row,colmn))
hold input The matrix is changed to row That's ok ,colmn Column
a = torch.arange(4.).reshape((2, 2))
b = torch.tensor([[0, 1], [2, 3]]).reshape((-1,))

'''  perhaps  a = torch.arange(4.).reshape((2, 2)) a = torch.reshape(a, (2, 2)) b = torch.tensor([[0, 1], [2, 3]]).reshape((-1,)) a = torch.reshape(b, (-1, )) '''

7. Tensor contraction squeeze()
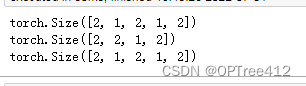
squeeze(Tensor, dim=None, *, out=None) Get rid of Tensor The middle dimension is 1 Dimensions , And return this Tensor. If there is dim Only the specified dimension squeeze operation . It's a deep copy .
x = torch.zeros(2, 1, 2, 1, 2)
print(x.size())

y = torch.squeeze(x,dim = 1)
print(y.size())
print(x.size())
8. Tensor expansion unsqueeze(input, dim)
unsqueeze(input, dim) stay input Insert a dimension with a length of 1 Dimensions , return Tensor
9. Dimension exchange transpose()
transpose(input, dim0, dim1) return input Transposed Tensor,dim0 and dim1 In exchange for .
x = torch.tensor([1, 2, 3, 4])
print(x.shape)
print(torch.unsqueeze(x, 0))
print(torch.unsqueeze(x, 0).shape)
print(torch.unsqueeze(x, 1))
print(torch.unsqueeze(x, 1).shape)

10. Find non-zero element nonzero()
nonzero(input, *, out=None, as_tuple=False)
①as_tuple=False: Returns a two-dimensional Tensor, Each row is one input Index of non-zero elements
torch.nonzero(torch.tensor([[0.6, 0.0, 0.0, 0.0],
                            [0.0, 0.4, 0.0, 0.0],
                            [0.0, 0.0, 1.2, 0.0],
                            [0.0, 0.0, 0.0,-0.4]]))
tensor([[ 0,  0],
        [ 1,  1],
        [ 2,  2],
        [ 3,  3]])
②as_tuple=True: Returns a one-dimensional index Tensor Composed of tuple( Each element is an index on a dimension )
Be careful :where(condition) and torch.nonzero(condition, as_tuple=True) identical
torch.nonzero(torch.tensor([[0.6, 0.0, 0.0, 0.0],
                             [0.0, 0.4, 0.0, 0.0],
                             [0.0, 0.0, 1.2, 0.0],
                             [0.0, 0.0, 0.0,-0.4]]), as_tuple=True)

(tensor([0, 1, 2, 3]), tensor([0, 1, 2, 3]))
11. Sum up , The average , square
y=x.sum(),y=x.mean(),y=x.pow(2)
2.Autograd
torch.autograd yes PyTorch Automatic derivation package provided , Very easy to use , You don't have to calculate the neural network partial derivative by yourself .
2.1 A round of training
- Forward propagation :
prediction = model(data) - Back propagation :
1. Calculation loss
2.loss.backward()(autograd The gradient of the parameter will be calculated in this step , There are corresponding parameters Tensor Of grad Properties of the )
3. Update parameters
1. load optimizer( adopt torch.optim)
2.optimizer.step()Use gradient descent method to update parameters ( The gradient comes from the parameter grad attribute )
import torch, torchvision
#  Build the model 、 Parameters 、 label
model = torchvision.models.resnet18(pretrained=True) #  Model
data = torch.rand(1, 3, 64, 64) #  data   Create a random data tensor to represent the data with  3  Channels 、 Height and width are  64  A single image of
labels = torch.rand(1, 1000) #  Initialize its corresponding tag to some random values .  The labels in the pre training model have shapes  (1,1000).

#  Forward propagation
prediction = model(data) #  Get the model prediction results
loss = (prediction - labels).sum() #  Calculate the loss function

#  Back propagation
loss.backward() #  Calculate the gradient of the parameter  .grad() Store gradients in
optim = torch.optim.SGD(model.parameters(), lr=1e-2, momentum=0.9) #  Stochastic gradient descent   Learning rate 0.001
# Last , call  .step()  To start the gradient descent .  The optimizer stores in  .grad  To adjust each parameter .
optim.step() #gradient descent
Reference resources :
边栏推荐
猜你喜欢

Is there a piece of code that makes you convinced by human wisdom
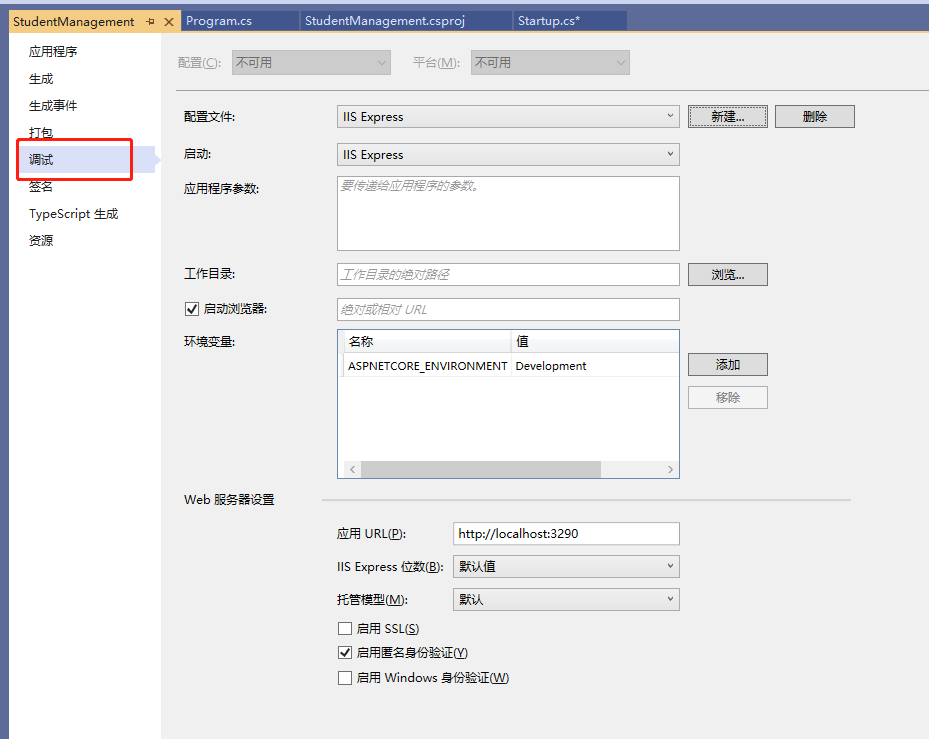
【.Net Core】程序相关各种全局文件

软件架构的本质
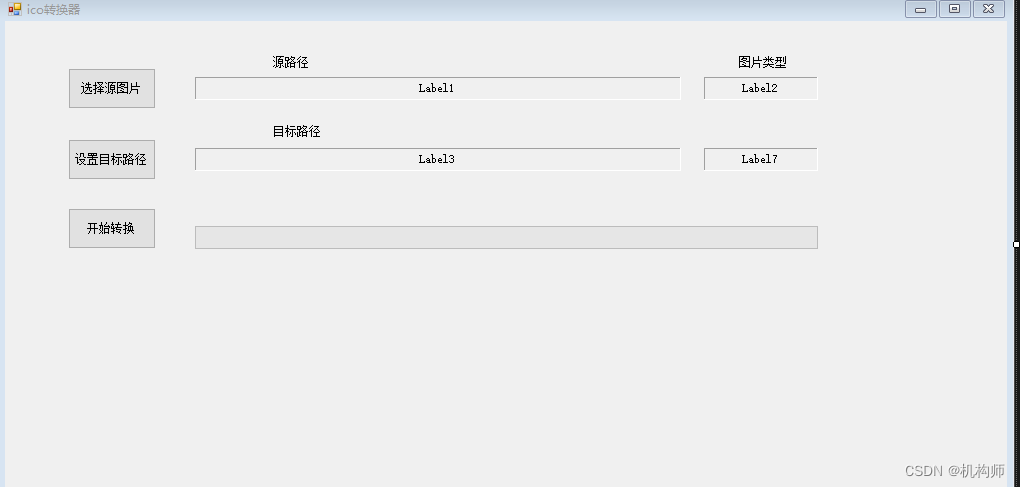
使用VB.net将PNG图片转成icon类型图标文件

第六章 数据流建模

使用uni-simple-router,动态传参 TypeError: Cannot convert undefined or null to object

Why is PHP called hypertext preprocessor
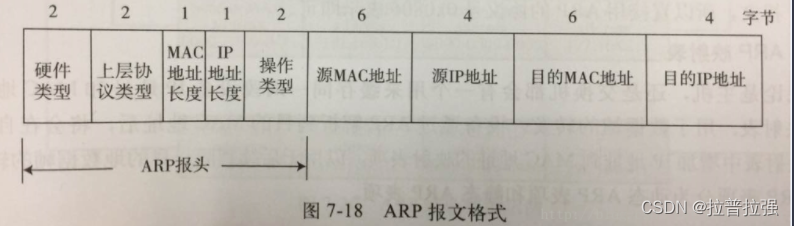
ARP message header format and request flow
2021 RoboCom 世界机器人开发者大赛-高职组复赛

BlocProvider为什么感觉和Provider很相似?
随机推荐
[understanding of opportunity-35]: Guiguzi - flying clamp - the art of remote connection, remote control and remote testing
Using SqlCommand objects in code
问题随记 —— file /usr/share/mysql/charsets/README from install of MySQL-server-5.1.73-1.glibc23.x86_64 c
Zero foundation tutorial of Internet of things development
ADO.NET 之sqlConnection 对象使用摘要
from pip._internal.cli.main import main ModuleNotFoundError: No module named ‘pip‘
华为HMS Core携手超图为三维GIS注入新动能
kubernetes资源对象介绍及常用命令(三)
vs2015 AdminDeployment.xml
ADO. Net SqlConnection object usage summary
ADO.NET之sqlCommand对象
De PIP. Interne. CLI. Main Import main modulenotfounderror: No module named 'PIP'
Behind sharing e-commerce: the spirit of CO creation, symbiosis, sharing, CO prosperity and win-win
小程序表单校验封装
SecurityUtils.getSubject().getPrincipal()为null的问题怎么解决
ARP报文头部格式和请求流程
Li Kou today's question -241 Design priorities for operational expressions
【ES实战】ES上的安全性运行方式
- Oui. Env. Fichier XXX, avec constante, mais non spécifié
距离度量 —— 汉明距离(Hamming Distance)