当前位置:网站首页>18_微信小程序之微信视频号滚动自动播放视频效果实现2.0
18_微信小程序之微信视频号滚动自动播放视频效果实现2.0
2022-07-03 00:26:00 【andr_gale】
18_微信小程序之微信视频号滚动自动播放视频效果实现2.0
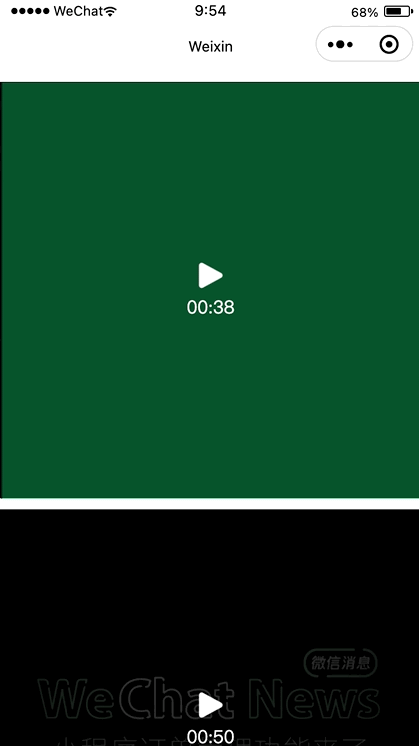
一.先上效果图

关于这个效果呢,我之前已经实现过一个12_微信小程序之微信视频号滚动自动播放视频效果实现,只不过之前的实现是监听scroll-view的onscroll,根据scroll-view的滑动位置动态计算出播放的index来控制自动播放,本文将采用微信小程序为我们提供的IntersectionObserver来实现。
二.IntersectionObserver
IntersectionObserver wx.createIntersectionObserver(Object component, Object options)
- 在页面中使用: IntersectionObserver wx.createIntersectionObserver(this, {observeAll: true}),observeAll为true可同时监听多个节点
- 在自定义组件中使用:IntersectionObserver this.createIntersectionObserver({observeAll: true})
IntersectionObserver IntersectionObserver.relativeTo(string selector, Object margins)
- 使用选择器指定一个节点,作为参照区域
IntersectionObserver.observe(string targetSelector, IntersectionObserver.observeCallback callback)
- 指定目标节点的选择器并监听由relativeTo指定的参照区域与目标节点是否相交,由于我们需要监听多个video节点,所以这里的目标节点选择器我们使用class选择器即可。
- 当目标节点与参照区域相交时,callback(res)返回的res中的intersectionRatio大于0
- 当目标节点与参照区域不相交时,callback(res)返回的res中的intersectionRatio等于0
IntersectionObserver.disconnect()
最后当页面或组件销毁的时候,需调用IntersectionObserver.disconnect()取消监听
在页面中使用时,在onUnload方法中调用即可
在组件中使用时,在detached方法中调用即可
三.视频列表渲染
细节的地方可参考12_微信小程序之微信视频号滚动自动播放视频效果实现,这里就直接上代码了。
<scroll-view class="video-list" scroll-y>
  <view class="list">
    <view class="video-item-wrapper video" style="width: {
        {
        item.videoWidth}}px;" wx:for="{
     {_videoList}}">
      <view class="video-item" style="height: {
        {
        item.videoHeight}}px;">
        <video wx:if="{
     {playIndex == index}}" id="player" class="player" src="{
     {item.src}}" object-fit="contain" show-center-play-btn="{
     {false}}" custom-cache="{
     {true}}" autoplay="{
     {true}}"></video>
        <block wx:else>
          <image class="thumbnail" src="{
     {
     'data:image/jpg;base64,' + item.thumbnail}}"/>
          <view class="action">
            <view class="play-wrapper" bindtap="play" data-index="{
     {index}}">
              <image class="play" src="./images/ic_play.png"/>
              <view style="margin-top: 10rpx;">{
   {item.formatDur}}</view>
            </view>
          </view>
        </block>
      </view>
    </view>
    <view style="width: 100%; height: {
        {
        _videoList[0] ? _videoList[0].videoHeight + 'px' : '600rpx'}};"></view>
  </view>
</scroll-view>
.video-list {

  width: 100%;
  height: 100vh;
}

.list {

  width: 100%;
}

.video-item-wrapper {

  background: #000;
  /* padding-top: 200rpx; padding-bottom: 200rpx; */
  margin-top: 20rpx;
}

.video-item-wrapper:last-child {

  margin-bottom: 20rpx;
}

.video-item {

  position: relative;
  width: 100%;
}

.thumbnail, .player {

  position: absolute;
  left: 50%;
  top: 50%;
  width: 100%;
  height: 100%;
  transform: translate(-50%, -50%);
}

.action {

  position: absolute;
  left: 0;
  top: 0;
  width: 100%;
  height: 100%;
  background: rgba(0, 0, 0, .6);
}

.play-wrapper {

  position: absolute;
  left: 50%;
  top: 50%;
  transform: translate(-50%, -50%);
  display: flex;
  flex-direction: column;
  align-items: center;
  justify-content: center;
  color: #fff;
}

.play {

  width: 48rpx;
  height: 48rpx;
}
Component({

  /** * 组件的属性列表 */
  properties: {

    videoList: {

      type: Array,
      value: [],
      observer: function(newVal, oldVal) {

        var that = this
        const query = that.createSelectorQuery()
        query.select(".video-list").boundingClientRect()
        query.exec((res) => {

          var itemWidth = res[0].width
          for(var i=0; i<newVal.length; i++) {

            newVal[i].videoWidth = Math.floor(itemWidth)
            newVal[i].videoHeight = Math.floor(itemWidth/(newVal[i].width/newVal[i].height))
          }
          that.setData({

            _videoList: newVal
          })
        })
      }
    },
    playIndex: {

      type: Number,
      value: -1,
      observer: function(newVal, oldVal) {

        var that = this
        this.setData({

          playIndex: newVal
        })
        if(newVal >= 0) {

          var videoContext = wx.createVideoContext('player', that)
          if(videoContext) {

            videoContext.stop()
          }
          var timer = setTimeout(function() {

          clearTimeout(timer)
            var videoContext = wx.createVideoContext('player', that)
            if(videoContext) {

              videoContext.play()
            }
          }, 500)
        }
      }
    }
  },

  /** * 组件的初始数据 */
  data: {

    _videoList: []
  },

  /** * 组件的方法列表 */
  methods: {

    play: function(event) {

      var that = this
      var index = event.currentTarget.dataset.index
      this.setData({

        playIndex: index
      })
    }
  }
})
四.参照节点选定
这里我们以第一个视频的高度一半的位置作为参照节点即可,在实际应用的时候也可以根据自己的需求去设置参照节点。
<scroll-view class="video-list" scroll-y>
  <view class="list">
    <view class="video-item-wrapper video" style="width: {
        {
        item.videoWidth}}px;" wx:for="{
     {_videoList}}">
      <view class="video-item" style="height: {
        {
        item.videoHeight}}px;">
        <video wx:if="{
     {playIndex == index}}" id="player" class="player" src="{
     {item.src}}" object-fit="contain" show-center-play-btn="{
     {false}}" custom-cache="{
     {true}}" autoplay="{
     {true}}"></video>
        <block wx:else>
          <image class="thumbnail" src="{
     {
     'data:image/jpg;base64,' + item.thumbnail}}"/>
          <view class="action">
            <view class="play-wrapper" bindtap="play" data-index="{
     {index}}">
              <image class="play" src="./images/ic_play.png"/>
              <view style="margin-top: 10rpx;">{
   {item.formatDur}}</view>
            </view>
          </view>
        </block>
      </view>
    </view>
    <view style="width: 100%; height: {
        {
        _videoList[0] ? _videoList[0].videoHeight + 'px' : '600rpx'}};"></view>
  </view>
</scroll-view>
<view class="relativeView" style="top: {
        {
        _videoList[0] ? _videoList[0].videoHeight/2 + 'px':'30%'}};"></view>
.relativeView {

  position: fixed;
  left: 0;
  top: 30%;
  width: 100%;
  height: 1px;
  background: #f00;
}

我们根据上面的图片分析一波,默认情况下,第一个视频与参照物相交,控制第一个视频播放即可,当向上滑动到第二个视频与参照物相交时,控制第二个视频播放即可
五.滑动自动播放
上面已经分析清楚了,直接上代码。
<scroll-view class="video-list" scroll-y>
  <view class="list">
    <!-- 指定data-index="{
    {index}}",当监听到有video节点与参照节点相交时,可以通过index获取到当前时第几个视频标签与参照节点相交 -->
    <view class="video-item-wrapper video" style="width: {
        {
        item.videoWidth}}px;" wx:for="{
     {_videoList}}" data-index="{
     {index}}">
      <view class="video-item" style="height: {
        {
        item.videoHeight}}px;">
        <video wx:if="{
     {playIndex == index}}" id="player" class="player" src="{
     {item.src}}" object-fit="contain" show-center-play-btn="{
     {false}}" custom-cache="{
     {true}}" autoplay="{
     {true}}"></video>
        <block wx:else>
          <image class="thumbnail" src="{
     {
     'data:image/jpg;base64,' + item.thumbnail}}"/>
          <view class="action">
            <view class="play-wrapper" bindtap="play" data-index="{
     {index}}">
              <image class="play" src="./images/ic_play.png"/>
              <view style="margin-top: 10rpx;">{
   {item.formatDur}}</view>
            </view>
          </view>
        </block>
      </view>
    </view>
    <view style="width: 100%; height: {
        {
        _videoList[0] ? _videoList[0].videoHeight + 'px' : '600rpx'}};"></view>
  </view>
</scroll-view>
<view class="relativeView" style="top: {
        {
        _videoList[0] ? _videoList[0].videoHeight/2 + 'px':'30%'}};"></view>
Component({

  /** * 组件的属性列表 */
  properties: {

    videoList: {

      type: Array,
      value: [],
      observer: function(newVal, oldVal) {

        var that = this
        const query = that.createSelectorQuery()
        query.select(".video-list").boundingClientRect()
        query.exec((res) => {

          var itemWidth = res[0].width
          for(var i=0; i<newVal.length; i++) {

            newVal[i].videoWidth = Math.floor(itemWidth)
            newVal[i].videoHeight = Math.floor(itemWidth/(newVal[i].width/newVal[i].height))
          }
          that.setData({

            _videoList: newVal
          })

          this.intersectionObserver = this.createIntersectionObserver({
    observeAll: true})
          this.intersectionObserver.relativeTo('.relativeView')
          .observe(".video", (res) => {

            let index = res.dataset.index
            let intersectionRatio = res.intersectionRatio
            if(intersectionRatio > 0) {

              that.setData({

                playIndex: index
              })
            }
          })
        })
      }
    },
    ...
  },

  ...
})
大功告成…
六.隐藏参照节点
注意:这里不能给参照节点设置 hidden=“{ {true}}” 或者使用wx:if,否则,将监听不到目标节点与参照节点相交的情况,而应该使用z-index。
<view class="relativeView" style="top: {
        {
        _videoList[0] ? _videoList[0].videoHeight/2 + 'px':'30%'}}; z-index: -9999"></view>
最后在组件销毁的时候,取消监听即可
lifetimes: {

  detached: function() {

    if (this.intersectionObserver) {

      this.intersectionObserver.disconnect()
    }
  }
},
边栏推荐
- 指针初阶(基础)
- University of Oslo: Li Meng | deep reinforcement learning based on swing transformer
- 【AutoSAR 五 方法论】
- How to systematically learn machine learning
- Unity learns from spaceshooter to record the difference between fixedupdate and update in unity for the second time
- 【AutoSAR 八 OS】
- Leetcode-1964: find the longest effective obstacle race route to each position
- 测试右移:线上质量监控 ELK 实战
- Leetcode-2280: represents the minimum number of line segments of a line graph
- 【AutoSAR 七 工具链简介】
猜你喜欢

Web2.0的巨头纷纷布局VC,Tiger DAO VC或成抵达Web3捷径

Shell 实现文件基本操作(sed-编辑、awk-匹配)
![[applet project development -- JD mall] user defined search component of uni app (middle) -- search suggestions](/img/ea/ee1ad50a497478b9d080bb5e4bdfb5.png)
[applet project development -- JD mall] user defined search component of uni app (middle) -- search suggestions

Rust所有权(非常重要)
Attributeerror: 'tuple' object has no attribute 'layer' problem solving
Is there a free text to speech tool to help recommend?
Vulkan-性能及精细化

基于ARM RK3568的红外热成像体温检测系统
![[AUTOSAR nine c/s principle Architecture]](/img/59/ce32c0ff58ef5d8385fe950136175b.png)
[AUTOSAR nine c/s principle Architecture]

数据分析思维分析犯法和业务知识——分析方法(一)
随机推荐
[AUTOSAR II appl overview]
leetcode-224:基本计算器
Leetcode-241: designing priorities for operational expressions
[Luogu p4320] road meets (round square tree)
Shell 实现文件基本操作(切割、排序、去重)
Attributeerror: 'tuple' object has no attribute 'layer' problem solving
[applet project development -- JD mall] user defined search component of uni app (middle) -- search suggestions
【AutoSAR 十三 NVM】
瑞萨电子RZ/G2L开发板上手评测
飞凌搭载TI AM62x的ARM核心板/开发板首发上市,亮相Embedded World 2022
Thank you for being together for these extraordinary two years!
Deep analysis of data storage in memory
leetcode-2115:从给定原材料中找到所有可以做出的菜
【AutoSAR 八 OS】
1.11 - bus
Unity learns from spaceshooter to record the difference between fixedupdate and update in unity for the second time
kubernetes资源对象介绍及常用命令(五)-(NFS&PV&PVC)
Vulkan performance and refinement
Lex & yacc & bison & flex configuration problems
How to find out the currently running version of Solr- How do I find out version of currently running Solr?