当前位置:网站首页>Take you to play with the camera module
Take you to play with the camera module
2022-06-27 09:07:00 【Embedded Yuexiang Garden】
Take you to play with the camera module by hand
1、 Preface
I am busy with my thesis recently , Busy graduation , Has not been updated , We will continue to update at least three original articles per week , Thank you for your support !
A few days ago, my younger brother gave me a piece ESP32-CAM Camera module , It's not easy to be idle now , Just had fun playing with this camera module , In the future, you can watch the situation at home remotely !
2、 What is? ESP32-CAM camera
ESP32-CAM It's based on ESP32-S2 chip , Miniature module with camera function . At the same time equipped with OV2640 camera 、 Connecting peripherals GPIO, And a device for storing captured images microSD card .

ESP32-CAM It can be widely used in various Internet of things occasions , Suitable for home smart devices 、 Industrial wireless control 、 Wireless monitoring 、QR Wireless identification , Wireless positioning system signals and other Internet of things applications , It is an ideal solution for Internet of things applications .
3、 Pin definition

ESP32-CAM There are three GND Pin and two pins are used for power supply :3.3V or 5V.
GPIO 1 and GPIO 3 Is the serial pin . You need these pins to upload code to your board . Besides ,GPIO 0 Also plays an important role , Because it determines ESP32 Is it in flashing mode . When GPIO 0 Connect to GND when ,ESP32 In flashing mode .
The following pins are internally connected to microSD Card reader :
- GPIO 14:CLK
- GPIO 15:CMD
- GPIO 2: data 0
- GPIO 4: data 1( Also connected to onboard LED)
- GPIO 12: data 2
- GPIO 13: data 3
4、 Import ESP32 CAM library
stay Arduino IDE Configuration installation in ESP 32 CAM Development board Library , The specific installation method is as follows :
1、 download Arduino IDE And install , This installation method is available on the Internet , I won't introduce you here , What you need can be Baidu by yourself .
2、Arduino IDE Add ESP32 Development board :
How to add : file -> Preferences -> Add... To the web site of the additional development board manager Arduino core for esp32 The address of :
https://dl.espressif.com/dl/package_esp32_index.json
3、 After adding the web address, you can go to : Tools -> Development board -> Development board Manager Search and download esp32 Development board data package .
4、 Import CameraWebServer Sample code

If in Arduino IDE Code not found in , Sure
After downloading , Unzip the folder , Then open the CameraWebServer.ino file .
Before uploading the code , You need to insert the network credentials in the following variables :
const char* ssid = "REPLACE_WITH_YOUR_SSID";
const char* password = "REPLACE_WITH_YOUR_PASSWORD";
then , Make sure the correct camera module is selected . under these circumstances , We use AI-THINKER Model .
5、 To configure WIFI password
We need to modify the loaded code , So that the module can be connected to WIFI.
1、WIFI Configuration of

among ssid by WIFI The name of ,password by WIFI password
2、 Select the camera
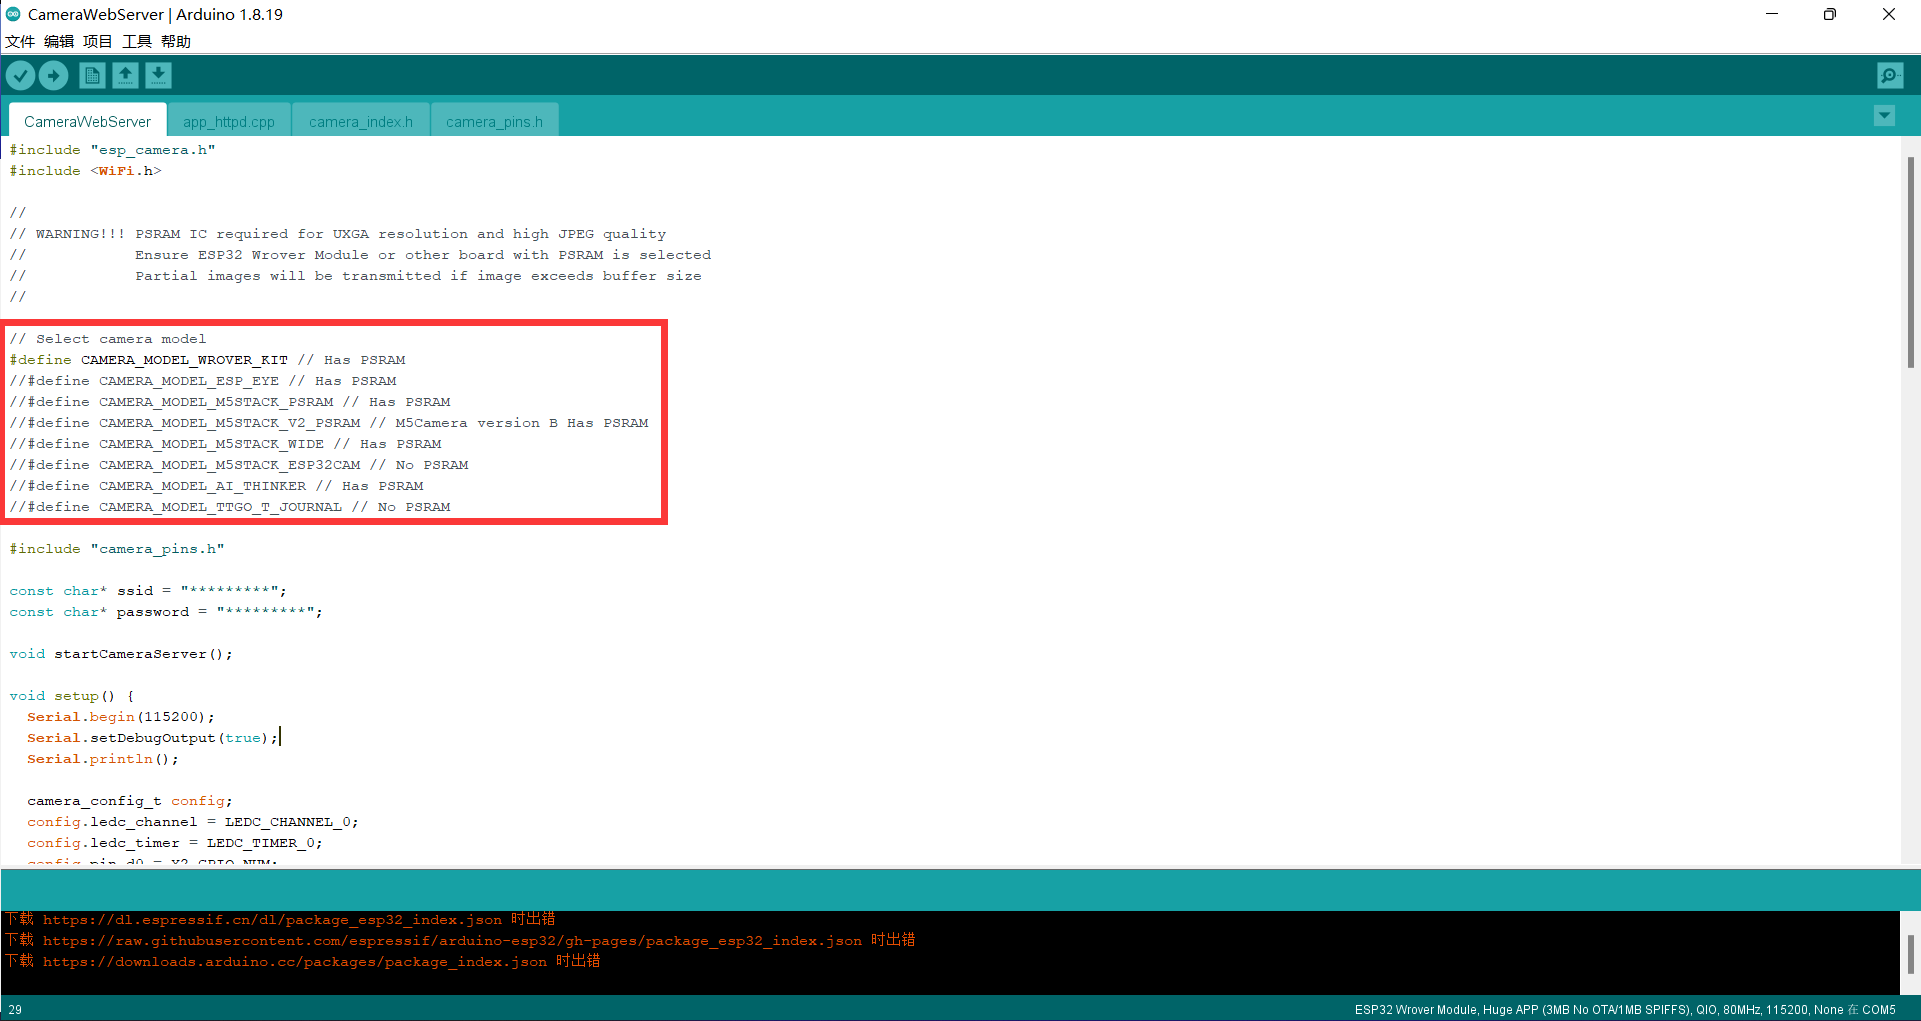
Select your own camera by commenting , If you don't know which camera you have, you can contact the seller , The seller will tell you about your camera manufacturer .
6、 Download program
Hardware required :
- ESP32-CAM Module one ;
- Five DuPont lines ;
- USB–TTL A serial port downloader ;
take USB-TTL And ESP32-CAM The modules are connected as follows , What needs to be noted here is IO0 Be sure to communicate with before power on GND Make a short circuit , Put it into download mode , Otherwise, you will not be able to download the program .

Code to upload , Please perform the following steps :
- Go to tools > plate , And then choose ESP32 Wrover modular
- Go to tools > port , And then choose ESP32 Connected COM port
- In tools > Partition scheme , choice “ tremendous APP(3MB nothing OTA) ”
- Press down ESP32-CAM On board RESET Button
- then , Click the upload button to upload the code .
** Important note :** If you can't upload the code , Please check carefully GPIO 0 Is it connected to GND, And in “ Tools ” The correct settings are selected in the menu . You should also press the onboard reset button to restart in flashing mode ESP32.
7、 Connect camera
We need to IO0 And GND Is disconnected , With Baud rate 115200 Turn on the serial monitor and press ESP32-CAM On board reset key , The following window will pop up :

We will display in the monitor IP The address is copied to the browser and can be used through the LAN ESP32-CAM Click Start Stream You can see that ESP32-CAM Real time picture .

There are many parameters that can be set on the left , Study it carefully later . The point, of course, is to look at the image on the right , The feeling is very clear , Better than raspberry pie 10+ Yuan's camera is much clearer .
8、 matters needing attention
- Make sure the wiring is correct ,ESP32-CAM Of IO0 Interface grounding is the burning mode , Ungrounded suspension is the operation mode
- Determine the port , It is necessary to install the corresponding burning line driver , View ports in Device Manager
- Some devices need to be clicked before burning RST key , Or re power on and restart
- Want to know more about it Arduino IDE You can collect the website :
https://www.arduino.cn/thread-1066-1-1.html
9、 Conclusion
Today, I'd like to introduce ( I think it is simple and easy to use )ESP32-CAM Download and debug mode of .
Go back and study whether the goods can record video to realize the function of surveillance camera .
边栏推荐
- I'm almost addicted to it. I can't sleep! Let a bug fuck me twice!
- Win10 add right-click menu for any file
- 2022.6.26-----leetcode.710
- main()的参数argc与argv
- When multiple network devices exist, how to configure their Internet access priority?
- Rockermq message sending mode
- win10为任意文件添加右键菜单
- Five basic types of redis
- Obsidian 一周使用心得(配置、主题和插件)
- 快捷键 bug,可复现(貌似 bug 才是需要的功能 [滑稽.gif])
猜你喜欢

That is, a one-stop live broadcast service with "smooth live broadcast" and full link upgrade

Persistence mechanism of redis

vim 从嫌弃到依赖(20)——global 命令

orthofinder直系同源蛋白分析及结果处理

2022.06.26(LC_6100_统计放置房子的方式数)

How Oracle converts strings to multiple lines

並發編程JUC的AQS底層源碼

Process 0, process 1, process 2
快捷键 bug,可复现(貌似 bug 才是需要的功能 [滑稽.gif])

Semi-supervised Learning入门学习——Π-Model、Temporal Ensembling、Mean Teacher简介
![快捷键 bug,可复现(貌似 bug 才是需要的功能 [滑稽.gif])](/img/1a/9ec6db6fccd16e54e33ace6ce073a8)
随机推荐
100% understanding of 5 IO models
Quelques exercices sur les arbres binaires
Redis configuration file details
Modify the contents of /etc/crontab file directly, and the scheduled task will not take effect
0号进程,1号进程,2号进程
今日3大面试Demo[Integer ASCII 类关系]
Fake constructor???
Advanced mathematics Chapter 7 differential equations
2022.06.26(LC_6101_判断矩阵是否是一个 X 矩阵)
Design of a solar charge pump power supply circuit
IO pin configuration and pinctrl drive
Parameters argc and argv of main()
力扣84柱状图中最大的矩形
Conception de plusieurs classes
Tips for using Jupiter notebook
A classic interview question covering 4 hot topics
CLassLoader
Rman-08137 main library failed to delete archive file
快速入门CherryPy(1)
关于el-date-picker点击清空参数变为null的问题