当前位置:网站首页>ShardingSphere-proxy +PostgreSQL实现读写分离(静态策略)
ShardingSphere-proxy +PostgreSQL实现读写分离(静态策略)
2022-08-02 19:18:00 【墨天轮】
在业务对数据库是读多写少,且单台服务器或者单个数据库的性能已经不能满足当前业务对数据库大量读取请求的时候,我们可能需要对数据库做读写分离。
常见的可以做读写分离的工具有mycat、ShardingSphere等。本文使用ShardingSphere-proxy实现了PostgreSQL的读写分离场景,如果对于PostgreSQL数据库除读写分离外还需要连接池等需求,还可以了解一下PostgreSQL的pgpool-II。
一、本文相关ip地址
| 角色 | 版本 | IP地址 |
|---|---|---|
| 主库 | PostgreSQL 13.4 | 172.20.10.9 |
| 从库 | PostgreSQL 13.4 | 172.20.10.10 |
| ShardingSphere-proxy | 5.1.2 | 172.20.10.3 |
| 用于测试连接ShardingSphere-Proxy(有psql客户端) | psql版本 12.9 | 172.20.10.6 |
本次安装部署是在CentOS Linux release 7.4上完成,开始已经部署好了PostgreSQL的主从流复制环境。在此不做赘述。
[[email protected] ~]$ psql -c "select * from pg_stat_replication;" pid | usesysid | usename | application_name | client_addr | client_hostname | client_port | backend_start | backend_xmin | state | sent_lsn | write_lsn | flush_lsn | replay_lsn | write_lag | flush_lag | replay_lag | sync_priority | sync_state | reply_time -------+----------+---------+------------------+--------------+-----------------+-------------+-------------------------------+--------------+-----------+------------+------------+------------+------------+-----------------+-----------+------------+---------------+------------+------------------------------ 56107 | 16385 | replica | walreceiver | 172.20.10.10 | | 46262 | 2022-08-02 12:02:49.504343+08 | | streaming | 0/FB841B40 | 0/FB841B40 | 0/FB841B40 | 0/FB841B40 | 00:00:00.037914 | | | 0 | async | 2022-08-02 12:02:49.65561+08(1 row)二、数据库配置
1.postgresql.conf里配置
listen_addresses = '*' 2.pg_hba.conf白名单配置(这里是我测试为了方便,如果实际使用,最好用范围最小的实际ip段来约束)
host all all 0.0.0.0/0 md5重启数据库
3.数据库里创建供测试ShardingSphere-proxy读写分离的用户和数据库(权限在使用时候也要进行约束,可以给数据库的owner,或根据需求调整)
create user ssp_user_test password '[email protected]' superuser;create database ssp_db_test;三、安装部署ShardingSphere-proxy
在172.20.10.3节点安装proxy
需要安装jdk(must have Java JRE 8 or higher),我本地的jdk版本为
[[email protected] conf]# java -versionopenjdk version "1.8.0_342"OpenJDK Runtime Environment (build 1.8.0_342-b07)OpenJDK 64-Bit Server VM (build 25.342-b07, mixed mode)1.获取软件包并安装ShardingSphere-proxy
--下载地址https://shardingsphere.apache.org/document/current/en/downloads/--解压tar -xvf apache-shardingsphere-5.1.2-shardingsphere-proxy-bin.tar.gz--做软链ln -s /root/apache-shardingsphere-5.1.2-shardingsphere-proxy-bin /opt/ssp2.修改server.yaml,配置虚拟帐号密码
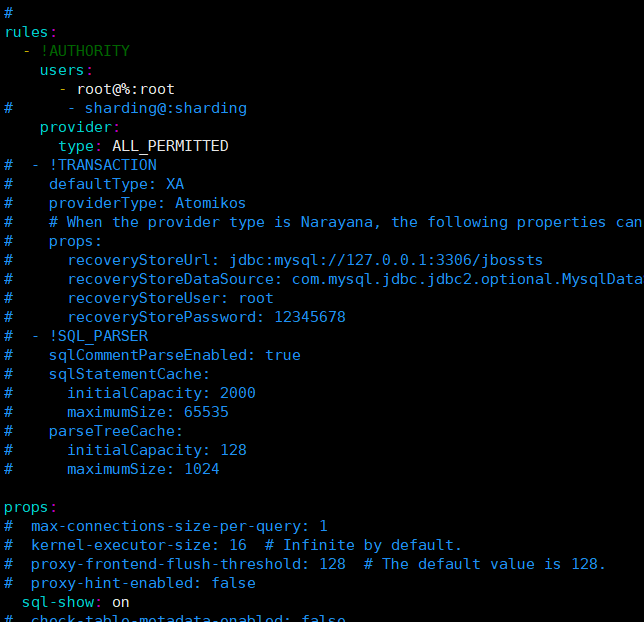
配置虚拟帐号密码,使用默认的root用户及密码root,且允许外网连接,同时权限指定为“所有权限无限制”,sql-show是用于在日志中记录下每条sql及执行的节点,其它为默认值
rules: - !AUTHORITY users: - [email protected]%:root# - [email protected]:sharding provider: type: type: ALL_PERMITTEDprops:# max-connections-size-per-query: 1# kernel-executor-size: 16 # Infinite by default.# proxy-frontend-flush-threshold: 128 # The default value is 128.# proxy-hint-enabled: false sql-show: on如图所示
3.编辑读写分离文件 config-readwrite-splitting.yaml
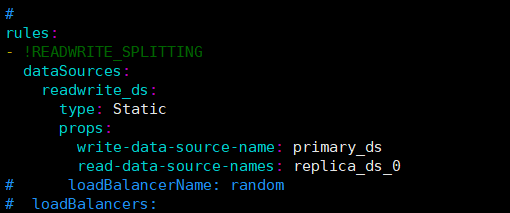
databaseName是我映射的数据库名字,primary_ds和replica_ds_0分别为主库/写库的相关配置和从库/读库的相关被配置。
databaseName: xmaster_db#dataSources: primary_ds: url: jdbc:postgresql://172.20.10.9:5432/ssp_db_test username: ssp_user_test password: [email protected]# connectiontimeoutMilliseconds: 30000# idletimeoutmilliseconds: 60000# maxlifetimemilliseconds: 1800000# maxpoolsize: 50# minpoolsize: 1 replica_ds_0: url: jdbc:postgresql://172.20.10.10:5432/ssp_db_test username: ssp_user_test password: [email protected]:- !READWRITE_SPLITTING dataSources: readwrite_ds: type: Static props: write-data-source-name: primary_ds read-data-source-names: replica_ds_0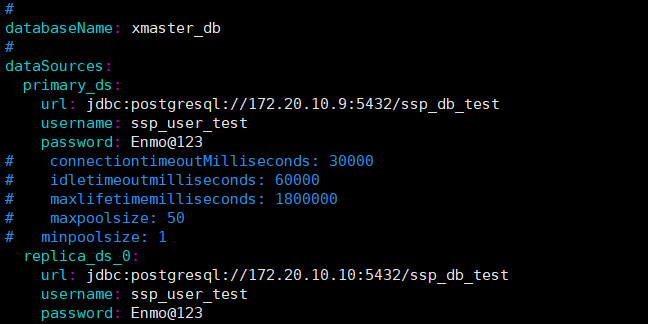
四、启动ShardingSphere-proxy并验证
[[email protected] bin]# pwd/root/apache-shardingsphere-5.1.2-shardingsphere-proxy-bin/bin[[email protected] bin]# sh start.sh we find java version: java8, full_version=1.8.0_342Starting the ShardingSphere-Proxy ...The classpath is /root/apache-shardingsphere-5.1.2-shardingsphere-proxy-bin/conf:.:/root/apache-shardingsphere-5.1.2-shardingsphere-proxy-bin/lib/*:/root/apache-shardingsphere-5.1.2-shardingsphere-proxy-bin/ext-lib/*Please check the STDOUT file: /root/apache-shardingsphere-5.1.2-shardingsphere-proxy-bin/logs/stdout.log
查看ShardingSphere-proxy输出的日志内容
[[email protected] bin]# cat /root/apache-shardingsphere-5.1.2-shardingsphere-proxy-bin/logs/stdout.logThanks for using Atomikos! This installation is not registered yet. REGISTER FOR FREE at http://www.atomikos.com/Main/RegisterYourDownload and receive:- tips & advice - working demos - access to the full documentation - special exclusive bonus offers not available to others - everything you need to get the most out of using Atomikos![INFO ] 2022-07-07 20:18:07.629 [main] o.a.s.p.v.ShardingSphereProxyVersion - Database name is `PostgreSQL`, version is `13.4`, database name is `xmaster_db`[INFO ] 2022-07-07 20:18:07.889 [main] o.a.s.p.frontend.ShardingSphereProxy - ShardingSphere-Proxy Memory mode started successfullyThanks for using Atomikos! This installation is not registered yet. REGISTER FOR FREE at http://www.atomikos.com/Main/RegisterYourDownload and receive:- tips & advice - working demos - access to the full documentation - special exclusive bonus offers not available to others - everything you need to get the most out of using Atomikos![INFO ] 2022-07-07 20:19:27.088 [main] o.a.s.p.v.ShardingSphereProxyVersion - Database name is `PostgreSQL`, version is `13.4`, database name is `xmaster_db`[INFO ] 2022-07-07 20:19:27.349 [main] o.a.s.p.frontend.ShardingSphereProxy - ShardingSphere-Proxy Memory mode started successfully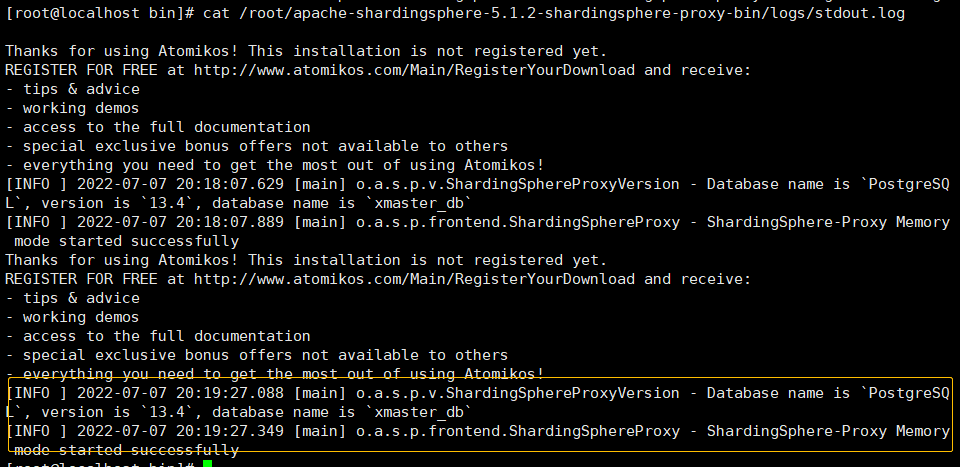
ShardingSphere-Proxy已经启动起来了。ShardingSphere-Proxy的默认端口3307也已经起来了
[[email protected] bin]# ss -tnlState Recv-Q Send-Q Local Address:Port Peer Address:Port LISTEN 0 128 *:6000 *:* LISTEN 0 128 *:22 *:* LISTEN 0 128 :::3307 :::* LISTEN 0 128 :::6000 :::* LISTEN 0 128 :::22 :::* 这时候我们通过另外的终端,进行连接验证,即我们的第四台服务器172.20.10.6,通过server.yaml里的虚拟账号密码,可以连接进来
[[email protected] ~]$ ip a | grep ens33 | grep global inet 172.20.10.6/28 brd 172.20.10.15 scope global ens33[[email protected] ~]$ psql -h 172.20.10.3 -U root xmaster_db -p 3307Password for user root: psql (12.9, server 13.4-ShardingSphere-Proxy 5.1.2)WARNING: psql major version 12, server major version 13. Some psql features might not work.Type "help" for help.xmaster_db=> create table t1(id int);CREATE TABLExmaster_db=> insert into t1 values(1);INSERT 0 1xmaster_db=> select * from t1; id ---- 1(1 row)插入数据期间可以去数据库的主库查看数据情况
ssp_db_test=# \dt List of relations Schema | Name | Type | Owner --------+------+-------+--------------- public | t1 | table | ssp_user_test(1 row)ssp_db_test=# select * from t1; id ---- 1(1 row)ssp_db_test=# select * from t1;ERROR: relation "t1" does not existLINE 1: select * from t1; ^ssp_db_test=# \dtDid not find any relations.去查看ShardingSphere-proxy的输出日志,发现create、insert、drop的操作都是在主节点进行的,而select在备机节点执行。
[[email protected] logs]# ll /root/apache-shardingsphere-5.1.2-shardingsphere-proxy-bin/logs/stdout.log -rw-r--r-- 1 root root 4926 Aug 2 14:46 /root/apache-shardingsphere-5.1.2-shardingsphere-proxy-bin/logs/stdout.log[INFO ] 2022-08-02 14:45:26.965 [Connection-2-ThreadExecutor] ShardingSphere-SQL - Logic SQL: create table t1(id int);[INFO ] 2022-08-02 14:45:26.965 [Connection-2-ThreadExecutor] ShardingSphere-SQL - SQLStatement: PostgreSQLCreateTableStatement(containsNotExistClause=false)[INFO ] 2022-08-02 14:45:26.965 [Connection-2-ThreadExecutor] ShardingSphere-SQL - Actual SQL: primary_ds ::: create table t1(id int);[INFO ] 2022-08-02 14:45:29.655 [Connection-2-ThreadExecutor] ShardingSphere-SQL - Logic SQL: insert into t1 values(1);[INFO ] 2022-08-02 14:45:29.655 [Connection-2-ThreadExecutor] ShardingSphere-SQL - SQLStatement: PostgreSQLInsertStatement(withSegment=Optional.empty)[INFO ] 2022-08-02 14:45:29.655 [Connection-2-ThreadExecutor] ShardingSphere-SQL - Actual SQL: primary_ds ::: insert into t1 values(1);[INFO ] 2022-08-02 14:45:31.953 [Connection-2-ThreadExecutor] ShardingSphere-SQL - Logic SQL: select * from t1;[INFO ] 2022-08-02 14:45:31.953 [Connection-2-ThreadExecutor] ShardingSphere-SQL - SQLStatement: PostgreSQLSelectStatement(limit=Optional.empty, lock=Optional.empty, window=Optional.empty)[INFO ] 2022-08-02 14:45:31.953 [Connection-2-ThreadExecutor] ShardingSphere-SQL - Actual SQL: replica_ds_0 ::: select * from t1;[INFO ] 2022-08-02 14:46:00.073 [Connection-2-ThreadExecutor] ShardingSphere-SQL - Logic SQL: drop table t1;[INFO ] 2022-08-02 14:46:00.073 [Connection-2-ThreadExecutor] ShardingSphere-SQL - SQLStatement: PostgreSQLDropTableStatement(containsExistClause=false)[INFO ] 2022-08-02 14:46:00.073 [Connection-2-ThreadExecutor] ShardingSphere-SQL - Actual SQL: primary_ds ::: drop table t1;
边栏推荐
猜你喜欢
Mppt光伏最大功率点跟踪控制matlab仿真
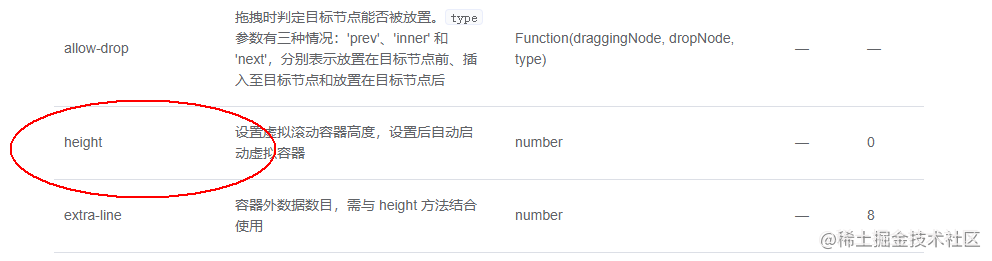
el-tree渲染大量数据的解决方案(不通过懒加载)
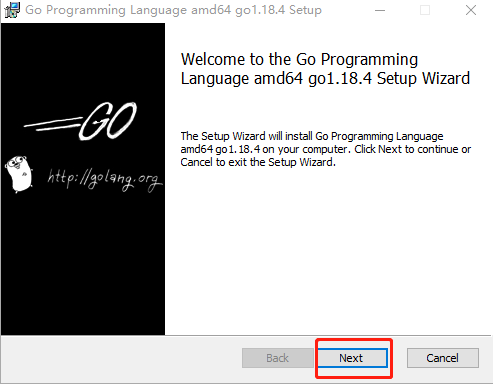
Go----Go 语言快速体验之开发环境搭建及第一个项目HelloWord
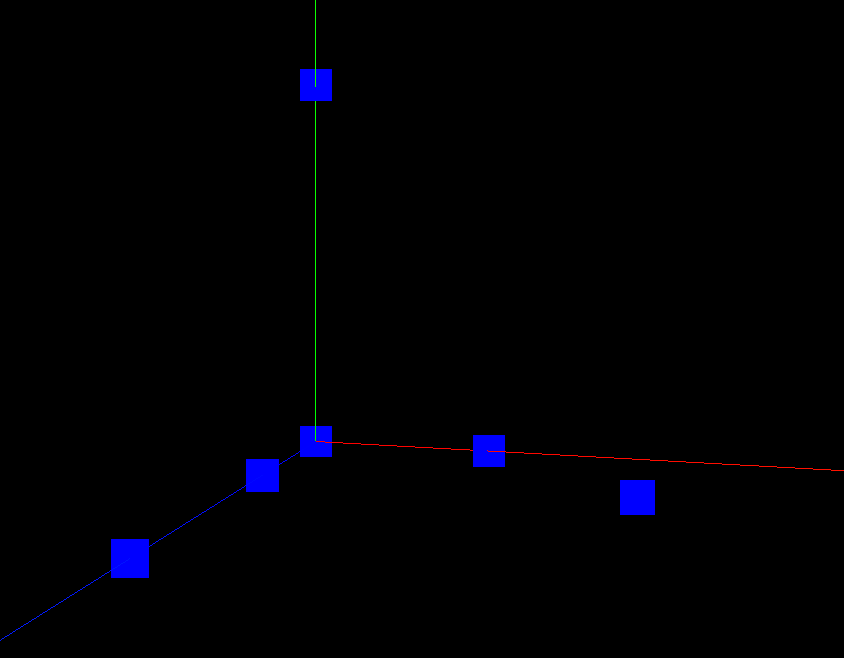
Three.js入门
I have 8 years of experience in the Ali test, and I was able to survive by relying on this understanding.

扫码预约 | 观看Apache Linkis数据处理实践以及计算治理能力
7月29-31 | APACHECON ASIA 2022
Nature Microbiology综述:聚焦藻际--浮游植物和细菌互作的生态界面
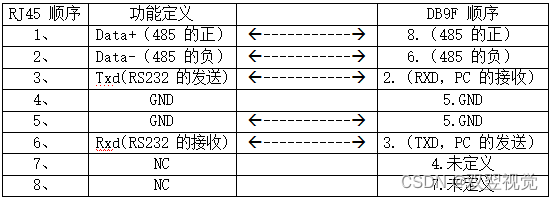
光源控制器接口定义说明
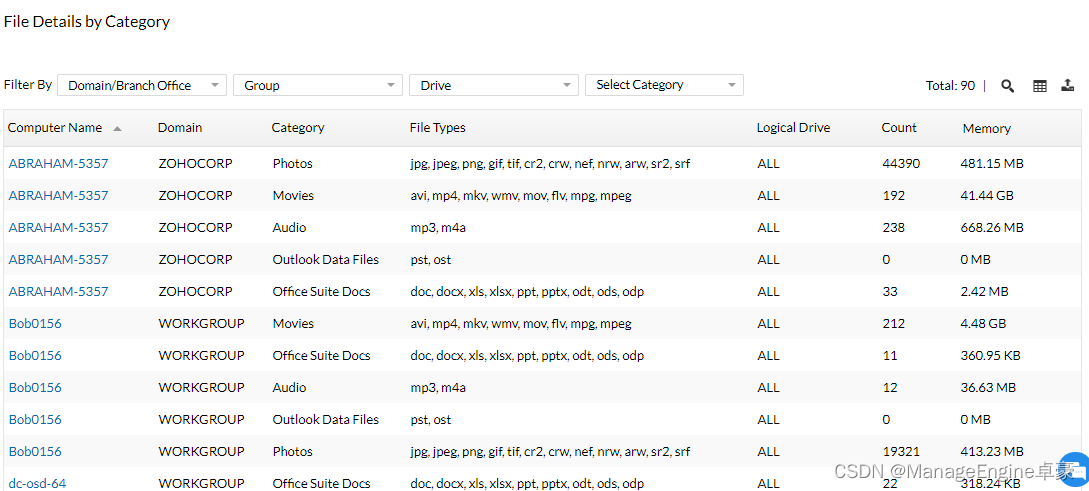
有什么好用的IT资产管理软件
随机推荐
7.21 - 每日一题 - 408
Nature Microbiology综述:聚焦藻际--浮游植物和细菌互作的生态界面
流量分析第一题
技术分享 | Apache Linkis 快速集成网页IDE工具 Scriptis
【C语言刷题】牛客网刷题——替换空格
MaxCompute 的SQL 引擎参数化视图具体有哪些增强功能?
光源控制器接口定义说明
Three.js入门
JVM内存和垃圾回收-05.虚拟机栈
LeetCode每日一题(324. Wiggle Sort II)
元宇宙001 | 情绪无法自控?元宇宙助你一臂之力
【心理学 · 人物】第一期
分布式事务
Geoserver+mysql+openlayers
日常开发中,String类中常用的方法
Fetch 请求不转换BLOB正常显示GBK编码的数据
golang刷leetcode 经典(12) 完全二叉树插入器
平稳发展 | 西欧地区手游玩家的数据和洞察
MySQL安装配置教程(超级详细)
如何正确地配置入口文件?