当前位置:网站首页>Prometheus + grafana + MySQL master-slave replication + host monitoring
Prometheus + grafana + MySQL master-slave replication + host monitoring
2022-06-28 07:59:00 【m0_ fifty-nine million four hundred and thirty thousand one hun】
List of articles
One 、 Host allocation
| Host name | ip Address | Deploy |
|---|---|---|
| prometheus + grafana | 192.168.8.18 | prometheus-2.27.1.linux-amd64.tar.gz/grafana-7.3.6-1.x86_64.rpm |
| master | 192.168.8.19 | node_exporter mysqld_exporter |
| slave | 192.168.8.20 | node_exporter mysqld_exporter |
Two 、 Master slave replication deployment
master:192.168.8.19
slave:192.168.8.20
systemctl stop firewalld && systemctl disable firewalld
setenforce 0
1. Master slave time synchronization
#master
yum install -y ntp
vim /etc/ntp.conf 							# At the end of the line, add the following

server 127.127.8.0							# Set local clock source , Pay attention to modifying your own network segment
fudge 127.127.8.0 stratum 8					# Set the time level to  8( Restriction on  15  Inside )

systemctl start ntpd
------------------------------------------------------------------------------------------------
#slave
yum install -y ntp ntpdate
systemctl start ntpd
/usr/sbin/ntpdate 192.168.8.19				# Time synchronization

crontab -e									# Set up scheduled tasks

*/30 * * * * /usr/sbin/ntpdate 192.168.8.19
2. Of the main server mysql To configure
vim /etc/my.cnf
# Add the following configuration
server-id = 1								# Definition  server-id, Each host cannot be the same
log-bin=master-bin							# The primary server turns on the binary log
binlog_format = MIXED						# This use  MIXED  Pattern
log-slave-updates=true						# Allows binary logs to be updated from the server

# Be careful :default-character-set=utf8  You need to comment this out , Otherwise, it will report a mistake


systemctl restart mysqld.service 			# Restart the service

# Set the slave server account and authorize
mysql -uroot -p123456

# Authorize the slave server
mysql> GRANT REPLICATION SLAVE ON *.* TO 'myslave'@'192.168.8.%' IDENTIFIED BY '123456';
mysql> flush privileges;
mysql> use mysql;
mysql> select user,host,authentication_string from user;
+-----------+-------------+-------------------------------------------+
| user      | host        | authentication_string                     |
+-----------+-------------+-------------------------------------------+
| root      | localhost   | *6BB4837EB74329105EE4568DDA7DC67ED2CA2AD9 |
| mysql.sys | localhost   | *THISISNOTAVALIDPASSWORDTHATCANBEUSEDHERE |
| myslave   | 192.168.8.% | *6BB4837EB74329105EE4568DDA7DC67ED2CA2AD9 |
+-----------+-------------+-------------------------------------------+
3 rows in set (0.00 sec)

mysql> show master status;
+-------------------+----------+--------------+------------------+-------------------+
| File              | Position | Binlog_Do_DB | Binlog_Ignore_DB | Executed_Gtid_Set |
+-------------------+----------+--------------+------------------+-------------------+
| master-bin.000001 |      602 |              |                  |                   |
+-------------------+----------+--------------+------------------+-------------------+
1 row in set (0.00 sec)

#File  The column displays the log name ,Position  Column shows the offset
3. From the server mysql To configure
vim /etc/my.cnf

server-id = 2								# Be careful  id  It cannot be the same as other hosts
relay-log=relay-log-bin						# Turn on relay log , Synchronize log records from the primary server to the local
relay-log-index=slave-relay-bin.index		# Define the location and name of the relay log file
relay_log_recovery = 1                  	# Optional items

# When  slave  After downtime from the library , If  relay-log  Damaged , Some relay logs are not processed , Then all the unimplemented  relay-log,
 And again from  master  Get log on , That's the guarantee relay-log  The integrity of .
 This feature is off by default , take  relay_log_recovery  Is set to  1  when ,  Can be found in  slave  Open this function from the library , Recommended Opening .

systemctl restart mysqld
mysql -uroot -p123456

# Configuration synchronization , Be careful  master_log_file  and  master_log_pos  The value of should be the same as  Master  Consistency of query

mysql> CHANGE master to master_host='192.168.8.19',master_user='myslave',master_password='123456',master_log_file='master-bin.000001',master_log_pos=602;
mysql> start slave;							# Start the synchronization , If an error is reported, execute  reset slave;
mysql> show slave status\G;					# see  Slave  state , Make sure  IO  and  SQL  Threads are  Yes, It means that the synchronization is normal

4. Master slave replication node authorization exporter
#master The node database is authorized to execute
create user 'exporter'@'%' identified by '123456';
create user 'exporter'@'127.0.0.1' identified by '123456';
create user 'exporter'@'localhost' identified by '123456';

grant process,replication client,select on *.* to 'exporter'@'%' identified by 'admin123';
grant process,replication client,select on *.* to 'exporter'@'127.0.0.1' identified by 'admin123';
grant process,replication client,select on *.* to 'exporter'@'localhost' identified by 'admin123';

flush privileges;
5. To configure mysql Indicator exposure of master-slave replication
Upload mysqld_exporter, To configure mysqld Indicator exposure of master-slave replication
master:192.168.8.19
slave:192.168.8.20
# Upload installation package  mysqld_exporter-0.12.1.linux-amd64.tar.gz
tar -zxvf mysqld_exporter-0.12.1.linux-amd64.tar.gz -C /usr/local
cd /usr/local/mysqld_exporter-0.12.1.linux-amd64/				# Entry directory , create profile

cat > /usr/local/mysqld_exporter-0.12.1.linux-amd64/my.cnf << EOF [client] user=exporter password=admin123 EOF

cat > /usr/lib/systemd/system/mysqld_exporter.service << EOF [Unit] Description=mysqld_exporter After=network.target [Service] User=root Type=simple ExecStart=/usr/local/mysqld_exporter-0.12.1.linux-amd64/mysqld_exporter \ --config.my-cnf /usr/local/mysqld_exporter-0.12.1.linux-amd64/my.cnf \ --collect.info_schema.processlist Restart=on-failure [Install] WantedBy=multi-user.target EOF

systemctl daemon-reload
systemctl start mysqld_exporter.service
netstat -natp | grep 9104
6. To configure mysql Server indicator expose
master:192.168.8.19
slave:192.168.8.20
# Upload installation package  node_exporter-1.1.2.linux-amd64.tar.gz
tar zxvf node_exporter-1.1.2.linux-amd64.tar.gz -C /opt
cd /opt
mv node_exporter-1.1.2.linux-amd64 node_exporter

cat > /usr/lib/systemd/system/node_exporter.service << EOF [Unit] Description=node_exporter Documentation=https://prometheus.io/ After=network.target [Service] Type=simple User=root ExecStart=/opt/node_exporter/node_exporter Restart=on-failure [Install] WantedBy=multi-user.target EOF

systemctl daemon-reload
systemctl start node_exporter && systemctl enable node_exporter
netstat -antp | grep 9100
3、 ... and 、 Deploy prometheus
# Upload and unzip  prometheus-2.27.1.linux-amd64.tar.gz
tar zxvf prometheus-2.27.1.linux-amd64.tar.gz -C /usr/local
1. Modify the configuration file
cd /usr/local/prometheus-2.27.1.linux-amd64

vim prometheus.yml
# Finally insert :
  - job_name: 'mysql-master-slave'								# Define master-slave replication job
    scrape_interval: 5s											# Index data collection cycle
    static_configs:												# Static acquisition mode
    - targets: ['192.168.8.19:9104','192.168.8.20:9104']		# Definition targets
  - job_name: 'nodes'											# Definition nodes Host information job
    scrape_interval: 5s
    static_configs:
    - targets: ['192.168.8.19:9100','192.168.8.20:9100']
2. start-up prometheus
./prometheus
netstat -antp | grep prometheus
tcp        0      0 192.168.8.18:33584      192.168.8.19:9104       ESTABLISHED 45282/./prometheus
tcp        0      0 192.168.8.18:50022      192.168.8.20:9100       ESTABLISHED 45282/./prometheus
tcp        0      0 192.168.8.18:54936      192.168.8.19:9100       ESTABLISHED 45282/./prometheus
tcp        0      0 192.168.8.18:53908      192.168.8.20:9104       ESTABLISHED 45282/./prometheus
tcp6       0      0 :::9090                 :::*                    LISTEN      45282/./prometheus
tcp6       0      0 ::1:9090                ::1:52512               ESTABLISHED 45282/./prometheus
tcp6       0      0 ::1:52512               ::1:9090                ESTABLISHED 45282/./prometheus
3. Log in to the browser to view

4. Deploy grafana-server
The account password defaults to admin,admin grafana
Default profile directory /etc/grafana/grafana.ini Direct access to
ip:3000 Get into grafana Console
# Upload installation package grafana-7.3.6-1.x86_64.rpm
yum -y install grafana-7.3.6-1.x86_64.rpm
systemctl start grafana-server
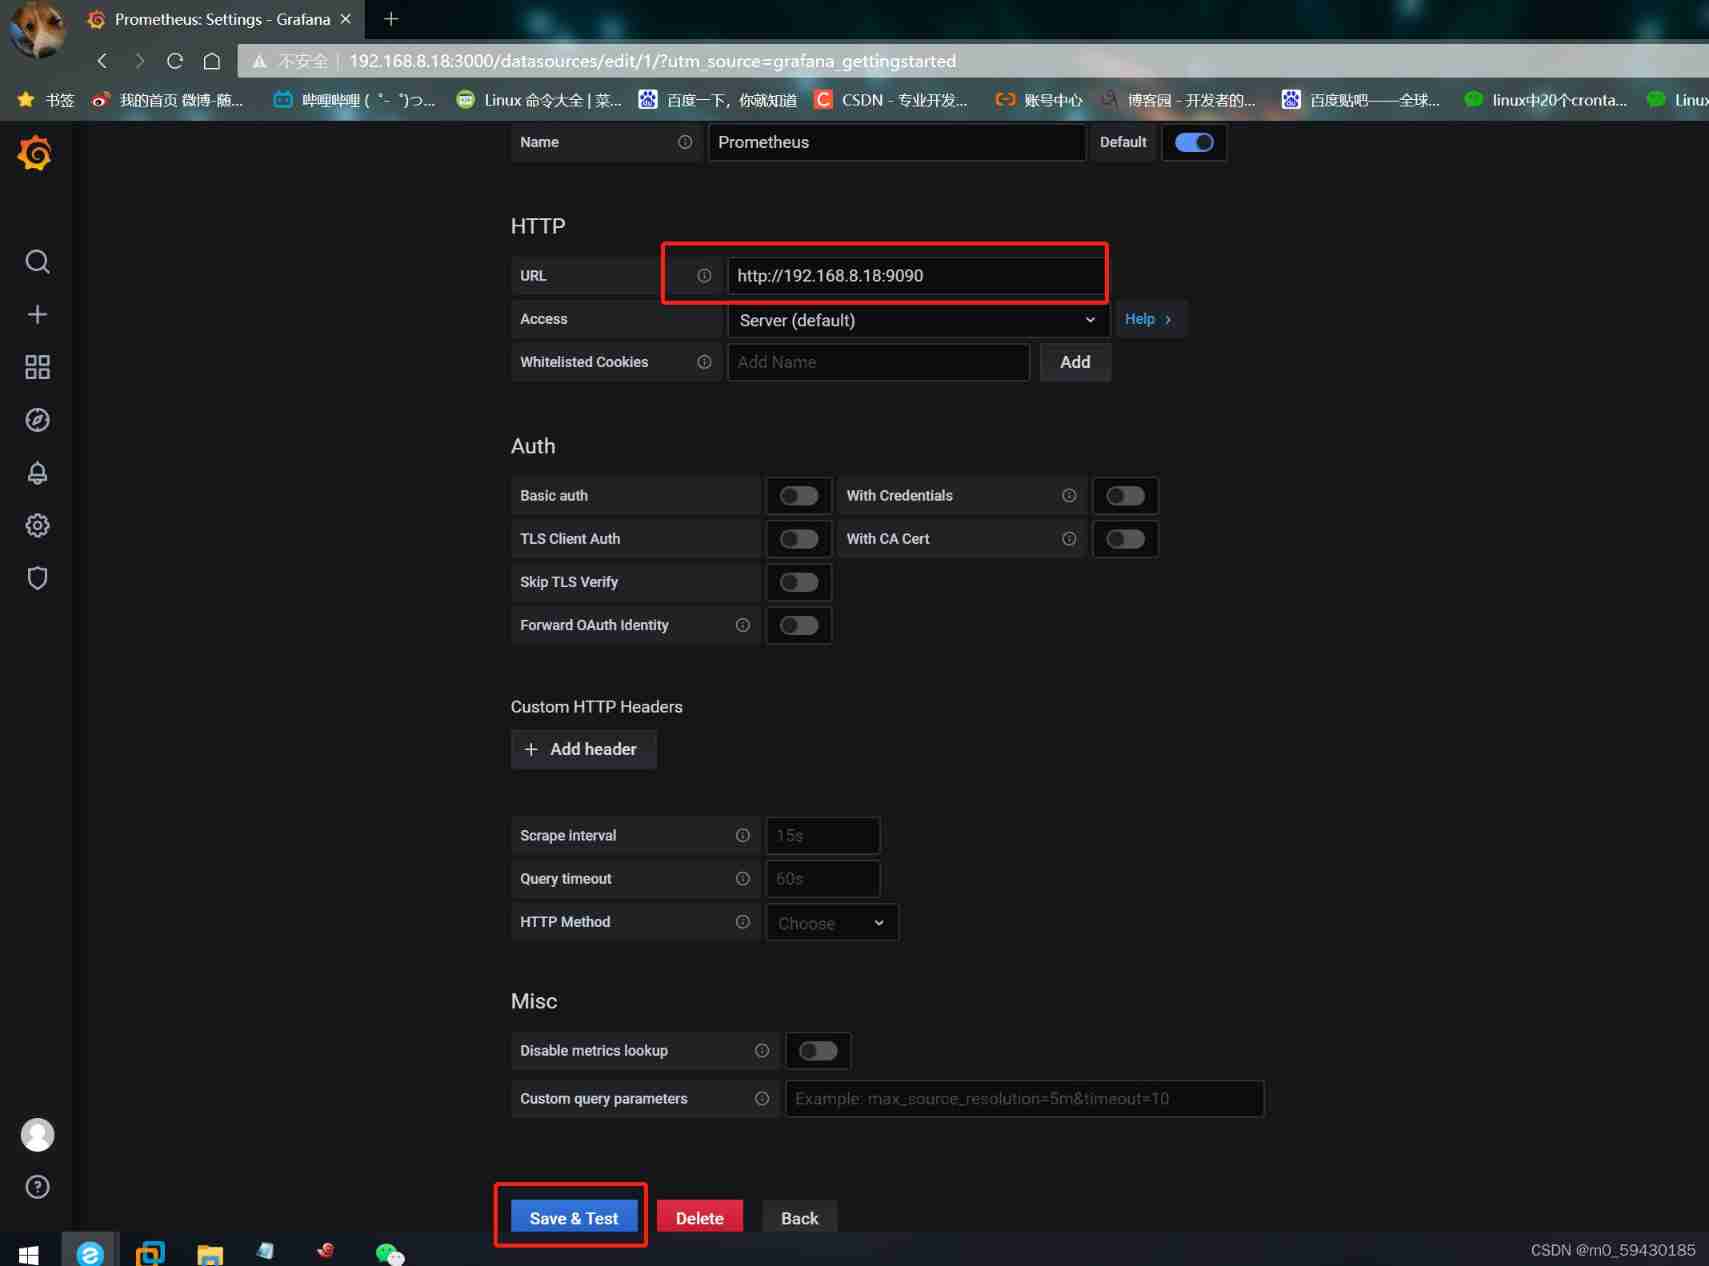
establish data sources choice prometheus
Definition prometheus node http://192.168.8.18:9090
Click on save & text
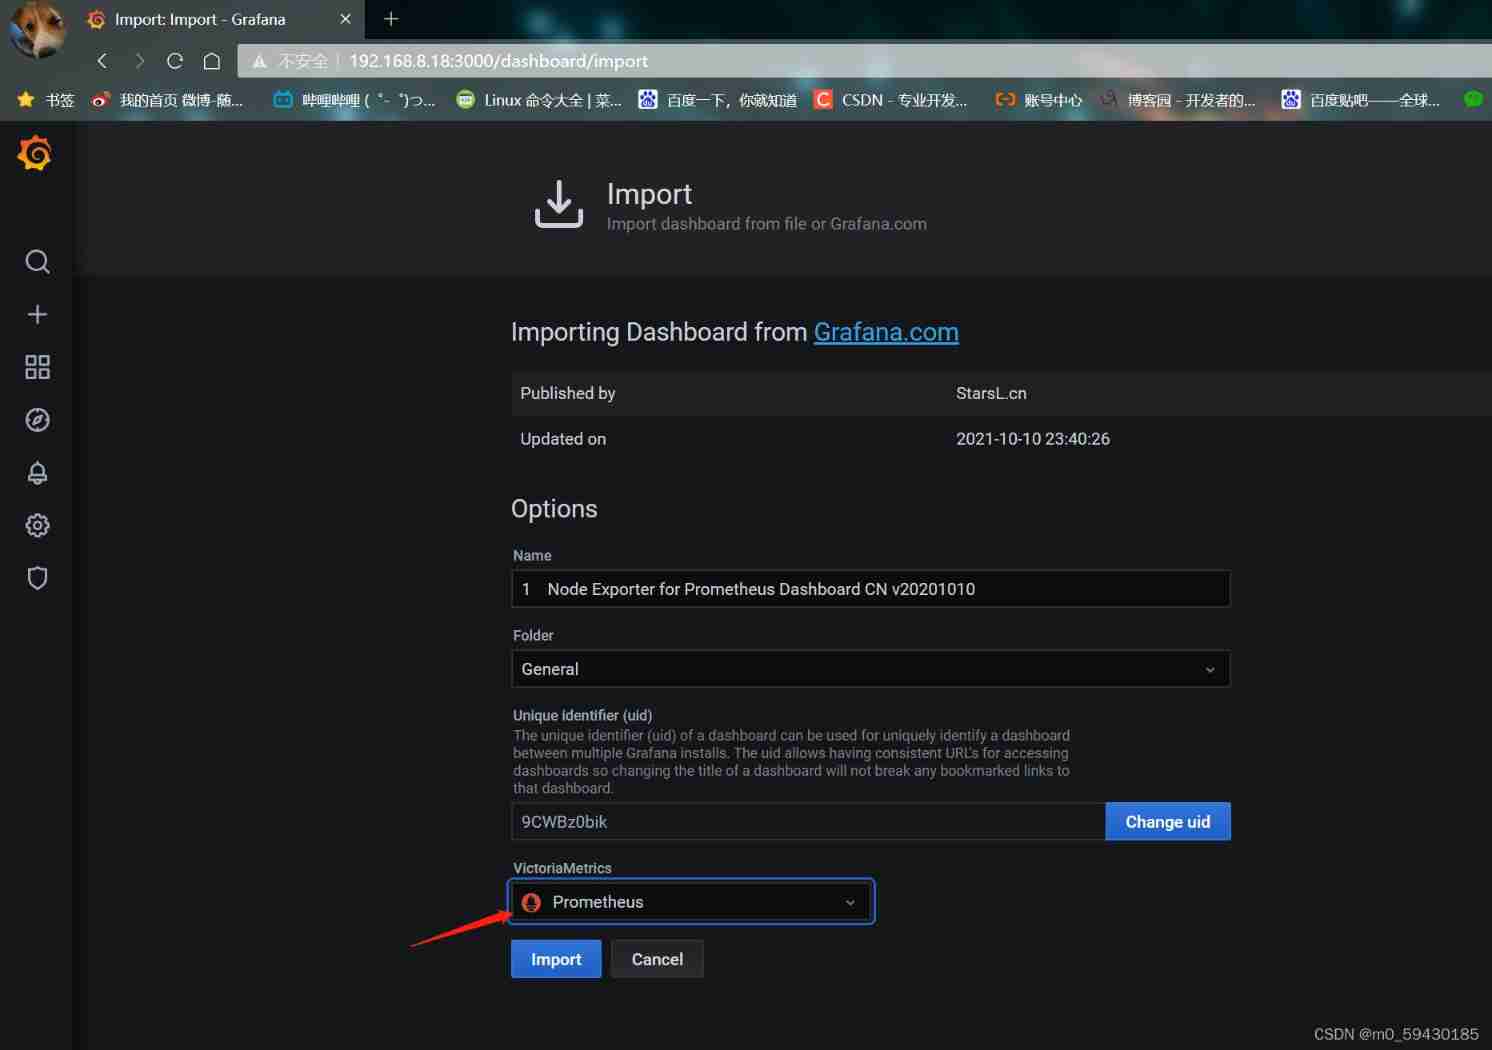
Click on "+" Input import , Select template 7371, choice prometheus data source -> save preservation mysqld-master-slave monitor
Click on "+" Input import , Select template 8919, choice prometheus data source -> save preservation mysqld nodes monitor
Click on dashboard Select the above two templates


边栏推荐
- Generation and verification of JWT token
- SOC serial port configuration
- Study notes 22/1/11
- 云原生:云计算技术再次升级 开启全面云开发时代
- SQL analysis (query interception analysis for SQL optimization)
- Study notes 22/1/10
- Is it reliable to open a new bond registration account? Is it safe?
- ES6 use of return in arrow function
- Activity implicit jump
- HJ质数因子
猜你喜欢

NLP sequence can completely simulate human brain intelligence

Redis persistence problem and final solution

SQL analysis (query interception analysis for SQL optimization)

SOC serial port configuration

Rediscluster cluster mode capacity expansion node

HJ prime factor

ACM notes

asp. Net upload image path and image name

Static resource compression reduces bandwidth pressure and increases access speed

Sword finger offer|: linked list (simple)
随机推荐
asp. Net upload image path and image name
asp. Net to search products and realize paging function
asp. Net datalist when there are multiple data displays
Online WPS tool
MySQL single table access method
Ice, protobuf, thrift -- Notes
Airflow2.x distributed deployment DAG execution failure log cannot be obtained normally
Study notes 22/1/17
HJ score ranking
Kubernetes cluster command line tool kubectl
sql主從複制搭建
22/02/14 study notes
Redis one master multi slave cluster setup
asp. Net error "/" server error in the application. String or binary data would be truncated. The statement...
Ambari (VII) --- ambari integrated hue4.2 document (valid for personal test)
Airflow2.1.1 ultra detailed installation document
The solution of "user account control to continue, please enter administrator user name and password" appears in win10 Professional Edition
HJ成绩排序
Recommended system series (Lecture 5): Optimization Practice of sorting model
Host is not allowed to connect to this MySQL server