1. Arduino IDE To configure ESP8266 Environmental Science
Reference resources :https://www.jianshu.com/p/cb0274d612b5
First of all, from the Arduino Official website Download the latest version of Arduino IDE Software and install .
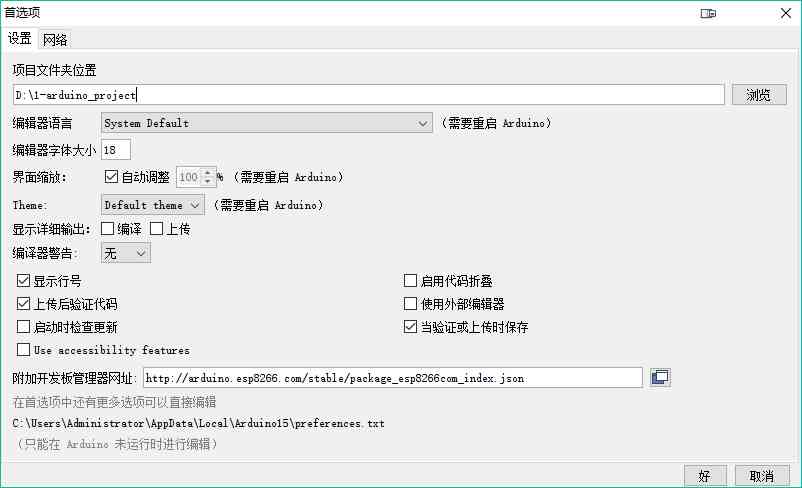
After installation , Get into Preferences (Preferences), find Add development board manager address (Additional Board Manager URLs), And add the following information :
http://arduino.esp8266.com/stable/package_esp8266com_index.json
Click again determine (OK);
After clicking on Tools - Development board - Development board Manager , Enter the development board manager interface :
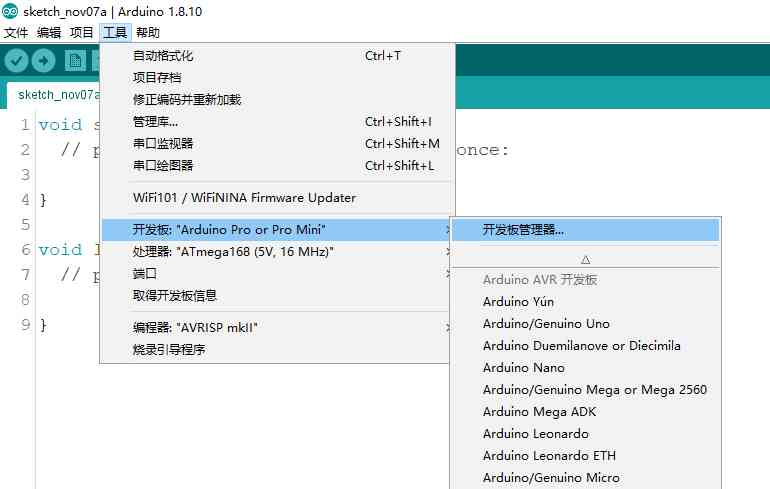
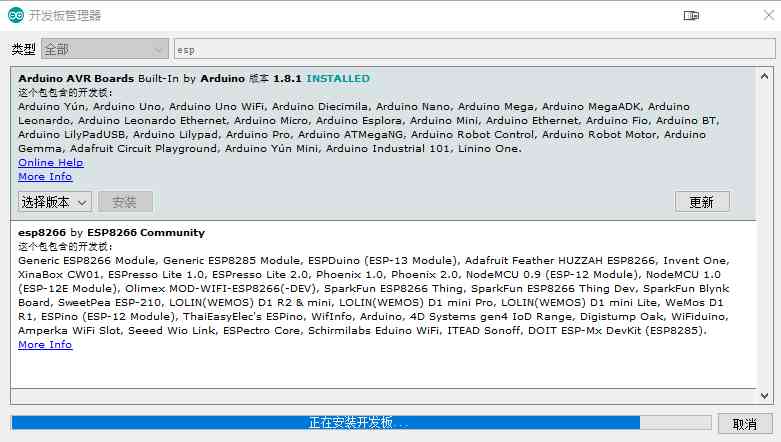
Input esp, find esp8266 And install ;

The author found that the download speed is too slow in the installation process , So I went to esp8266 arduino Of github page (https://github.com/esp8266/Arduino/releases) Download the compressed package ( Used by the author 2.6.0), Put in again C Just a plate , Here are the detailed steps :
https://github.com/earlephilhower/esp-quick-toolchain/releases?after=3.0.0-gnu5
I will 6 Compressed package put to Baidu network disk , Unzip it and put it in this folder ;
link :https://pan.baidu.com/s/1hX45SsujWOyPKyntA6fDkQ
Extraction code :8266
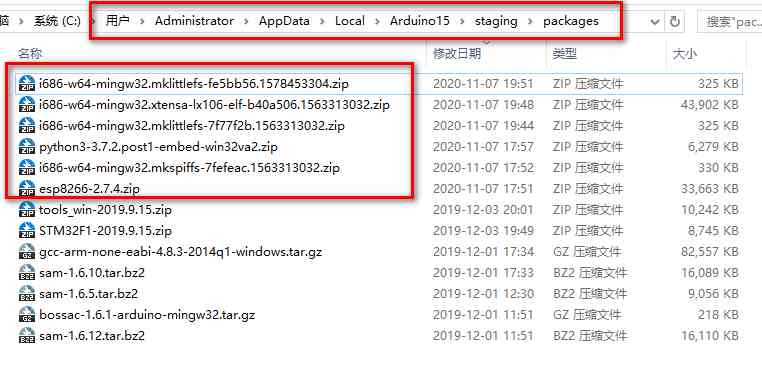
And then in Development board Manager On , Input esp, find esp8266 You can quickly install ~
2. Burn program method
Reference resources :http://www.elecfans.com/dianzichangshi/20171123584883.html
take ESP8266 And USB-TTL Connect according to the following wiring diagram . It's better to use the following kind of cold free start .

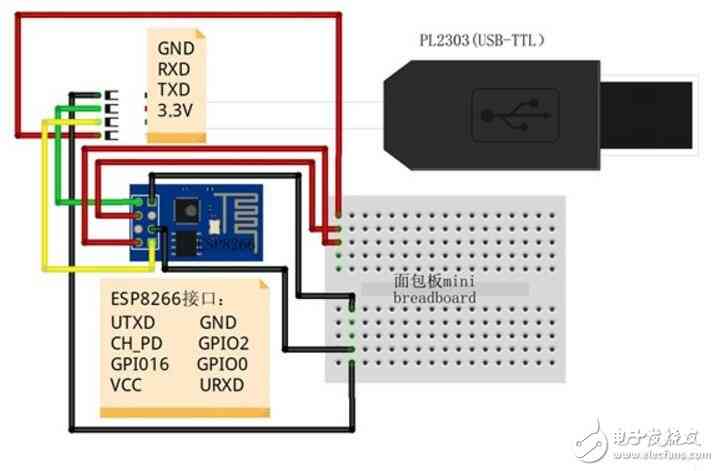
UTXD—–RXD
URXD—–TXD
CH_PD—-3.3v
VCC——-3.3V
GND——GND
GPIO0—–GND
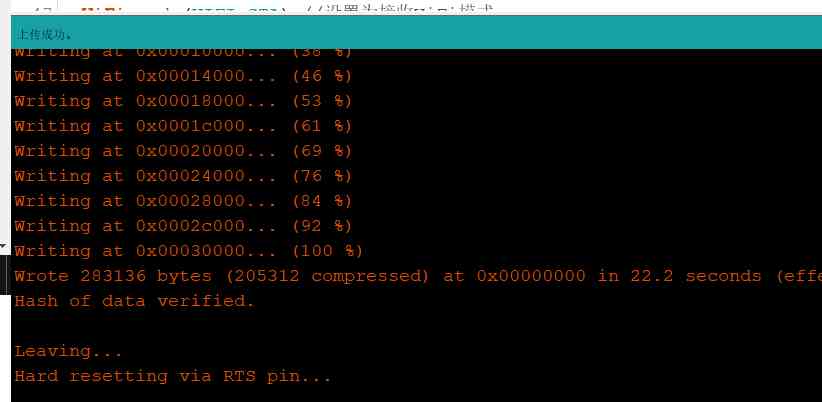
Will be connected ESP8266 Of USB-TTL Plug it into the computer , Yes IDE Set the following :
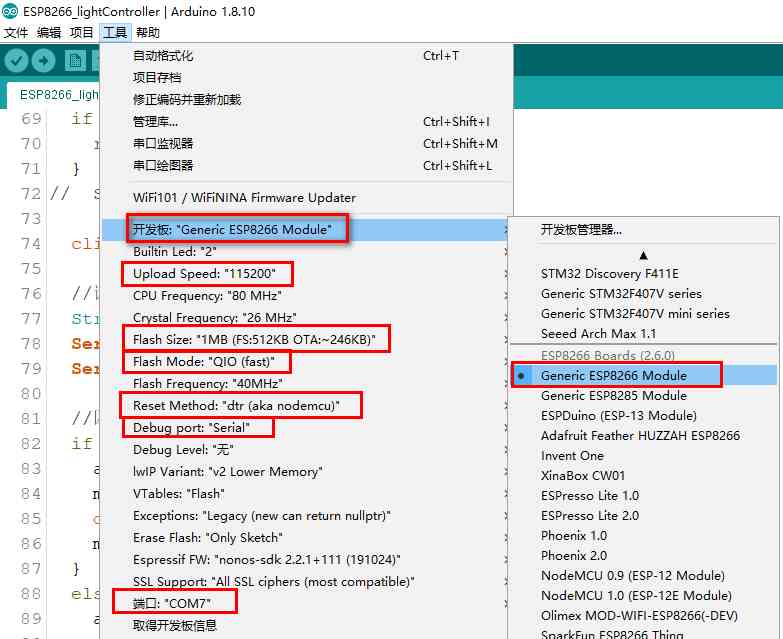
You can upload ESP8266WIFI Related procedures .
matters needing attention
1.esp8266-01 The board requires a high voltage , When burning and writing, the power supply must be used 3.3V about .
2. If the code can't be uploaded , And display a warning , Please check USB-TTL Whether it is good or not ( some USB-TTL Unable to open serial port when burning , Causing upload failure ).
3.ESP8266 And USB-TTL need RX,TX Cross connect .
4.CH_PD Whether the pin is burning program or , It's good to burn out the program , All need to be answered 3.3V.
5.GPIO0 This pin must be connected to the program GND( Connect to low level ), If you want to apply it after burning the program , This pin must be pulled high or suspended .
3. WiFi Control the steering gear program

/*
* nodemcu Pins correspond to numbers :
* 16=D0;
* 4=D2;
* 0=D3;
* 2=D4;
* 14=D5;
* 12=D6;
* 13=D7;
* 15=D8;
* 3=D9;
* 1=D10;
* ESP-01 Pins correspond to numbers :
* GPIO2 --2 The steering gear -> Analog output
* GPIO16--16
*/
#include <ESP8266WiFi.h>
#include <Servo.h>


#ifndef STASSID
#define STASSID " Fill in your WiFi name "    //WiFi name
#define STAPSK  " Fill in your WiFi password "  //WiFi password
#endif

#define ANGLE_ON  76    // The angle of the steering gear when turning on the light
#define ANGLE_OFF 153   // Steering gear angle when the lights are off
#define ANGLE_NONE 110  // Steering gear angle when empty

const char* ssid = STASSID;
const char* password = STAPSK;
int angle=ANGLE_NONE;// Steering angle
Servo myservo;  // To create a servo Structure

// Create a server instance , Specifies that the port to listen on is 80 port
WiFiServer server(80);

void setup() {
  Serial.begin(115200);
  myservo.attach(16); // Steering gear signal line , Pick up analogIn foot
  myservo.write(angle);// 0~180°
  // Connect WiFi
  Serial.println();
  Serial.println();
  Serial.print(F("WiFi start connect "));// use F Function will put the string into RAM in , Output to serial port
  Serial.println(ssid);

  WiFi.mode(WIFI_STA);// Set to receive WiFi Pattern
  WiFi.begin(ssid, password);

  while (WiFi.status() != WL_CONNECTED) {

    delay(500);
    Serial.print(F("."));
  }
  Serial.println();
  Serial.println(F("WiFi Connected !"));

  // Turn on the server of the module
  server.begin();
  Serial.println(F(" The module server is turned on !"));

  // Printing module IP Address
  Serial.println(WiFi.localIP());
}

void loop() {
  // Monitor whether the client is connected
  WiFiClient client = server.available();
  if (!client) {
    return;// If it's not connected, recycle the monitoring
  }
//  Serial.println(F("new client"));

  client.setTimeout(1000); // default is 1000

  // Read the first line of the request
  String req = client.readStringUntil('\r');
  Serial.println(F(" request : "));
  Serial.println(req);

  // matching   request --> Signal variable
  if (req.indexOf(F("/gpio/0")) != -1) {
    angle = ANGLE_ON;// If /gpio/0 In the content of the request , Give a signal to turn on the light
    myservo.write(angle);// 0~180°
    delay(1000);
    myservo.write(ANGLE_NONE);// Empty the steering gear again , So as not to be damaged by force all the time
  }
  else if (req.indexOf(F("/gpio/1")) != -1) {
    angle = ANGLE_OFF;
    myservo.write(angle);// 0~180°
    delay(1000);
    myservo.write(ANGLE_NONE);// Empty the steering gear again , So as not to be damaged by force all the time
  }
  else {
    Serial.println(F(" Invalid request "));
  }
  // Read or ignore the rest of the request
  while (client.available()) {
    client.read();
  }

  // Send a reply to the client ,HTML Web code content
  //nagle The algorithm will group them into a packet
  client.print(F("<!DOCTYPE html>\r\n<html xmlns='http://www.w3.org/1999/xhtml'>\r\n"));
  client.print(F("<head>\r\n<meta charset='utf-8'/>\r\n<title> Smart bedroom lights </title>\r\n"));
  client.print(F("<style type='text/css'>.state{text-align:center;font-size:80px;}"));
  client.print(F(".on{text-align:center;font-size:200px;alink='#1a9e5f'}.off{text-align:center;font-size:200px;alink='#da4f43'}"));
  client.print(F("</style><body><div class='state'> Light status :"));
  client.print((angle>ANGLE_NONE) ? F(" Turn off </div>") : F(" open </div>"));
  client.print(F("<br><br><div class='on'><a href='http://"));//<br> Line break
  client.print(WiFi.localIP());
  client.print(F("/gpio/0'> open </a></div><br><br><div class='off'><a href='http://"));
  client.print(WiFi.localIP());
  client.print(F("/gpio/1'> Turn off </a></div></body></html>"));

  //  The client will actually be “ Refresh ”, Then disconnect
  //  When the function returns and “ client ” When an object is destroyed
  //  Refresh = Make sure that the written data is received by the server
  Serial.println(F(" Client suspended !"));
}
Through the serial port monitor (115200 Baud rate ) Get to the router assigned to NodeMCU Of IP Address , You can control the opening by visiting the website / Turn off the lights .
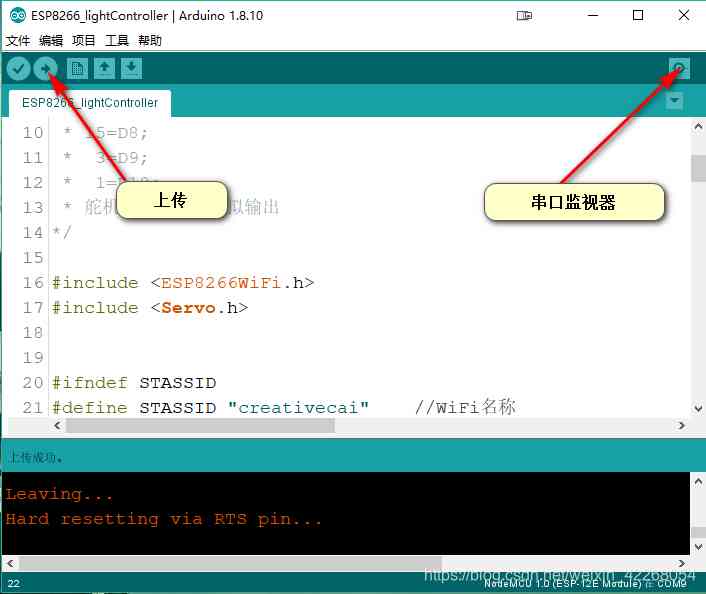
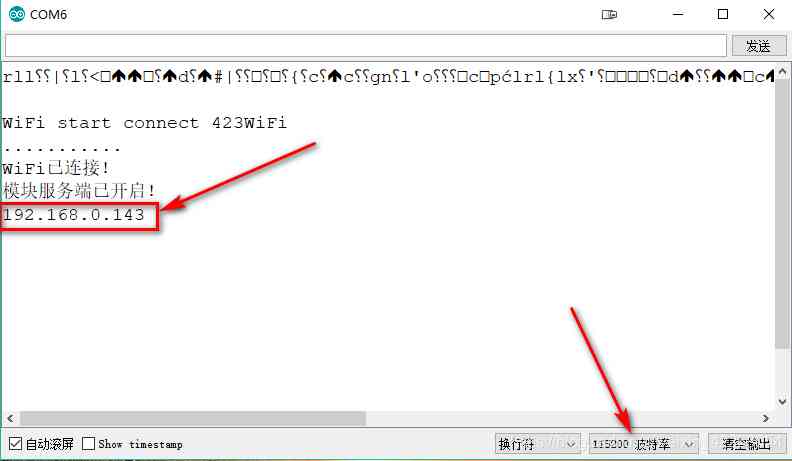
For example, the author read here IP by 192.168.0.143, that
When you turn on the lights, the website you visit on your mobile phone is http://192.168.0.143/gpio/0;
When you turn off the lights, the website you visit on your mobile phone is http://192.168.0.143/gpio/1.
( Cell phones need and NodeMCU Under the same router , That is, the connection is the same WiFi)
It should be noted that ESP8266 It may not be connected to the hot spots and 5GWiFi,WiFi It's better not to bring Chinese names .
