当前位置:网站首页>Simple production of wechat applet cloud development authorization login
Simple production of wechat applet cloud development authorization login
2022-07-05 12:07:00 【**inevitable**】
List of articles
- One 、tabBar Configuration of
- Two 、 Add compilation mode
- 3、 ... and 、 Design of login page
- Four 、 Configuration of cloud development environment
- 5、 ... and 、 Get user unique _openid
- 6、 ... and 、 Add user information to the database
- 7、 ... and 、 Automatically log in and display user information
- 8、 ... and 、 Log out
- Nine 、 design sketch
One 、tabBar Configuration of
1. New folder
stay app.json Add the following code to , It can be generated automatically 3 A folder 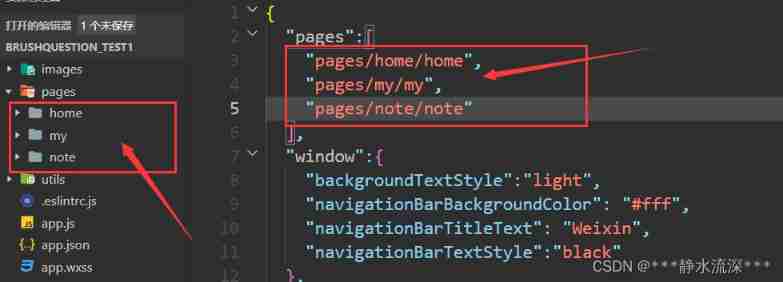
At the same time with app.json Create a new one under the directory of the same level of the configuration file images Folder , This folder is used to store some icons , as follows :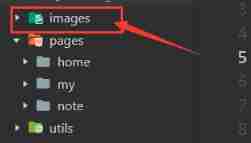
2. newly added tabBar node
stay app.json in , And windows Add nodes under the same level tabBar node , The configuration is as follows :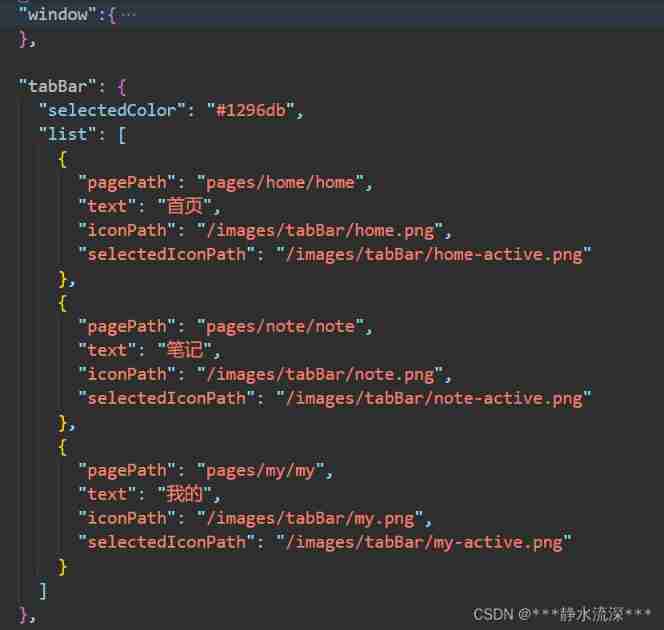
The effect picture after configuration is as follows :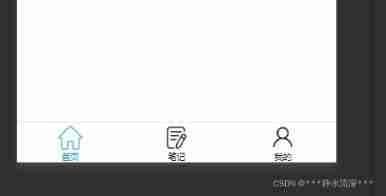
Icons can go to Ali Icon Library download
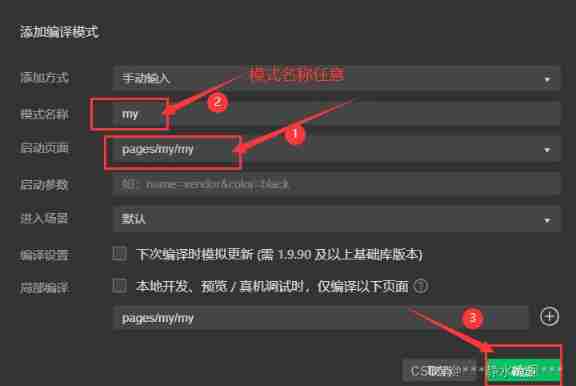
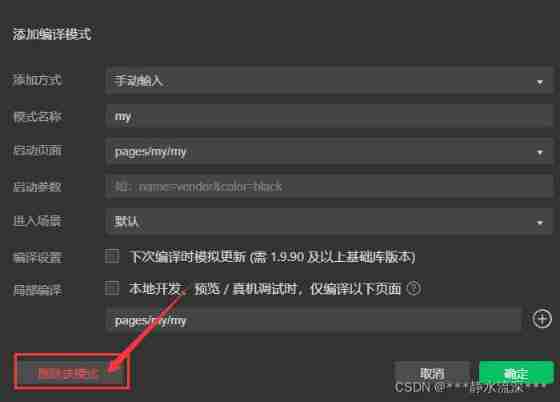
Two 、 Add compilation mode
Because the login page needs to be " my " Page , So for the convenience of , Avoid jumping from the home page to " my " On the page , Here we add the compilation mode , Add steps as follows :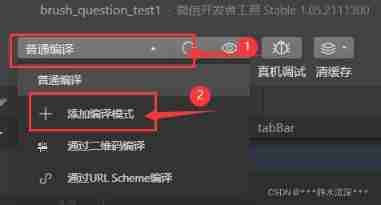
After this addition , Every time you recompile, you will be the first to show " my " page
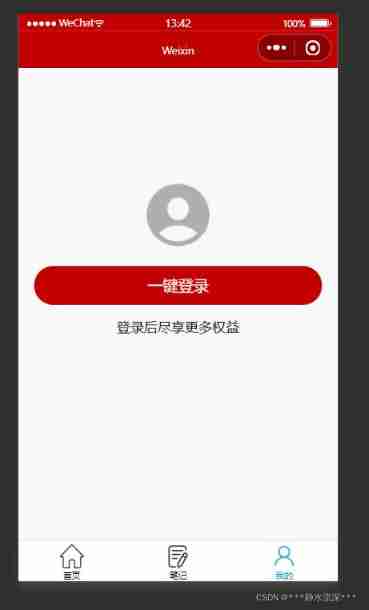
3、 ... and 、 Design of login page
1. wxml structure
<view class="login-container">
  <image src="/images/contact-filled.png" class="contact-filled" mode="widthFix"></image>
  <button class="btn-login"> One click login </button>
  <text class="tip-text"> Enjoy more benefits after logging in </text>
</view>
2. wxss style
page {

  background-color: #f8f8f8;
}

.login-container {

  height: 900rpx;
  display: flex;
  flex-direction: column;
  align-items: center;
  justify-content: center;
  position: relative;
  overflow: hidden;
}

/*  The style of the icon  */
.contact-filled {

  width: 150rpx;
  margin-bottom: 16rpx;
}

/*  Login button style  */
.btn-login {

  width: 90%;
  border-radius: 100px;
  margin: 15px 0;
  background-color: #c00000;
  color: #f8f8f8;
}

/*  The style of the prompt message below the button  */
.tips-text {

  font-size: 12px;
  color: gray;
}
3. Navigation bar style configuration
stay app.jspn Change the background color and text color of the navigation bar 
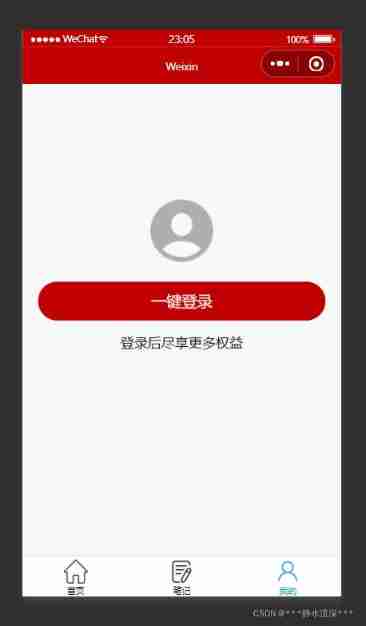
4. design sketch
Four 、 Configuration of cloud development environment
1. newly build cloud Folder
With the pages Create a new directory at the same level cloud Folder 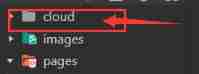
2. modify project.config.json To configure
stay project.config.json Add "cloudfunctionRoot": “/cloud”
After the change, you will find cloud Folder The icon has changed 
3. Cloud development environment initialization
stay app.js Medium onLaunch Function , as follows :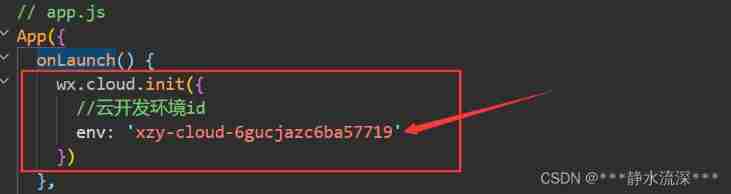
5、 ... and 、 Get user unique _openid
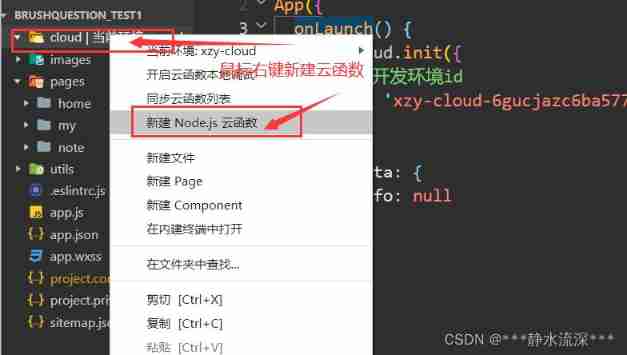
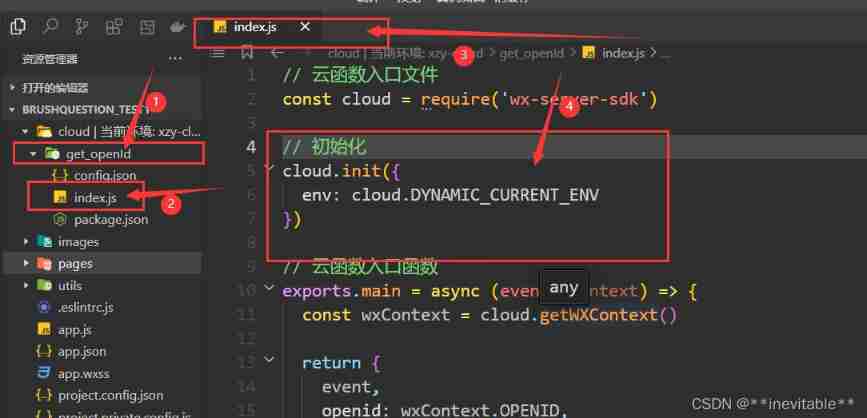
1. New cloud function
2. Call cloud function
In order to make all pages accessible to users openid, We are app.js Global settings in , The code is as follows :
// app.js
App({

  onLaunch() {

    wx.cloud.init({

      // Cloud development environment id
      env: 'xzy-cloud-6gucjazc6ba57719'
    }),

    // Call cloud function
    wx.cloud.callFunction({

      name: 'get_openId',
      success: res => {

        // Get users openid
        this.globalData.user_openid = res.result.openid
        console.log(this.globalData.user_openid)
      }
    })
  },
  // Global data
  globalData: {

    // user openid
    user_openid: '',
    // User information
    userInfo: null
  }
})
6、 ... and 、 Add user information to the database
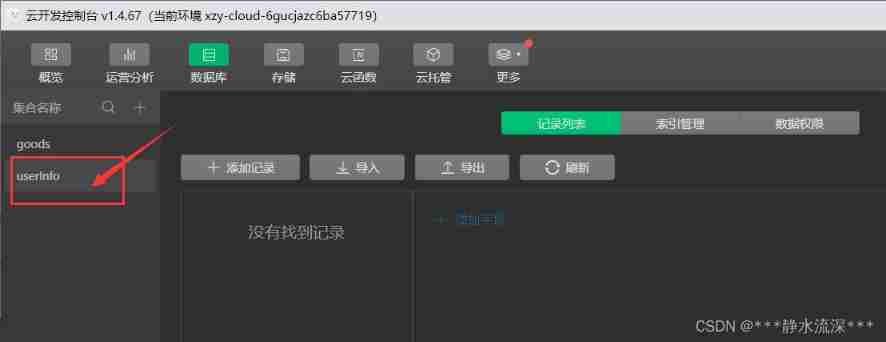
1. Build table
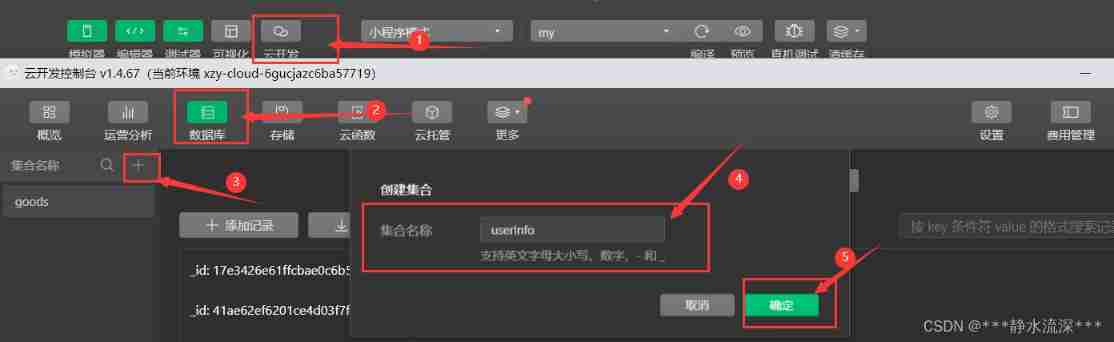
2. Get user information
- Step1: by button Button bound event
stay my Add binding events to the page
<button class="btn-login" bindtap="login"> One click login </button>
- Step2: Write binding event functions
stay my.js in , And data Write event functions at the same level
data: {

    userInfo: null
  },

login() {

    wx.getUserProfile({

      desc: ' Get user information ',
      success: res => {

        console.log(res.userInfo)
        // Set global user information
        app.globalData.userInfo = res.userInfo
        // Set local user information
        this.setData({

          userInfo: res.userInfo
        })
      }
    })
  },
Be careful : Before setting user information globally, you need to my.js China and Page Add the following code under the level :
const app = getApp()
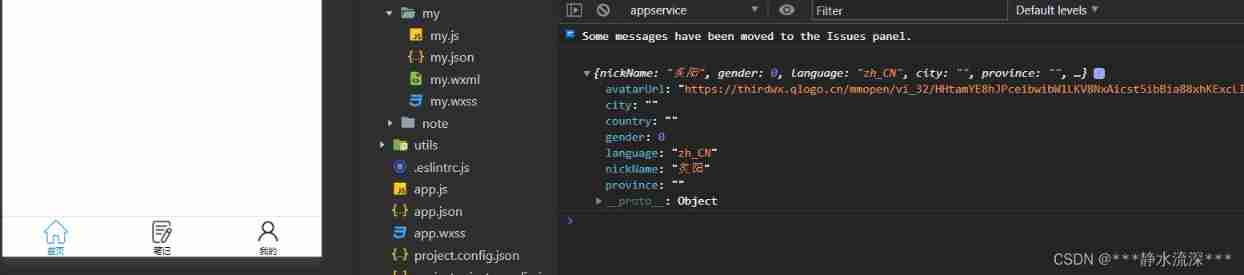
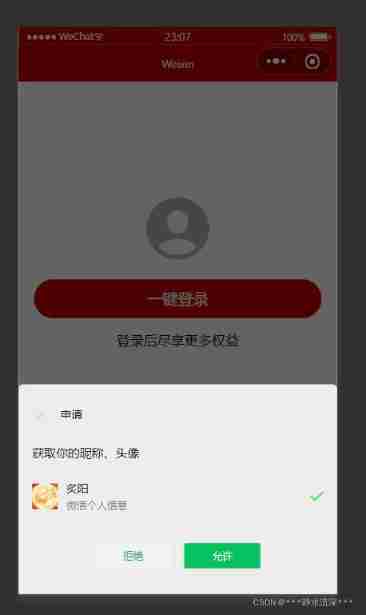
Click the button to get the user information as follows :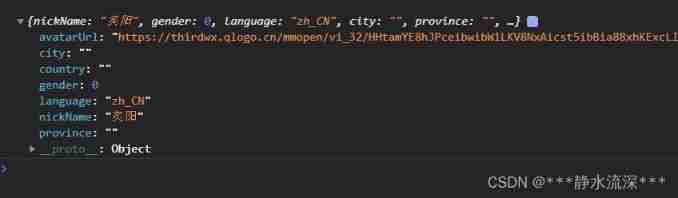
3. Incomplete user information
It can be seen from the above figure that the city in the user information , Some information such as country is empty , This is because of the official adjustment to this interface , As shown below :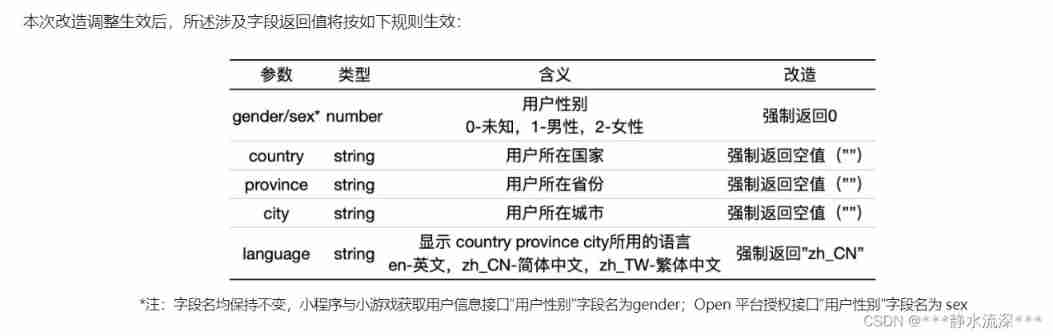
May refer to Official adjustment announcement
4. Get user information on other pages
Take the home page as an example , First, in the home.js China and Page Add the following code under the level :
const app = getApp()
And then in home.js Medium onshow Function to print user information 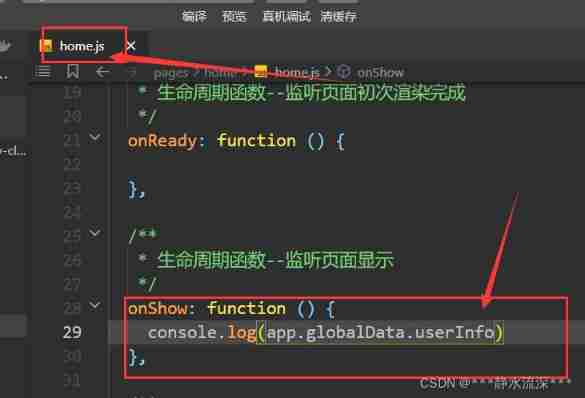
5. Add user information to the database
stay my.js Of login Continue to write the code of adding information to the database in the event function , As shown below :
 login() {

    wx.getUserProfile({

      desc: ' Get user information ',
      success: res => {

        console.log(res.userInfo)
        var user = res.userInfo
        // Set global user information
        app.globalData.userInfo = user
        // Set local user information
        this.setData({

          userInfo: user
        })

        // Add data to the database
        wx.cloud.database().collection('userInfo').add({

          data: {

            avatarUrl: user.avatarUrl,
            nickName: user.nickName
          },
          success: res => {

            console.log(res)
          }
        })
      }
    })
  },
Click the button to authorize login , Can view database 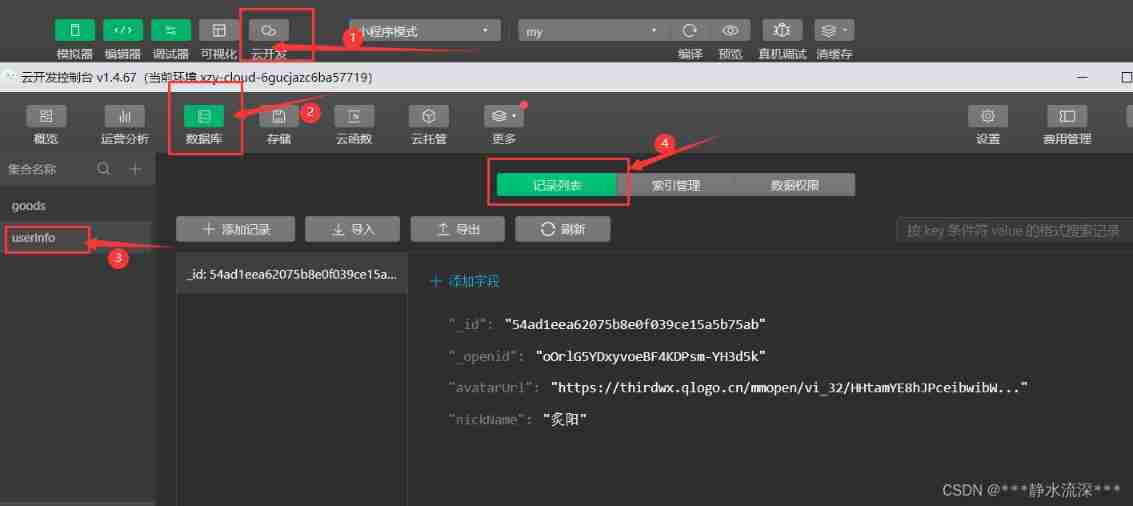
6. Solve the problem of users adding repeatedly
Because it will be executed every time you log in add command , Each execution will add a piece of data to the database , Therefore, it is necessary to avoid repeated execution add Instructions , change my.js Medium login function , Change it as follows :
  login() {

    wx.getUserProfile({

      desc: ' Get user information ',
      success: res => {

        // console.log(res.userInfo)
        var user = res.userInfo
        // Set global user information
        app.globalData.userInfo = user
        // Set local user information
        this.setData({

          userInfo: user
        })

        // Check whether the login has been authorized before
        wx.cloud.database().collection('userInfo').where({

          _openid: app.globalData.user_openid
        }).get({

          success: res => {

            // Originally not added , Add here
            if (!res.data[0]) {

              // Add data to the database
              wx.cloud.database().collection('userInfo').add({

                data: {

                  avatarUrl: user.avatarUrl,
                  nickName: user.nickName
                },
                success: res => {

                  wx.showToast({

                    title: ' Login successful ',
                    icon: 'none'
                  })
                }
              })
            } else {

              // Already added
              this.setData({

                userInfo: res.data[0]
              })
            }
          }
        })
      }
    })
  },
7、 ... and 、 Automatically log in and display user information
1. Find and save user information
First, in the app.js Of onLaunch Function to find whether the user has logged in , If you have logged in , Then find the user information and save ,app.js The code is as follows :
// app.js
App({

  onLaunch() {

    wx.cloud.init({

      // Cloud development environment id
      env: 'xzy-cloud-6gucjazc6ba57719'
    }),

    // Call cloud function
    wx.cloud.callFunction({

      name: 'get_openId',
      success: res => {

        // Get users openid
        this.globalData.user_openid = res.result.openid
        // console.log(this.globalData.user_openid)

        // Find out whether the user has logged in in the database
        wx.cloud.database().collection('userInfo').where({

          _openid: res.result.openid
        }).get({

          success: result => {

            this.globalData.userInfo = result.data[0]
          }
        })
      }
    })
  },
  // Global data
  globalData: {

    // user openid
    user_openid: '',
    // User information
    userInfo: null
  }
})
The user information is then stored in the my.js in , Store as follows :
onLoad: function (options) {

    this.setData({

      userInfo: app.globalData.userInfo
    })
  },
2. Change of compilation mode
Change the compilation mode to normal compilation mode 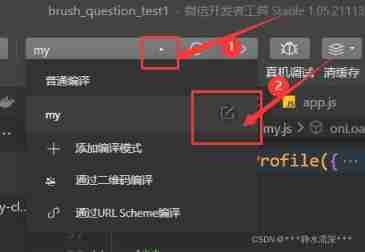
3. Display user information
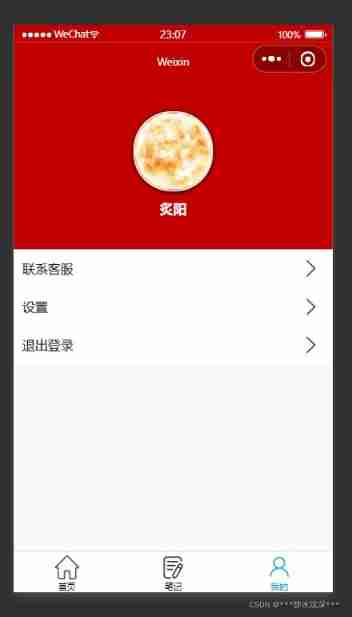
my.wxml The page structure is as follows :
<block wx:if="{
     {!userInfo}}">
  <!--  Login area  -->
  <view class="login-container">
    <image src="/images/contact-filled.png" class="contact-filled" mode="widthFix"></image>
    <button class="btn-login" bindtap="login"> One click login </button>
    <text class="tip-text"> Enjoy more benefits after logging in </text>
  </view>
</block>

<block wx:else>

  <!--  Avatar nickname area  -->
  <view class="top-box">
    <image src="{
     {userInfo.avatarUrl}}" class="avatar"></image>
    <view class="nickname">{
   {userInfo.nickName}}</view>
  </view>

  <!--  Panel area  -->
  <view class="panel">
    <view class="panel-list-item">
      <text> Contact customer service </text>
      <image src="/images/arrow.png"></image>
    </view>

    <view class="panel-list-item">
      <text> Set up </text>
      <image src="/images/arrow.png"></image>
    </view>

    <view class="panel-list-item" bindtap="logout">
      <text> Log out </text>
      <image src="/images/arrow.png"></image>
    </view>
  </view>

</block>
my.wxss The style is as follows :
page {

  background-color: #f8f8f8;
}

.login-container {

  height: 900rpx;
  display: flex;
  flex-direction: column;
  align-items: center;
  justify-content: center;
  position: relative;
  overflow: hidden;
}

/*  The style of the icon  */
.contact-filled {

  width: 150rpx;
  margin-bottom: 16rpx;
}

/*  Login button style  */
.btn-login {

  width: 90%;
  border-radius: 100px;
  margin: 15px 0;
  background-color: #c00000;
  color: #f8f8f8;
}

/*  The style of the prompt message below the button  */
.tips-text {

  font-size: 12px;
  color: gray;
}

/*  User information style  */
.top-box {

  height: 400rpx;
  background-color: #c00000;
  display: flex;
  flex-direction: column;
  align-items: center;
  justify-content: center;

}

/*  User avatar style  */
.top-box .avatar {

  display: block;
  width: 90px;
  height: 90px;
  border-radius: 45px;
  border: 2px solid white;
  box-shadow: 0 1px 5px black;
}

/*  User nickname style  */
.top-box .nickname {

  color: white;
  font-weight: bold;
  font-size: 16px;
  margin-top: 10px;
}

/*  Panel style settings  */
.panel {

  background-color: white;
  border-radius: 3px;
}

.panel-list-item {

  height: 45px;
  display: flex;
  justify-content: space-between;
  align-items: center;
  font-size: 15px;
  padding: 0 10px;
}

/*  Arrow pattern  */
.panel-list-item image {

  width: 60rpx;
  height: 60rpx;
}
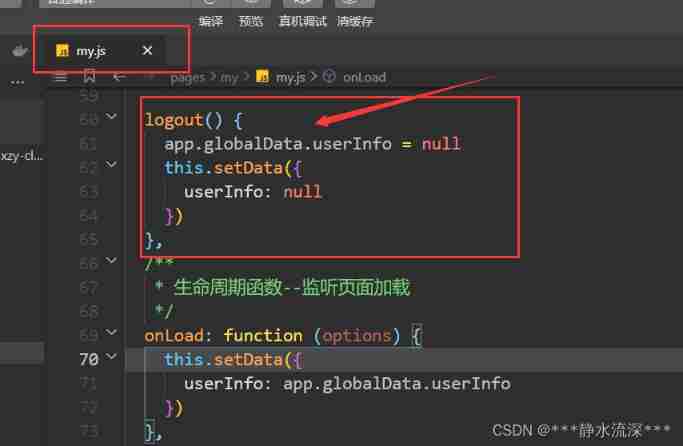
8、 ... and 、 Log out
Bind events for logout logout, And in my.js Write the corresponding event function 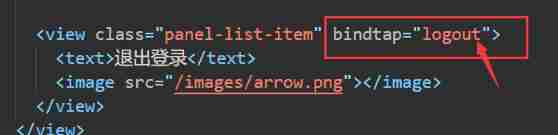
Nine 、 design sketch
边栏推荐
- Open3D 欧式聚类
- codeforces每日5题(均1700)-第五天
- 一类恒等式的应用(范德蒙德卷积与超几何函数)
- View all processes of multiple machines
- XML parsing
- 13. (map data) conversion between Baidu coordinate (bd09), national survey of China coordinate (Mars coordinate, gcj02), and WGS84 coordinate system
- 什么是数字化存在?数字化转型要先从数字化存在开始
- Yolov5 target detection neural network -- calculation principle of loss function
- 【无标题】
- Application of a class of identities (vandermond convolution and hypergeometric functions)
猜你喜欢
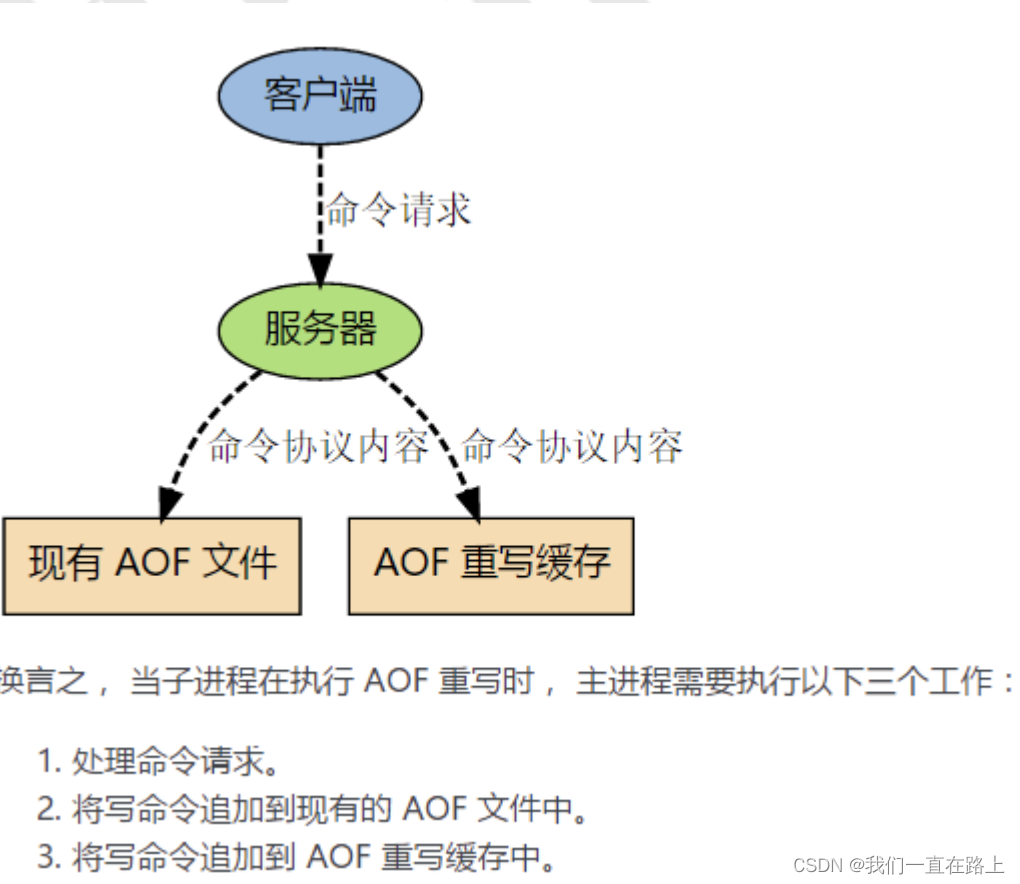
redis的持久化机制原理
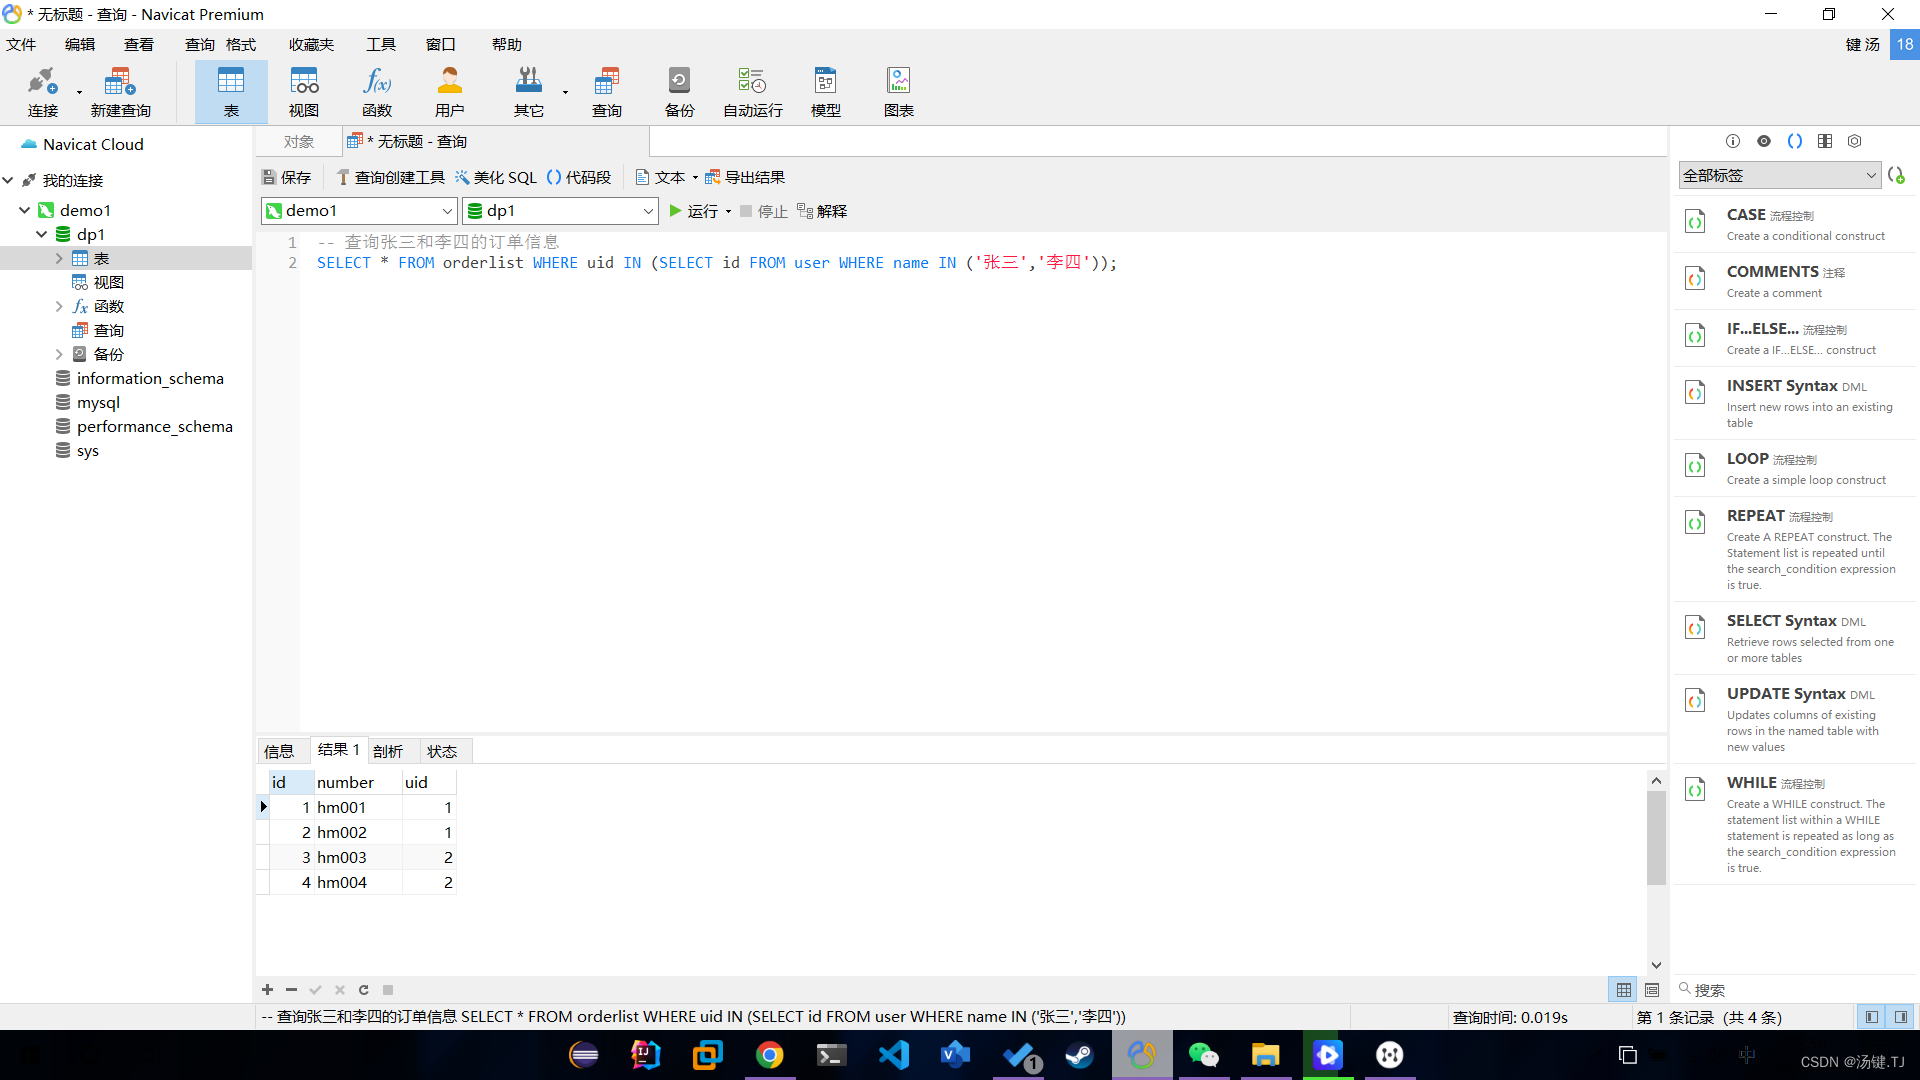
Multi table operation - sub query
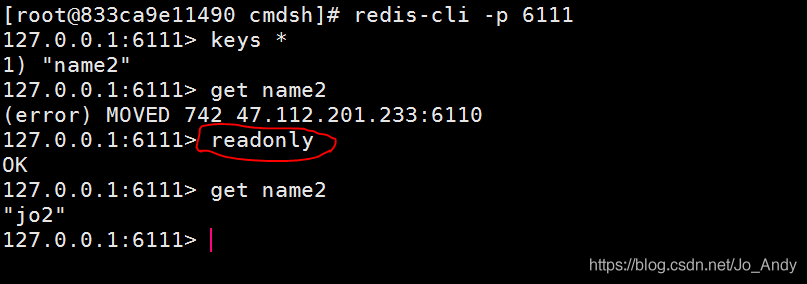
Simply solve the problem that the node in the redis cluster cannot read data (error) moved
pytorch-softmax回归
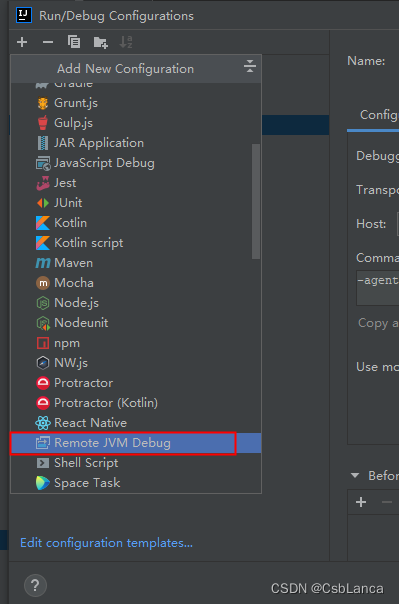
Check the debug port information in rancher and do idea remote JVM debug
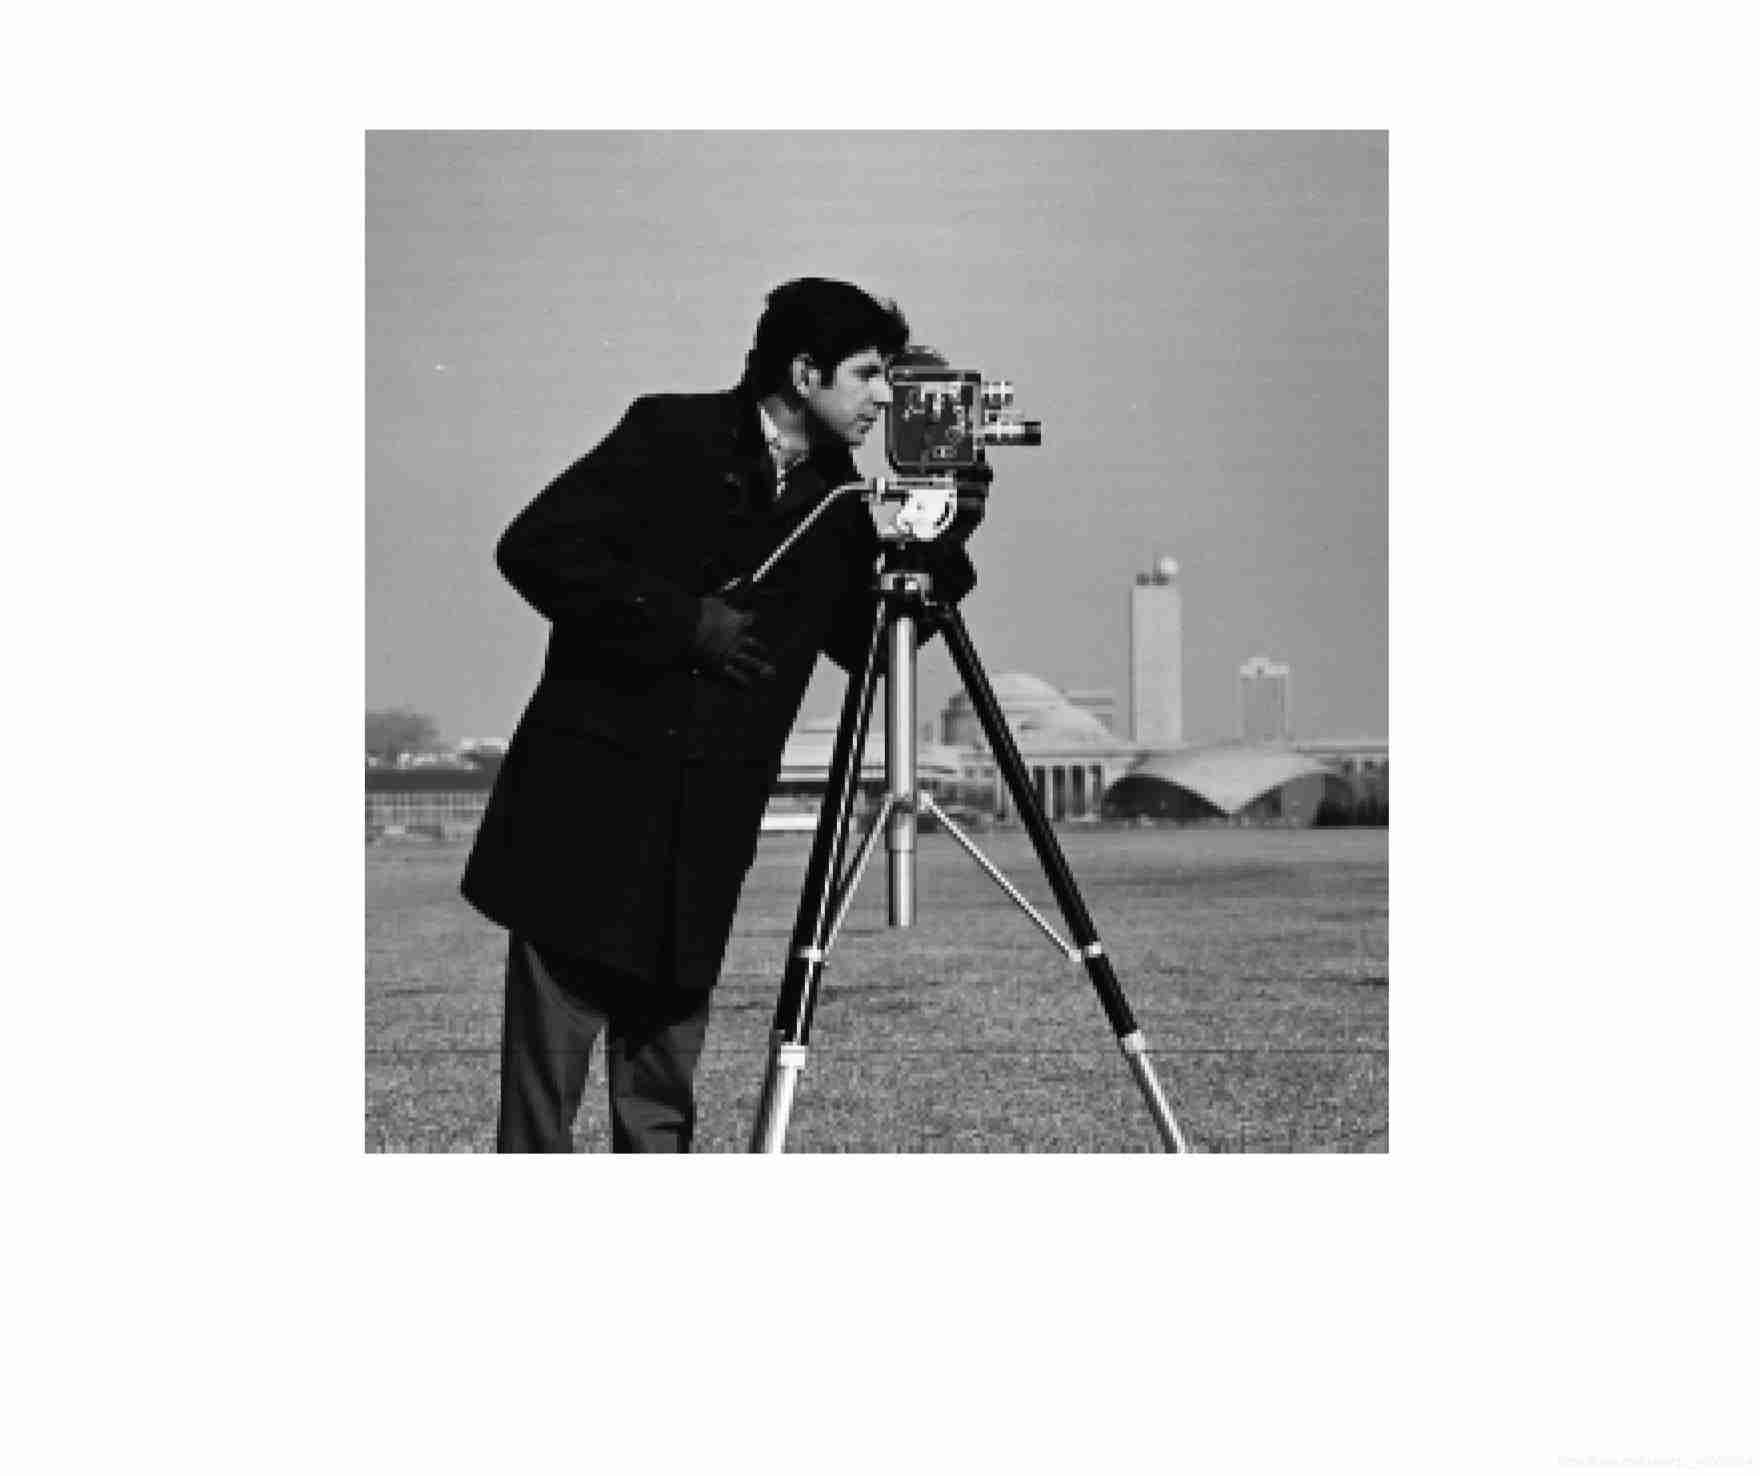
Matlab imoverlay function (burn binary mask into two-dimensional image)
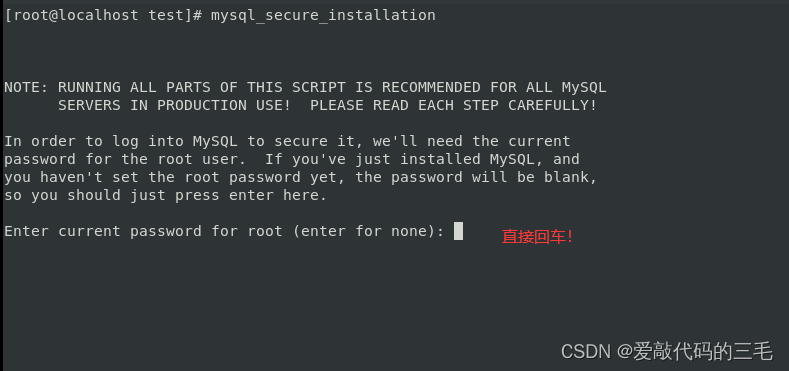
Linux安装部署LAMP(Apache+MySQL+PHP)
Mongodb replica set
HiEngine:可媲美本地的云原生内存数据库引擎
Use and install RkNN toolkit Lite2 on itop-3568 development board NPU
随机推荐
Yolov5 target detection neural network -- calculation principle of loss function
Redirection of redis cluster
liunx禁ping 详解traceroute的不同用法
12.(地图数据篇)cesium城市建筑物贴图
Programmers are involved and maintain industry competitiveness
splunk配置163邮箱告警
石油化工企业安全生产智能化管控系统平台建设思考和建议
Acid transaction theory
redis 集群模式原理
1 plug-in to handle advertisements in web pages
Hiengine: comparable to the local cloud native memory database engine
Liunx prohibit Ping explain the different usage of traceroute
JS for loop number exception
Open3D 网格(曲面)赋色
想问问,如何选择券商?在线开户是很安全么?
Thoughts and suggestions on the construction of intelligent management and control system platform for safe production in petrochemical enterprises
pytorch-权重衰退(weight decay)和丢弃法(dropout)
13.(地图数据篇)百度坐标(BD09)、国测局坐标(火星坐标,GCJ02)、和WGS84坐标系之间的转换
Open3d European clustering
[deploy pytoch project through onnx using tensorrt]