当前位置:网站首页>[actual combat] transformer architecture of the major medical segmentation challenges on the list --nnformer
[actual combat] transformer architecture of the major medical segmentation challenges on the list --nnformer
2022-07-07 10:37:00 【Sister Tina】
List of articles
brief introduction : We introduced nnFormer(not-another transFormer), One for 3D Medical image segmentation transformer.
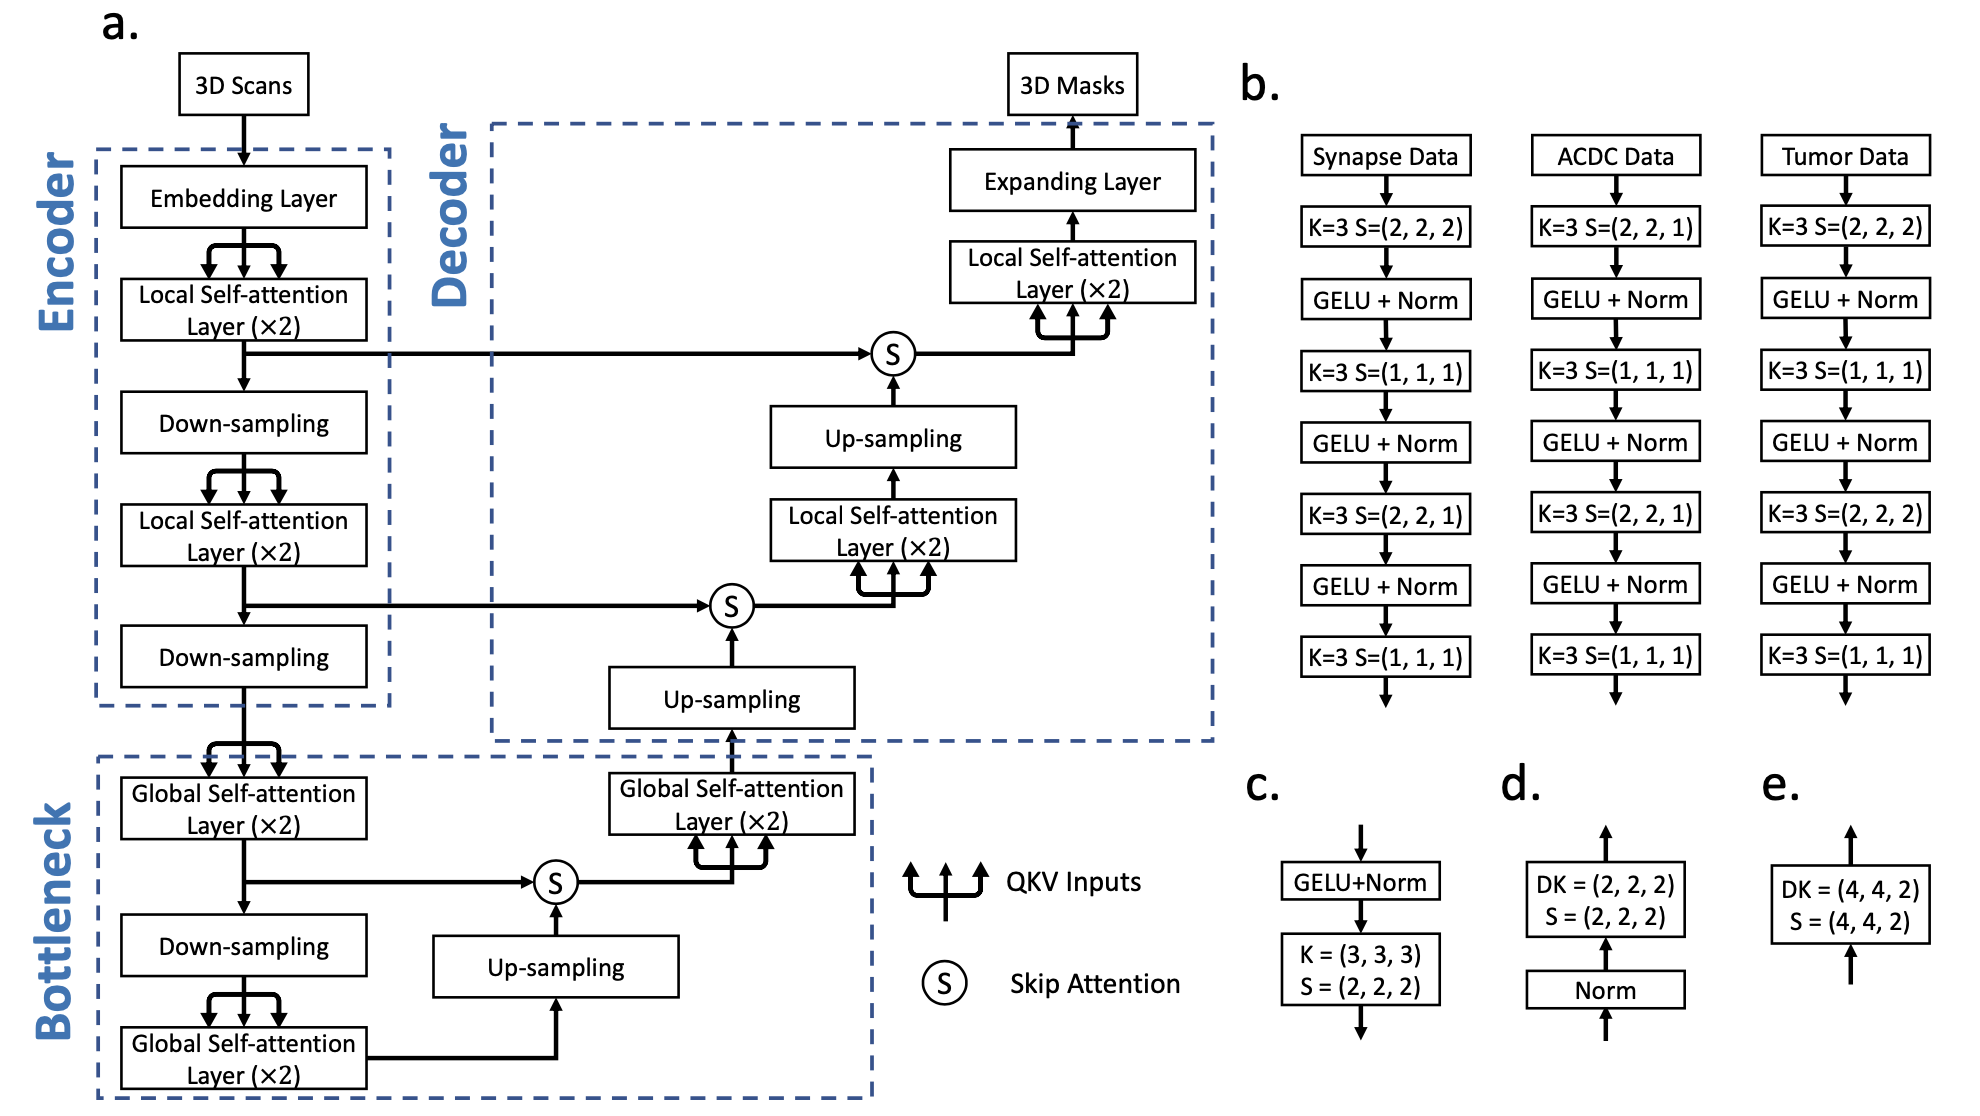
nnFormer Not only the combination of convolution and self attention is used , Self attention mechanism based on local and global volume is also introduced to learn volume representation .
Besides ,nnFormer It is suggested to use jumping attention instead of U-Net Traditional operations in jumping connections in class architecture .
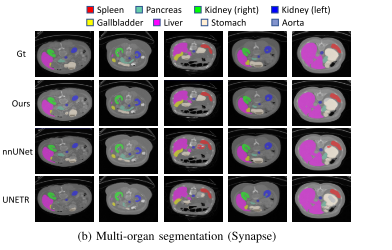
Experiments show that , On three public datasets ,nnFormer Remarkable performance . And nnUNet comparison ,nnFormer Produced HD95 Significantly reduce the ,DSC The results are also comparable . Besides ,nnFormer and nnUNet It is highly complementary in model fusion .nnFormer The code of is also based on nnUNet Changed .
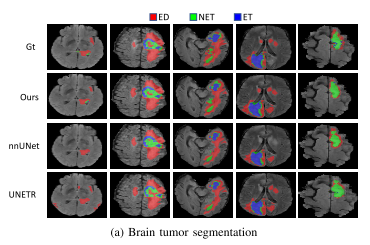 ,
,
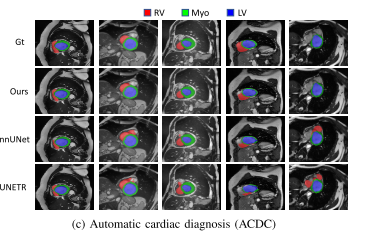
therefore , Just use it nnUNet, This part of the code is relatively smooth
This tutorial is difficult :
Never used nnUNet: ️️️️
Have used nnUNet: ️️
The difficulty lies in the installation environment , Download data , Preprocessing data , Training and testing are done with one command . The preliminary work should be done well .
nnFormer Paper download
nnFormer github
install
1. Official system version
Ubuntu 18.01、Python 3.6、PyTorch 1.8.1 and CUDA 10.1 . A complete list of packages and version numbers , see also Conda Environmental documents environment.yml.
- Installation steps
It is recommended to use conda Package manager installs the required packages
git clone https://github.com/282857341/nnFormer.git
( The default download location is different , After downloading, I can't find Baidu )
cd nnFormer ( Cut the whole file into your daily project folder , Easy to use )
conda env create -f environment.yml ( This step will create a file called nnFormer Of conda Environmental Science )
source activate nnFormer
pip install -e .
This step installs , If the network is not good , Most of them will make mistakes . If not , It is recommended to create an environment manually conda create -n nnFormer python=3.6, And install it manually environment.yml The package required in the file .
Download and preprocess the experimental data
Three data sets are officially used , Each data set has its own model,train, inference.
Therefore, the data set used must be specified during the experiment .
This tutorial uses Brain_tumor Data sets , When downloading task01_Braintomor, Rename it to Task03_tumor( In this paper task03 It's just brain tumor, To correspond .)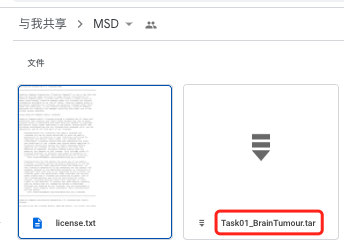
Students who can't download can go to my online disk to download :
link : https://pan.baidu.com/s/1TChc4yXZjPlv9ApqS-OHkQ Extraction code : c0mj
Limited by online disk upload , altogether 3 Compressed packages , Unzip it and put it in Task03_tumor Under the folder . Contains the following 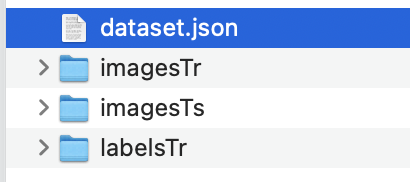
Preprocessing data
We need to look like nnUNet like that , Data has a strict format .
First create the following folder 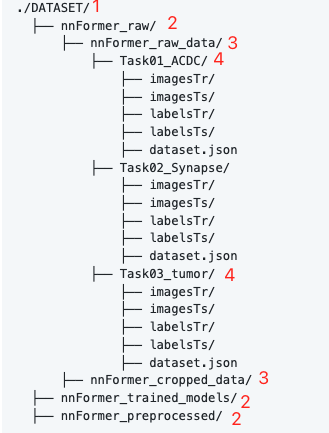
among DATASET Wherever you put it , For convenience , I put it in nnFormer Inside , The folder level is marked on the picture , Don't get it wrong . The fourth level of this experiment only needs Task03_tumor, Put the folder you just put in .
Be careful : The downloaded data has a dataset.json, The training set and the test set are the same nnFormer Dissimilarity . You can proceed to the next step according to the current division , But there is no data in this test set ground truth, When doing the test, you can't ask dice. If you want to know the performance of the test set , Just follow nnFormer Of dataset.json Re divide imagesTr, imagesTs, labelsTr, labelsTs. nnFormer It is to divide the training set into training set and test set again , So his test set has ground truth.( There's so much to say , Don't know to make it clear )
The initial data has , Next, preprocess
- Open the terminal
cd nnFormerconda activate nnFormernnFormer_convert_decathlon_task -i ../DATASET/nnFormer_raw/nnFormer_raw_data/Task03_tumor
This step will create a new one under the data directory Task003_tumor Folder , And convert the multimodal data into 4 Single mode data , Same as nnUNet The data format to be used is the samennFormer_plan_and_preprocess -t 3
The above preprocessing data is over
Now let's enter the formal practical stage
Modify source code errors
There are several errors in the downloaded code that need to be modified
nnFormer/nnformer/run/default_configuration.pyfile
There is one else The position is not rightnnFormer/nnformer/run/run_train.pyfileimport numpy as no Change to npnnFormer/nnformer/training/network_training/nnFormerTrainerV2_nnformer_tumor.pyfileself.load_pretrain_weightSet to False
train
There are altogether 2 Methods
Either way , First Switch to the following path cd nnFormer
- 1 Use
bash train_inference.sh
The file is downloadednnFormerUnder the home directory , You need to open the file before running , Change the folder address to your own address ,
bash train_inference.sh -c 0 -n nnformer_tumor -t 3
Using this command will perform training and testing 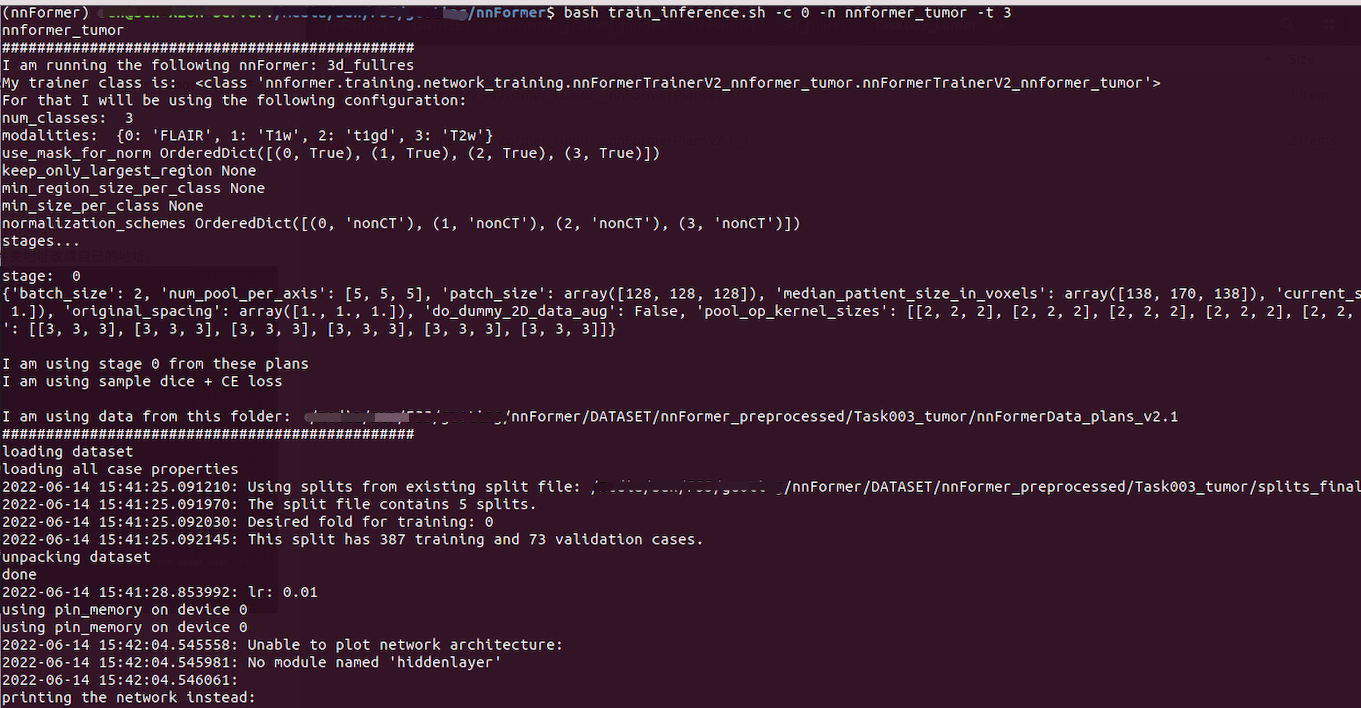

ps: Make sure the variables have been set before
export nnFormer_raw_data_base='/xxxxxxxx/nnFormer/DATASET/nnFormer_raw'
export nnFormer_preprocessed='/xxxxxx/nnFormer/DATASET/nnFormer_preprocessed'
export RESULTS_FOLDER='/xxxxxxx/nnFormer/DATASET/nnFormer_trained_models'
For the setting of environment variables, see the previous article nnunet
The trained model is saved in
xxxx/nnFormer/DATASET/nnFormer_trained_models/nnFormer/3d_fullres/Task003_tumor/nnFormerTrainerV2_nnformer_tumor__nnFormerPlansv2.1
- 2 Use
nnFormer_train
open train_inference.sh file , You can see in the predict part , The actual call is nnFormer_train function , So we can call this function directly for training .
Use nnFormer_train -h Check the meaning of parameters 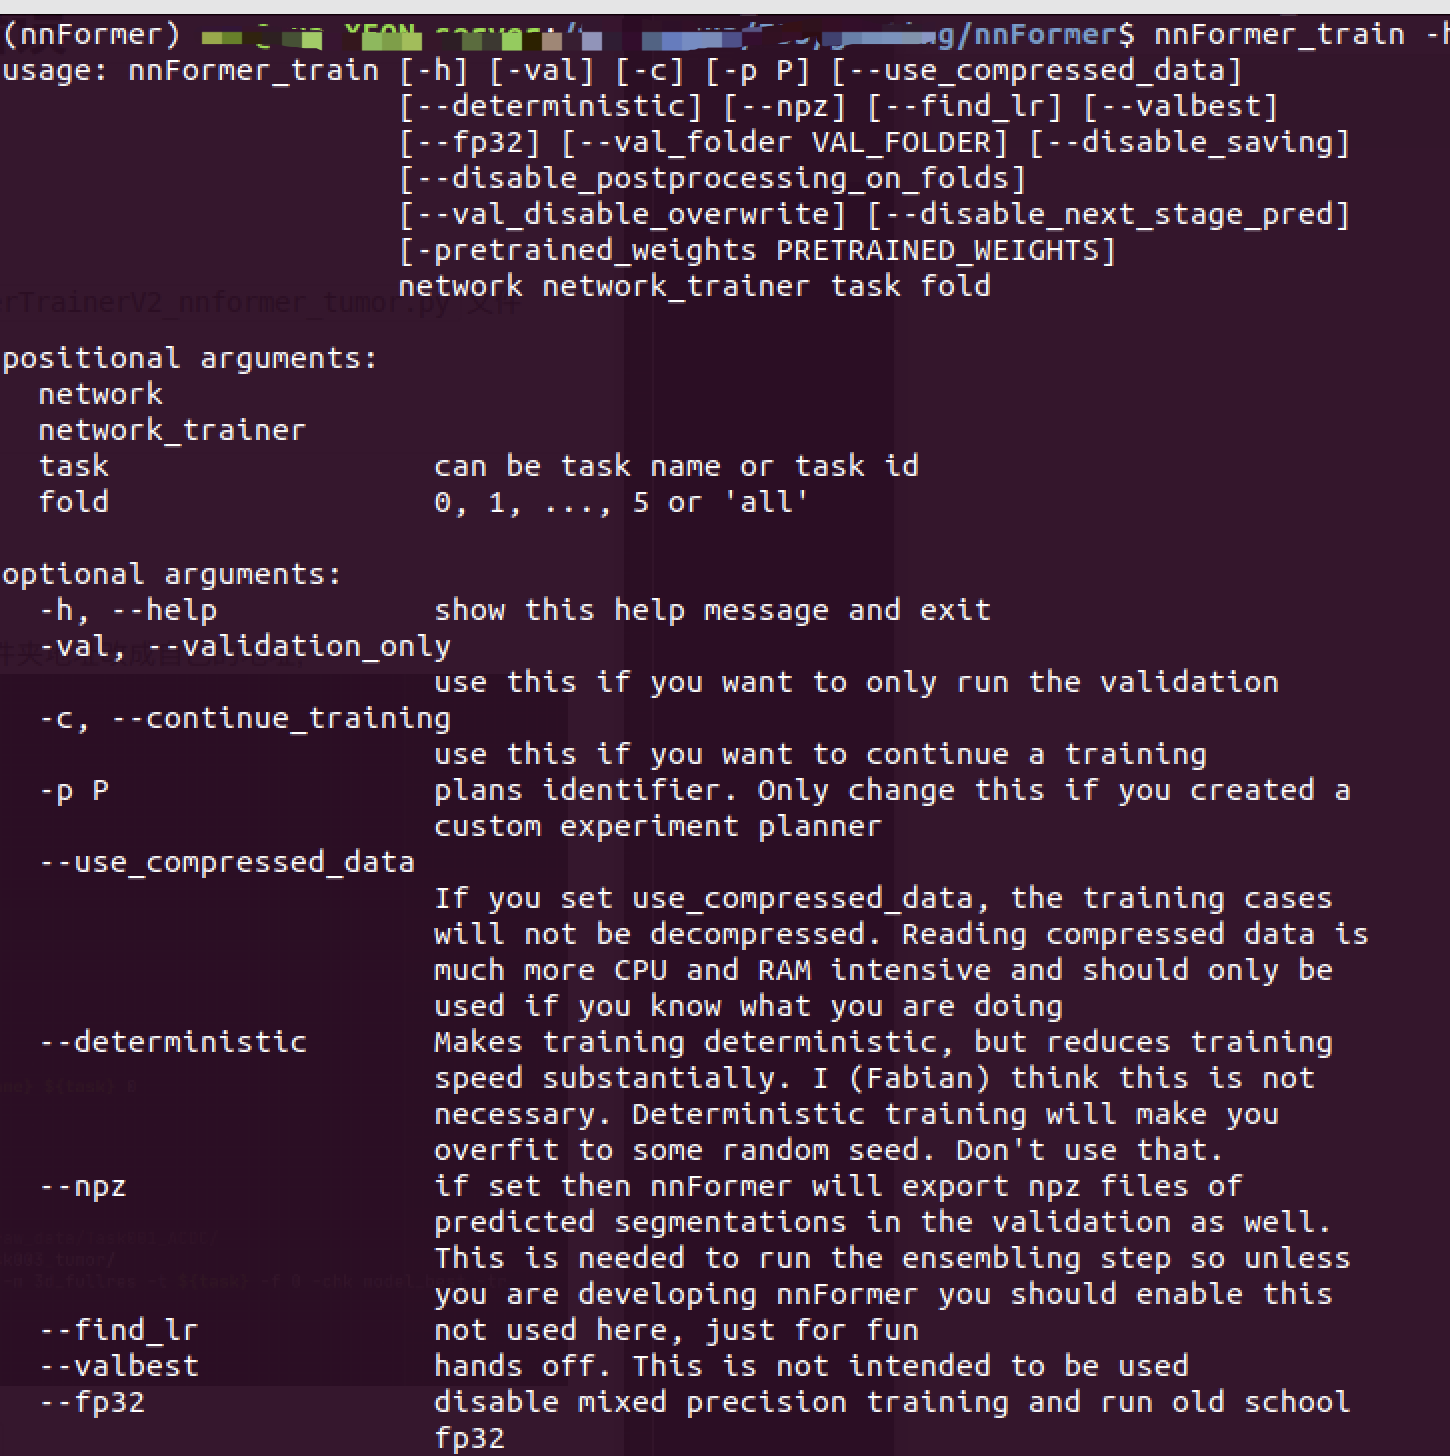
eg. CUDA_VISIBLE_DEVICES=1 nnFormer_train 3d_fullres nnFormerTrainerV2_nnformer_tumor 3 0
- The first parameter : network
- The second parameter : network_trainer
- The third parameter : task, can be task name or task id
- Fourth parameter : fold, Five fold cross ,fold It can be specific x fold (0-4), If it is 5 You have to do everything ,fold=5,or all
test
There are altogether 2 Methods
Either way , First Switch to the following path cd nnFormer
- 1 Use
bash train_inference.sh
The file is downloaded nnFormer Under the home directory , You need to open the file before running , Change the folder address to your own address ,
[ Failed to transfer the external chain picture , The origin station may have anti-theft chain mechanism , It is suggested to save the pictures and upload them directly (img-quJrtIVU-1655445035770)(imgs/20220614-150345.png)]
We don't need training here , Reasoning only
bash train_inference.sh -c 0 -n nnformer_tumor -t 3
Be careful : If you don't train , To use this command, you need to manually train Part of the code is commented out . I don't understand the code getopts How to use the set parameters , No matter how you set it on the command line, you can't turn off training . So use this stupid method .
c: stands for the index of your cuda device
n: denotes the suffix of the trainer located at nnFormer/nnformer/training/network_training/
t: denotes the task index
2 Use
nnFormer_predict
open train_inference.sh file , You can see in the predict part , The actual call is nnFormer_predict function , So we can call this function directly to make predictions .
Use nnFormer_predict -h Check the meaning of parameters 
eg: nnFormer_predict -i xxx/nnFormer/DATASET/nnFormer_raw/nnFormer_raw_data/Task003_tumor/imagesTs -o xxx/nnFormer/DATASET/nnFormer_raw/nnFormer_raw_data/Task003_tumor/inferTS/nnformer_tumor -t 3 -m 3d_fullres -f 0 -chk model_best -tr nnFormerTrainerV2_nnformer_tumor
After correct operation , The following will appear 
And then you can do it in OUTPUT_FOLDER Check the segmentation results under the folder .
Because the test data does not ground truth, Therefore, you can only view the segmentation performance manually .
ps: The official data is labeled with test sets , You can find what you need . If there's a label , You can use the following command to find dicepython nnformer/inference_tumor.py nnformer_tumor
Articles are constantly updated , You can pay attention to the official account of WeChat 【 Medical image AI combat camp 】 Get the latest , The official account of the frontier technology in the field of medical image processing . Stick to the practice , Take you hand in hand to do the project , Play the game , Write a paper . All original articles provide theoretical explanation , Experimental code , experimental data . Only practice can grow faster , Pay attention to our , Learn together ~
I am a Tina, I'll see you on our next blog ~
Working during the day and writing at night , cough
If you think it's well written, finally , Please thumb up , Comment on , Collection . Or three times with one click 
边栏推荐
- Talking about the return format in the log, encapsulation format handling, exception handling
- BUUCTF---Reverse---reverse1
- Study summary of postgraduate entrance examination in October
- 宁愿把简单的问题说一百遍,也不把复杂的问题做一遍
- Gym installation pit records
- Installation and configuration of slurm resource management and job scheduling system
- Application of OpenGL gllightfv function and related knowledge of light source
- CC2530 zigbee IAR8.10.1环境搭建
- 软考信息处理技术员有哪些备考资料与方法?
- 南航 PA3.1
猜你喜欢
OpenGL glLightfv 函数的应用以及光源的相关知识
![[recommendation system 02] deepfm, youtubednn, DSSM, MMOE](/img/d5/33765983e6b98235ca085f503a1272.png)
[recommendation system 02] deepfm, youtubednn, DSSM, MMOE
如何顺利通过下半年的高级系统架构设计师?

5个chrome简单实用的日常开发功能详解,赶快解锁让你提升更多效率!
![1323: [example 6.5] activity selection](/img/2e/ba74f1c56b8a180399e5d3172c7b6d.png)
1323: [example 6.5] activity selection

优雅的 Controller 层代码
Summary of router development knowledge
求方程ax^2+bx+c=0的根(C语言)
求最大公约数与最小公倍数(C语言)
ADB utility commands (network package, log, tuning related)
随机推荐
Study summary of postgraduate entrance examination in November
Five simple and practical daily development functions of chrome are explained in detail. Unlock quickly to improve your efficiency!
CSAPP Bomb Lab 解析
Use the fetch statement to obtain the repetition of the last row of cursor data
BigDecimal value comparison
Socket通信原理和实践
Installation and configuration of slurm resource management and job scheduling system
JMeter loop controller and CSV data file settings are used together
The variables or functions declared in the header file cannot be recognized after importing other people's projects and adding the header file
leetcode-560:和为 K 的子数组
ThreadLocal会用可不够
[牛客网刷题 Day6] JZ27 二叉树的镜像
Gym installation pit records
Elegant controller layer code
[email protected] can help us get the log object quickly
【PyTorch 07】 动手学深度学习——chapter_preliminaries/ndarray 习题动手版
【作业】2022.7.6 写一个自己的cal函数
Talking about the return format in the log, encapsulation format handling, exception handling
深入分析ERC-4907协议的主要内容,思考此协议对NFT市场流动性意义!
P1031 [noip2002 improvement group] average Solitaire