当前位置:网站首页>【 2 】 OpenCV image processing: basic knowledge of OpenCV
【 2 】 OpenCV image processing: basic knowledge of OpenCV
2022-08-05 02:19:00 【LeoATLiang】
文章目录
二、OpenCV 基础知识
1、OpenCV 的色彩空间
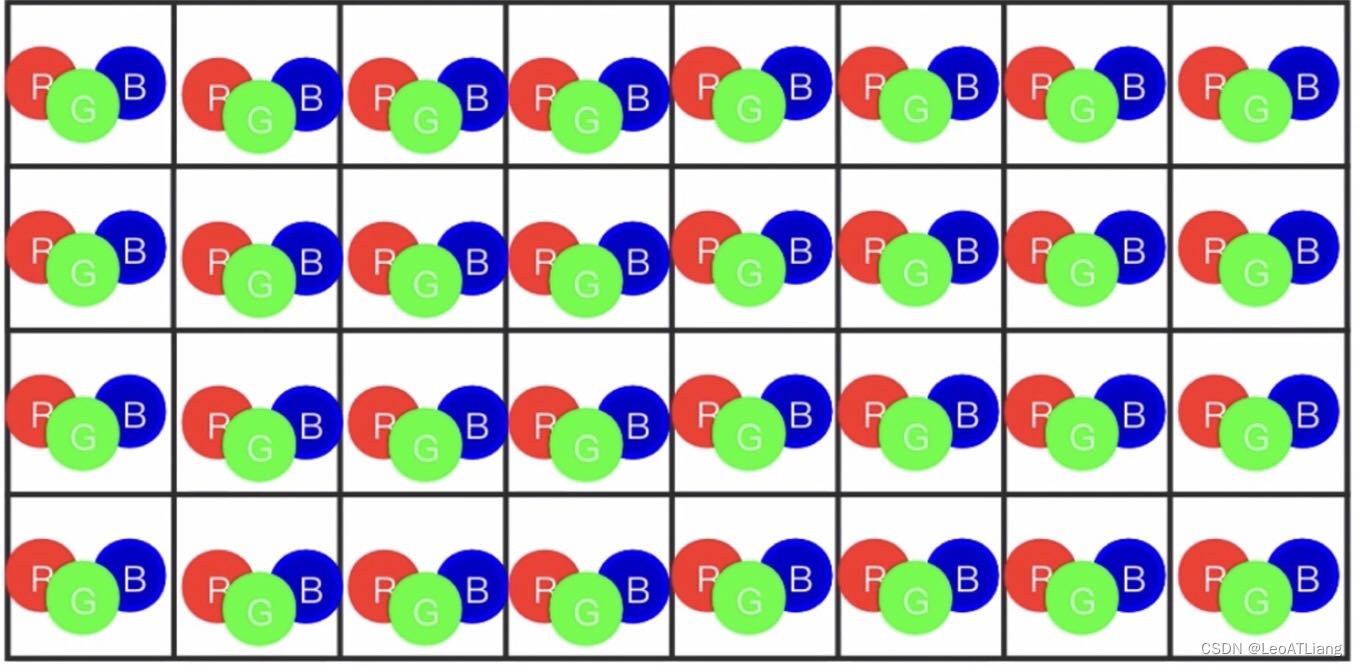
1.1 RGB 和 BGR
最常见的色彩空间就是RGB,人眼也是基于RGB的色彩空间去分辨颜色的.OpenCV 默认使用的是BGR.
RGB和BGR色彩空间的区别在于图片在色彩通道上的排列顺序不同.
1、RGB 如下图所示:
2、BGR 如下图所示:
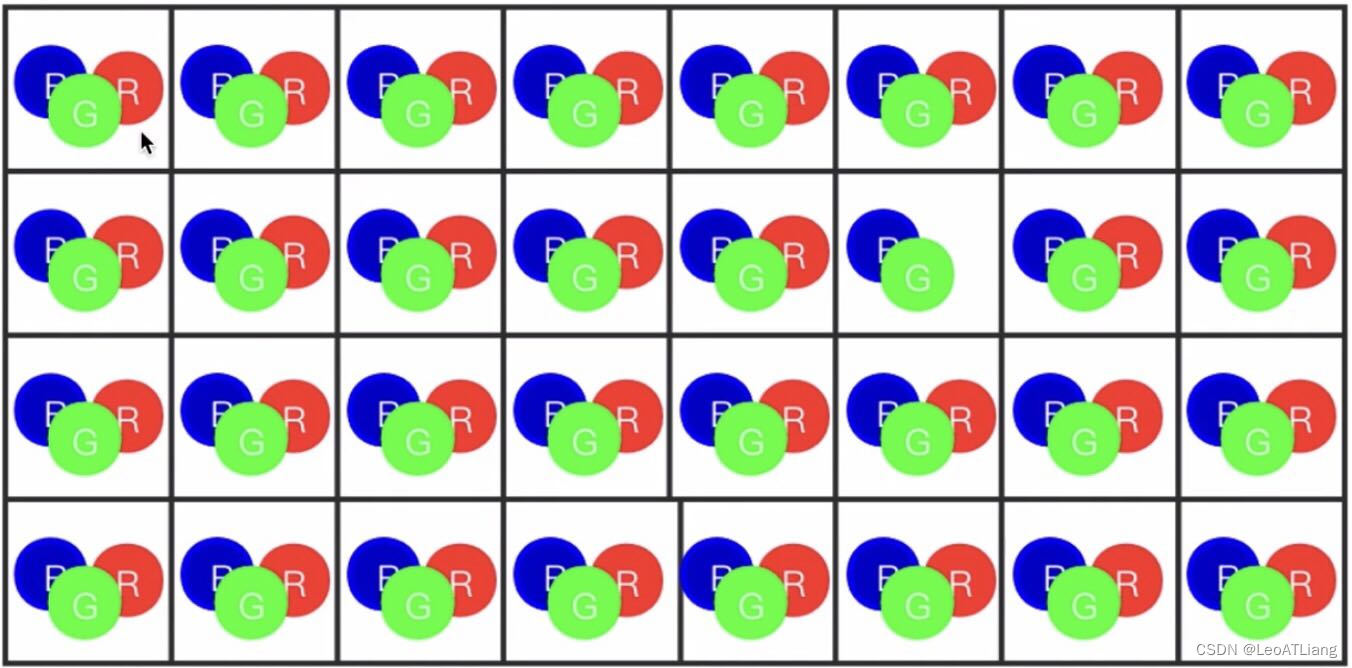
Be careful when displaying pictures适配图片color space and 显示环境的色彩空间.
比如传入的图片是BGR色彩空间,显示环境是RGB色彩空间,就会出现颜色混乱的情况.
1.2 HSV、HSL 和 YUV
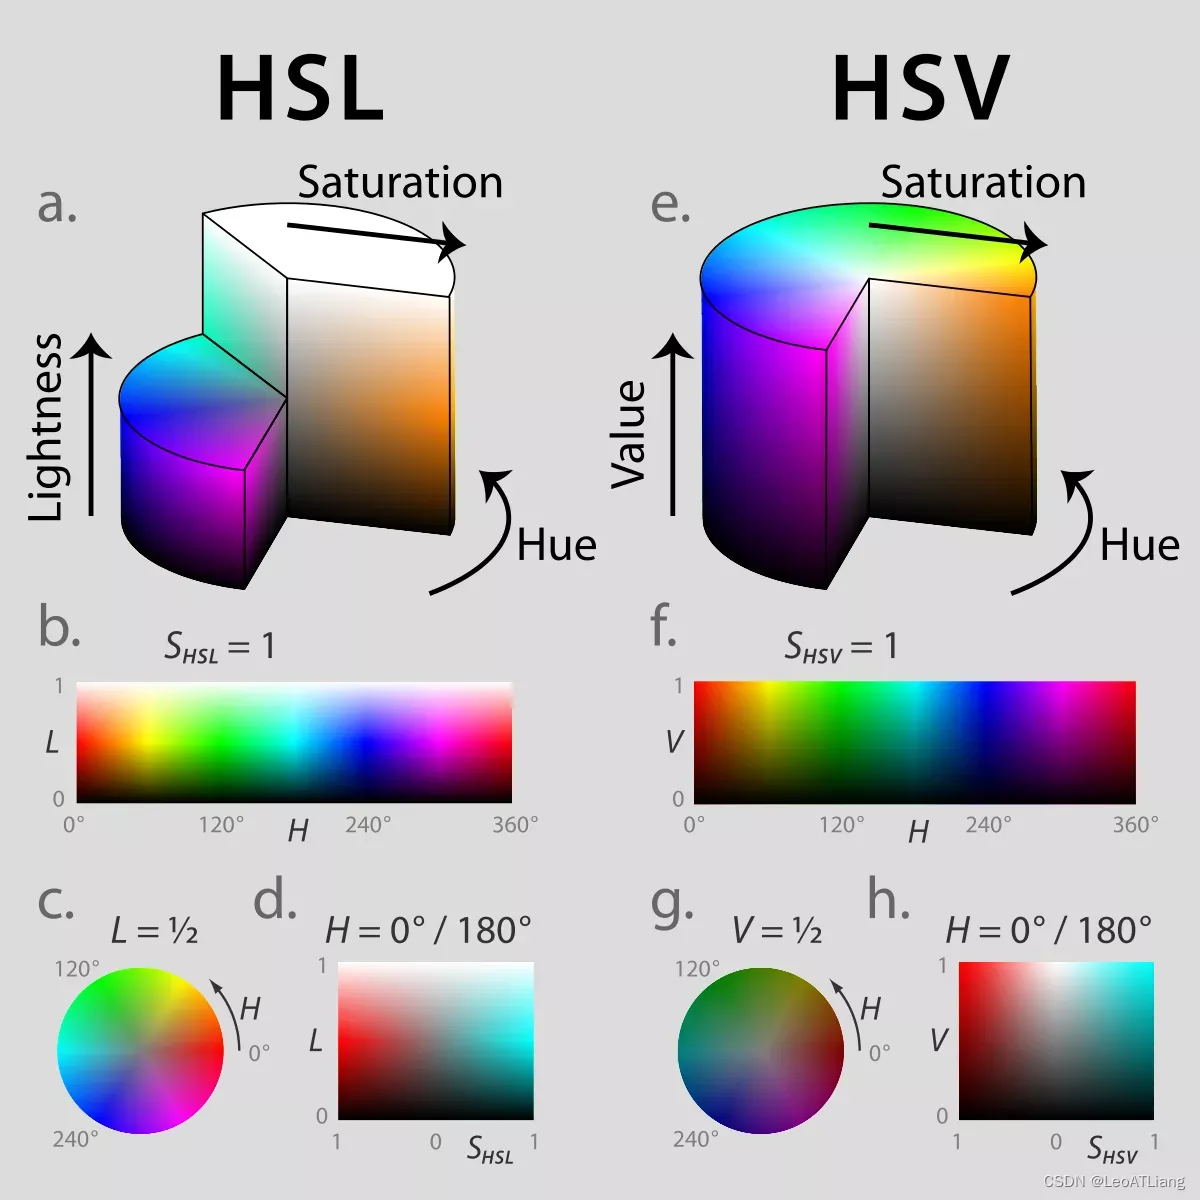
1、HSV(HSB)
- Hue:色相,即色彩,如红色、绿色、蓝色.
- 用角度度量,取值范围为0°~360°,从红色开始按逆时针方向计算,红色为0°,绿色为120°,蓝色为240°.
- 它们的补色是:黄色为60°,青色为180°,紫色为300°.
- Saturation:饱和度,表示颜色接近光谱色的程度.
- 一种颜色,可以看成是某种光谱色与白色混合的结果.
- 其中光谱色所占的比例愈大,颜色接近光谱色的程度就愈高,颜色的饱和度也就愈高.
- 饱和度高,颜色则深而艳.
- 光谱色的白光成分为0,饱和度达到最高.
- 通常取值范围为0%~100%,值越大,颜色越饱和.
- 一种颜色,可以看成是某种光谱色与白色混合的结果.
- Value(Brightness):明度,表示颜色明亮的程度.
- 对于光源色,明度值与发光体的光亮度有关;
- 对于物体色,This value is related to the transmittance or reflectance of the object.
- 通常取值范围为0%(黑)~100%(白).
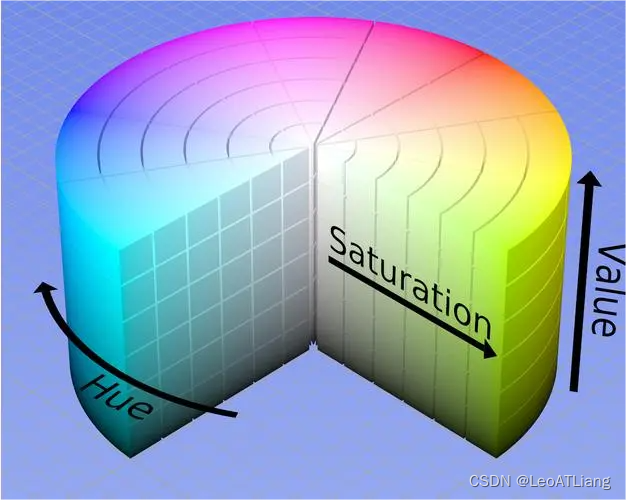
OpenCV用的最多的色彩空间是HSV.
2、HSL
HUE:色相,色彩的基本属性,就是平常所说的颜色名称.如红色、黄色等.
Saturation:色彩的纯度,越高色彩越纯,低则逐渐变灰,取0%~100%的数值.
Lightness:亮度,取0%~100%
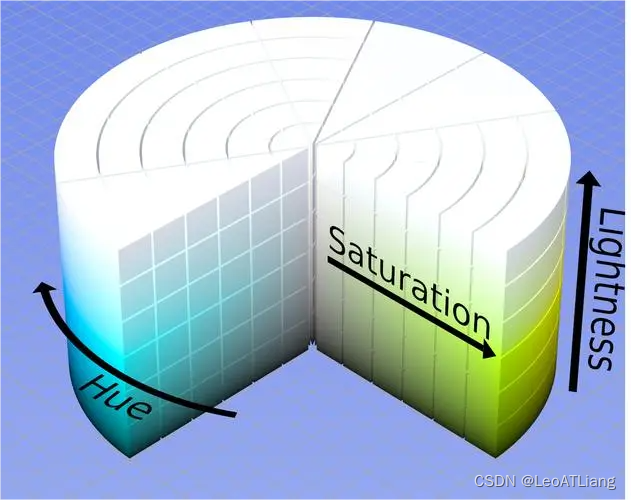
3、HSV 和 HSL 的区别:
4、YUV
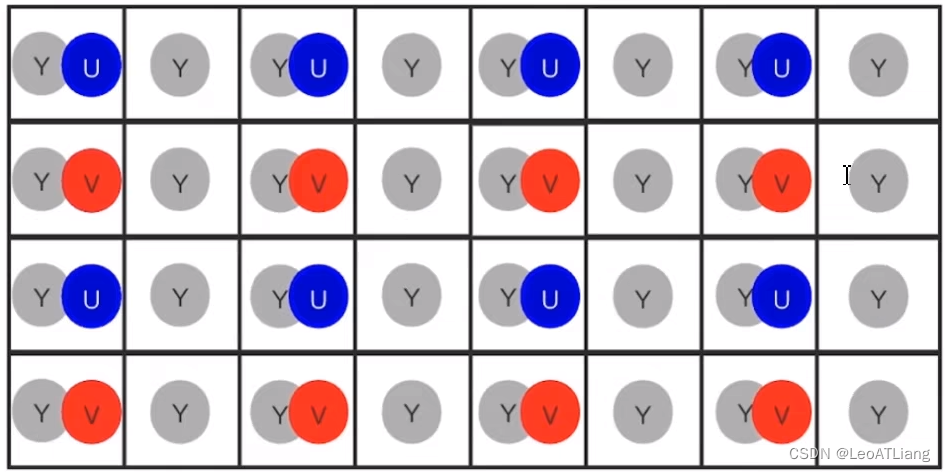
YUV,是一种颜色编码方法.常使用在各个视频处理组件中. YUV在对照片或视频编码时,考虑到人类的感知能力,允许降低色度的带宽.
“Y”表示明亮度(Luminance或Luma),也就是灰阶值,“U”和“V”表示的则是色度(Chrominance或Chroma),作用是描述影像色彩及饱和度,用于指定像素的颜色.
YUV的发明是由于彩色电视与黑白电视的过渡时期.
黑白视频只有Y(Luma,Luminance)视频,也就是灰阶值.到了彩色电视规格的制定,是以YUV/YIQ的格式来处理彩色电视图像,把UV视作表示彩度的C(Chrominance或Chroma),如果忽略C信号,那么剩下的Y(Luma)信号就跟之前的黑白电视频号相同,这样一来便解决彩色电视机与黑白电视机的兼容问题.
YUV最大的优点在于只需占用极少的带宽.
为节省带宽起见,大多数YUV格式平均使用的每像素位数都少于24位.主要的抽样(subsample)格式有YCbCr4:2:0、YCbCr4:2:2、YCbCr4:1:1和YCbCr4:4:4.YUV的表示法称为A:B:C表示法:
- 4:4:4表示完全取样.
- 4:2:2表示2:1的水平取样,垂直完全采样.
- 4:2:0表示2:1的水平取样,垂直2:1采样.
- 4:1:1表示4:1的水平取样,垂直完全采样.
1.3 色彩空间的转换
1.3.1 cvtColor() 颜色转换
cvtColor()用法:
cv2.cvtColor(img, colorspace)
参数说明:
- img:需要转换的图像
- colorspace:What format to convert the image to
cv2.COLOR_BGR2RGBA是将BGR格式转换为RGBA格式
1.3.2 代码实现
import cv2

def callback(value):
    print(value)

cv2.namedWindow('color', cv2.WINDOW_NORMAL)
cv2.resizeWindow('color', 640, 480)

# OpenCV读取的图像默认是BGR的色彩空间
img = cv2.imread('../resource/dog.jpg')

# Defines a list of color space conversions 2 = to
color_spaces = [
    cv2.COLOR_BGR2RGBA, cv2.COLOR_BGR2BGRA,
    cv2.COLOR_BGR2GRAY, cv2.COLOR_BGR2HSV,
    cv2.COLOR_BGR2YUV
]

# 创建Trackbar
cv2.createTrackbar('trackbar', 'color', 0, 4, callback)

while True:
    # 获取当前Trackbar值
    index = cv2.getTrackbarPos('trackbar', 'color')

    # 颜色空间转换API
    cvt_img = cv2.cvtColor(img, color_spaces[index])

    cv2.imshow('color', cvt_img)

    key = cv2.waitKey(10)
    if key & 0xFF == ord('q'):
        break

cv2.destroyAllWindows()
2、Numpy 基本操作
Numpy是一个经高度优化的Python数值库.OpenCV中用到的矩阵都要转换成Numpy数组,然后再进行后续操作.
在使用Numpywhen performing basic operations,都需要导入Numpy库,即import numpy as np.
2.1 创建矩阵
1、创建数组 array()
- 一维数组
a = np.array([1, 2, 3])
- 二维数组
b = np.array([[1, 3, 5], [2, 4, 6]])
2、创建全 0 / 1 数组 zeros() / ones()
zeros()用法:
c = np.zeros((480, 640, 3), np.uint8)
参数说明:
- (480, 640, 3):(行的个数, 列的个数, 通道数/层数)
- np.uint8:矩阵中的数据类型
实例1:4 * 4 * 3(方便演示)
c = np.zeros((4, 4, 3), np.uint8)
print(c)
[[[0 0 0]
  [0 0 0]
  [0 0 0]
  [0 0 0]]

 [[0 0 0]
  [0 0 0]
  [0 0 0]
  [0 0 0]]

 [[0 0 0]
  [0 0 0]
  [0 0 0]
  [0 0 0]]

 [[0 0 0]
  [0 0 0]
  [0 0 0]
  [0 0 0]]]
实例2:4 * 4(The number of channels may not be specified/层数,即默认1通道/层)
c = np.zeros((4, 4), np.uint8)
print(c)
[[0 0 0 0]
 [0 0 0 0]
 [0 0 0 0]
 [0 0 0 0]]
ones()用法:
d = np.ones((480, 640, 3), np.uint8)
ones() 用法和 zeros() 用法基本一致,其主要区别是:ones() The created array values are all 1 ,而 zeros() The created arrays are all 0 .
3、创建全值数组 full()
full()用法:
e = np.full((480, 640, 3), 255, np.uint8)
参数说明:
- (480, 640, 3):(行的个数, 列的个数, 通道数/层数)
- 255:表示每个元素的数值
- np.uint8:矩阵中的数据类型
实例1:
e = np.full((4, 4, 3), 255, np.uint8)
print(e)
[[[255 255 255]
  [255 255 255]
  [255 255 255]
  [255 255 255]]

 [[255 255 255]
  [255 255 255]
  [255 255 255]
  [255 255 255]]

 [[255 255 255]
  [255 255 255]
  [255 255 255]
  [255 255 255]]

 [[255 255 255]
  [255 255 255]
  [255 255 255]
  [255 255 255]]]
实例2:Of course, the number of channels may not be specified/层数
e = np.full((4, 4), 255, np.uint8)
print(e)
[[255 255 255 255]
 [255 255 255 255]
 [255 255 255 255]
 [255 255 255 255]]
4、创建单元数组 identity() / eye()
identity()用法:
f = np.identity(3)
参数说明:
- 3:表示几维数组,即 3 * 3(3行3列)
- The main diagonal is1,其它是0
实例1:3 * 3
f = np.identity(3)
print(f)
[[1. 0. 0.]
 [0. 1. 0.]
 [0. 0. 1.]]
实例2:5 * 5
f = np.identity(5)
print(f)
[[1. 0. 0. 0. 0.]
 [0. 1. 0. 0. 0.]
 [0. 0. 1. 0. 0.]
 [0. 0. 0. 1. 0.]
 [0. 0. 0. 0. 1.]]
eye()用法:
g = np.eye(3, 5, k=3)
参数说明:
- (3, 5):3行5列
- k=3:从下标为3The starting diagonal is 1,其它为0(下标0,1,2,3,…)
实例1:
g = np.eye(3, 5, k=3)
print(g)
[[0. 0. 0. 1. 0.]
 [0. 0. 0. 0. 1.]
 [0. 0. 0. 0. 0.]]
实例2:如果不指定k或者k为0,The default is to start with one(下标为0)That is, the main diagonal assignment1,其它为0.
g = np.eye(3, 5)
h = np.eye(3, 5, 0)
print(g)
print(h)
[[1. 0. 0. 0. 0.]
 [0. 1. 0. 0. 0.]
 [0. 0. 1. 0. 0.]]
# 效果一样
[[1. 0. 0. 0. 0.]
 [0. 1. 0. 0. 0.]
 [0. 0. 1. 0. 0.]]
2.2 检索与赋值[y, x] / [y, x, channel]
1、检索
- [y, x]
img = np.zeros((480, 640, 3), np.uint8)
print(img[100, 100])
[0 0 0]
- [y, x, channel]
img = np.zeros((480, 640, 3), np.uint8)
print(img[100, 100, 0])
0
channelUsed to specify the number of channels,由于OpenCV默认是BGR三通道,所以取值0,1,2
2、赋值
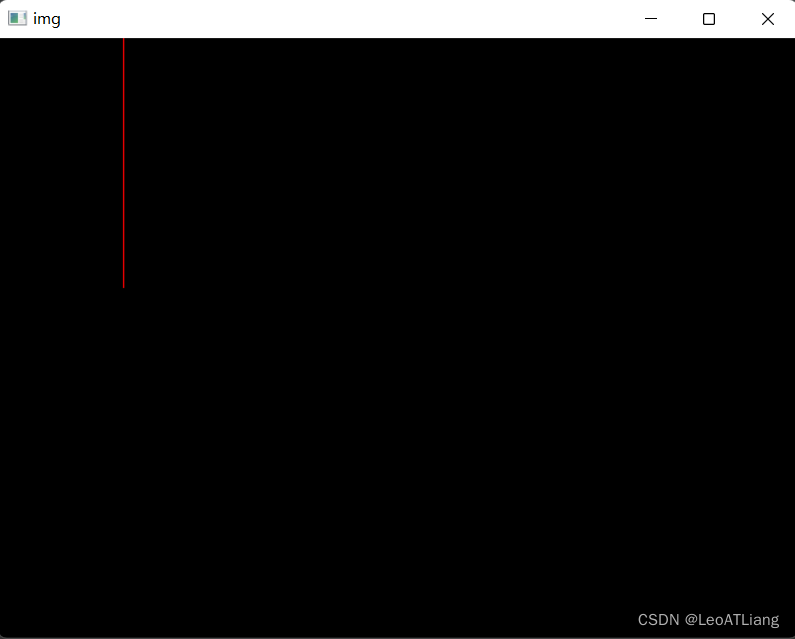
实例1:img[y, x] = 255
img[count, 100] = 255
不指定channel,默认白色.
实例2:img[y, x] = [B, G, R]
通道组合 [B, G, R] Generally only need to master the following:
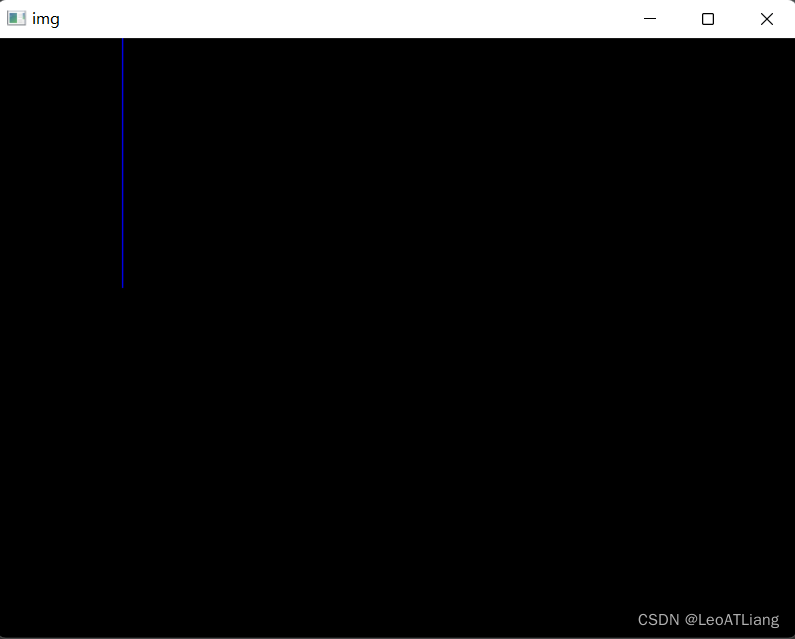
- [255, 0, 0]:蓝色通道(B)
- [0, 255, 0]:绿色通道(G)
- [0, 0, 255]:红色通道
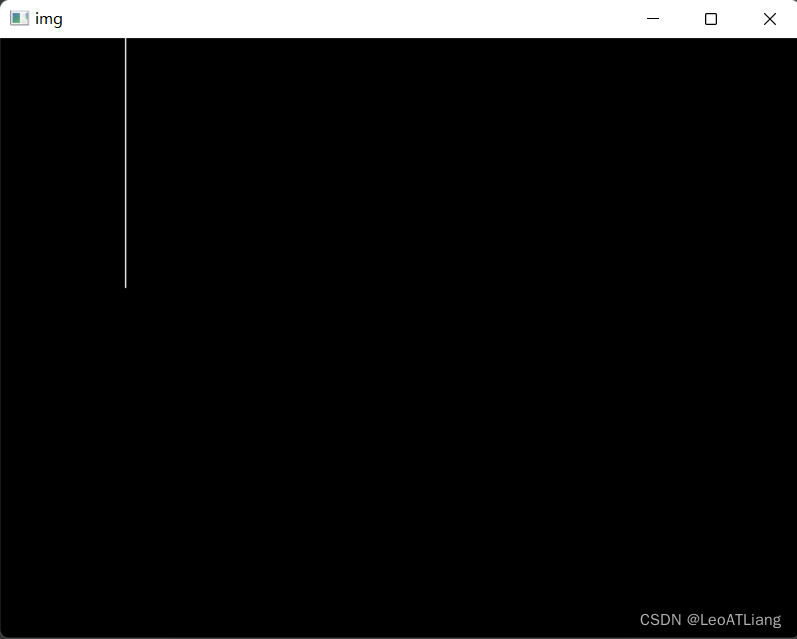
- [255, 255, 255]:白色(混合)
img[count, 100] = [0, 0, 255]
img[count, 100] = [255, 255, 255]
实例3:img[y, x, channel] = 255
OpenCV默认是BGR三通道,所以channel可以取0、1或2,即:
- channel = 0:蓝色通道(B)
- channel = 1:绿色通道(G)
- channel = 2:红色通道
img[count, 100, 0] = 255
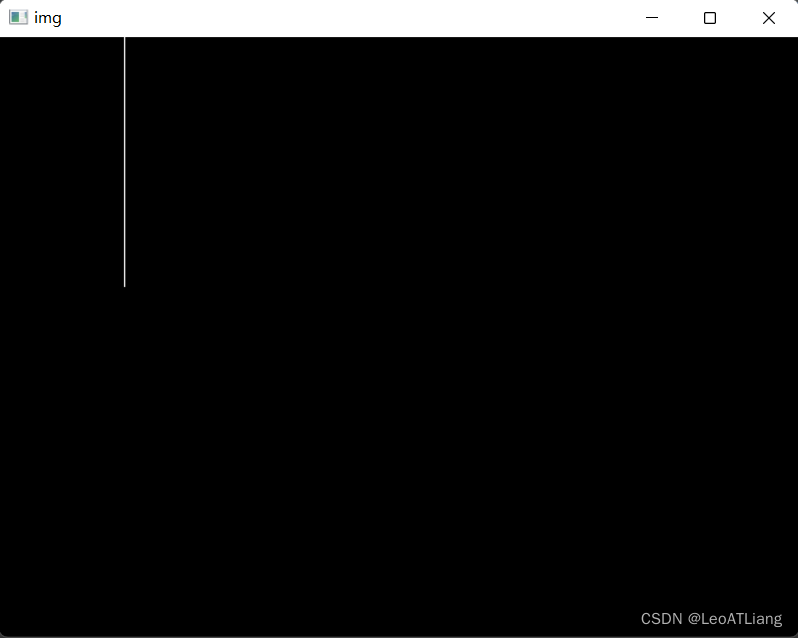
代码实现(完整)
import cv2
import numpy as np

img = np.zeros((480, 640, 3), np.uint8)

# Read the value of an element from a matrix
print(img[100, 100])
print(img[100, 100, 1])

count = 0

# Assign a value to an element in a matrix
while count < 200:
    # img[count, 100] = 255
    # img[count, 100, 0] = 255
    img[count, 100] = [255, 255, 255]
    count += 1

cv2.imshow('img', img)
cv2.waitKey(0)
cv2.destroyAllWindows()
2.3 获取子矩阵[:, :]
1、[y1: y2, x1: x2]获取像素点x1~x2,y1~y2的区域.
2、[:, :] 或 [:] Get all pixels.
import cv2
import numpy as np
img = np.zeros((480, 640, 3), np.uint8)
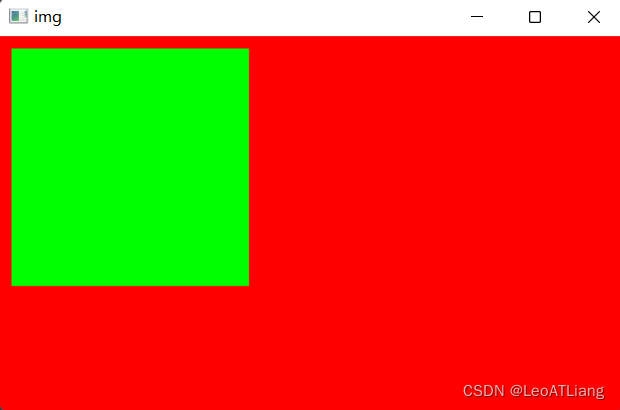
roi = img[100:400, 100:600]
# roi[:, :] = [0, 0, 255]
roi[:] = [0, 0, 255]
roi[10:200, 10:200] = [0, 255, 0]
cv2.imshow('img', roi)
cv2.waitKey(0)
cv2.destroyAllWindows()
3、OpenCV 的重要数据结构—Mat
3.1 Mat 介绍
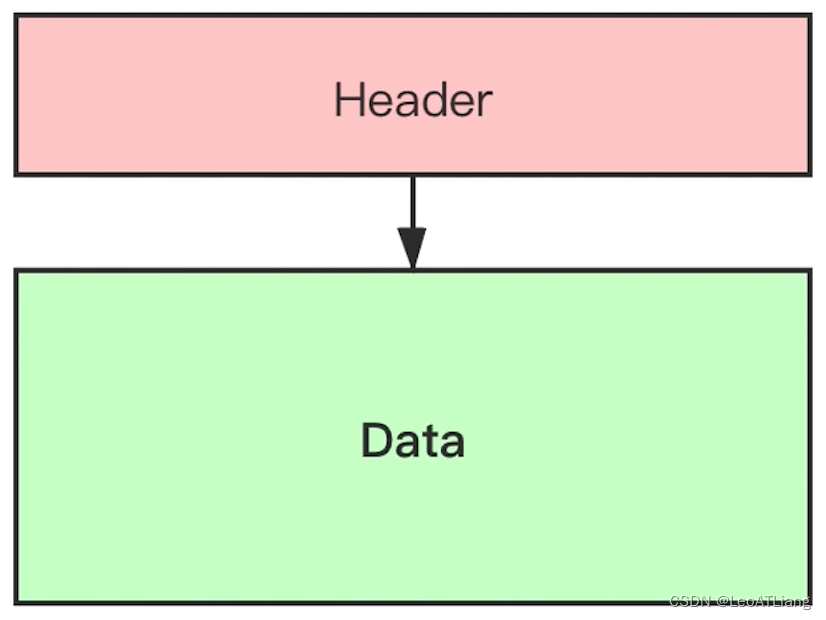
Mat是OpenCV在 C++ 语言中用来表示图像数据的一种数据结构,在 Python 中转换为numpy的ndarray.
- Mat由header和data组成,header中记录了图片的维数、Data such as size and data type.
- Mat在C++中的原型:
class CV_EXPORTS Mat{
    public:
    ...
    int dims; //维数
    int rows, cols; //行、列数
    uchar *data; //存储数据的指针
    int *refcount; //引用计数
    ...
};
- Mat属性
| 字段 | 说明 | 字段 | 说明 |
|---|---|---|---|
| dims | 维度 | channels | 通道数 RGB是3 |
| rows | 行数 | size | 矩阵大小 |
| cols | 列数 | type | dep + dt + chs CV_8UC3 |
| depth | 像素的位深 | data | 存放数据 |
3.2 Mat 拷贝
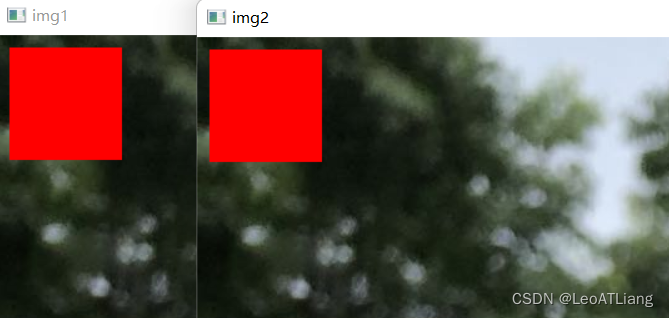
MatThe default is shallow copy when copying,只拷贝Header中的内容,数据不变.

1、Mat浅拷贝
Mat A
A = imread(file, IMREAD_COLOR)
Mat B(A)
B 与 A 的 Header 不同,但指向的数据相同,如下代码:
img1 = cv2.imread('../resource/cold.jpg', cv2.IMREAD_COLOR)
img2 = img1
img1[10:100, 10:100] = [0, 0, 255]
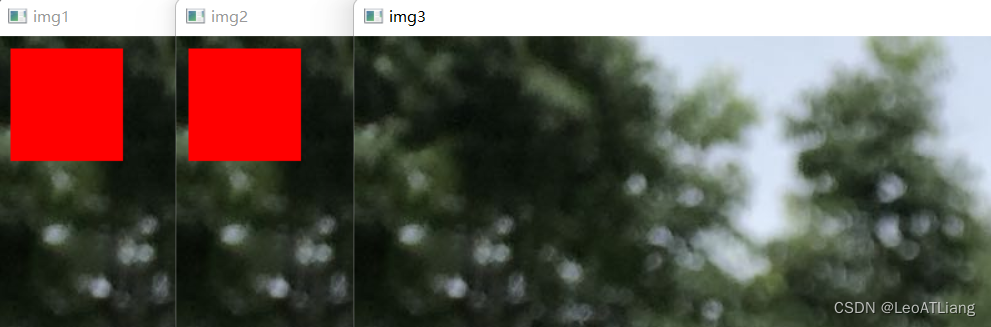
2、Mat深拷贝
C++中实现方式有两种:
cv::Mat::clone()
cv::Mat::copyTo()
将 Data 也重新赋值一份,A 与 B 完全切断.
在Python中:
img3 = img1.copy()
进行深拷贝后,The original image is not affected during image processing.
img1 = cv2.imread('../resource/cold.jpg', cv2.IMREAD_COLOR)
img3 = img1.copy()
img1[10:100, 10:100] = [0, 0, 255]

3.3 代码实现
import cv2

img1 = cv2.imread('../resource/cold.jpg', cv2.IMREAD_COLOR)

# 浅拷贝
img2 = img1
# 深拷贝
img3 = img1.copy()

img1[10:100, 10:100] = [0, 0, 255]

cv2.imshow('img1', img1)
cv2.imshow('img2', img2)
cv2.imshow('img3', img3)
cv2.waitKey(0)
cv2.destroyAllWindows()
3.4 访问图像(Mat)的属性
import cv2

img = cv2.imread('../resource/structure.jpg', cv2.IMREAD_COLOR)
方便演示!
1、img.shape用法:
shape 中包含三个信息:高度、宽度和通道数.
print(img.shape)
(3000, 4500, 3)
i.e. the image(高:3000,宽:4500,通道数:3).
2、img.size用法:
size i.e. the image takes up space = 高度 * 宽度 * 通道数 .
print(img.size)
40500000
3000 * 4500 * 3 = 40500000
3、img.dtype用法:
dtype Represents each element in the image位深.
print(img.dtype)
uint8
uint8 表示 8位无符号整型(0~255).
3.5 通道分离与合并
1、split(mat): 分离
import cv2
import numpy as np

img = np.zeros((480, 640, 3), np.uint8)

b, g, r = cv2.split(img)

b[10:100, 10:100] = 255
g[10:100, 10:100] = 255

cv2.imshow('img', img)
cv2.imshow('b', b)
cv2.imshow('g', g)

cv2.waitKey(0)
cv2.destroyAllWindows()

2、merge((ch1, ch2, ...)): 合并
import cv2
import numpy as np

img = np.zeros((480, 640, 3), np.uint8)

b, g, r = cv2.split(img)

b[10:100, 10:100] = 255
g[10:100, 10:100] = 255

img_merge = cv2.merge((b, g, r))

cv2.imshow('img', img)
cv2.imshow('b', b)
cv2.imshow('g', g)
cv2.imshow('img_merge', img_merge)

cv2.waitKey(0)
cv2.destroyAllWindows()

边栏推荐
- 开篇-开启全新的.NET现代应用开发体验
- C语言日记 9 if的3种语句
- fragment可见性判断
- Pisanix v0.2.0 发布|新增动态读写分离支持
- STM32使用stm32cubemx LL库系列教程
- Understand the recommendation system in one article: Recall 06: Two-tower model - model structure, training method, the recall model is a late fusion feature, and the sorting model is an early fusion
- 蚁剑高级模块开发
- 进程在用户态和内核态的区别[独家解析]
- MySQL learning
- “配置”是把双刃剑,带你了解各种配置方法
猜你喜欢

"Dilili, wait for the lights, wait for the lights", the prompt sound for safe production in the factory
Xunrui cms website cannot be displayed normally after relocation and server change

Pisanix v0.2.0 released | Added support for dynamic read-write separation
nodeJs--封装路由

直播回放含 PPT 下载|基于 Flink & DeepRec 构建 Online Deep Learning

LPQ(局部相位量化)学习笔记
“嘀哩哩,等灯等灯”,工厂安全生产的提示音
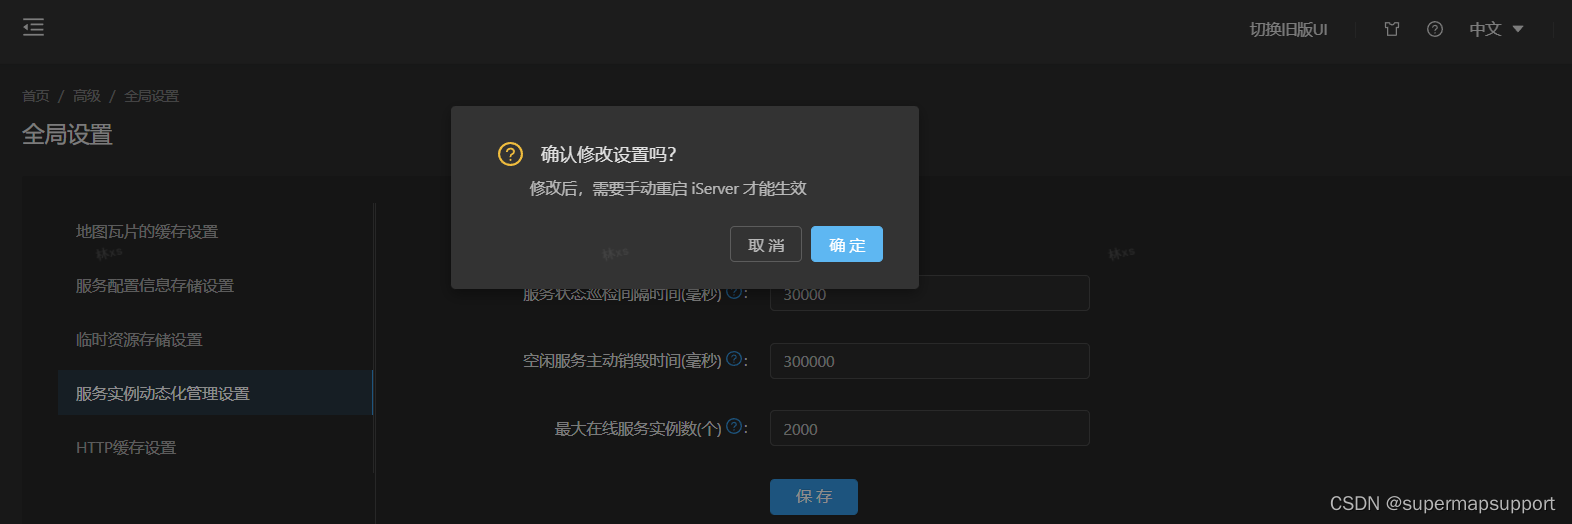
海量服务实例动态化管理
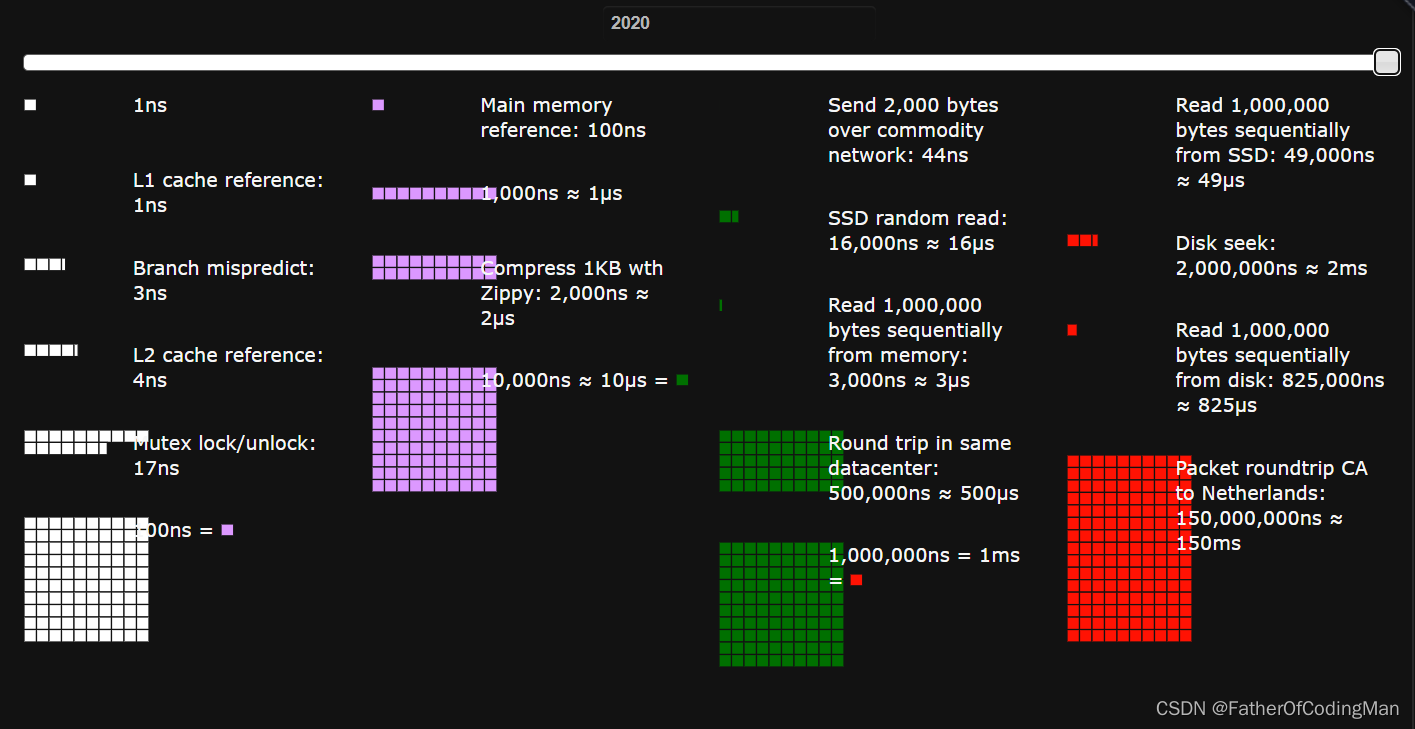
常见的硬件延迟
![Chapter 09 Use of Performance Analysis Tools [2. Index and Tuning] [MySQL Advanced]](/img/e7/61863c356e4c7bb03ba27865ee7be0.png)
Chapter 09 Use of Performance Analysis Tools [2. Index and Tuning] [MySQL Advanced]
随机推荐
The 2022 EdgeX China Challenge will be grandly opened on August 3
【genius_platform软件平台开发】第七十六讲:vs预处理器定义的牛逼写法!!!!(其他组牛逼conding人员告知这么配置来取消宏定义)
hypervisor相关的知识点
[Endnote] Word inserts a custom form of Endnote document format
PHP技能评测
The difference between a process in user mode and kernel mode [exclusive analysis]
Short domain name bypass and xss related knowledge
[ROS](10)ROS通信 —— 服务(Service)通信
关于#sql shell#的问题,如何解决?
leetcode 15
Greenplum Database Fault Analysis - Can a Soft Connection Be Made to the Database Base Folder?
Log an error encountered when compiling google gn "I could not find a ".gn" file ..."
KingbaseES V8 GIS data migration solution (2. Introduction to the capabilities of Kingbase GIS)
.Net C# Console Create a window using Win32 API
Unleashing the engine of technological innovation, Intel joins hands with ecological partners to promote the vigorous development of smart retail
CPDA|运营人如何从负基础学会数据分析(SQL)
特殊矩阵的压缩存储
转:查尔斯·汉迪:你是谁,比你做什么更重要
开篇-开启全新的.NET现代应用开发体验
Amazon Cloud Technology joins hands with Thundersoft to build an AIoT platform for industry customers