当前位置:网站首页>【数字IC验证快速入门】6、Questasim 快速上手使用(以全加器设计与验证为例)
【数字IC验证快速入门】6、Questasim 快速上手使用(以全加器设计与验证为例)
2022-07-05 20:06:00 【luoganttcc】
导读:作者有幸在中国电子信息领域的排头兵院校“电子科技大学”攻读研究生期间,接触到前沿的数字IC验证知识,旁听到诸如华为海思、清华紫光、联发科技等业界顶尖集成电路相关企业面授课程,对数字IC验证有了一些知识积累和学习心得。为帮助想入门前端IC验证的朋友,思忱一二后,特开此专栏,以期花最短的时间,走最少的弯路,学最多的IC验证技术知识。
文章目录
前言
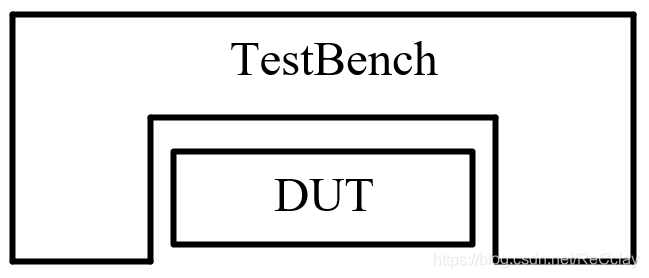
QuestaSim 是 Mentor 公司升级版本的 ModelSim,工业界与之对标的EDA厂商工具有:Cadence 公司的 NC-Sim,Synopsys 公司的 VCS。在工业界做芯片验证用的较多的工具是 VCS,它较其他两款工具性能有着不可比拟的优势,尤其是大规模集成电路的场景。但是 QuestaSim 较 VCS 的 License 费用更便宜,同时对资源消耗也较少,一般用在小规模集成电路开发中!如FPGA验证中,常用的就是 QuestaSim 。FPGA 的验证场景较简单,一般都是用 Verilog 直接搭建的 TestBench (flatten,不带 hierarchy),这种验证场景我们通常将其称之为 VTB。而ASIC验证中是需要使用 SystemVerilog 以及 UVM 方法学,来搭建层次化的验证环境,这种验证场景我们通常将其称之为 SVTB。
一、QuestaSim 安装
1.1、Windows 下安装
- 安装包及安装指南可到<这里>获取…(提取码:s7nh)
1.2、Linux 下安装
- 安装较困难,可找博主分享搭建好的虚拟机…
二、QuestaSim 使用
注:无论是在Linux下还是windows下,QuestaSim 的基本操作方法都是一样的!
本节将以一个全加器demo,来实现 Questasim 快速上手使用。
总体流程可总结为:
- 建立库 library
- 建立工程 project
- (编写)添加仿真文件
- 编译 compile
- 仿真 simulate
- 运行 run
2.1、QuestaSim 启动
- Linux下,在 Terminal 中输入
vsim &即可在后台启动 QuestaSim。
注:
&表示后台运行vsim命令,不占用当前的terminal。
- windows下,直接双击启动图标即可启动!
2.x、关闭工程
这里顺带提一句,每次打开Questasim会默认保留上一次的工程,如何关闭呢?
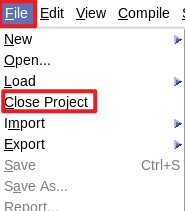
- 依次点击:
File -> Close Project
在弹出窗口选择
Yes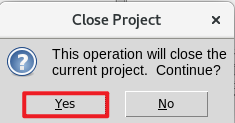
同时在
Library栏中找到work,右击选择Delete进行删除!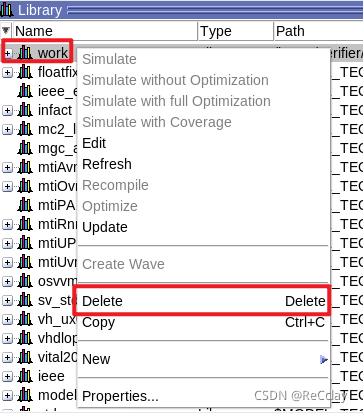
在弹出的对话框选择
Yes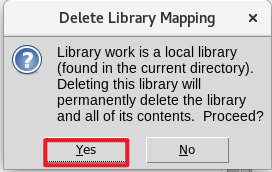
2.2、新建工程(GUI方式)
2.2.1、建立 Library
每一个工程都对应有一个库,Verilog或SystemVerilog等源文件编译后,会将编译的结果存放到对应的库中,进而才能在进行仿真的时候从库中调用编译的结果。
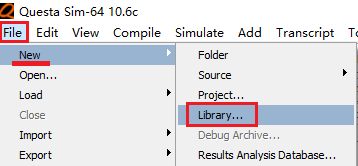
建立库的方法:File -> New -> Library
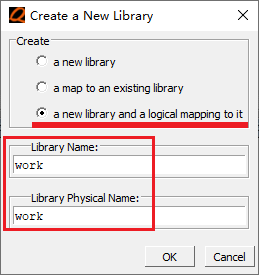
一般库的名字默认为work即可
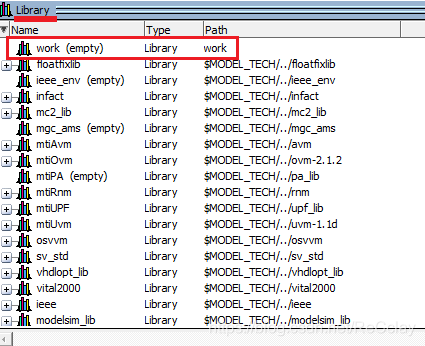
之后在主界面的Library界面可以看到新建的work库,后续跑仿真的一些依赖库都会放在这个里面,而其他库是工具运行默认自带的库,可不去深究。
2.2.2、建立工程
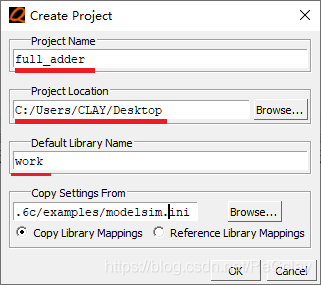
工程的建立方法:File -> New -> Project
Project Name可以任意,这里我设置为full_adderProjectLocation可以任意,这里我设置为C:/Users/CLAY/Desktop,即我的windows桌面。Default Library Name要与上一节建立的Library名字work一致,不然会找不到Library!
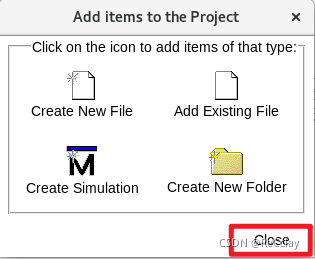
接着弹出Add items to the project,我们先选择Close,后面DUT和TB源文件编写完成后再添加!
2.2.3、编写DUT和TestBench
DUT:full_adder.v
module full_adder( input wire a_in, input wire b_in, input wire c_in, output wire sum_out, output wire c_out );//方法一:门级描述<span class="token punctuation">(</span>真值表和逻辑表达式描述<span class="token punctuation">)</span> assign sum_out <span class="token operator">=</span> a_in ^ b_in ^ c_in<span class="token punctuation">;</span> assign c_out <span class="token operator">=</span> <span class="token punctuation">(</span>a_in <span class="token operator">&</span> b_in<span class="token punctuation">)</span> <span class="token operator">|</span> <span class="token punctuation">(</span>b_in <span class="token operator">&</span> c_in<span class="token punctuation">)</span> <span class="token operator">|</span> <span class="token punctuation">(</span>a_in <span class="token operator">&</span> c_in<span class="token punctuation">)</span><span class="token punctuation">;</span> /* //方法二:RTL级描述<span class="token punctuation">(</span>assign连续赋值语句 c_out 和 sum_out是wire型<span class="token punctuation">)</span> assign <span class="token punctuation">{<!-- --></span>c_out, sum_out<span class="token punctuation">}</span> <span class="token operator">=</span> a_in + b_in + c_in<span class="token punctuation">;</span>*/ /* //方法三:RTL级描述<span class="token punctuation">(</span>always块 c_out 和 sum_out是reg型<span class="token punctuation">)</span> reg c_o, sum_o<span class="token punctuation">;</span> always @<span class="token punctuation">(</span><span class="token punctuation">)</span> begin <span class="token punctuation">{<!-- --></span>c_o, sum_o<span class="token punctuation">}</span> <span class="token operator">=</span> a_in + b_in + c_in<span class="token punctuation">;</span> end assign <span class="token punctuation">{<!-- --></span>c_out, sum_out<span class="token punctuation">}</span> <span class="token operator">=</span> <span class="token punctuation">{<!-- --></span>c_o, sum_o<span class="token punctuation">}</span><span class="token punctuation">;</span>*/
endmodule
- 1
- 2
- 3
- 4
- 5
- 6
- 7
- 8
- 9
- 10
- 11
- 12
- 13
- 14
- 15
- 16
- 17
- 18
- 19
- 20
- 21
- 22
- 23
- 24
- 25
- 26
TestBench:full_adder_tb.v
module full_adder_tb; reg ain, bin, cin; wire sumout, cout;//Task1 例化全加器模块 full_adder u_full_adder<span class="token punctuation">(</span> .a_in <span class="token punctuation">(</span>ain <span class="token punctuation">)</span>, .b_in <span class="token punctuation">(</span>bin <span class="token punctuation">)</span>, .c_in <span class="token punctuation">(</span>cin <span class="token punctuation">)</span>, .sum_out<span class="token punctuation">(</span>sumout<span class="token punctuation">)</span>, .c_out <span class="token punctuation">(</span>cout <span class="token punctuation">)</span> <span class="token punctuation">)</span><span class="token punctuation">;</span> //Task2 产生clock/Reset信号 parameter CLK_PERIOD <span class="token operator">=</span> <span class="token number">20</span><span class="token punctuation">;</span> reg clk, reset_n<span class="token punctuation">;</span> initial begin clk <span class="token operator">=</span> <span class="token number">0</span><span class="token punctuation">;</span> forever begin <span class="token comment">#(CLK_PERIOD/2)clk = ~clk;</span> end end initial begin reset_n <span class="token operator">=</span> <span class="token number">0</span><span class="token punctuation">;</span> <span class="token comment">#100</span> reset_n <span class="token operator">=</span> <span class="token number">1</span><span class="token punctuation">;</span> end //Task3 驱动仿真捕捉相应 initial begin <span class="token comment">#110 ain = 0; bin = 0; cin = 0; //00</span> <span class="token comment">#20 ain = 0; bin = 1; cin = 0; //01</span> <span class="token comment">#20 ain = 1; bin = 0; cin = 0; //01</span> <span class="token comment">#20 ain = 1; bin = 1; cin = 0; //10</span> <span class="token comment">#20 ain = 0; bin = 0; cin = 1; //01</span> <span class="token comment">#20 ain = 0; bin = 1; cin = 1; //10</span> <span class="token comment">#20 ain = 1; bin = 0; cin = 1; //10</span> <span class="token comment">#20 ain = 1; bin = 1; cin = 1; //11</span> <span class="token comment">#50 $finish;</span> end //Task4 检查结果 [email protected]<span class="token punctuation">(</span>posedge clk<span class="token punctuation">)</span>begin if<span class="token punctuation">(</span><span class="token operator">!</span>reset_n<span class="token punctuation">)</span> begin <span class="token variable">$display</span><span class="token punctuation">(</span><span class="token string">"%t:%m:resetting ..."</span>, <span class="token variable">$time</span><span class="token punctuation">)</span><span class="token punctuation">;</span>//counter <span class="token number">5</span> clock end <span class="token keyword">else</span> begin <span class="token variable">$display</span><span class="token punctuation">(</span><span class="token string">"%t:%m:resetting finish!"</span>, <span class="token variable">$time</span><span class="token punctuation">)</span><span class="token punctuation">;</span>//the 6th clock end end initial begin <span class="token comment">#115 if({cout,sumout} != 2'b00) $display("Error:{cout,sumout}=%b,ain=%b,bin=%b,cin=%b",{cout,sumout},ain,bin,cin);</span> <span class="token comment">#20 if({cout,sumout} != 2'b01) $display("Error:{cout,sumout}=%b,ain=%b,bin=%b,cin=%b",{cout,sumout},ain,bin,cin);</span> <span class="token comment">#20 if({cout,sumout} != 2'b01) $display("Error:{cout,sumout}=%b,ain=%b,bin=%b,cin=%b",{cout,sumout},ain,bin,cin);</span> <span class="token comment">#20 if({cout,sumout} != 2'b10) $display("Error:{cout,sumout}=%b,ain=%b,bin=%b,cin=%b",{cout,sumout},ain,bin,cin);</span> <span class="token comment">#20 if({cout,sumout} != 2'b01) $display("Error:{cout,sumout}=%b,ain=%b,bin=%b,cin=%b",{cout,sumout},ain,bin,cin);</span> <span class="token comment">#20 if({cout,sumout} != 2'b10) $display("Error:{cout,sumout}=%b,ain=%b,bin=%b,cin=%b",{cout,sumout},ain,bin,cin);</span> <span class="token comment">#20 if({cout,sumout} != 2'b10) $display("Error:{cout,sumout}=%b,ain=%b,bin=%b,cin=%b",{cout,sumout},ain,bin,cin);</span> <span class="token comment">#20 if({cout,sumout} != 2'b11) $display("Error:{cout,sumout}=%b,ain=%b,bin=%b,cin=%b",{cout,sumout},ain,bin,cin);</span> end //Task5 //initial begin // <span class="token variable">$vcdpluson</span><span class="token punctuation">;</span> //end
endmodule
- 1
- 2
- 3
- 4
- 5
- 6
- 7
- 8
- 9
- 10
- 11
- 12
- 13
- 14
- 15
- 16
- 17
- 18
- 19
- 20
- 21
- 22
- 23
- 24
- 25
- 26
- 27
- 28
- 29
- 30
- 31
- 32
- 33
- 34
- 35
- 36
- 37
- 38
- 39
- 40
- 41
- 42
- 43
- 44
- 45
- 46
- 47
- 48
- 49
- 50
- 51
- 52
- 53
- 54
- 55
- 56
- 57
- 58
- 59
- 60
- 61
- 62
- 63
- 64
- 65
- 66
- 67
- 68
- 69
- 70
2.2.4、添加文件
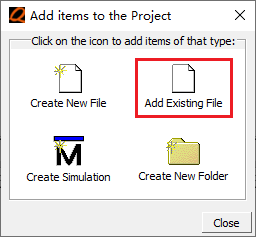
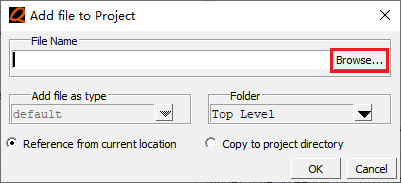
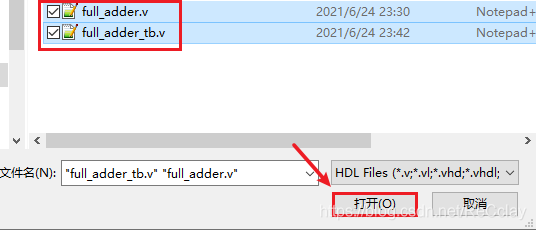
通常我们代码是在GVIM等文本编辑工具中编写,而不在Questasim中编写,编写完毕后会在Questasim中Add Existing File。
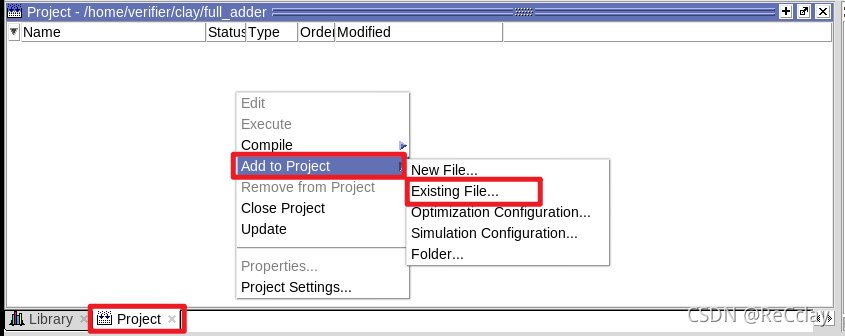
或在Project栏中,右击空白处依次选择Add to Project -> Existing File...
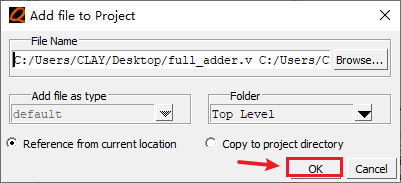
添加完成后,界面如下图

2.2.5、编译文件
选中上述任一文件,然后:右击 -> Compile -> Compile All
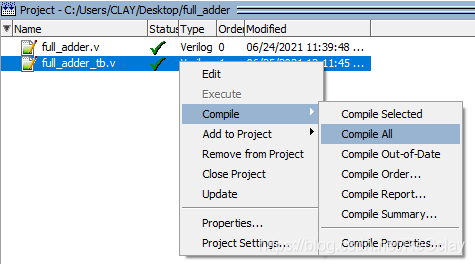
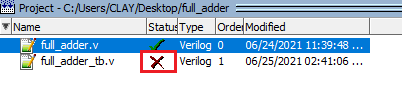
没有错误的话,上图中Status栏会显示√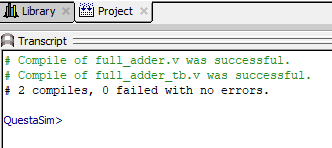
同时,底下的Transcript中会有编译成功的提示信息!
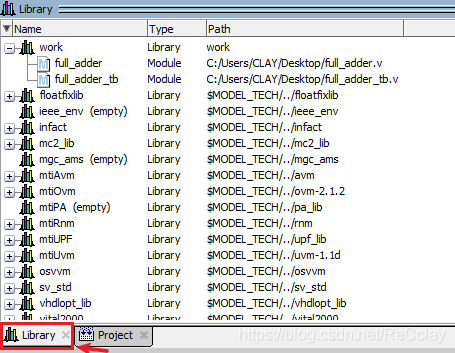
编译成功后可在work对应的Library中查看到full_adder和full_adder_tb这两个,如下图所示
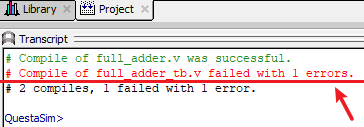
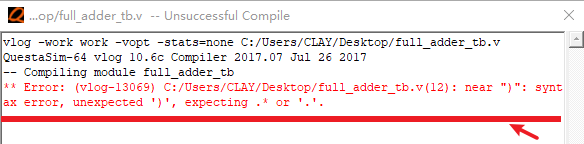
注:如果文件中有语法错误,会提示编译失败的情况,界面如下:
双击上图中的错误信息,即可查看具体错误内容,进而定位到错误发生的位置。
从上图可以看到,错误发生在full_adder_tb.v的12行附近,错误原因是在)后多加了一个,,打开源文件修改后,重新编译,即可消除错误!
2.2.6、仿真
在Library 选项卡中选中TestBench文件full_adder_tb,然后右击,选择Simulate without Optimization。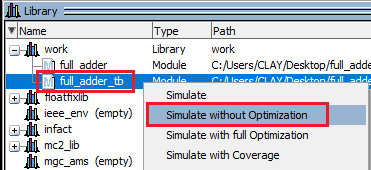
注:Questasim跑的运算量相对不大的逻辑,故上图中的
Simulate without Optimization和Simulate with full Optimization差别不是很大!另外,经测试在Linux上点击
Simulate without Optimization会出现的错误提示,但是点击Simulate不会出现该错误。
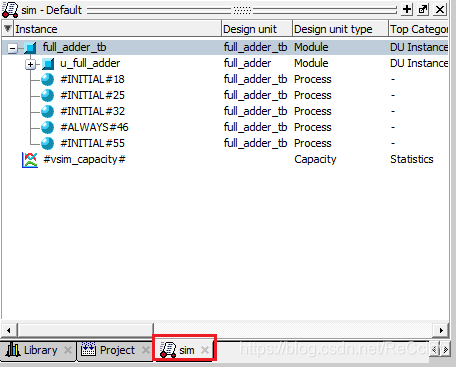
接着可以看到出现了sim选项卡,把跑仿真的hierarchy显示出来!
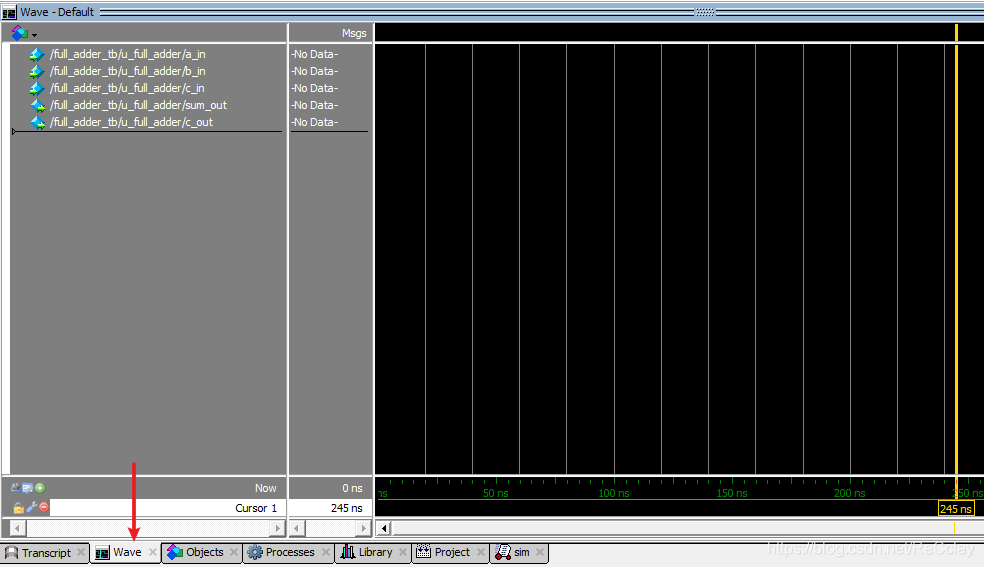
2.2.7、加入信号:TestBench驱动和采样
简单的仿真的话会去看下波形,但是实际正常流程是在TestBench中把激励写好,然后去做自动化的比对,而不是仅仅通过波形去check对应的DUT行为是否正确。波形check一般是在自动化比对不通过时,去调试时使用的,来排查是DUT问题还是TestBench问题。
在sim选项卡找到u_full_adder,然后右击选择Add wave或者快捷键ctrl+w添加波形到wave界面!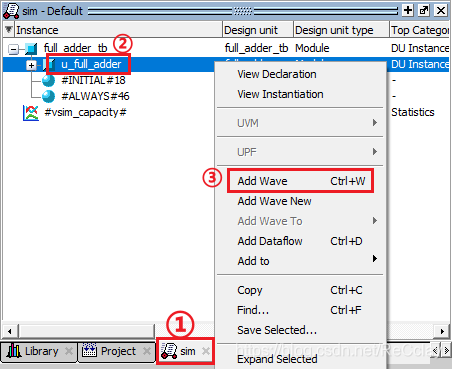
2.2.8、设置仿真时间
设置仿真时间有两种方式:
- 第一种是在
TestBench中设置 - 第二种是在仿真工具
Qestasim中设置
仿真工具中设置仿真时间,有两种方式:①、通过命令行;②、通过图形界面。
- ①、通过命令行的方式操作,只需在
Transcript中输入对应的命令即可。假如这里想要运行200ns,输入run 200ns即可:
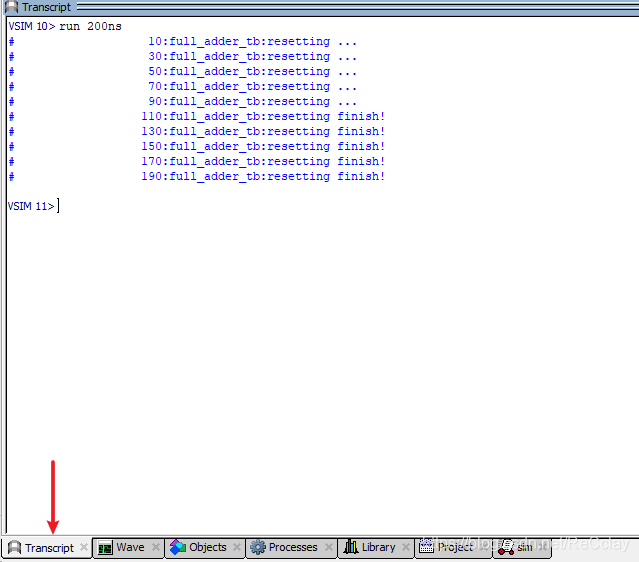
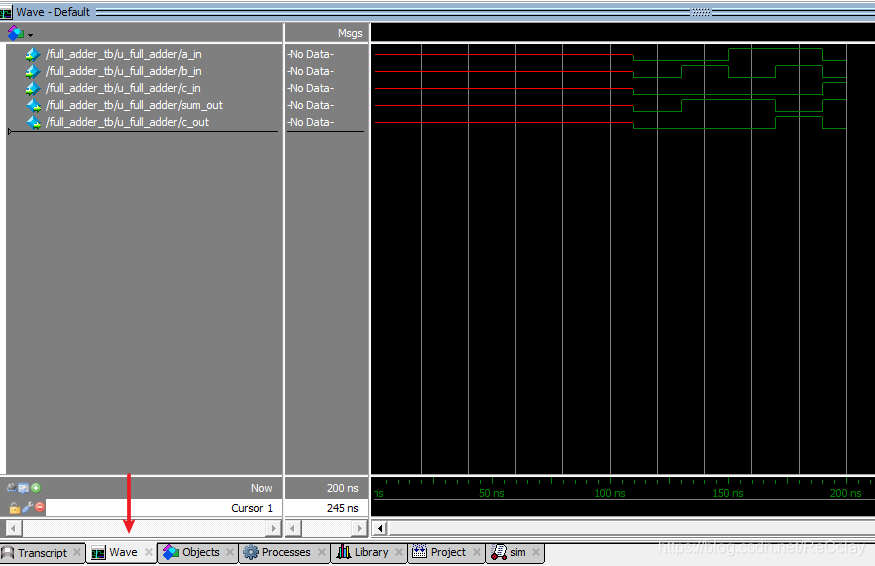
对应的wave界面也会显示出对应的波形:
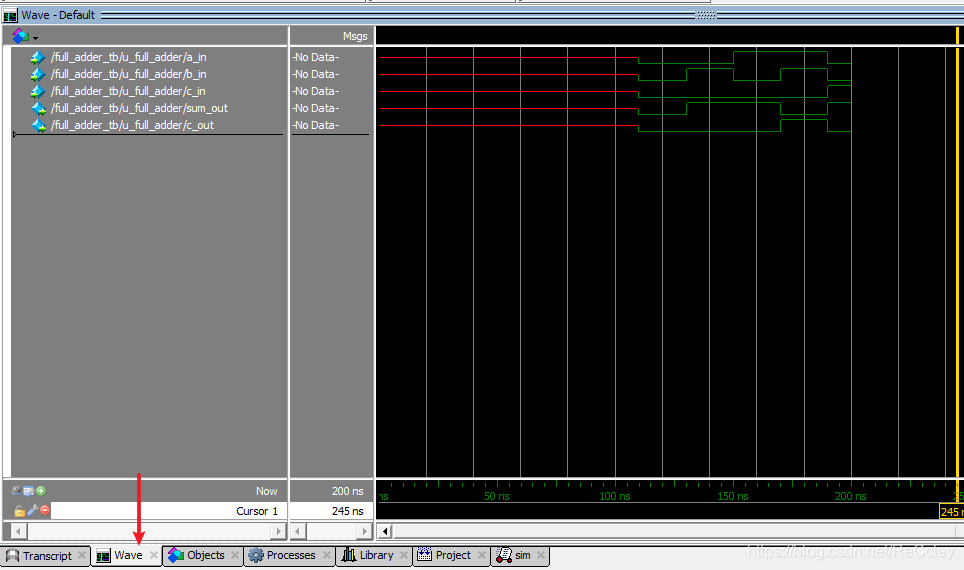
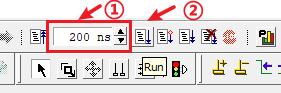
- ②、假如想要通过图形界面的方式在仿真工具中设置仿真时间,可以在工具栏中设置仿真时间
200ns,然后点击run即可!
对应的wave界面也会显示出对应的波形:
2.2.9、验证一个全加器
- 功能
- 真值表
- 验证
- 功能完整性
- 穷举法
- 代码覆盖率
- 实验
- 编译
- 仿真
- 看波形
全加器比较简单,直接验证所有的Pattern即可!
| a_in | b_in | c_in | c_out | sum_out |
|---|---|---|---|---|
| 0 | 0 | 0 | 0 | 0 |
| 0 | 1 | 0 | 0 | 1 |
| 1 | 0 | 0 | 0 | 1 |
| 1 | 1 | 0 | 1 | 0 |
| 0 | 0 | 1 | 0 | 1 |
| 0 | 1 | 1 | 1 | 0 |
| 1 | 0 | 1 | 1 | 0 |
| 1 | 1 | 1 | 1 | 1 |
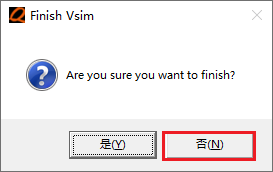
在Transcprit中输入run -all,因为该命令会遇到$finish停止,会弹出是否退出的对话框,这里选择“否”!
在Transcprit中,查看是否有TB中的错误打印信息,若没有说明验证完成!

2.3、新建工程(命令行方式)
注:命令行方式相较于图形界面方式,占用内存更小,运行速度更快!
2.3.1、创建、编译、运行工程
- 新建文件名
Makefile,添加如下内容:- 如果Makefile文件名字不是
Makefile,那么执行的时候需要加上-f参数,然后是Makefile文件名!
- 如果Makefile文件名字不是
all: create_lib compile simulate
create_lib:
vlib work
compile:
vlog -l com.log full_adder.v full_adder_tb.v
simulate:
vsim -l sim.log -c -voptargs=+acc work.full_adder_tb -do “log -r *;run -all;quit -f”
clean:
rm -rf work mti_lib transcript modelsim.ini *.log vsim.wlf
- 1
- 2
- 3
- 4
- 5
- 6
- 7
- 8
- 9
- 10
- 11
- 12
- 13
- 对比GUI方式创建工程,Transcript窗口的命令如下:
vlib work
vlog -work work -vopt -stats=none full_adder.v full_adder_tb.v
vsim -voptargs=+acc work.full_adder_tb -c -do "run -all;quit -f"
- 1
- 2
- 3
- 4
可以看到我们新建的Makefile内容与Transcript窗口命令几乎一样。实际也肯定是这样,我们就是把这些命令放到了一起运行而已!
Questasim一些命令参数含义:
-c:command模式,不启动图形界面-l:存放日志到后面的文件中-do "xxx"执行xxx命令log -r *:生成波形文件-work work:指定work目录名字叫work-vopt:simulate full optimization-novopt:simulate without optimization-voptargs=+acc:simulate
实际开发中,一般是log出现问题,才会去看波形!同时,为了加快工作效率,通常是一个终端改代码,一个终端跑仿真,十分方便!
在终端输入make命令,即可运行该Makefile脚本文件:
注:如果Makefile的名字不是
Makefile,假如是Makefile_text,那么运行该Makefile的时候应该输入make -f Makefile_text

全部日志信息如下:
[[email protected] full_adder]$ make
vlib work
vlog -l com.log full_adder.v full_adder_tb.v
QuestaSim vlog 10.7c Compiler 2018.08 Aug 17 2018
Start time: 16:43:33 on Aug 31,2021
vlog -l com.log full_adder.v full_adder_tb.v
-- Compiling module full_adder
-- Compiling module full_adder_tb
Top level modules:
full_adder_tb
End time: 16:43:33 on Aug 31,2021, Elapsed time: 0:00:00
Errors: 0, Warnings: 0
vsim -l sim.log -c -voptargs=+acc work.full_adder_tb -do “log -r *;run -all;quit -f”
Reading pref.tcl
# 10.7c
# vsim -l sim.log -c -voptargs=“+acc” work.full_adder_tb -do “log -r *;run -all;quit -f”
# Start time: 16:43:36 on Aug 31,2021
# ** Note: (vsim-3812) Design is being optimized…
# // Questa Sim
# // Version 10.7c linux Aug 17 2018
# //
# // Copyright 1991-2018 Mentor Graphics Corporation
# // All Rights Reserved.
# //
# // QuestaSim and its associated documentation contain trade
# // secrets and commercial or financial information that are the property of
# // Mentor Graphics Corporation and are privileged, confidential,
# // and exempt from disclosure under the Freedom of Information Act,
# // 5 U.S.C. Section 552. Furthermore, this information
# // is prohibited from disclosure under the Trade Secrets Act,
# // 18 U.S.C. Section 1905.
# //
# Loading work.full_adder_tb(fast)
# Loading work.full_adder(fast)
# log -r *
# run -all
# 10:full_adder_tb:resetting …
# 30:full_adder_tb:resetting …
# 50:full_adder_tb:resetting …
# 70:full_adder_tb:resetting …
# 90:full_adder_tb:resetting …
# 110:full_adder_tb:resetting finish!
# 130:full_adder_tb:resetting finish!
# 150:full_adder_tb:resetting finish!
# 170:full_adder_tb:resetting finish!
# 190:full_adder_tb:resetting finish!
# 210:full_adder_tb:resetting finish!
# 230:full_adder_tb:resetting finish!
# 250:full_adder_tb:resetting finish!
# 270:full_adder_tb:resetting finish!
# 290:full_adder_tb:resetting finish!
# ** Note: KaTeX parse error: Expected 'EOF', got '#' at position 68: …token comment">#̲ Time: 300 n…ls
com.log full_adder_tb.v full_adder.v Makefile sim.log vsim.wlf work
- 1
- 2
- 3
- 4
- 5
- 6
- 7
- 8
- 9
- 10
- 11
- 12
- 13
- 14
- 15
- 16
- 17
- 18
- 19
- 20
- 21
- 22
- 23
- 24
- 25
- 26
- 27
- 28
- 29
- 30
- 31
- 32
- 33
- 34
- 35
- 36
- 37
- 38
- 39
- 40
- 41
- 42
- 43
- 44
- 45
- 46
- 47
- 48
- 49
- 50
- 51
- 52
- 53
- 54
- 55
- 56
- 57
- 58
- 59
- 60
- 61
注:关于Makefile一些小知识点复习,可以参考下图:
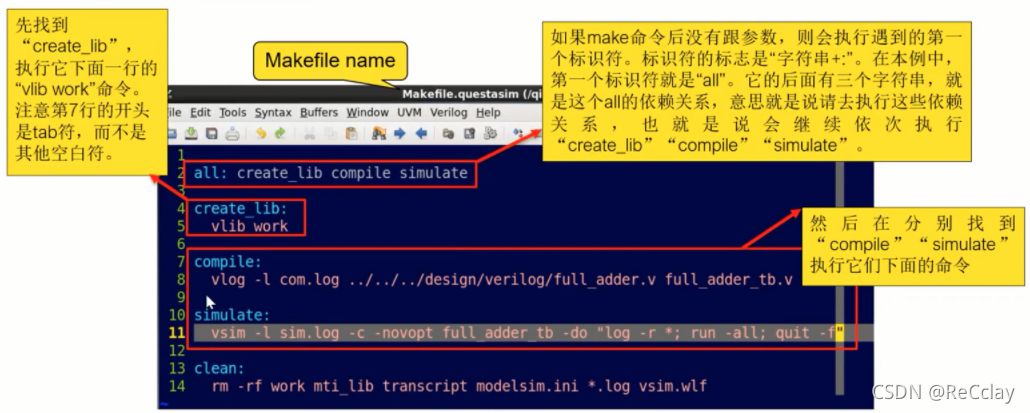
可以看出,通过Makefile脚本的方式可以将创建工程、加载文件、编译工程,运行工程等步骤一起进行,操作更为高效方便!
2.3.2、查看波形
注:波形文件只是在terminal打印log有误的情况才会去看!
2.3.2.1、方法一:通过vsim.wlf文件查看
terminal中的log有误后,在终端输入vsim &启动Questasim,如下图所示:

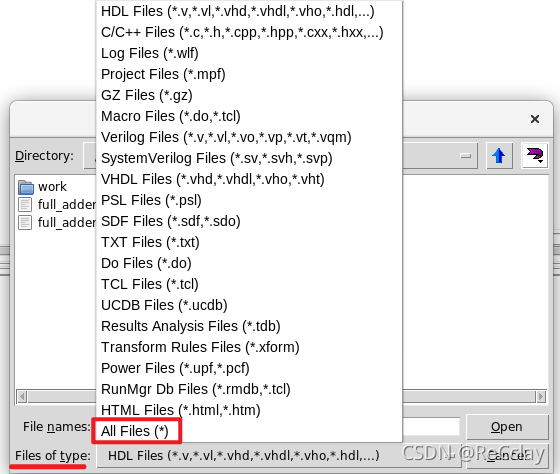
然后依次点击File -> Open,如下图所示:
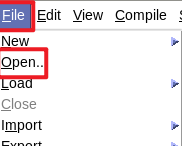
然后再Files of type中选择All Files(*),接着选中vsim.wlf打开即可!

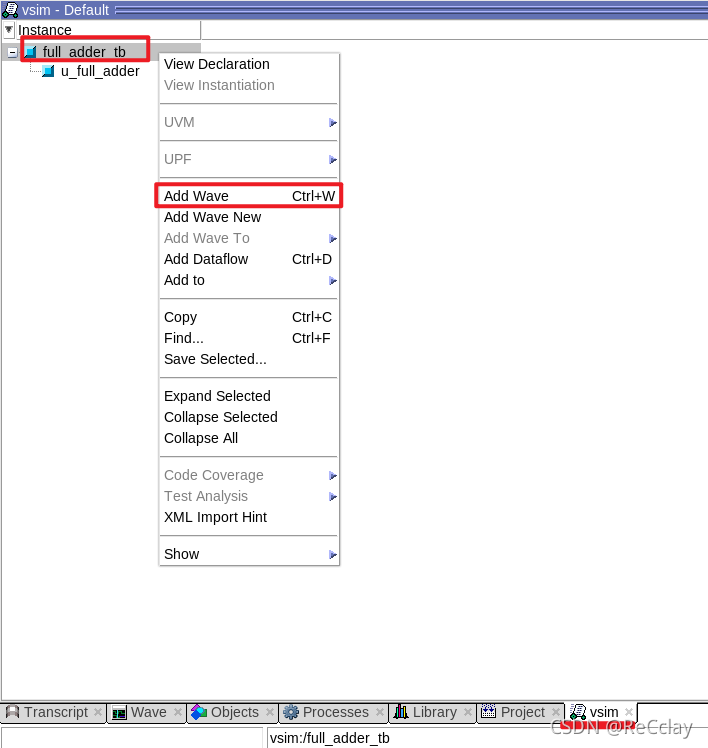
接着在vsim栏中右击full_adder_tb,选择Add Wave,(也可以单击full_adder_tb后按下快捷键ctrl+w)即可添加波形到Wave栏中。
2.3.2.2、方法二:修改Makefile
all: create_lib compile simulate
create_lib:
vlib work
compile:
vlog -l com.log full_adder.v full_adder_tb.v
simulate:
#vsim -l sim.log -c -voptargs=+acc work.full_adder_tb -do “log -r ;run -all;quit -f"
vsim -l sim.log -voptargs=+acc work.full_adder_tb -do "add wave -position insertpoint sim:/full_adder_tb/;log -r *;run -all”
clean:
rm -rf work mti_lib transcript modelsim.ini *.log vsim.wlf
- 1
- 2
- 3
- 4
- 5
- 6
- 7
- 8
- 9
- 10
- 11
- 12
- 13
- 14
- 主要是
simulate的依赖发生了改变:取消-c即不使用命令行模式,取消quit -f即不强制退出,增加add wave -position insertpoint sim:/full_adder_tb/*即添加tb波形信号。
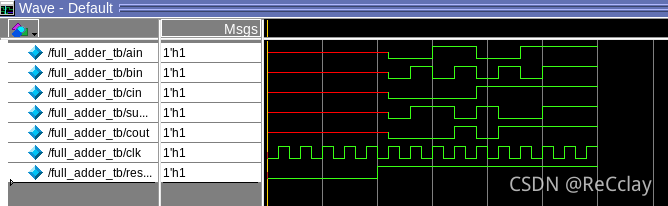
修改完毕后, 在终端运行make命令,即可在Questasim中的Wave栏查看到波形!
2.3.3、帮助文档
查看帮助文档有两种方式,一种是通过安装目录查看帮助文档,另一种是通过命令行help命令查看帮助文档!
但是不论是哪一种,需要记住的是:EDA工具书是用来查阅的,不是用来从头读到尾的!
2.3.3.1、方法一:通过安装目录查看帮助文档
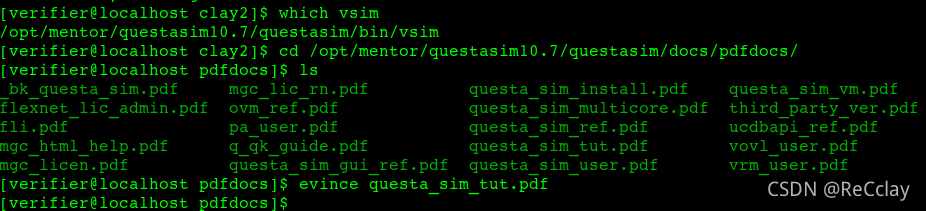
- 可以使用
which vsim命令先找到Questasim的安装位置,比如我的是/opt/mentor/questasim10.7/questasim/bin/vsim - 然后进入到
/opt/mentor/questasim10.7/questasim/docs/pdfdocs/即可查看到所有的帮助文档 - 使用
evince xxx可以快速打开某个文档
2.3.3.2、方法二:通过命令行help命令查看帮助文档
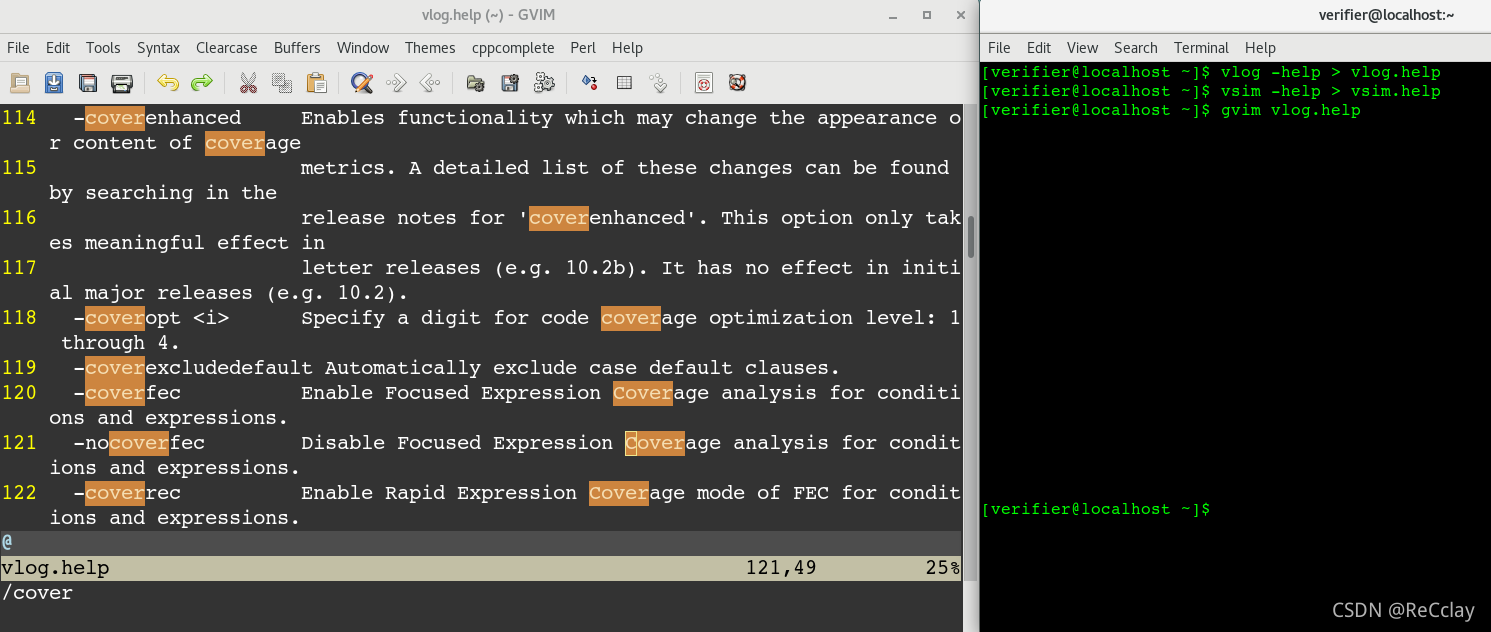
命令行输入如下命令,重定向help帮助文档:
vlog -help > vlog.helpvsim -help > vsim.help
如果要查看编译或仿真选项的含义,输入如下命令:
gvim vlog.help打开help帮助文档/cover搜索关键词cover
附:QuestaSim 常用操作
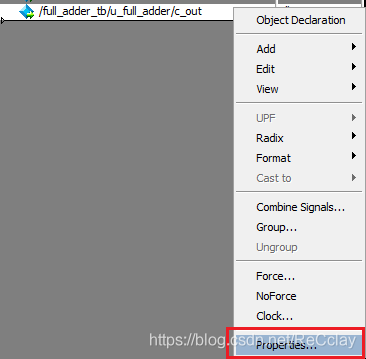
设置波形颜色
右击想要设置的信号,然后选择Properties
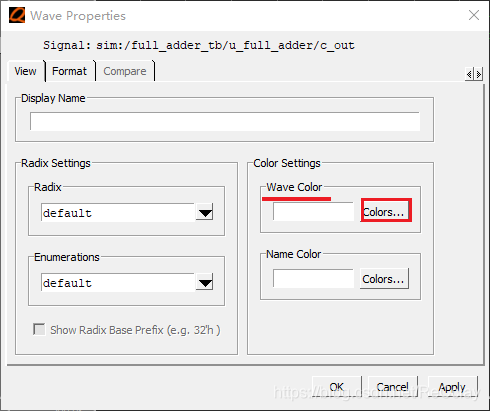
选择Wave Color下的Colors...
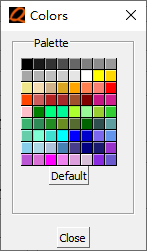
在弹窗中设置想要的波形颜色
波形分组Group
方法一:手动分组
按住ctrl+鼠标左键,分别选中想要分成一组波形信号(或按ctrl+A全选波形),然后右击选择Group
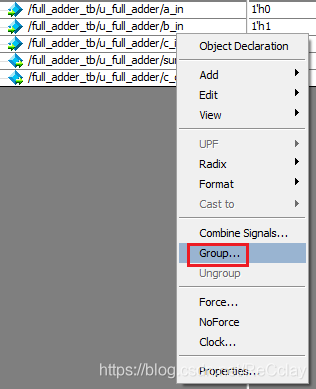
接着设置想要的分组名字即可!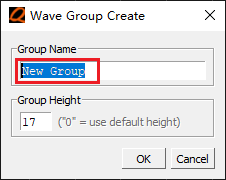
方法二:快捷键分组
按住ctrl+鼠标左键,分别选中想要分成一组波形信号(或按ctrl+a全选波形),然后按下快捷键ctrl+g实现快捷分组!
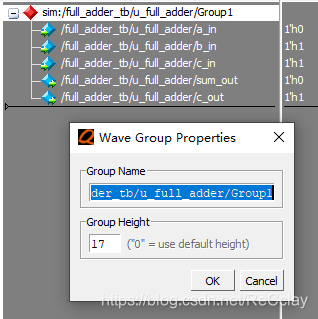
分组完毕后,想要再次更改组名,双击组名弹出如下对话框,即可更改。
清除波形Restart
清除已显示在波形窗口的所有波形

运行全部Run -All
Run -All自动运行到代码里的$finish语句后停止。
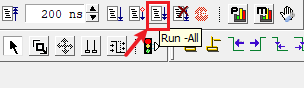
注:
run xx ns之后,这时候在Run -All如果仿真器发现没有运行完,会继续运行,如果发现已经运行完毕,此时仿真器不会继续运行!
添加/清除 Cursor
方法一:
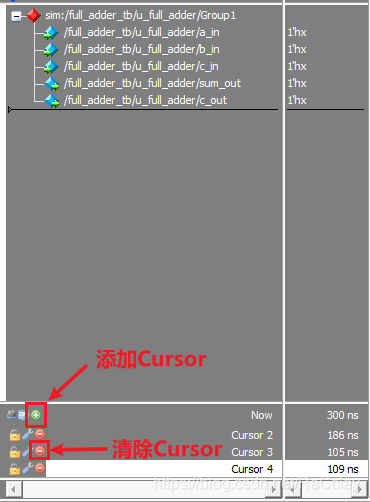
方法二:

需要提醒的是,清除Cursor之前,需要先选中要删除的Cursor!
设置Cursor之间显示的单位为频率
在Cursor之间的显示上,右击选择Grid,Timeline & Cursor Control...

勾选Show freqency in Cursor delta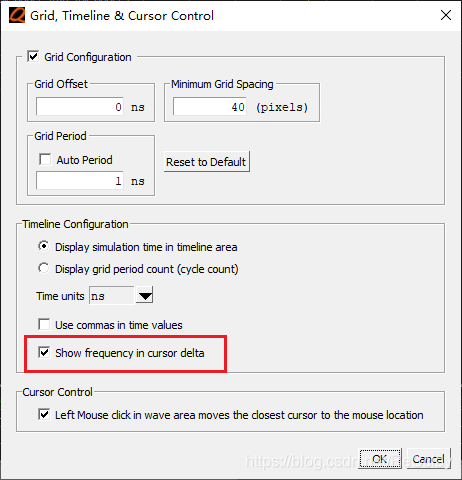
波形局部方法
方法一:
按住ctrl键,然后按住鼠标左键,往右拖曳。
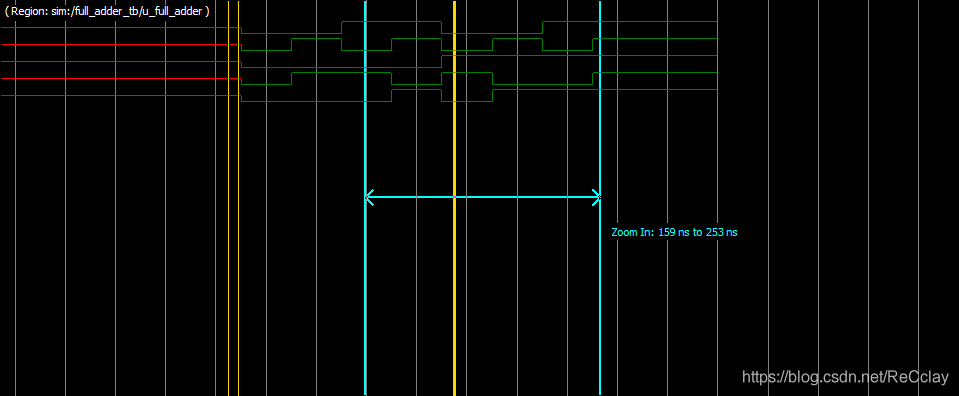
方法二:
ctrl+鼠标滚轮
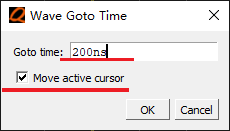
定位光标到指定时刻点
先选中想要定位的光标,然后Edit -> Goto
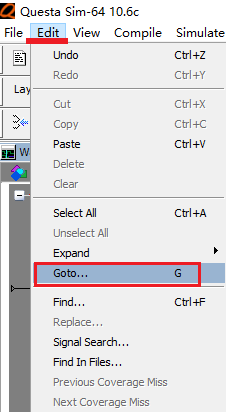
假如想要定位到200ns,输入到Goto time栏中输入200ns即可,注意勾选Move active cursor
快速定位到信号的上/下沿
选中要定位的信号,选中要定位的光标,然后单击如下图标,鼠标悬浮到某图标上,可看到该图标的英文释义:

参考
边栏推荐
- Bzoj 3747 poi2015 kinoman segment tree
- Bitcoinwin (BCW) was invited to attend Hanoi traders fair 2022
- Tasks in GStreamer
- Debezium series: PostgreSQL loads the correct last submission LSN from the offset
- Successful entry into Baidu, 35K monthly salary, 2022 Android development interview answer
- leetcode刷题:二叉树10(完全二叉树的节点个数)
- js实现禁止网页缩放(Ctrl+鼠标、+、-缩放有效亲测)
- 微信小程序正则表达式提取链接
- leetcode刷题:二叉树13(相同的树)
- Is the education of caiqiantang reliable and safe?
猜你喜欢

使用 RepositoryProvider简化父子组件的传值

实操演示:产研团队如何高效构建需求工作流?
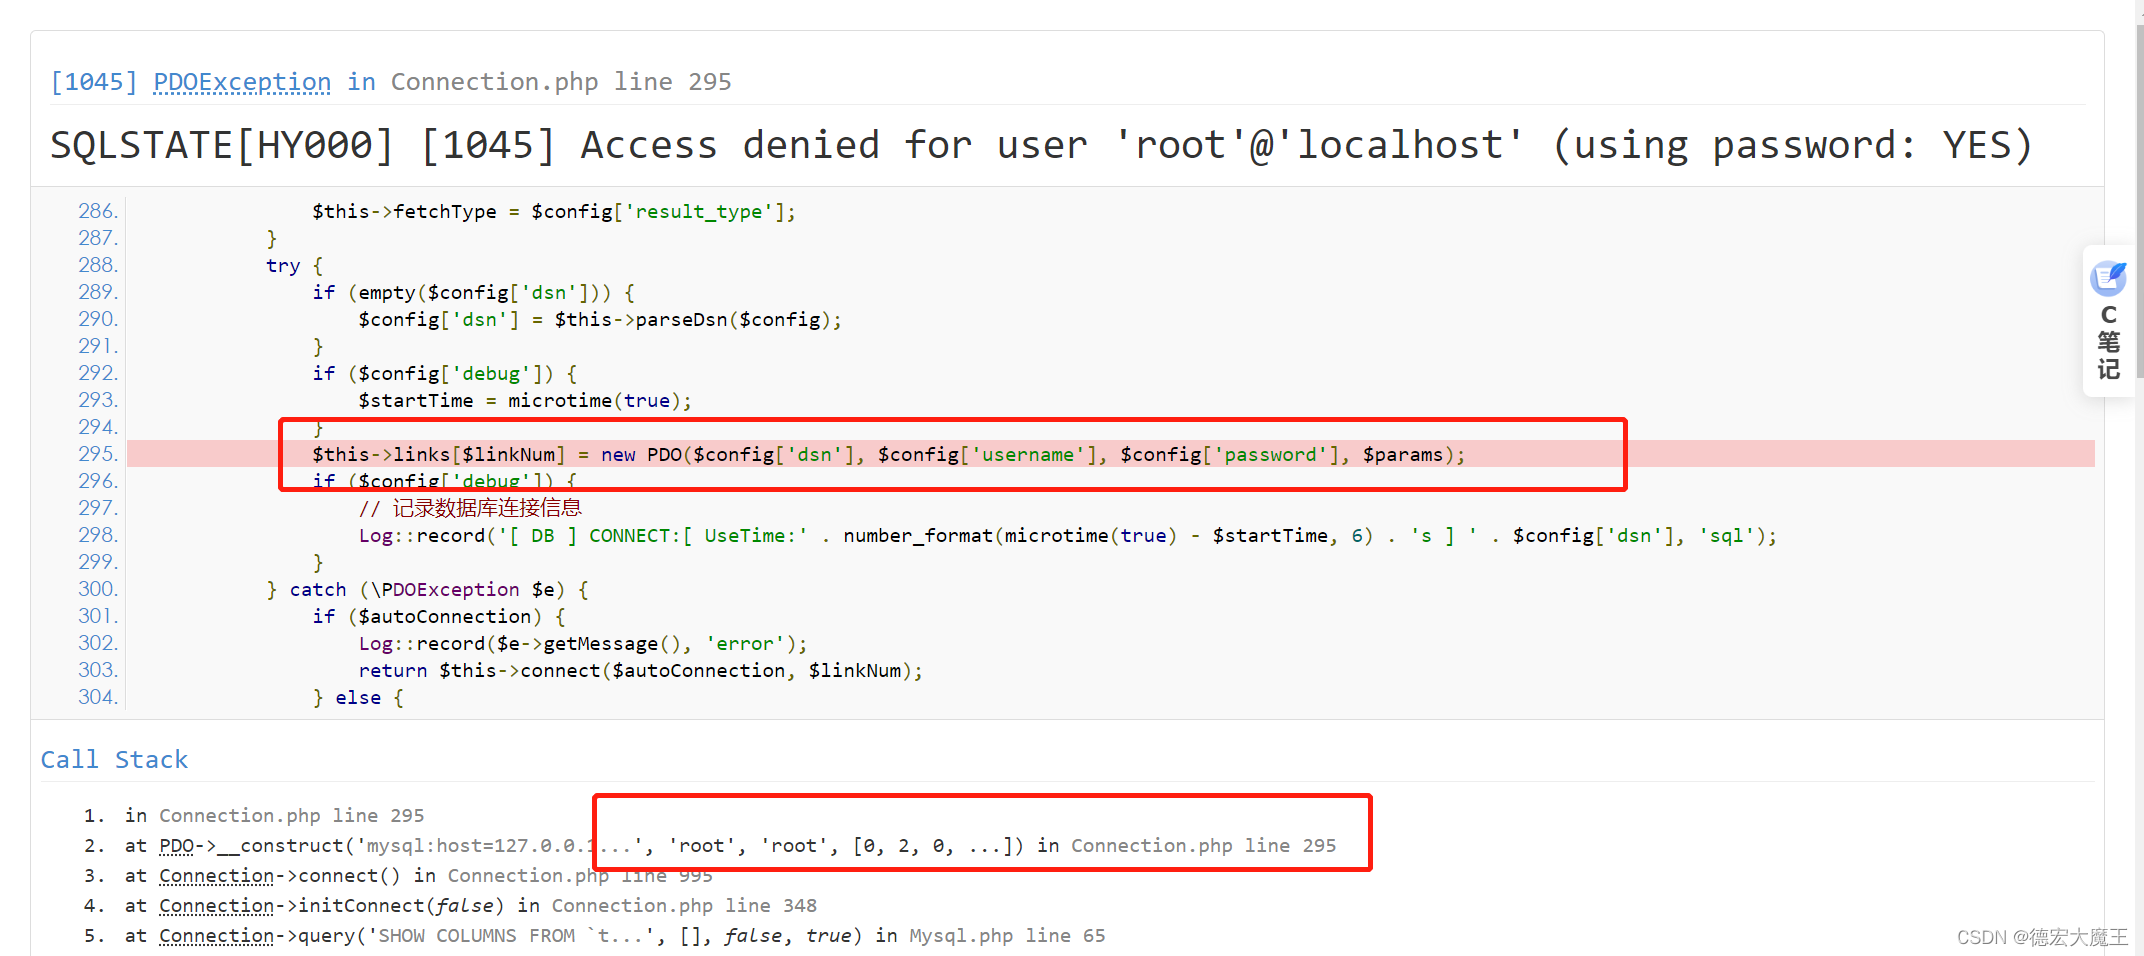
Solve the problem that the database configuration information under the ThinkPHP framework application directory is still connected by default after modification

third-party dynamic library (libcudnn.so) that Paddle depends on is not configured correctl

SecureRandom那些事|真伪随机数
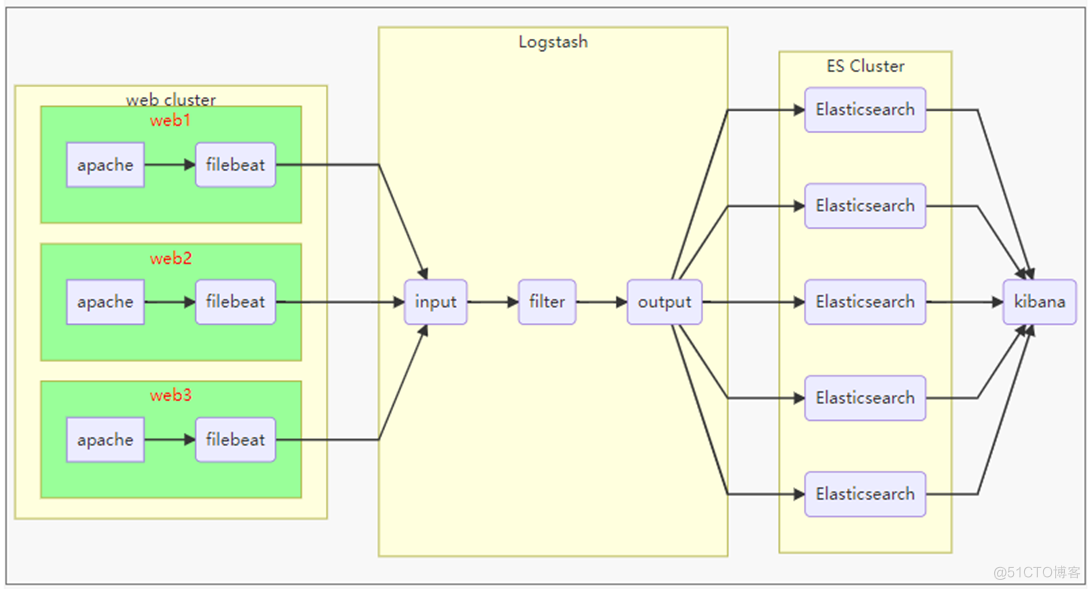
Elk distributed log analysis system deployment (Huawei cloud)
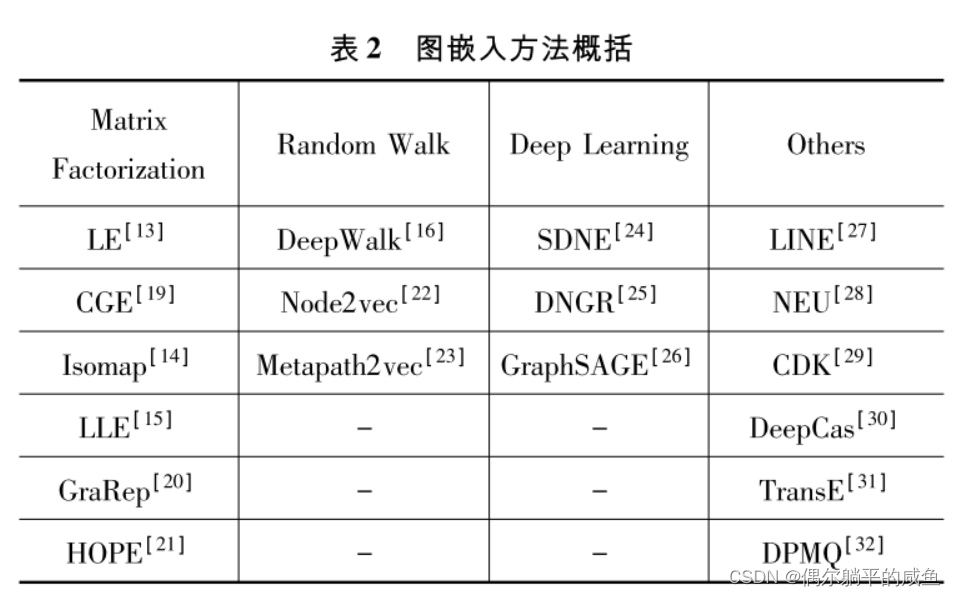
图嵌入Graph embedding学习笔记

JS implementation prohibits web page zooming (ctrl+ mouse, +, - zooming effective pro test)
![[hard core dry goods] which company is better in data analysis? Choose pandas or SQL](/img/70/a79c4a1724c11e208814de2d9cf553.png)
[hard core dry goods] which company is better in data analysis? Choose pandas or SQL

Bitcoinwin (BCW) was invited to attend Hanoi traders fair 2022
随机推荐
2023年深圳市绿色低碳产业扶持计划申报指南
After 95, Alibaba P7 published the payroll: it's really fragrant to make up this
ICTCLAS用的字Lucene4.9捆绑
安信证券在网上开户安全吗?
Using repositoryprovider to simplify the value passing of parent-child components
.Net分布式事務及落地解决方案
The difference between ID selector and class selector
随机数生成的四种方法|Random|Math|ThreadLocalRandom|SecurityRandom
Leetcode: binary tree 15 (find the value in the lower left corner of the tree)
函数的概念及语法
Fundamentals of deep learning convolutional neural network (CNN)
Build your own website (16)
C language OJ gets PE, OJ of ACM introduction~
Is it safe for Guosen Securities to open an account online?
leetcode刷题:二叉树11(平衡二叉树)
B站UP搭建世界首个纯红石神经网络、基于深度学习动作识别的色情检测、陈天奇《机器学编译MLC》课程进展、AI前沿论文 | ShowMeAI资讯日报 #07.05
Leetcode brush questions: binary tree 18 (largest binary tree)
Zhongang Mining: analysis of the current market supply situation of the global fluorite industry in 2022
《乔布斯传》英文原著重点词汇笔记(十二)【 chapter ten & eleven】
Wechat applet regular expression extraction link