当前位置:网站首页>Elk distributed log analysis system deployment (Huawei cloud)
Elk distributed log analysis system deployment (Huawei cloud)
2022-07-05 19:52:00 【51CTO】
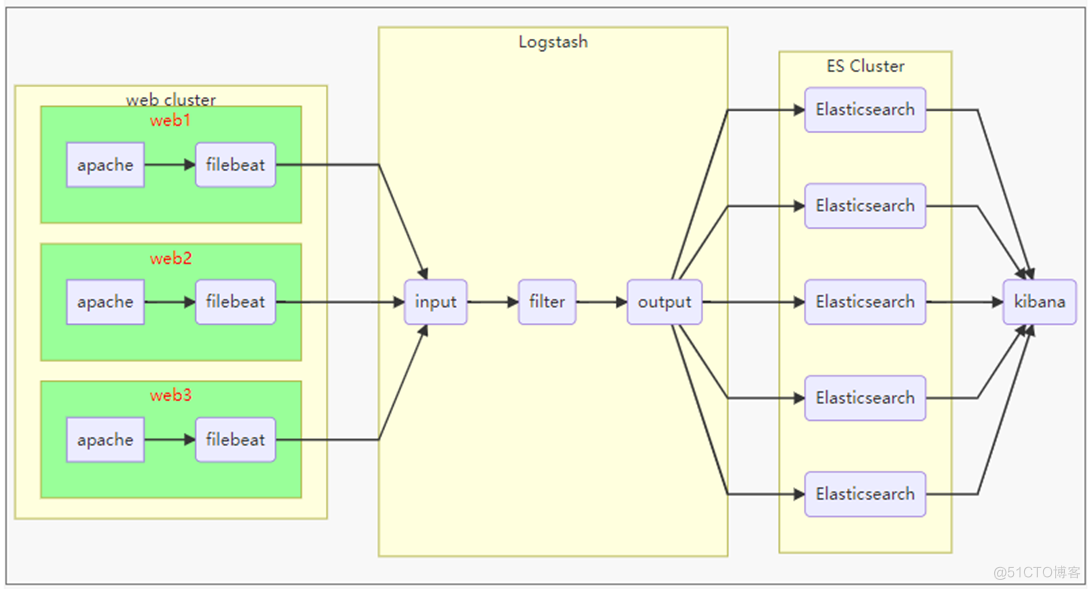
Architecture diagram
One 、 Environmental preparation
1. Host list
Host name | IP Address | To configure |
es-0001 | 192.168.1.41 | 1cpu,1G Memory ,10G Hard disk |
es-0002 | 192.168.1.42 | 1cpu,1G Memory ,10G Hard disk |
es-0003 | 192.168.1.43 | 1cpu,1G Memory ,10G Hard disk |
es-0004 | 192.168.1.44 | 1cpu,1G Memory ,10G Hard disk |
es-0005 | 192.168.1.45 | 1cpu,1G Memory ,10G Hard disk |
Kibana | 192.168.1.46 | 1cpu,1G Memory ,10G Hard disk |
logstash | 192.168.1.47 | 2CPU、2G Memory ,10G Hard disk |
apache | 192.168.1.48 | 1PU、1G Memory ,10G Hard disk |
2. Software inventory
- elasticsearch-2.3.4.rpm
- logstash-2.3.4-1.noarch.rpm
- kibana-4.5.2-1.x86_64.rpm
- filebeat-1.2.3-x86_64.rpm
3. Plug in list :
- [x] elasticsearch plug-in unit :
software package | describe |
| bigdesk-master.zip | yes ES Cluster monitoring tools |
| elasticsearch-kopf-master.zip | One ElasticSearch Management tools , Provide right ES Cluster operated API |
| elasticsearch-head-master.zip | show ES Clustered # Display help information ?help topology , Indexable (index)、 node (node) Level of operation |
4. Huawei cloud jump board
To configure yum repositories :
       [[email protected] <sub>]

       # rm -rf /etc/yum.repos.d/*.repo


[[email protected] </sub>]

       # curl -o /etc/yum.repos.d/CentOS-Base.repo http://mirrors.myhuaweicloud.com/repo/CentOS-Base-7.repo


[[email protected] <sub>]

       # yum clean all


[[email protected] </sub>]

       # yum makecache


[[email protected] <sub>]

       # yum install -y net-tools lftp rsync psmisc vim-enhanced tree vsftpd bash-completion createrepo lrzsz iproute


[[email protected] </sub>]

       # mkdir /var/ftp/localrepo


[[email protected] <sub>]

       # cd /var/ftp/localrepo


[[email protected] </sub>]

       # createrepo .


[[email protected] <sub>]

       # createrepo --update . #  to update


[[email protected] </sub>]

       # systemctl enable --now vsftpd


[[email protected] ~]

       # cp -a elk /var/ftp/localrepo/elk


[[email protected] elk]

       # cd /var/ftp/localrepo/


[[email protected] localrepo]

       # createrepo --update .
- 1.
- 2.
- 3.
- 4.
- 5.
- 6.
- 7.
- 8.
- 9.
- 10.
- 11.
- 12.
- 13.
- 14.
Optimize system services
       [[email protected] <sub>]

       # systemctl stop postfix


[[email protected] </sub>]

       # yum remove -y postfix firewalld-*


[[email protected] <sub>]

       # yum install chrony


[[email protected] </sub>]

       # vim /etc/chrony.conf


       #  Comment out  server  Start line , Add the following configuration


server ntp.myhuaweicloud.com minpoll

       4 maxpoll

       10 iburst


[[email protected] <sub>]

       # systemctl enable --now chronyd


[[email protected] </sub>]

       # chronyc sources -v // Verify configuration results  ^*  On behalf of success


[[email protected] <sub>]

       # vim /etc/cloud/cloud.cfg


       # manage_etc_hosts: localhost // Comment out this line


[[email protected] </sub>]

       # reboot
- 1.
- 2.
- 3.
- 4.
- 5.
- 6.
- 7.
- 8.
- 9.
- 10.
- 11.
Installation configuration ansible Management host
       [[email protected] <sub>]

       # cp -a ansible_centos7 /var/ftp/localrepo/ansible


[[email protected] </sub>]

       # cd /var/ftp/localrepo


[[email protected] <sub>]

       # createrepo --update .


[[email protected] </sub>]

       # vim /etc/yum.repos.d/local.repo


  [local_repo]


       name

       =CentOS-

       $releasever – Localrepo


       baseurl

       =ftp://192.168.1.252/localrepo


       enabled

       =

       1


       gpgcheck

       =

       0


[[email protected] <sub>]

       # yum makecache


[[email protected] </sub>]

       # yum install -y ansible // Go to Huawei cloud website to download the secret key , And upload the secret key to the springboard


[[email protected] <sub>]

       # mv luck.pem /root/.ssh/id_rsa


[[email protected] </sub>]

       # chmod 0400 /root/.ssh/id_rsa
- 1.
- 2.
- 3.
- 4.
- 5.
- 6.
- 7.
- 8.
- 9.
- 10.
- 11.
- 12.
- 13.
5. Huawei cloud template machine ( Mirror image ) To configure
       [[email protected] <sub>]

       # passwd root


[[email protected] </sub>]

       # rm -rf /etc/yum.repos.d/*.repo


[[email protected] <sub>]

       # curl -o /etc/yum.repos.d/CentOS-Base.repo http://mirrors.myhuaweicloud.com/repo/CentOS-Base-7.repo


[[email protected] </sub>]

       # vim /etc/yum.repos.d/local.repo


[local_repo]


       name

       =CentOS-

       $releasever – Localrepo


       baseurl

       =ftp://192.168.1.252/localrepo


       enabled

       =

       1


       gpgcheck

       =

       0


[[email protected] <sub>]

       # yum clean all


[[email protected] </sub>]

       # yum makecache


[[email protected] <sub>]

       # yum repolist


[[email protected] </sub>]

       # yum install -y net-tools lftp rsync psmisc vim-enhanced tree lrzsz bash-completion iproute
- 1.
- 2.
- 3.
- 4.
- 5.
- 6.
- 7.
- 8.
- 9.
- 10.
- 11.
- 12.
- 13.
Optimize system services
       [[email protected] <sub>]

       # systemctl stop postfix atd tuned


[[email protected] </sub>]

       # yum remove -y postfix at audit tuned kexec-tools firewalld-*


[[email protected] <sub>]

       # yum install chrony


[[email protected] </sub>]

       # vim /etc/chrony.conf


       #  Comment out  server  Start line , Add the following configuration


 server ntp.myhuaweicloud.com minpoll

       4 maxpoll

       10 iburst


[[email protected] <sub>]

       # systemctl enable --now chronyd


[[email protected] </sub>]

       # chronyc sources -v


       #  Verify configuration results  ^*  On behalf of success


[[email protected] <sub>]

       # vim /etc/cloud/cloud.cfg


       # manage_etc_hosts: localhost  Comment out this line


[[email protected] </sub>]

       # yum clean all


[[email protected] ~]

       # poweroff
- 1.
- 2.
- 3.
- 4.
- 5.
- 6.
- 7.
- 8.
- 9.
- 10.
- 11.
- 12.
- 13.
1. Host name resolution ( mutual ping through )
Two 、【 Deploy Elasticsearch】( all es node )
A. Deploy elasticsearch service
Install the software
Modify the configuration
       # vim /etc/elasticsearch/elasticsearch.yml


       17| cluster.name: my-ES        // Configuration cluster name


       23|

       node.name: es1        // Current host name


       55| network.host:0.0.0.0      // Listen to all addresses / This machine IP


       68| discovery.zen.ping.unicast.hosts:  [

       "es1",

       "es2",

       "es3"]    // Declare cluster members ( Not all )


 perhaps


       # sed -i '/cluster.name/s/# cluster.name/cluster.name/' /etc/elasticsearch/elasticsearch.yml // Remove annotations


       # sed -i '/cluster.name/s/my-application/my-ES/' /etc/elasticsearch/elasticsearch.yml


       # sed -i '/node.name/s/# node.name: node-1/node.name: es-0002/' /etc/elasticsearch/elasticsearch.yml


       # sed -i '/network.host/s/# network.host: 192.168.0.1/network.host: 0.0.0.0/' /etc/elasticsearch/elasticsearch.yml


       # sed -i '/discovery.zen.ping/a discovery.zen.ping.unicast.hosts: ["es-0001", "es-0002"]' /etc/elasticsearch/elasticsearch.yml // Add configuration under the line
- 1.
- 2.
- 3.
- 4.
- 5.
- 6.
- 7.
- 8.
- 9.
- 10.
- 11.
- 12.
- 13.
- 14.
Start the service
Service validation
       # ss -ntulp | grep 9200


       # ss -ntulp | grep 9300


       # curl http://es-0001:9200/


       # curl http://192.168.1.41:9200/_cluster/health?pretty


{


       "cluster_name" :

       "my-ES",     // Cluster identity / name


       "status" :

       "green",


       "timed_out" :

       false,


       "number_of_nodes" :

       3,      // Number of cluster members


       "number_of_data_nodes" :

       3,   // How many nodes are there in the cluster


       "active_primary_shards" :

       0,


       "active_shards" :

       0,


       "relocating_shards" :

       0,


       "initializing_shards" :

       0,


       "unassigned_shards" :

       0,


       "delayed_unassigned_shards" :

       0,


       "number_of_pending_tasks" :

       0,


       "number_of_in_flight_fetch" :

       0,


       "task_max_waiting_in_queue_millis" :

       0,


       "active_shards_percent_as_number" :

       100.0


}


cluster: colony


health: health
- 1.
- 2.
- 3.
- 4.
- 5.
- 6.
- 7.
- 8.
- 9.
- 10.
- 11.
- 12.
- 13.
- 14.
- 15.
- 16.
- 17.
- 18.
- 19.
- 20.
- 21.
- 22.
- 23.
- 24.
B. Plug in deployment language application
Which machine is the plug-in installed on , Only use on which machine
        For local installation file; For remote installation ftp.


       # /usr/share/elasticsearch/bin/plugin install file:///root/file/bigdesk-master.zip


       # /usr/share/elasticsearch/bin/plugin install file:///root/file/elasticsearch-kopf-master.zip


       # /usr/share/elasticsearch/bin/plugin install file:///root/file/elasticsearch-head-master.zip


       # /usr/share/elasticsearch/bin/plugin list // Check the installed plug-ins


Installed plugins

       in /usr/share/elasticsearch/plugins:


       - kopf


       - bigdesk


       - head
- 1.
- 2.
- 3.
- 4.
- 5.
- 6.
- 7.
- 8.
- 9.
Access plug-ins
1、 Huawei cloud is bound to the elastic public network IP to es-0005 node
2、http:// Elastic public network IP:9200/_plugin/ The plug-in name [bigdesk|head|kopf]
http:// Public network IP:9200/\_plugin/kopf
http:// Public network IP:9200/\_plugin/head
http:// Public network IP:9200/\_plugin/bigdesk
http:// Public network IP/info.php // Request method
Elasticsearch Basic operation
Inquire about _cat Method
       [[email protected] <sub>]

       # curl -XGET http://es-0001:9200/_cat/ #  Query supported keywords


[[email protected] </sub>]

       # curl -XGET http://es-0001:9200/_cat/master #  Check the specific information


[[email protected] <sub>]

       # curl -XGET http://es-0001:9200/_cat/master?v #  Show details  ?v


[[email protected] </sub>]

       # curl -XGET http://es-0001:9200/_cat/master?help #  Display help information  ?help
- 1.
- 2.
- 3.
- 4.
Create index
Specify the name of the index , Specify the number of tiles , Specify the number of copies
Create an index using PUT Method , After the creation is completed, pass head Plug in validation
       [[email protected] ~]

       # curl -XPUT http://es-0001:9200/tedu -d \


       '{


        "settings":{ // establish


        "index":{ // Indexes


        "number_of_shards": 5, // Number of slices


        "number_of_replicas": 1 // Copy number


        }


        }


       }'


 It is equivalent to building a database


       # curl -XGET http://es-0001:9200/_cat/indices?v // View index details


 Browser access :http://122.9.96.62:9200/_plugin/head/     The change of , The block depth is the source data , Shallow copy
- 1.
- 2.
- 3.
- 4.
- 5.
- 6.
- 7.
- 8.
- 9.
- 10.
- 11.
- 12.

Add data
Query data
Modifying data
       [[email protected] ~]

       # curl -XPOST http://es-0001:9200/tedu/teacher/1/_update -d \


       '{


        "doc": {


        " years ": " A.D. 701"


        }


       }'
- 1.
- 2.
- 3.
- 4.
- 5.
- 6.
Delete data
       [[email protected] <sub>]

       # curl -XDELETE http://es-0001:9200/tedu/teacher/1 // Delete one


[[email protected] </sub>]

       # curl -XDELETE http://es-0001:9200/tedu // Delete index
- 1.
- 2.
3、 ... and .Kibana Deploy
Upload kibana-4.5.2-1.x86_64.rpm
       # yum install -y kibana


       # vim /opt/kibana/config/kibana.yml // Modify the configuration file


       2| server.port:

       5601                // port


       5| server.host:

       "0.0.0.0"


       15| elasticsearch.url: http://es1:9200          // colony


       23| kibana.index:

       ".kibana"


       26| kibana.defaultAppId:

       "discover"        //kibana default page
- 1.
- 2.
- 3.
- 4.
- 5.
- 6.
- 7.
Service startup / verification
Access test
Import log data
Copy cloud disk public/elk/logs.jsonl.gz To the springboard machine
       [[email protected] ~]

       # gunzip logs.jsonl.gz


       # curl -XPOST http://192.168.1.41:9200/_bulk --data-binary @logs.jsonl // It will take a few minutes
- 1.
- 2.
Successful import :

To configure kibana, wildcard

The modification time is consistent with the log

【logstash】
install logstash
       # yum install -y java-1.8.0-openjdk logstash


       # vim /etc/logstash/logstash.conf // Create the configuration file manually


input {


  stdin {}


}


filter{ }


output{


  stdout{}


}


stdin   The standard input (0)


stdout   standard output (1)


stderr   Error output (2)


       # /opt/logstash/bin/logstash -f /etc/logstash/logstash.conf // Start service from profile
- 1.
- 2.
- 3.
- 4.
- 5.
- 6.
- 7.
- 8.
- 9.
- 10.
- 11.
- 12.
- 13.
Plug in and debugging format
Use json Format string test {"a":"1", "b":"2","c":"3"}
边栏推荐
- 面试官:Redis中集合数据类型的内部实现方式是什么?
- 淺淺的談一下ThreadLocalInsecureRandom
- Reptile exercises (II)
- That's awesome. It's enough to read this article
- [untitled]
- 司空见惯 - 英雄扫雷鼠
- 打新债在哪里操作开户是更安全可靠的呢
- Float. The specific meaning of the return value of floattorawintbits is to convert float into byte array
- Two pits exported using easyexcel template (map empty data columns are disordered and nested objects are not supported)
- 挖财钱堂教育靠谱安全吗?
猜你喜欢
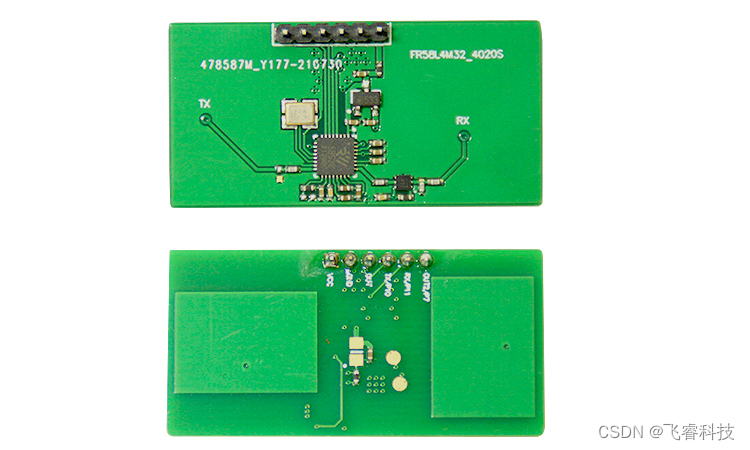
Microwave radar induction module technology, real-time intelligent detection of human existence, static micro motion and static perception

S7-200SMART利用V90 MODBUS通信控制库控制V90伺服的具体方法和步骤
40000 word Wenshuo operator new & operator delete

如何在2022年更明智地应用智能合约?
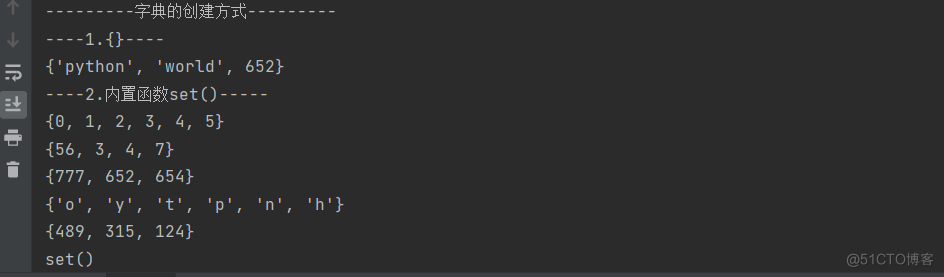
集合
![[FAQ] summary of common causes and solutions of Huawei account service error 907135701](/img/1d/0e716533237c0e4463f5d6357395bd.png)
[FAQ] summary of common causes and solutions of Huawei account service error 907135701

使用 RepositoryProvider简化父子组件的传值

What does software testing do? What are the requirements for learning?
Force buckle 1200 Minimum absolute difference
![[hard core dry goods] which company is better in data analysis? Choose pandas or SQL](/img/70/a79c4a1724c11e208814de2d9cf553.png)
[hard core dry goods] which company is better in data analysis? Choose pandas or SQL
随机推荐
Autumn byte interviewer asked you any questions? In fact, you have stepped on thunder
leetcode刷题:二叉树17(从中序与后序遍历序列构造二叉树)
【C语言】字符串函数及模拟实现strlen&&strcpy&&strcat&&strcmp
What does software testing do? What are the requirements for learning?
Base du réseau neuronal de convolution d'apprentissage profond (CNN)
多分支结构
【无标题】
JMeter 常用的几种断言方法,你会了吗?
Reinforcement learning - learning notes 4 | actor critical
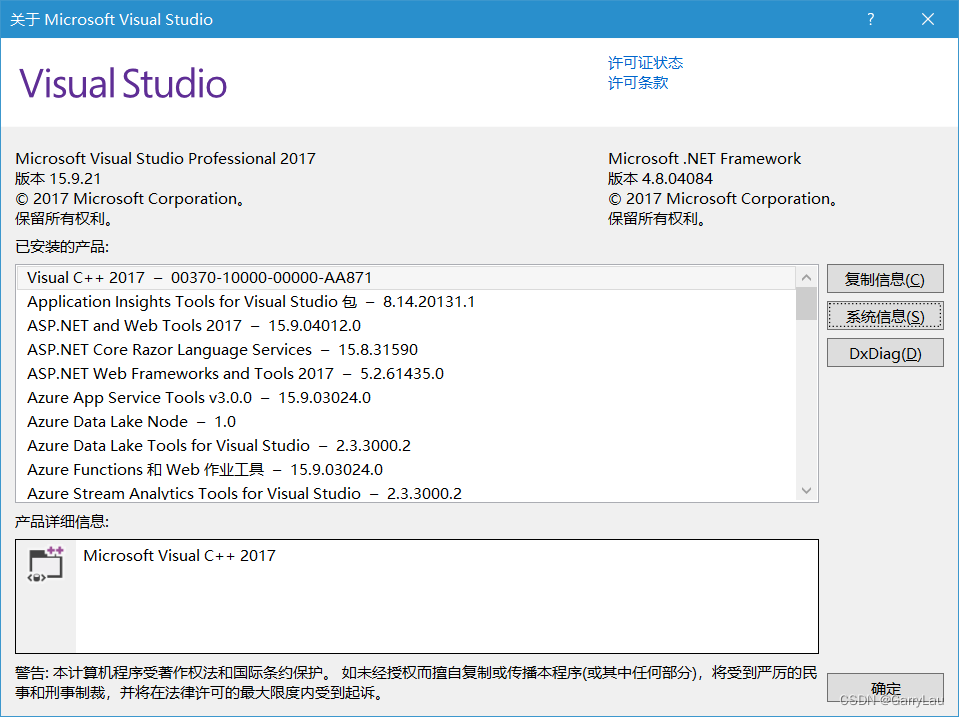
Based on vs2017 and cmake GUI configuration, zxing and opencv are used in win10 x64 environment, and simple detection of data matrix code is realized
Microwave radar induction module technology, real-time intelligent detection of human existence, static micro motion and static perception
Float.floatToRawIntBits的返回值具体意思,将float转为byte数组
Recommended collection, my Tencent Android interview experience sharing
Necessary skills for interview in large factories, 2022android will not die, I will not fall
Is the education of caiqiantang reliable and safe?
That's awesome. It's enough to read this article
随机数生成的四种方法|Random|Math|ThreadLocalRandom|SecurityRandom
Debezium series: idea integrates lexical and grammatical analysis ANTLR, and check the DDL, DML and other statements supported by debezium
[Collection - industry solutions] how to build a high-performance data acceleration and data editing platform
【硬核干货】数据分析哪家强?选Pandas还是选SQL